


1、阿里云短信服务已经整合到消息服务MNS中了,需要使用MNS的sdk来发送短信。


2、新的sdk地址
JAVA SDK:https://help.aliyun.com/document_detail/51063.html
Python SDK:https://help.aliyun.com/document_detail/51372.html
C# SDK:https://help.aliyun.com/document_detail/52016.html
PHP SDK: https://help.aliyun.com/document_detail/51929.html
3、接下来将讲解新的短信服务demo开发,结尾有源码
准备工作:
/**********需要准备的参数**************/
public static String YourAccessId="";//需要修改
public static String YourAccessKeySecret="";//需要修改
//Endpoint 需要修改
public static String YourMNSEndpoint="https://14342555.mns.cn-hangzhou.aliyuncs.com/";
public static String YourTopic="sms.topic-cn-hangzhou";//主题名称 选择性修改
public static String YourSMSTemplateCode="SMS_49290109";//短信模板code 需要修改
public static String YourSignName="";//短信签名名称, 需要修改
public static String phone1="15575902020";//手机号码需要修改
public static String phone2="15575905959";//手机号码需要修改
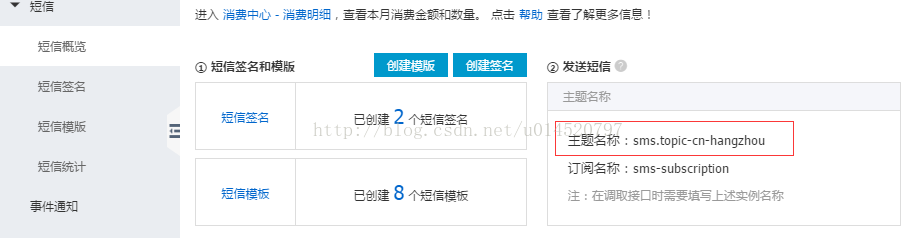
/**********需要准备的参数**************/4、获取Endpoint


5、获取主题名称
6、
创建和查看Access Key
https://ak-console.aliyun.com/#/accesskey/
7、YourSignName 和 YourSMSTemplateCode 获取在前面的文章有提到
http://blog.csdn.net/u014520797/article/details/54411392
8、demo
package com.kp.test;
import com.aliyun.mns.client.CloudAccount;
import com.aliyun.mns.client.CloudTopic;
import com.aliyun.mns.client.MNSClient;
import com.aliyun.mns.common.ServiceException;
import com.aliyun.mns.model.BatchSmsAttributes;
import com.aliyun.mns.model.MessageAttributes;
import com.aliyun.mns.model.RawTopicMessage;
import com.aliyun.mns.model.TopicMessage;
/**
* @author: py
* @version:2017年5月4日 下午2:57:31
* com.kp.test.TestNewSms.java
* @Desc
*/
public class TestNewSms {
/**********需要准备的参数**************/
public static String YourAccessId="";//需要修改
public static String YourAccessKeySecret="";//需要修改
//Endpoint 需要修改
public static String YourMNSEndpoint="https://14342555.mns.cn-hangzhou.aliyuncs.com/";
public static String YourTopic="sms.topic-cn-hangzhou";//主题名称 选择性修改
public static String YourSMSTemplateCode="SMS_49290109";//短信模板code 需要修改
public static String YourSignName="";//短信签名名称, 需要修改
public static String phone1="15575902020";//手机号码需要修改
public static String phone2="15575905959";//手机号码需要修改
/**********需要准备的参数**************/
public static void main(String[] args) {
/**
* Step 1. 获取主题引用
*/
CloudAccount account = new CloudAccount(YourAccessId, YourAccessKeySecret, YourMNSEndpoint);
MNSClient client = account.getMNSClient();
CloudTopic topic = client.getTopicRef(YourTopic);
/**
* Step 2. 设置SMS消息体(必须)
*
* 注:目前暂时不支持消息内容为空,需要指定消息内容,不为空即可。
*/
RawTopicMessage msg = new RawTopicMessage();
msg.setMessageBody("sms-message");
/**
* Step 3. 生成SMS消息属性
*/
MessageAttributes messageAttributes = new MessageAttributes();
BatchSmsAttributes batchSmsAttributes = new BatchSmsAttributes();
// 3.1 设置发送短信的签名(SMSSignName)
batchSmsAttributes.setFreeSignName(YourSignName);
// 3.2 设置发送短信使用的模板(SMSTempateCode)
batchSmsAttributes.setTemplateCode(YourSMSTemplateCode);
// 3.3 设置发送短信所使用的模板中参数对应的值(在短信模板中定义的,没有可以不用设置)
BatchSmsAttributes.SmsReceiverParams smsReceiverParams = new BatchSmsAttributes.SmsReceiverParams();
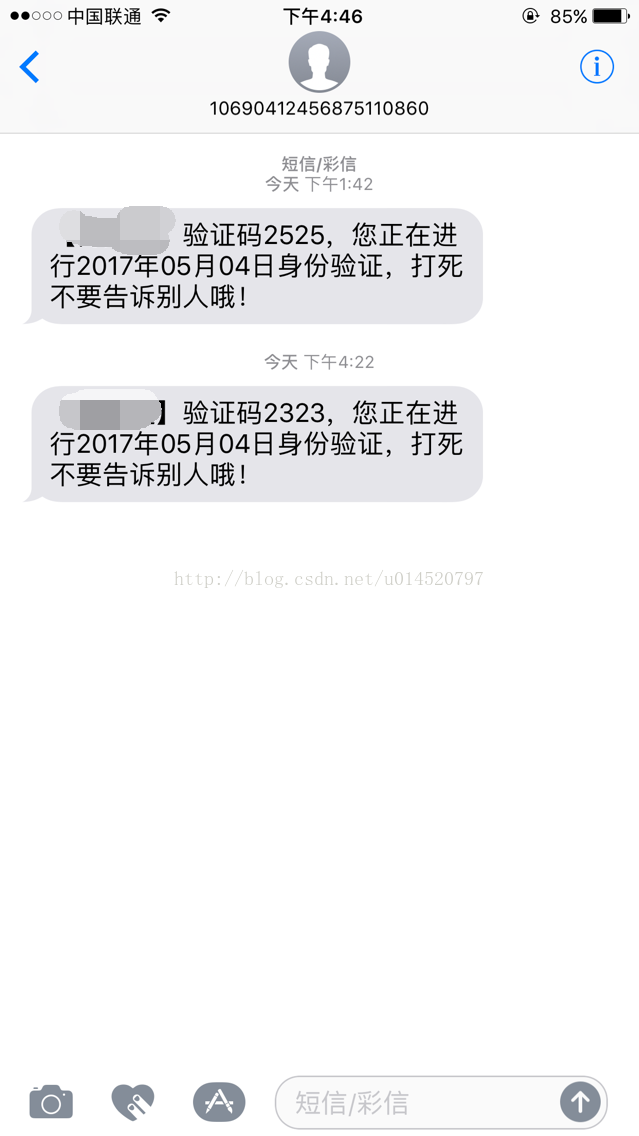
smsReceiverParams.setParam("code", "2323");
smsReceiverParams.setParam("product", getChinaDateByMM(System.currentTimeMillis()));
// 3.4 增加接收短信的号码
batchSmsAttributes.addSmsReceiver(phone1, smsReceiverParams);
// batchSmsAttributes.addSmsReceiver(phone2, smsReceiverParams);
messageAttributes.setBatchSmsAttributes(batchSmsAttributes);
try {
/**
* Step 4. 发布SMS消息
*/
TopicMessage ret = topic.publishMessage(msg, messageAttributes);
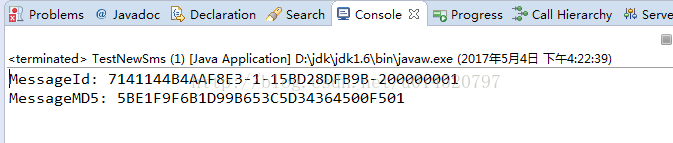
System.out.println("MessageId: " + ret.getMessageId());
System.out.println("MessageMD5: " + ret.getMessageBodyMD5());
} catch (ServiceException se) {
System.out.println(se.getErrorCode() + se.getRequestId());
System.out.println(se.getMessage());
se.printStackTrace();
} catch (Exception e) {
e.printStackTrace();
}
client.close();
}
/**
* 使用毫秒转换为中文日期
* @param tmpDateInt
* @return
*/
public static String getChinaDateByMM(long time){
String ret_date = "";
java.text.SimpleDateFormat formatter = new java.text.SimpleDateFormat("yyyy年MM月dd日");
ret_date = formatter.format(time);
return ret_date;
}
}
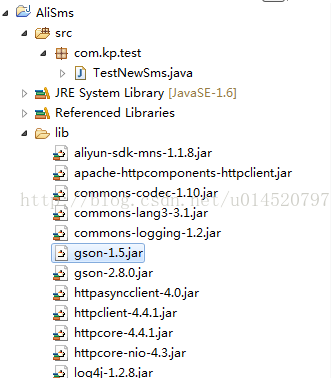
9、工程结构
10、源码地址


 688
688

 被折叠的 条评论
为什么被折叠?
被折叠的 条评论
为什么被折叠?
 到【灌水乐园】发言


