


前言
对于有导航条的列表我们一定是再熟悉不过了,很多通讯类应用都会使用sidebar来帮助用户快速定位到需要查看的地方,今天我们来亲手撸一个sidebar。
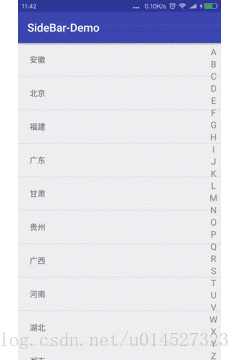
先上图:
列表数据排序
如果使用导航sidebar,则我们使用的数据必须是有序的。
如图中所示,我们对城市以首字符拼音排序。需要用到的工具类 PinyinUtils 可在github中查看源码。
    /**
     * 对数据重新排序
     */
    private void initDatas() {
        String[] data = getResources().getStringArray(R.array.provinces);
        mDatas = new ArrayList<>();
        for (int i = 0; i < data.length; i++) {
            for (int j = 0; j < data.length - i - 1; j++) {
                if (PinyinUtils.getPinyinFirstLetter(data[j])
                        .compareTo(PinyinUtils.getPinyinFirstLetter(data[j + 1])) > 0) {
                    // 比较名称拼音首字符
                    String tmp = data[j];
                    data[j] = data[j + 1];
                    data[j + 1] = tmp;
                }
            }

        }
        for (int i = 0; i < data.length; i++) {
            CityBean cityBean = new CityBean(PinyinUtils.getPinyinFirstLetter(data[i]).toUpperCase(), data[i]);
            mDatas.add(cityBean);
        }
    }
Adapter 实现 SectionIndexer 接口
A section is a group of list items that have something in common. For example, they may begin with the same letter or they may be songs from the same artist.
翻译过来就是一个section是一组具有共同点的列表项。 例如,他们可能以相同的字母开头,或者他们可能是同一位艺术家的歌曲。
SectionIndexer 接口中有三个方法
- Object[] getSections();
- int getPositionForSection(int section);
- int getSectionForPosition(int position);
我们需要做的就是重写 getPositionForSection 方法,通过 Section 获取位置信息。
@Override
    public int getPositionForSection(int sectionIndex) {
        CityBean bean ;
        String firstLetter;
        if (sectionIndex == '!'){
            return 0;
        }else {
            for (int i = 0; i < mList.size();i++){
                bean = mList.get(i);
                // 取首字母
                firstLetter = PinyinUtils.getPinyinFirstLetter(bean.getCity());
                char firstChar = firstLetter.toUpperCase().charAt(0);
                if (firstChar == sectionIndex) {
                    return i;
                }
            }
        }
        bean = null;
        firstLetter = null;
        return -1;
    }
自定义View
对于自定义控件,第一步当然是定义属性。我希望可改变的属性包括:
- 默认背景色
- 触摸后的背景色
- 导航字体大小、颜色
- 弹出框背景
- 弹出框的宽高
- 弹出框字体大小、颜色
- 导航的文字
<?xml version="1.0" encoding="utf-8"?>
<resources>
    <declare-styleable name="SideBar">
        <attr name="sidebar_background" format="color"/>
        <attr name="sidebar_background_hint" format="color"/>
        <attr name="sidebar_textcolor" format="color"/>
        <attr name="sidebar_textsize" format="dimension"/>
        <attr name="dialog_textcolor" format="color"/>
        <attr name="dialog_textsize" format="dimension"/>
        <attr name="dialog_background" format="color"/>
        <attr name="dialog_width" format="dimension"/>
        <attr name="dialog_height" format="dimension"/>
        <attr name="sidebar_gidits" format="string"/>
    </declare-styleable>
</resources>
获得自定义的属性
public SideBar(Context context) {
        this(context, null);
    }

    public SideBar(Context context, AttributeSet attrs) {
        this(context, attrs, 0);
    }

    public SideBar(Context context, AttributeSet attrs, int defStyleAttr) {
        super(context, attrs, defStyleAttr);
        // 获取属性值
        TypedArray array = context.getTheme().obtainStyledAttributes(attrs, R.styleable.SideBar, defStyleAttr, 0);
        digits = array.getString(R.styleable.SideBar_sidebar_gidits);
        backgroundColorHint = array.getColor(R.styleable.SideBar_sidebar_background_hint, backgroundColorHint);
        textColor = array.getColor(R.styleable.SideBar_sidebar_textcolor, textColor);
        sidebarTextsize = array.getDimensionPixelSize(R.styleable.SideBar_sidebar_textsize, sidebarTextsize);
        backgroundColor = array.getColor(R.styleable.SideBar_sidebar_background, backgroundColor);
        dialogTextsize = array.getDimensionPixelSize(R.styleable.SideBar_dialog_textsize, dialogTextsize);
        dialogTextColor = array.getColor(R.styleable.SideBar_dialog_textcolor, dialogTextColor);
        dialogBackground = array.getColor(R.styleable.SideBar_dialog_background, dialogBackground);
        mWidth = (int) array.getDimension(R.styleable.SideBar_dialog_width, mWidth);
        mHeight = (int) array.getDimension(R.styleable.SideBar_dialog_height, mHeight);
        array.recycle();
        init(context);
        paint = new Paint();
    }
    /**
     * 初始化导航栏
     * @param context
     */
    private void init(Context context) {
        mLetters = new char[]{'A', 'B', 'C', 'D', 'E', 'F', 'G', 'H', 'I', 'J', 'K', 'L', 'M', 'N', 'O', 'P', 'Q',
                'R', 'S', 'T', 'U', 'V', 'W', 'X', 'Y', 'Z'};
        if (!TextUtils.isEmpty(digits)) {
            digits = digits.toUpperCase();
            mLetters = new char[digits.length()];
            for (int i = 0; i < digits.length(); i++) {
                mLetters[i] = digits.charAt(i);
            }
        }
        initDialogText(context);
    }
onDraw 绘制
1. 初始化 Paint
        paint.setAntiAlias(true); // 抗锯齿
        paint.setColor(textColor);
        paint.setTextSize(sidebarTextsize);
        paint.setStyle(Paint.Style.FILL);
        paint.setTextAlign(Paint.Align.CENTER);//居中绘制
2.设置背景色
setBackgroundColor(backgroundColorHint);3.绘制导航文字
因为我们设置了 paint.setTextAlign(Paint.Align.CENTER);,所以文字的位置使用文字中心点来确定。用总高度/文字个数算出每个文字应占用的高度。
float widthCenter = getMeasuredWidth() / 2;
        if (mLetters.length > 0) {
            float height = getMeasuredHeight() / mLetters.length;
            for (int i = 0; i < mLetters.length; i++) {
                canvas.drawText(String.valueOf(mLetters[i]), widthCenter, (i + 1) * height, paint);
            }
        }
4.初始化弹出框
     /**
     * 初始化提示框
     * @param context
     */
    private void initDialogText(Context context) {
        mDialogText = new TextView(context);
        mDialogText.setVisibility(View.INVISIBLE); // 默认不显示
        mDialogText.setTextSize(dialogTextsize);
        mDialogText.setTextColor(dialogTextColor);
        mDialogText.setBackgroundColor(dialogBackground);
        mDialogText.setMinHeight(mHeight);
        mDialogText.setMaxHeight(mHeight);
        mDialogText.setMinWidth(mWidth);
        mDialogText.setMaxWidth(mWidth);
        mDialogText.setGravity(Gravity.CENTER);

        WindowManager mWindowManager = (WindowManager) context.getSystemService(Context.WINDOW_SERVICE);
        WindowManager.LayoutParams lp = new WindowManager.LayoutParams(WindowManager.LayoutParams.WRAP_CONTENT,
                WindowManager.LayoutParams.WRAP_CONTENT, WindowManager.LayoutParams.TYPE_APPLICATION,
                WindowManager.LayoutParams.FLAG_NOT_TOUCHABLE | WindowManager.LayoutParams.FLAG_NOT_FOCUSABLE,
                PixelFormat.TRANSLUCENT);
        mWindowManager.addView(mDialogText, lp);
    }
5.设置导航条事件监听接听
    /**
     * sidebar 选中监听
     */
    public interface onSelecListener {
        void setSelection(int position);
    }

    public void setOnSelecListener(onSelecListener listener) {
        this.listener = listener;
    }
6.重写 onTouchEvent 方法
// 为了确定位置,Adapter 需要实现 SectionIndexer 接口
private SectionIndexer mSectionIndexer = null;
@Override
    public boolean onTouchEvent(MotionEvent event) {
        super.onTouchEvent(event);

        int y = (int) event.getY();
        int idx = y / (getHeight() / mLetters.length);
        if (idx >= mLetters.length) {
            idx = mLetters.length - 1;
        } else if (idx < 0) {
            idx = 0;
        }

        if (event.getAction() == MotionEvent.ACTION_DOWN || event.getAction() == MotionEvent.ACTION_MOVE) {
            setBackgroundColor(backgroundColor); // 改变背景颜色
            mDialogText.setVisibility(View.VISIBLE); // 显示弹出框
            mDialogText.setText(String.valueOf(mLetters[idx]));// 设置弹出框文字
            if (mSectionIndexer == null) {
                throw new NullPointerException("mSectionIndexer can't be null");
            }
            int position = mSectionIndexer.getPositionForSection(mLetters[idx]);

            if (position == -1) {
                return true;
            }
            if (listener != null) {
                listener.setSelection(position);
            }

        } else {
            mDialogText.setVisibility(View.INVISIBLE);
        }

        if (event.getAction() == MotionEvent.ACTION_UP) {
            setBackgroundColor(backgroundColorHint);
        }
        return true;
    }
列表的跳转需要在页面中调用 SideBar.setOnSelecListener 方法实现 onSelecListener 接口。
使用
     <RelativeLayout xmlns:android="http://schemas.android.com/apk/res/android"
    xmlns:app="http://schemas.android.com/apk/res-auto"
    ……
    />


    <android.support.v7.widget.RecyclerView
        ……
       />

    <com.zhang.sidebar_demo.SideBar
        android:id="@+id/sideBar"
        android:layout_width="25dp"
        android:layout_height="match_parent"
        android:layout_alignParentEnd="true"
        android:layout_gravity="end|center_vertical" />
</RelativeLayout>
在页面中需要调用 sideBar 的 setOnSelecListener 方法。因为RecyclerView的 smoothScrollToPosition 方法有一些小问题,我们需要自己写列表的跳转方法。具体可见http://blog.csdn.net/u014527323/article/details/69389529。
        sideBar = (SideBar) findViewById(R.id.sideBar);
        sideBar.setSectionIndexer((SectionIndexer) mRecyclerView.getAdapter());
        sideBar.setOnSelecListener(new SideBar.onSelecListener() {
            @Override
            public void setSelection(int position) {
                smoothMoveToPosition(mRecyclerView,position);
            }
        });


    /**
     * 滑动到指定位置
     * @param mRecyclerView
     * @param position
     */
    private void smoothMoveToPosition(RecyclerView mRecyclerView, final int position) {
        // 第一个可见位置
        int firstItem = mRecyclerView.getChildLayoutPosition(mRecyclerView.getChildAt(0));
        // 最后一个可见位置
        int lastItem = mRecyclerView.getChildLayoutPosition(mRecyclerView.getChildAt(mRecyclerView.getChildCount() - 1));

        if (position < firstItem) {
            // 如果跳转位置在第一个可见位置之前,就smoothScrollToPosition可以直接跳转
            mRecyclerView.smoothScrollToPosition(position);
        } else if (position <= lastItem) {
            // 跳转位置在第一个可见项之后,最后一个可见项之前
            // smoothScrollToPosition根本不会动,此时调用smoothScrollBy来滑动到指定位置
            int movePosition = position - firstItem;
            if (movePosition >= 0 && movePosition < mRecyclerView.getChildCount()) {
                int top = mRecyclerView.getChildAt(movePosition).getTop();
                mRecyclerView.smoothScrollBy(0, top);
            }
        }else {
            // 如果要跳转的位置在最后可见项之后,则先调用smoothScrollToPosition将要跳转的位置滚动到可见位置
            // 再通过onScrollStateChanged控制再次调用smoothMoveToPosition,进入上一个控制语句
            mRecyclerView.smoothScrollToPosition(position);
            mToPosition = position;
            mShouldScroll = true;
        }
    }
源码
附上github 地址
https://github.com/695336128/SideBar-Demo。


 2442
2442


 被折叠的 条评论
为什么被折叠?
被折叠的 条评论
为什么被折叠?
 到【灌水乐园】发言


