


在先前的教程"在Ubuntu OS上创建一个dianping Scope (Qt JSON)",我们知道如何使用C++来在Ubuntu平台上开发一个Scope;我们也在文章"使用golang来设计我们的Ubuntu Scope"里展示了如何使用go语言来在Ubuntu上开发一个Scope.在今天的文章中,我们来展示如何利用Javascript语言来开发一个Scope.这对于一些网页开发的开发者来说,无疑是一个天大的好消息,因为你们不需要学习另外一种语言就可以轻松地开发一个属于你们自己的Scope.更多关于Scope开发的知识可以在网址https://developer.ubuntu.com/en/scopes/
1)安装
首先我们必须强调的是Javascrip支持Scope的开发始于Ubuntu 15.04(vivid)系统及以后的版本.在开发之前,开发者必须按照文章"
Ubuntu SDK 安装"安装好自己的SDK.同时,必须做如下的JS Scope开发工具的安装:
$ sudo apt install unity-js-scopes-dev
$ unity-js-scopes-tool setup
在这里必须注意的是,我们必须在安装完我们的Ubuntu SDK后才可以执行上面的安装,并在SDK的安装中chroots必须安装完整.经过上面的安装,我们基本上已经完成了我们所有的工具的安装.
2)JS Scope开发文档
所有的开发离不开我们所需要的技术文档.JS Scope的开发文档的地址可以在
early build找到.当然你们也可以通过安装unity-js-scopes-doc包来得到帮助.
3)创建一个我们的Scope
Webservice API
我们还是使用我们先前使用百度天气API为例.该API的连接为:
点击上面的连接后,我们可以得到JSON格式的输出:
{"error":0,"status":"success","date":"2016-01-18","results":[{"currentCity":"北京","pm25":"13","index":[{"title":"穿衣","zs":"寒冷","tipt":"穿衣指数","des":"天气寒冷,建议着厚羽绒服、毛皮大衣加厚毛衣等隆冬服装。年老体弱者尤其要注意保暖防冻。"},{"title":"洗车","zs":"较适宜","tipt":"洗车指数","des":"较适宜洗车,未来一天无雨,风力较小,擦洗一新的汽车至少能保持一天。"},{"title":"旅游","zs":"一般","tipt":"旅游指数","des":"天气较好,温度稍低,而且风稍大,让您感觉有些冷,会对外出有一定影响,外出注意防风保暖。"},{"title":"感冒","zs":"极易发","tipt":"感冒指数","des":"天气寒冷,昼夜温差极大且空气湿度较大,易发生感冒,请注意适当增减衣服,加强自我防护避免感冒。"},{"title":"运动","zs":"较不宜","tipt":"运动指数","des":"天气较好,但考虑天气寒冷,风力较强,推荐您进行室内运动,若在户外运动请注意保暖并做好准备活动。"},{"title":"紫外线强度","zs":"弱","tipt":"紫外线强度指数","des":"紫外线强度较弱,建议出门前涂擦SPF在12-15之间、PA+的防晒护肤品。"}],"weather_data":[{"date":"周一 01月18日 (实时:-8℃)","dayPictureUrl":"http://api.map.baidu.com/images/weather/day/qing.png","nightPictureUrl":"http://api.map.baidu.com/images/weather/night/qing.png","weather":"晴","wind":"北风3-4级","temperature":"-4 ~ -11℃"},{"date":"周二","dayPictureUrl":"http://api.map.baidu.com/images/weather/day/qing.png","nightPictureUrl":"http://api.map.baidu.com/images/weather/night/duoyun.png","weather":"晴转多云","wind":"微风","temperature":"-1 ~ -8℃"},{"date":"周三","dayPictureUrl":"http://api.map.baidu.com/images/weather/day/duoyun.png","nightPictureUrl":"http://api.map.baidu.com/images/weather/night/yin.png","weather":"多云转阴","wind":"微风","temperature":"0 ~ -7℃"},{"date":"周四","dayPictureUrl":"http://api.map.baidu.com/images/weather/day/yin.png","nightPictureUrl":"http://api.map.baidu.com/images/weather/night/duoyun.png","weather":"阴转多云","wind":"微风","temperature":"-3 ~ -6℃"}]}]}我们的Scope需要来解析上面的JSON格式的输出,并在我们的Scope中呈现.
创建一个最基本的scope
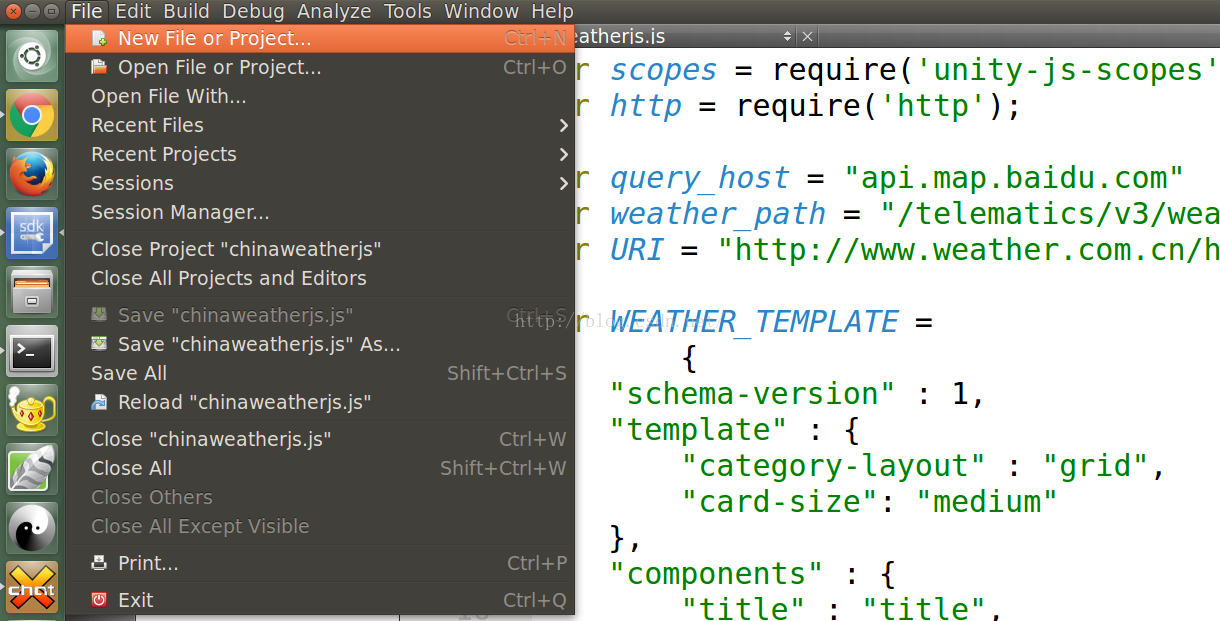
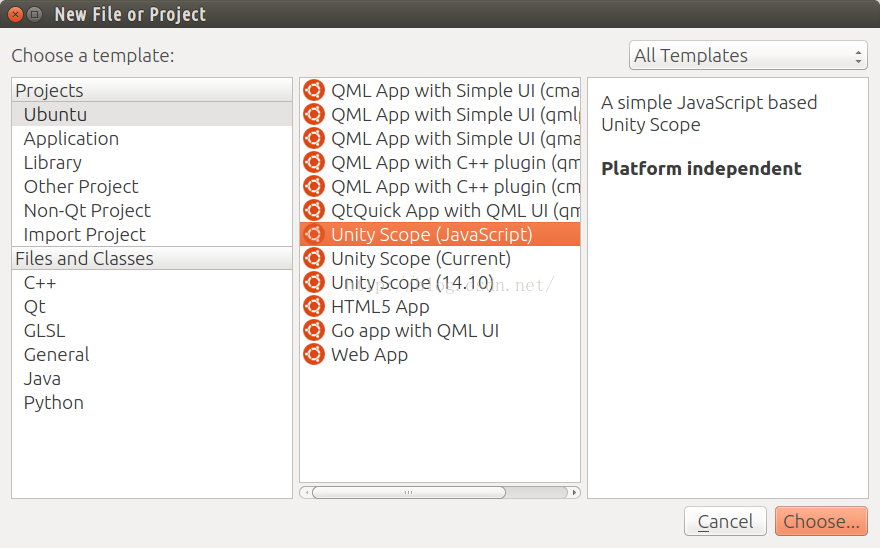
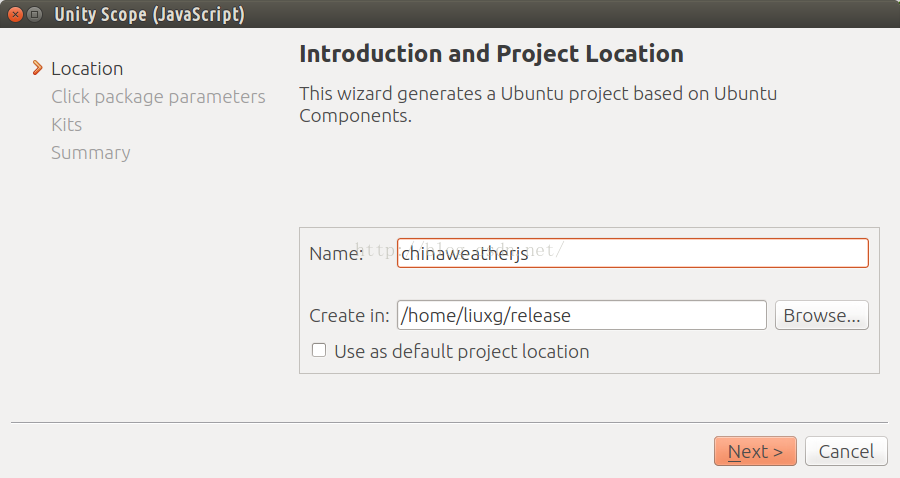
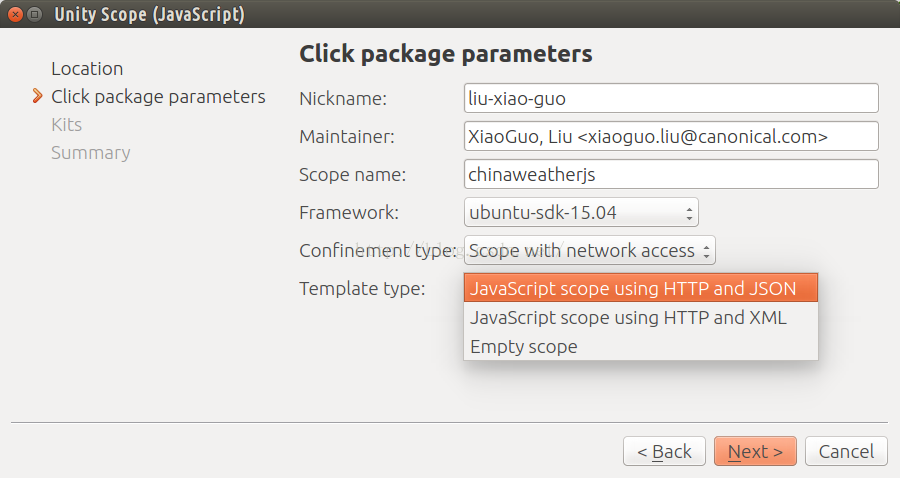
在这一节中,我们来创建一个JS Scope.我们可以利用在Ubuntu SDK中所提供的template来轻松地创建一个Scope.首先,我们打开我们的SDK,并且选择"
New File or Project":
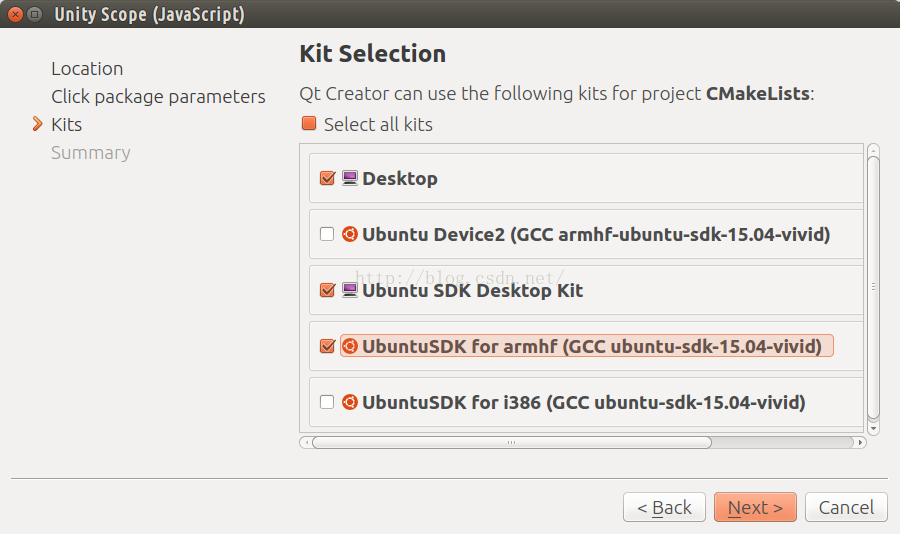
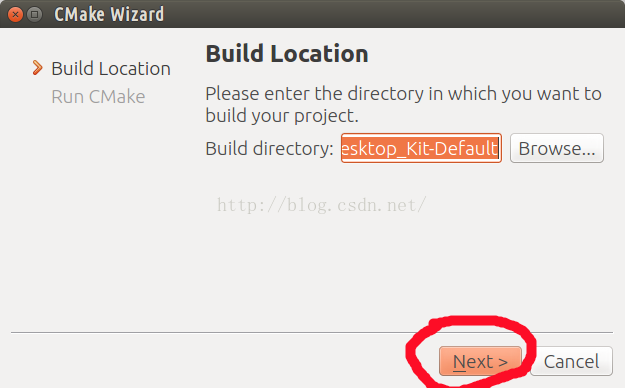
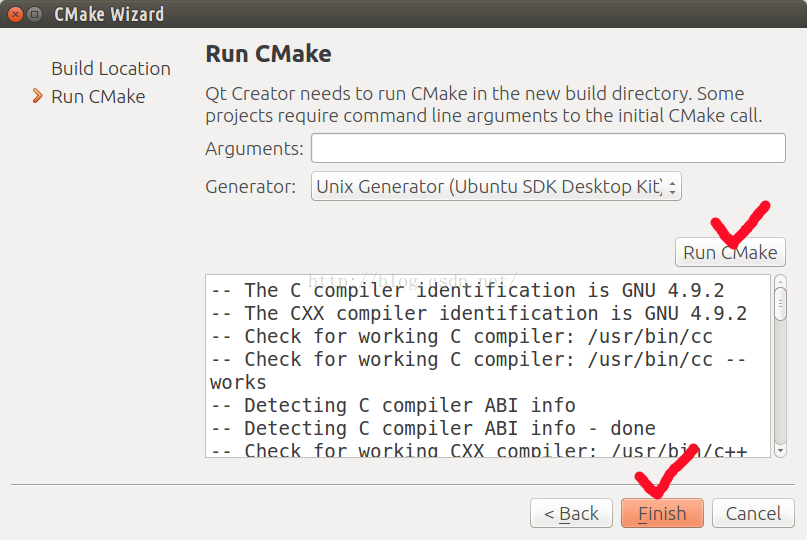
在最后的几步中,我们必须为每个我们所选择的Kit都要做同样的步骤以完成整个项目的生成.我们这时可以运行(点击SDK左下角的绿色按钮)我们的Scope:
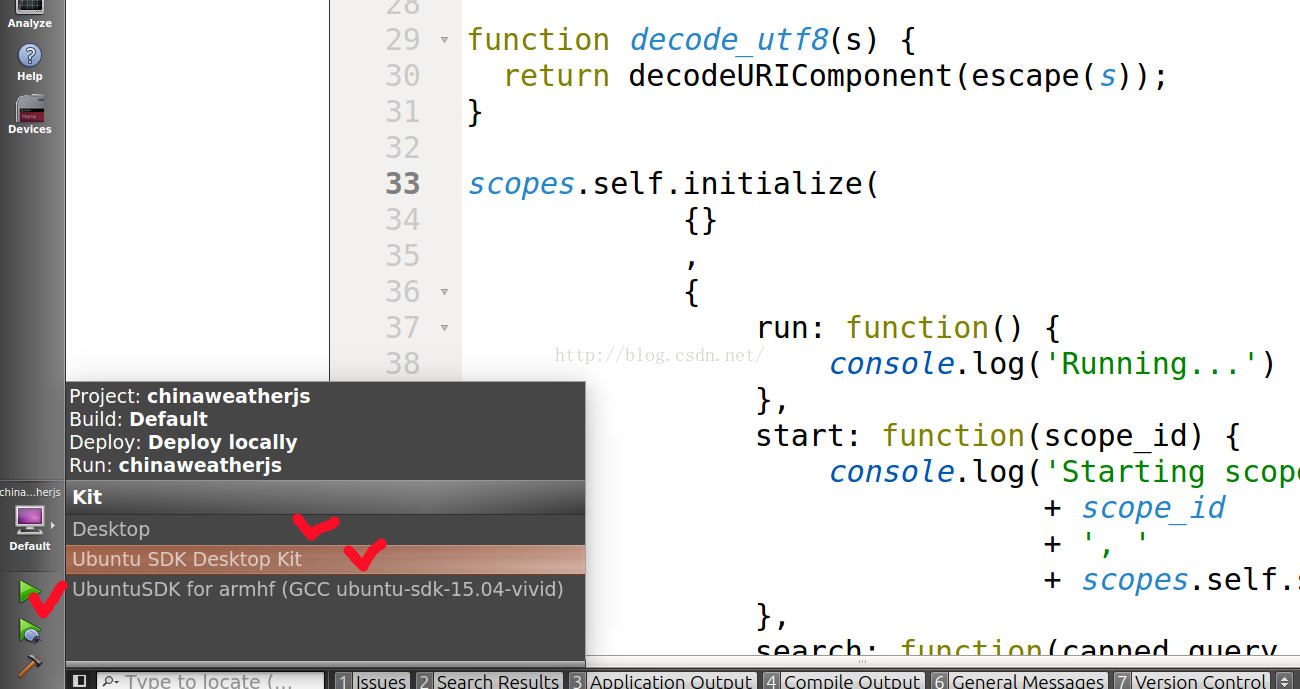
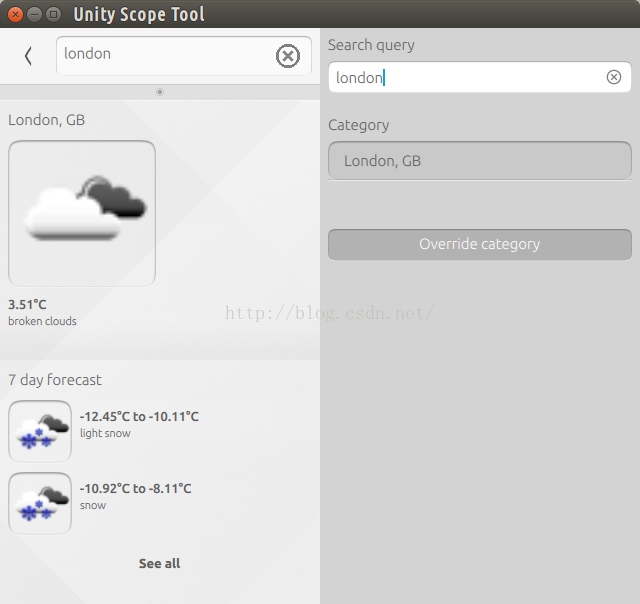
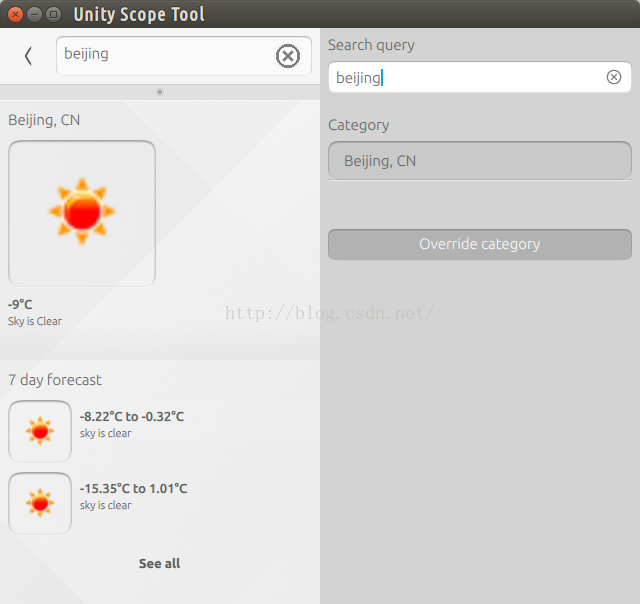
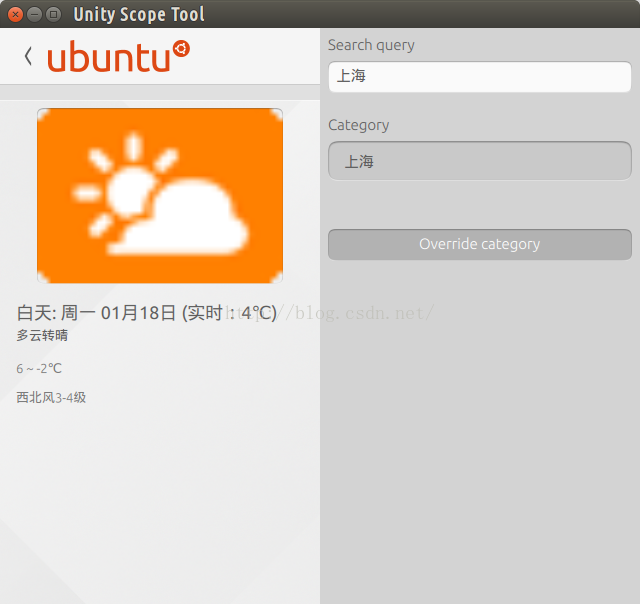
显示如下.基本上没有什么特别的东西.它在默认的情况下显示的是一个天气的Scope,我们可以在它里面输入一些我们所感兴趣的城市的名称来得到当前城市的天气情况.我们可以选择SDK屏幕做下角的Desktop或Ubuntu Desktop SDK kit来在Desktop的环境下运行.当我们需要在手机上运行时,我们必须选择Ubuntu SDK for armhf来运行:
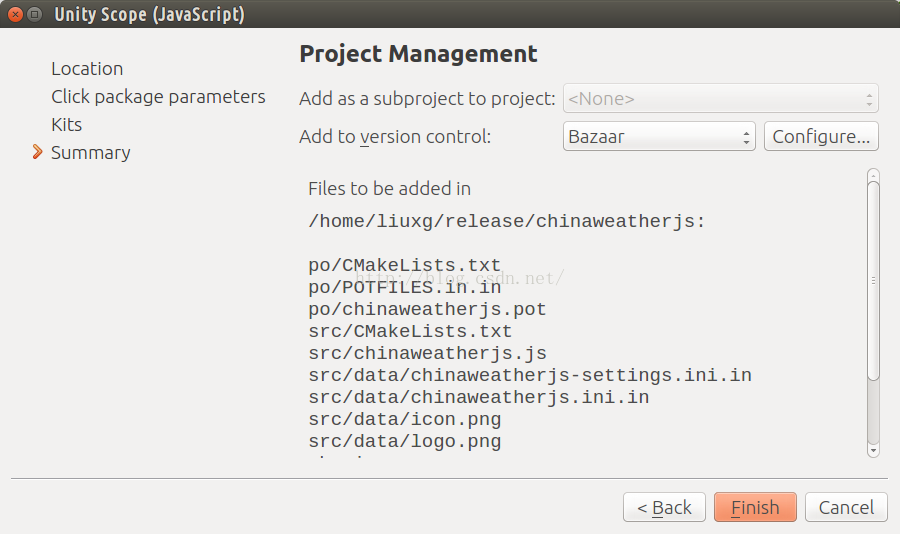
项目总览及npm集成:
我们在上面已经生产了我们的项目,我们首先来查看一下我们的项目的结构:
liuxg@liuxg:~/release/chinaweatherjs$ tree
.
├── chinaweatherjs.apparmor
├── CMakeLists.txt
├── CMakeLists.txt.user
├── manifest.json.in
├── po
│   ├── chinaweatherjs.pot
│   ├── CMakeLists.txt
│   ├── Makefile.in.in
│   ├── POTFILES.in
│   └── POTFILES.in.in
└── src
    ├── chinaweatherjs.js
    ├── CMakeLists.txt
    ├── data
    │   ├── chinaweatherjs.ini.in
    │   ├── chinaweatherjs-settings.ini.in
    │   ├── icon.png
    │   └── logo.png
    ├── etc
    └── node_modules
        ├── last-build-arch.txt
        └── unity-js-scopes
            ├── bin
            │   └── unity-js-scopes-launcher
            ├── index.js
            ├── lib
            │   └── scope-core.js
            └── unity_js_scopes_bindings.node

8 directories, 20 files
从上面的结构中,我们可以看出来我们的核心的文件将是src/chinaweatherjs.js文件.在node_modules中含有我们所需要的库.如果你先前已经做过一些Scope开发,那么重新利用该文件来构造自己的Scope将是非常简单的.如果你还没有开发过任何其它的Scope的话,那么,请继续阅读我们下面的介绍.
npm集成
细心的开发者可能已经注意到一个叫做node_modules的目录.JS Scope使用的框架就是npm + Scope.我们可以很方便地使用unity-js-scopes-tool来加入我们所需要的npm包到我们的Scope项目中去.运行的命令如下:
$ unity-js-scopes-tool install <path/to/project/src/node_modules> <npm package> 上述命令将安装任何一个我们所需要的npm包到我们的项目中去.如果你对npm还不是很熟话,请参阅连接 https://www.npmjs.com/.
API总览
在这一节中,我们将介绍一下我们所使用的API及如何实现我们所需要的Scope.
Javascript Scope的基本架构
为了能够连接到Scope的runtime,你的Scope只需要遵守几个简单的准则:
- 导入 Javascript Scope模块到你的代码中
- 设置你的Scope的runtime上下文
这些步骤简单地说就是如下的代码:
var scopes = require('unity-js-scopes')
scopes.self.initialize({}, {});
一旦被导入,unity-js-scopes核心模块即是和Scope runtime交互的入口点.runtime将帮我们设置好我们的Scope,和我们的Dash进行交互及显示用户在Scope交互所生产的结果等.
在上面的初始化代码中,"
self"属性是用来帮助我们实现我们的交互.它引用当前正在运行的Scope的上下文.我们可以在上面显示的index.js文件中看到如下的代码:
Object.defineProperty(
    module.exports,
    "self",
    {
        get: function() {
            if (! self) {
                self = new Scope();
            }
            return self;
        },
    });
除了定义一些你的Scope在运行时的一下runtime元素以外,你的runtime上下文还允许你来检查当前Scope的设置及接受scope runtime环境变化时所生产的变化等.
Runtime 元素
现在,我们可以来重新回顾我们的Scope代码并开始定义一些重要的运行时的函数的行为.
一旦我们的Scope和runtime建立起连接并被用户所启动,scope runtime将发送来所有的由用户所产生的动作.最终这些动作将被发送到有我们的Scope在Initialize过程中所定义的API函数中.
这些API函数可以由我们的Scope来有选择地定义.它们将在runtime时反应出那些最重要的被触发的步骤.下面列举那些最重要的runtime回调函数.
- run: 当一个scope准备运行时,这个回调函数将被调用.
- start: 当一个scope准备启动时,这个函数将被调用
- stop: 当一个scope准备停止时,这个函数将被调用
- search: 当用户请求一个搜索时,这个函数将被调用.runtime将将提供所有的关于搜索所需要的信息给这个函数的调用.开发者的任务就是通过和runtime的交互把所有可能的结果push给runttime.你也可以控制如何显示这些结果
- preview: 显示一个在上面search中显示结果的preview.runtime将提供关于这个preview所需要的所有的信息
一个简单的模版为:
var scopes = require('unity-js-scopes')
scopes.self.initialize({}, {
    run: function() {
        console.log('Running...');
    },
    start: function(scope_id) {
        console.log('Starting scope id: ' + scope_id + ', ' + scopes.self.scope_config)
    },
    search: function(canned_query, metadata) {
        return null
    },
    preview: function(result, metadata) {
        return null
    },
}});
对于每一个scope runtime的回调函数来说,它相应于一个用户的交互.scope runtime希望你的scope发送回一个描述各个关键交互所需要的对象.
比如,对search回调函数来说,它希望你的scope发送回一个叫做SearchQuery的object.你将使用这个object来定义用户进行搜索时的行为.
SearchQuery object可以定义一个run回调函数.当搜索发生时,该函数将被调用.同时它也可以定义一个cancel的回调函数.当一个搜索被停止时,该函数将被调用.
Scope runtime同时也传入一个叫做SearchReply的object.这个object可以被用来push一些结果到scope runtime.
上面的这种交互模式是贯穿了整个scope及scope rumtime设计的核心交互模式.
推送搜索结果
上面讲到的一个最核心的搜索交互就是我们的scope可以把我们所需要的结果推送到scope runtime.这些结果是通过SearchReply来完成推送的.这个函数希望一个叫做CategorisedResult类型的数据被创建,并被推送到scope runtime.这个result对象将让我们的scope来定义诸如title, icon,uri等信息.
CategorisedResult的一个额外的功能就是在创建它时,可以指定它结果显示的layout.这个layout是由Category及CategoryRender对象共同定义的.下面就是一个我们天气scope中所使用的一个例子.为了能够获取百度天气API的数据,我们必须重新定义tempalate中的变量:
var query_host = "api.map.baidu.com"
var weather_path = "/telematics/v3/weather?output=json&ak=DdzwVcsGMoYpeg5xQlAFrXQt&location="
var URI = "http://www.weather.com.cn/html/weather/101010100.shtml";
initialize中的search方法定义如下:
search: function(canned_query, metadata) {
return new scopes.lib.SearchQuery(
canned_query,
metadata,
// run
function(search_reply) {
var qs = canned_query.query_string();
if (!qs) {
qs = "北京"
}
console.log("query string: " + qs);
var weather_cb = function(response) {
var res = '';
// Another chunk of data has been recieved, so append it to res
response.on('data', function(chunk) {
res += chunk;
});
// The whole response has been recieved
response.on('end', function() {
// console.log("res: " + res);
r = JSON.parse(res);
// Let's get the detailed info
var request_date = r.date
console.log("date: " + date);
var city = r.results[0].currentCity;
console.log("city: " + city);
var pm25 = r.results[0].pm25
console.log("pm25: " + pm25)
var category_renderer = new scopes.lib.CategoryRenderer(JSON.stringify(WEATHER_TEMPLATE));
var category = search_reply.register_category("Chineweather", city, "", category_renderer);
try {
r = JSON.parse(res);
var length = r.results[0].weather_data.length
console.log("length: " + length)
for (var i = 0; i < length; i++) {
var categorised_result = new scopes.lib.CategorisedResult(category);
var date = r.results[0].weather_data[i].date
console.log("date: "+ date);
var dayPictureUrl = r.results[0].weather_data[i].dayPictureUrl;
console.log("dayPictureUrl: " + dayPictureUrl);
var nightPictureUrl = r.results[0].weather_data[i].nightPictureUrl;
console.log("nightPictureUrl: " + nightPictureUrl);
var weather = r.results[0].weather_data[i].weather;
console.log("weather: " + weather);
var wind = r.results[0].weather_data[i].wind;
console.log("wind: " + wind);
var temperature = r.results[0].weather_data[i].temperature;
console.log("temperature: " + temperature);
categorised_result.set("weather", weather);
categorised_result.set("wind", wind);
categorised_result.set("temperature", temperature);
categorised_result.set_uri(URI);
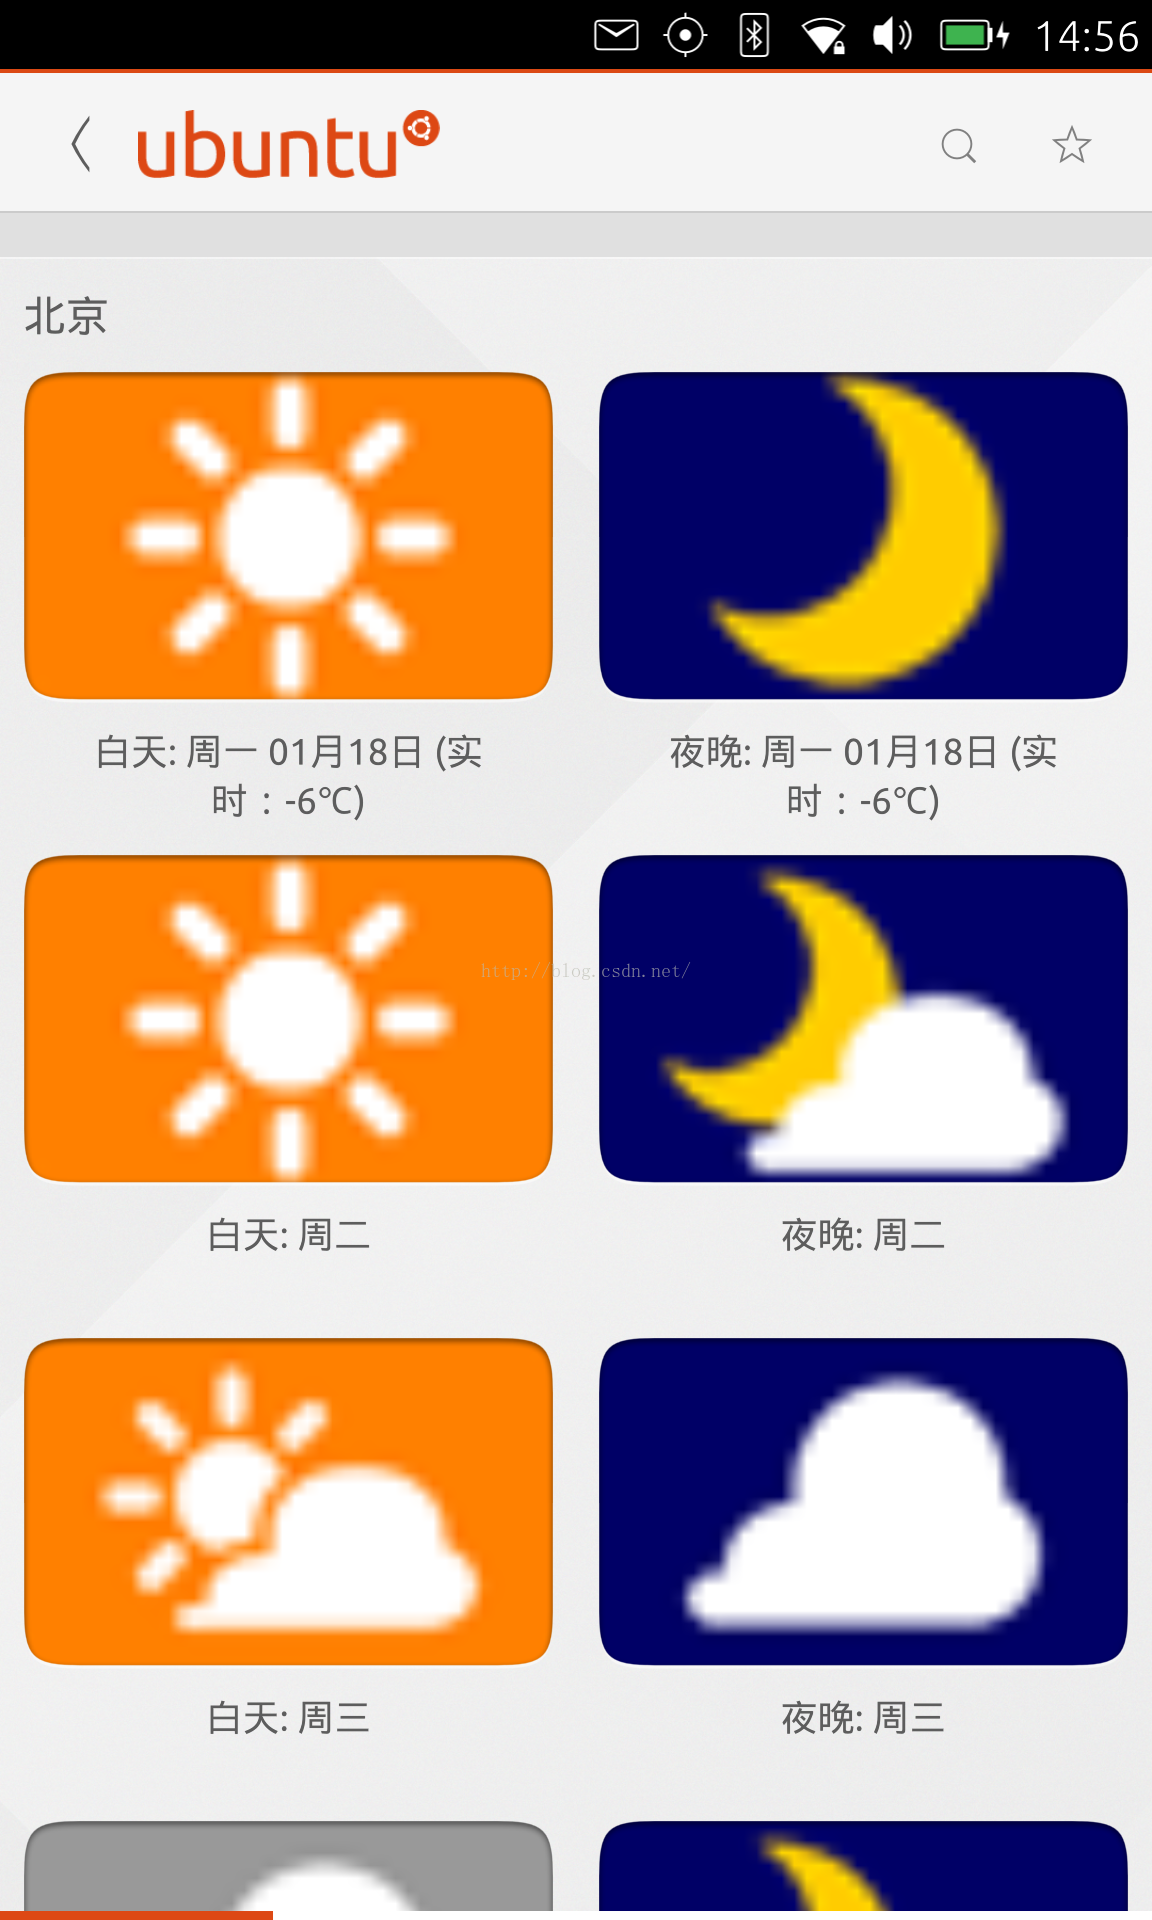
categorised_result.set_title("白天: " + date );
categorised_result.set_art(dayPictureUrl);
categorised_result.set("subtitle", weather);
search_reply.push(categorised_result);
categorised_result.set_title("夜晚: " + date );
categorised_result.set_art(nightPictureUrl);
search_reply.push(categorised_result);
}
// We are done, call finished() on our search_reply
// search_reply.finished();
}
catch(e) {
// Forecast not available
console.log("Forecast for '" + qs + "' is unavailable: " + e)
}
});
}
console.log("request string: " + query_host + weather_path + qs);
http.request({host: query_host, path: weather_path + encode_utf8(qs)}, weather_cb).end();
},
// cancelled
function() {
});
},Preview搜索结果
一旦我们的搜索结果被推送到scope runtime并被显示,用户可以点击显示的结果并请求一个关于该结果的preview.Scope runtime将通过你的scope中所定义的preview回调来显示所需要的结果.
就像我们上面对search所描述的那样,scope runtime希望你的scope返回一个PreViewQuery的对象来作为一个交互的桥梁.这个对象必须指定一个run及一个cancel的函数.这两个函数和我们上面介绍的search中的语义是一样的.这里不再累述.
对Preview来说,有两个最重要的元素:column layout及Preview Widgets.就像它们的名字所描述的那样,column layout元素是用来定义Preview页面中Preview Component的layout的.Preview Widget是用来在Preview页面中组成页面的.
一旦我们明白了上面所讲的,预览插件并且它被绑定的数据之间的关联是通过“ID”来完成。下面是我们的百度天气里的preview的实现:
preview: function(result, action_metadata) {
return new scopes.lib.PreviewQuery(
result,
action_metadata,
// run
function(preview_reply) {
var layout1col = new scopes.lib.ColumnLayout(1);
var layout2col = new scopes.lib.ColumnLayout(2);
var layout3col = new scopes.lib.ColumnLayout(3);
layout1col.add_column(["imageId", "headerId", "temperatureId", "windId"]);
layout2col.add_column(["imageId"]);
layout2col.add_column(["headerId", "temperatureId", "windId"]);
layout3col.add_column(["imageId"]);
layout3col.add_column(["headerId", "temperatureId", "windId"]);
layout3col.add_column([]);
preview_reply.register_layout([layout1col, layout2col, layout3col]);
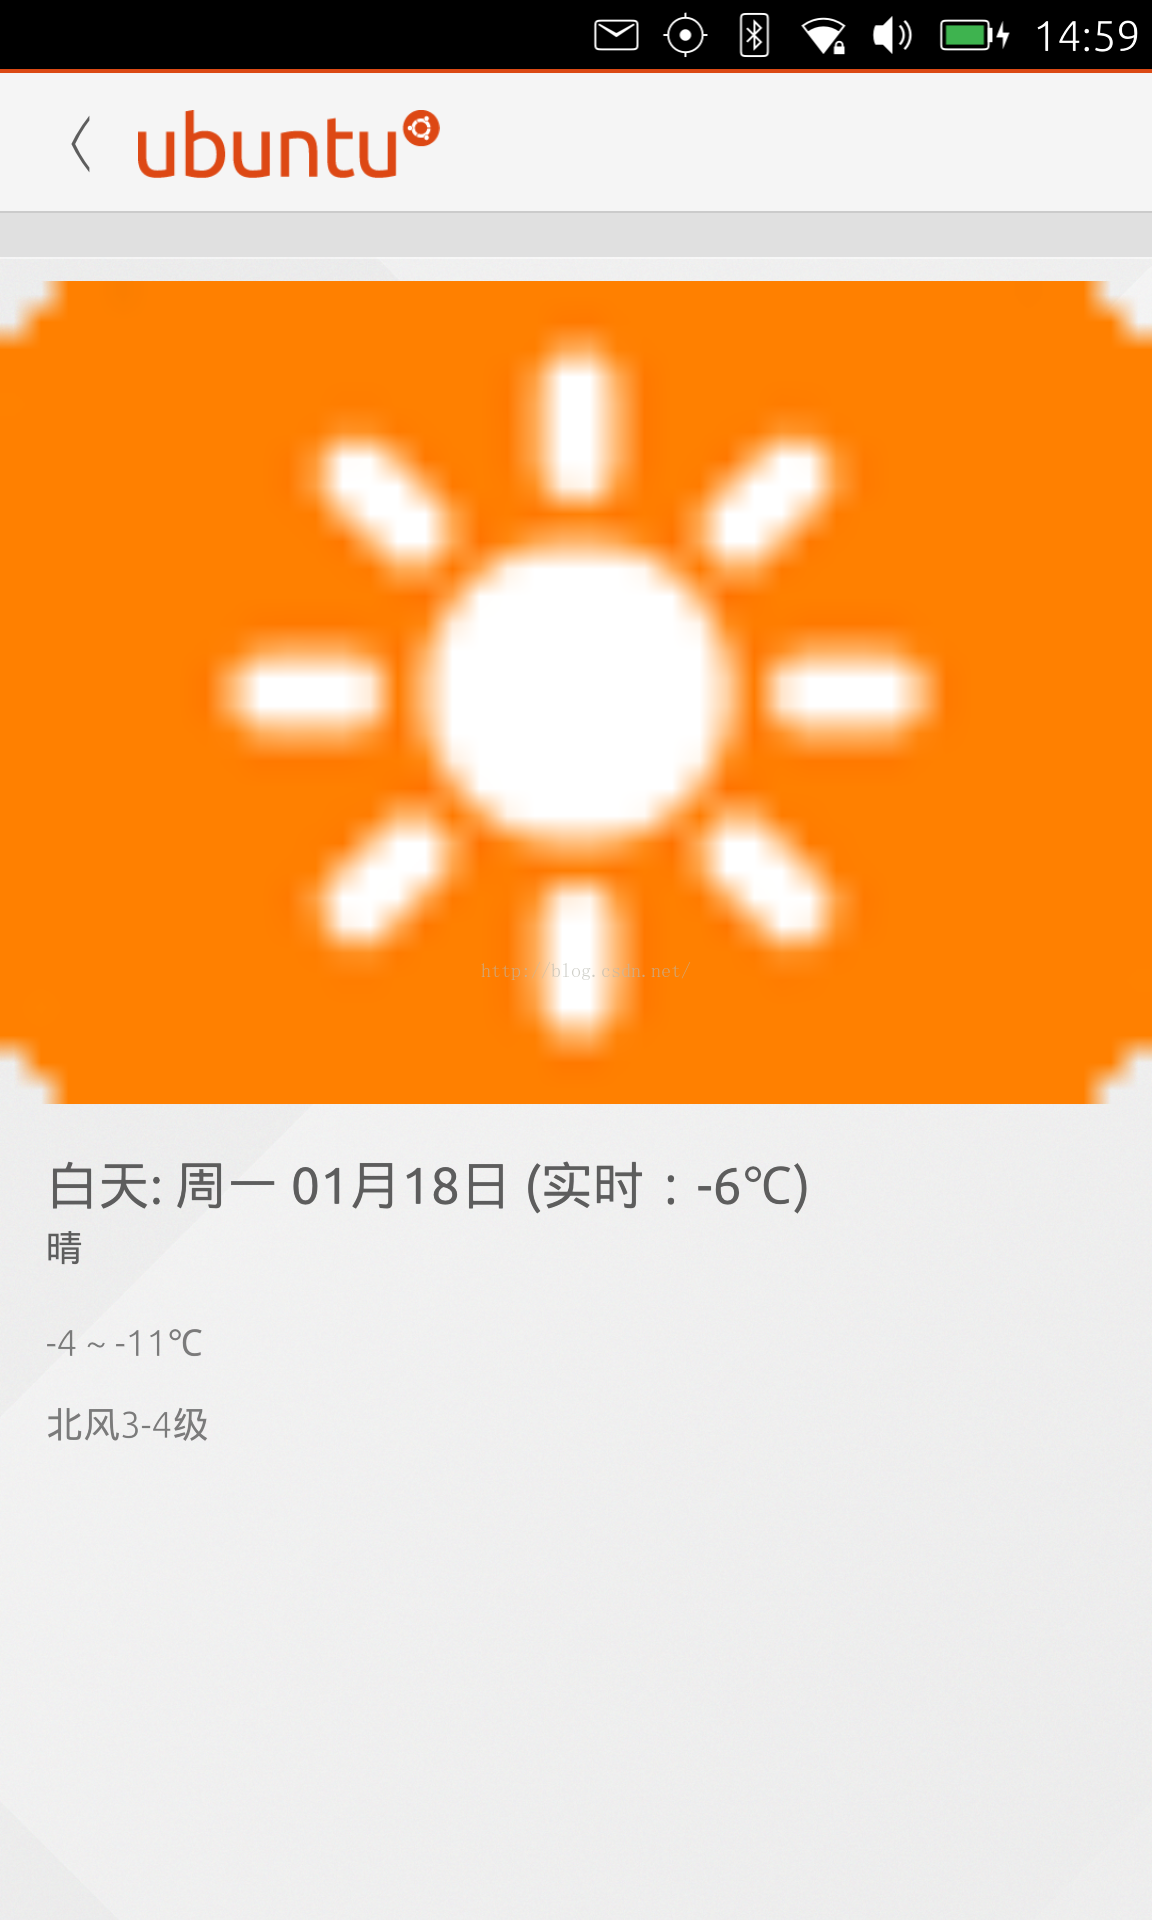
var header = new scopes.lib.PreviewWidget("headerId", "header");
header.add_attribute_mapping("title", "title");
header.add_attribute_mapping("subtitle", "subtitle");
var image = new scopes.lib.PreviewWidget("imageId", "image");
image.add_attribute_mapping("source", "art");
var temperature = new scopes.lib.PreviewWidget("temperatureId", "text");
temperature.add_attribute_mapping("text", "temperature");
var wind = new scopes.lib.PreviewWidget("windId", "text");
wind.add_attribute_mapping("text", "wind");
preview_reply.push([image, header, temperature, wind ]);
preview_reply.finished();
},
// cancelled
function() {
});
}我们可以运行我们的Scope:

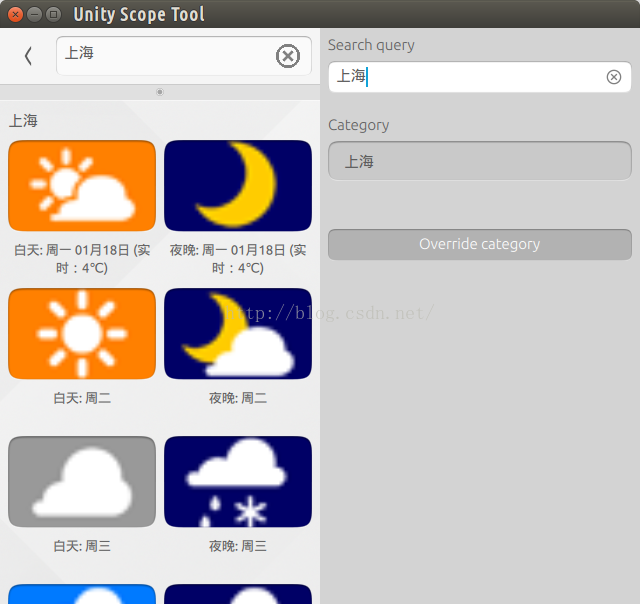
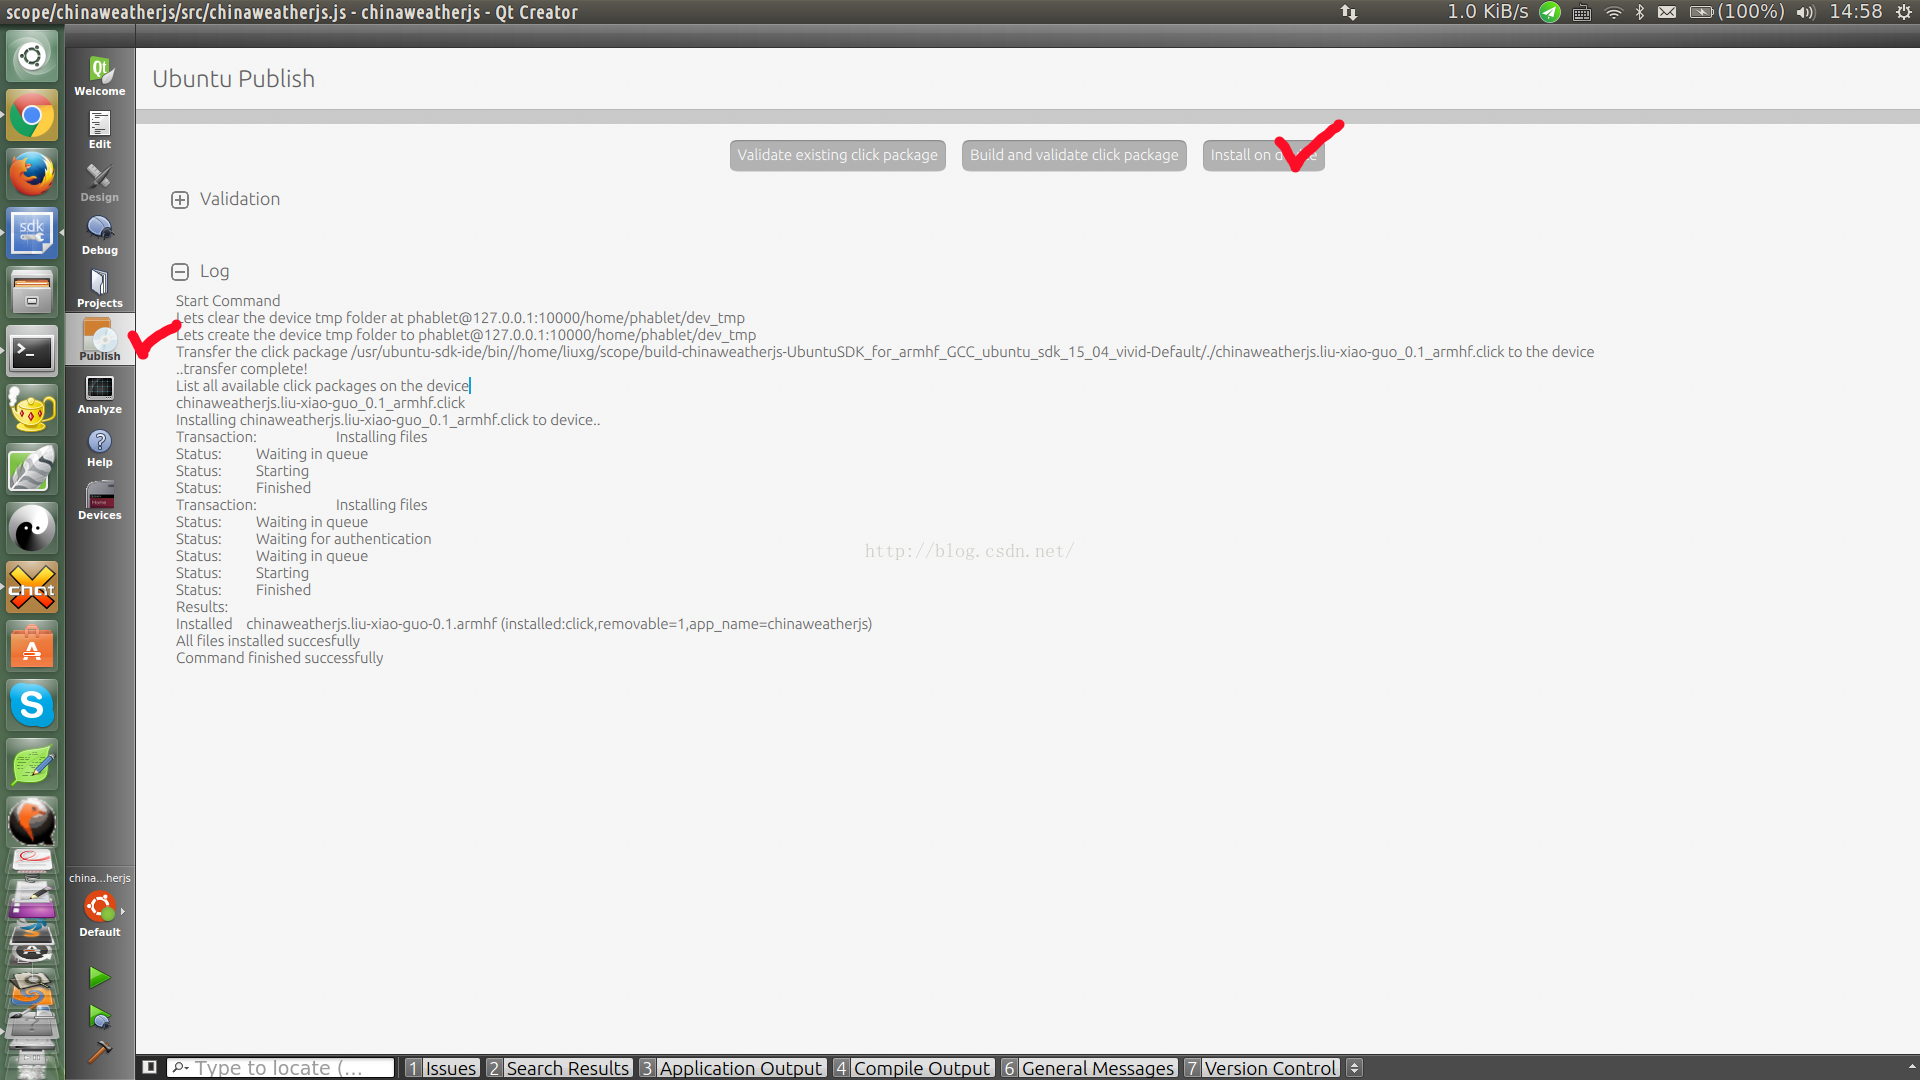
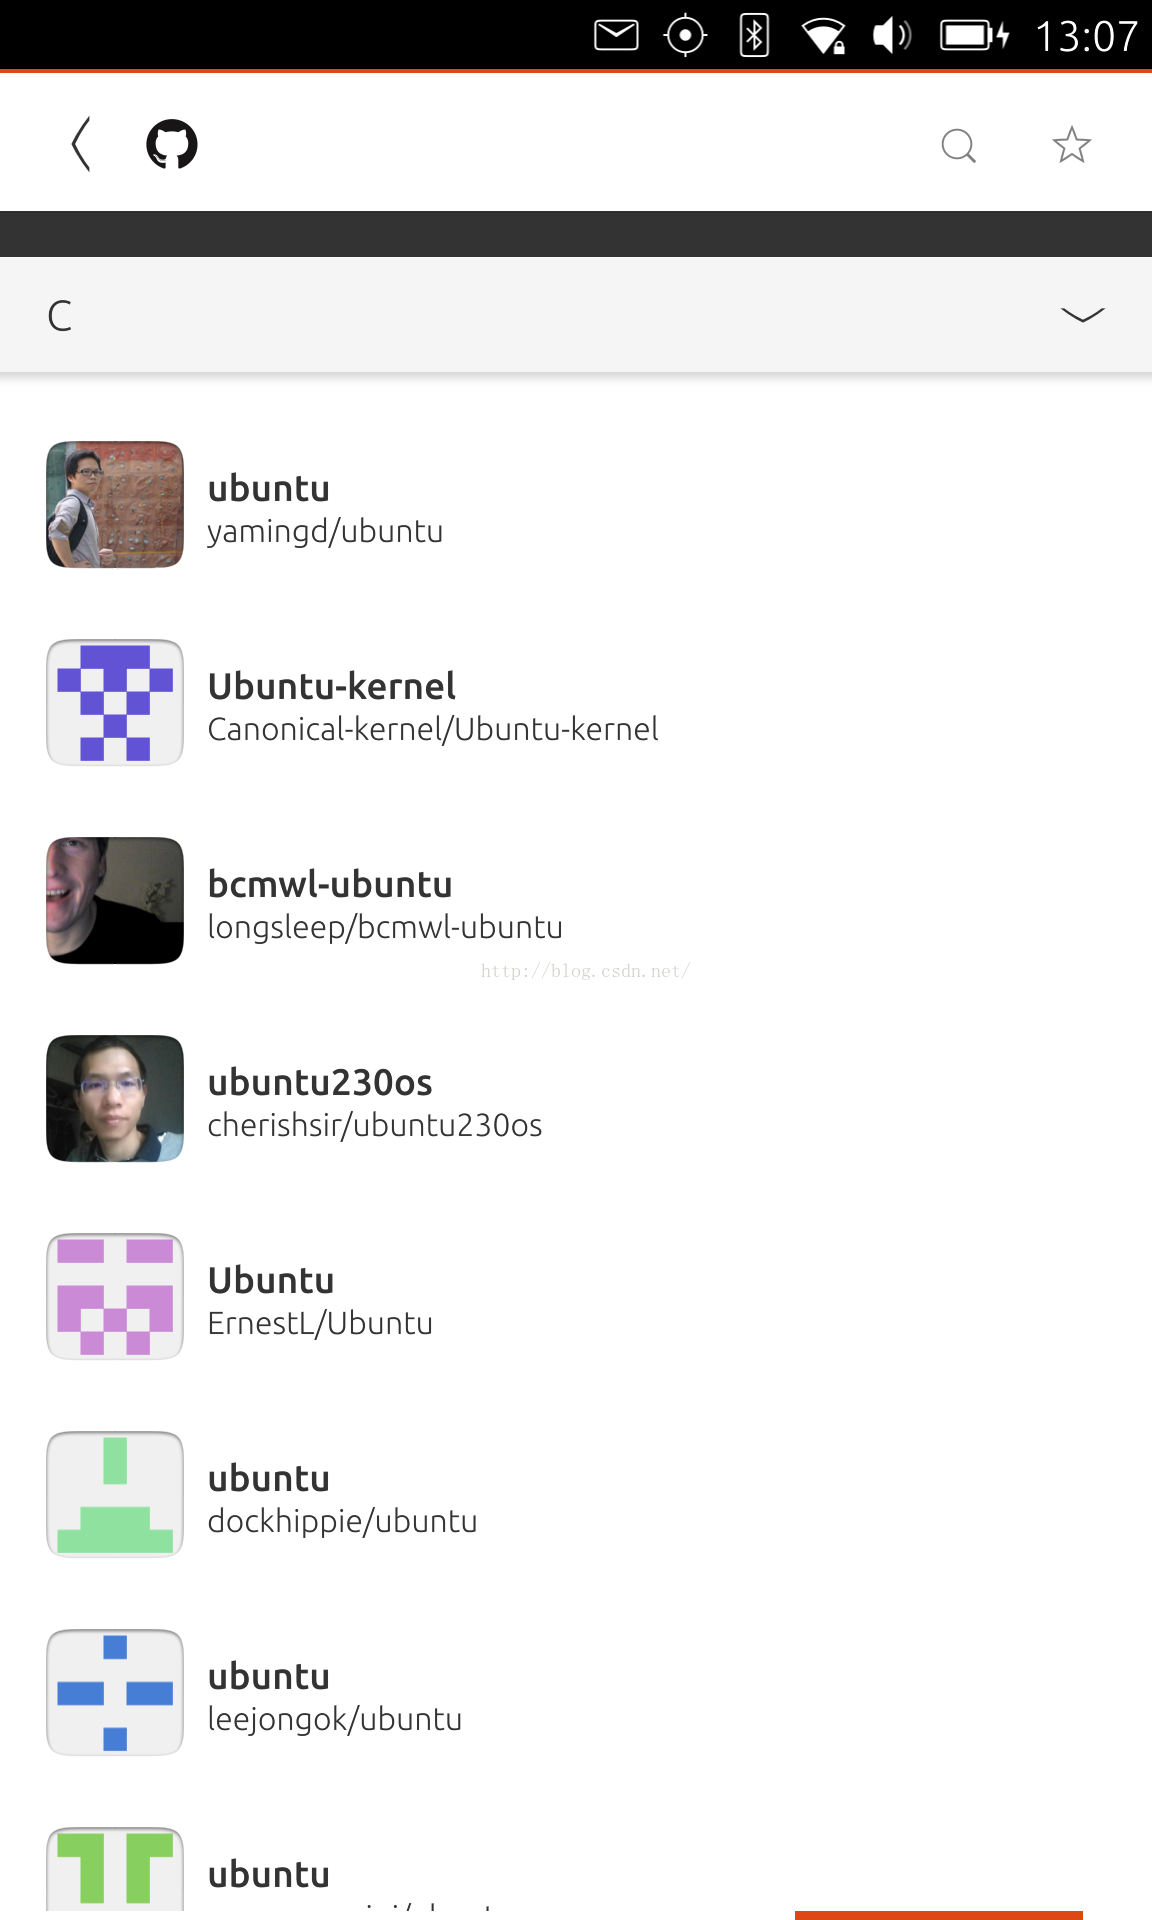
我们可以通过如下的方式来把我们的Scope部署到我们的手机上:
为了能够编译好连接中的
例程,我们必须进入到我们的项目中,并安装如下的方法安装github:
$ bzr branch lp:~davidc3/+junk/github-js-scope
$ liuxg@liuxg:~/scope/github-js-scope/src$ unity-js-scopes-tool install ./node_modules github 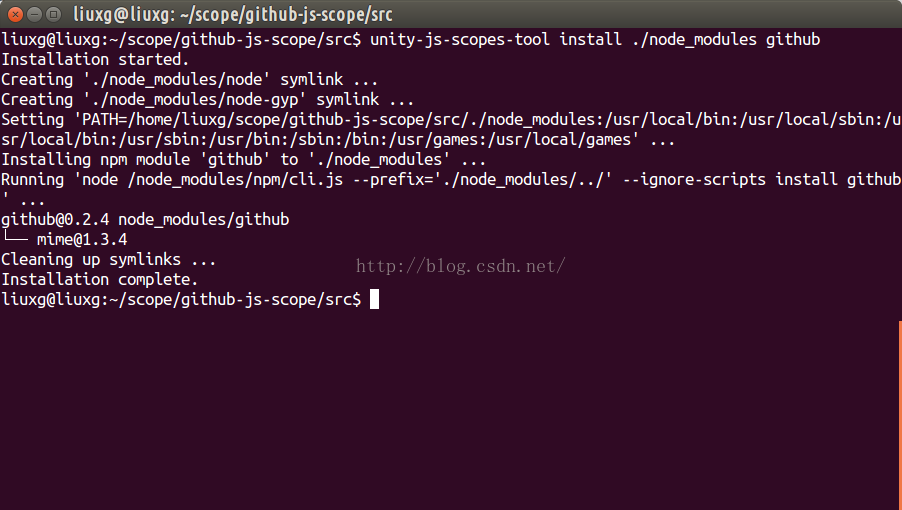


 1378
1378


 被折叠的 条评论
为什么被折叠?
被折叠的 条评论
为什么被折叠?
 到【灌水乐园】发言


