在阅读IoBuffer源码之前,我们先看Mina对IoBuffer的描述:A byte buffer used by MINA applications. This is a replacement for ByteBuffer. 这是一个对ByteBuffer的replacement,同样是用作缓冲区,做内容的切换和承载的容器,为什么要用重新封装ByteBuffer,MINA是这么给出解释的Two Reasons:
l It doesn't provide useful getters and putters
l It is difficult to write variable-length data due to its fixed capacity
用过ByteBuffer的人可能经常会遇到BufferOverflowException这样的异常,原因是buffer在初始化allocate之后就不能再自动的改变大小了,如果项目很规整,约定的很好,那可能不太会出意外,怕就怕项目一大,好多东西就乱套了。所以在阅读IoBuffer源码的时候,我们会着重看它和ByteBuffer之间的差异。另外一点,就是IoBuffer作为一个应用框架的工具,必然会提供比原生Buffer更便捷的方法,比如IoBuffer中可以直接put和get String,可以直接将内容转成十六进制等等。
用法很简单,我倒是想从如何将一个已有的类进行封装和扩展的角度来看IoBuffer的源码。在看MINA的源码之前,我们有必要稍稍回顾一下ByteBuffer的构成:
ByteBuffer继承了Buffer类,这个继承关系约定了Buffer系列中特定的操作形式(有点儿像指针),limit/position/mark/capacity,以及在遍历中使用的hasRemaining。然后通过两个静态方法来构建出ByteBuffer:
使用Heap空间,堆空间的构造采用申请byte数组:
1 | public static ByteBuffer allocate(int capacity) { |
3 | throw new IllegalArgumentException(); |
4 | return new HeapByteBuffer(capacity, capacity); |
使用direct memory,这块内存的开辟就比较麻烦了,好多都是采用了Bit和native的方法:
1 | public static ByteBuffer allocateDirect(int capacity) { |
2 | return new DirectByteBuffer(capacity); |
除了构造之外,剩下的主要是对数据的操作方法,wrap、get和put,下面的图没有截全,还有好多方法:
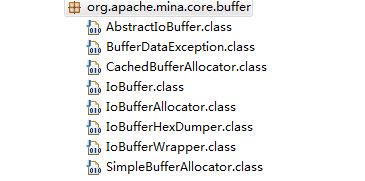
IoBuffer及其相关的类均在org.apache.mina.core.buffer下,IoBuffer定义了buffer使用的规则,AbseractIoBuffer提供了具体的实现:
IoBuffer没有继承任何类,只是实现了comparable接口,我们注意到IoBuffer类修饰符用的是abstract,跟ByteBuffer也是用abstract修饰,至于为什么要用abstract,我觉得也容易理解,毕竟这是一个要对外直接使用的类,同时需要对实现进行规则和扩展:
1 | public abstract class IoBuffer implements Comparable<IoBuffer> |
在IoBuffer的一系列代码阅读中,你可以看到抽象类之间的继承,内部类的使用情况等等,后面,我会通过一个删减版的例子来盘点这中间的关系,所以大片的源码就不贴了。
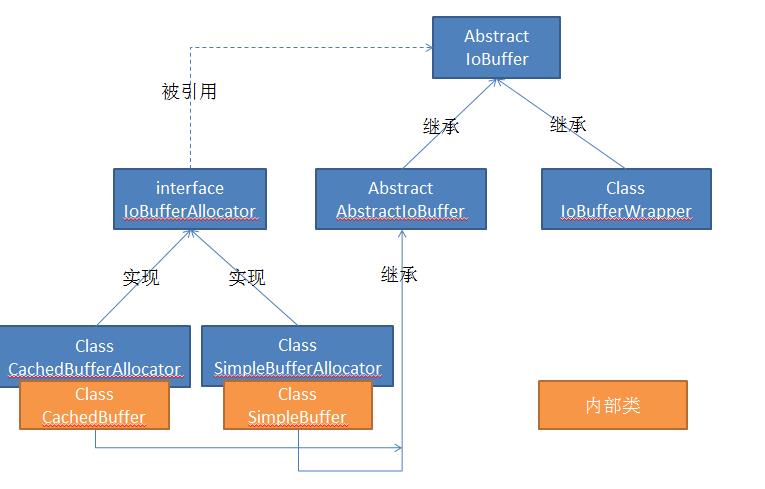
UML工具不会用,关键是怕用错了,还是用PPT画了。囧一个,大家有好那种可以一键生成的工具推荐一下,我之前用的是JUDE和Visio。上图画出了IoBuffer中几个重要类之间的关系,两个内部类均继承了AbstractIoBuffer,AbstractIoBuffer和IoBufferWrapper均实现了IoBuffer中的具体操作部分。IoBufferAllocator接口主要定义了为缓冲区开辟空间的方法,所以IoBuffer中需要引用来自IoBufferAllocator的对象。
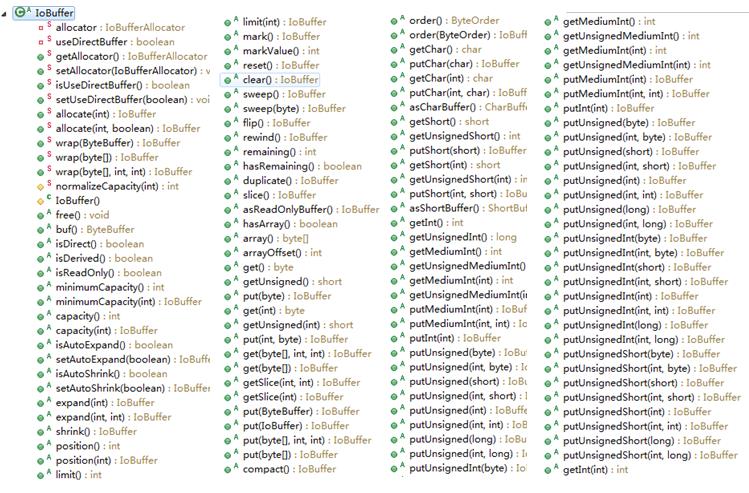
在IoBuffer中,我们熟知的allocate和wrap方法被声明成了static,通过引用IoBufferAllocator接口中的对象来实现,而其他诸如get、put等操作的方法都定义为abstract了,让其子类得以实现。IoBuffer中我们还值得关注的主要见我之前写过的一篇文章《IoBuffer和ByteBuffer》。
下面是这些中产生buffer的接口IoBufferAllocator和其实现类:
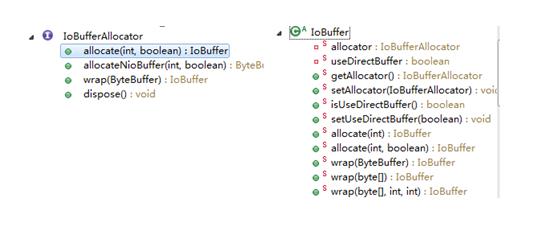
接口很简单,就定义了几个在IoBuffer中已经被static修饰的方法。有两个类都实现了IoBufferAllocator,但是在IoBuffer中使用的是SimpleBufferAllocator:
1 | /** The allocator used to create new buffers */ |
2 | private static IoBufferAllocator allocator = new SimpleBufferAllocator(); |
4 | /** A flag indicating which type of buffer we are using : heap or direct */ |
5 | private static boolean useDirectBuffer = false; |
所以我们主要关注SimpleBufferAllocator:
01 | public IoBuffer allocate(int capacity, boolean direct) { |
02 | return wrap(allocateNioBuffer(capacity, direct)); |
05 | public ByteBuffer allocateNioBuffer(int capacity, boolean direct) { |
08 | nioBuffer = ByteBuffer.allocateDirect(capacity); |
10 | nioBuffer = ByteBuffer.allocate(capacity); |
15 | public IoBuffer wrap(ByteBuffer nioBuffer) { |
16 | return new SimpleBuffer(nioBuffer); |
19 | public void dispose() { |
这是接口中定义的几个方法,这里调用内部类SimpleBuffer来生成相应的buffer,又由于SimpleBuffer继承了AbstractIoBuffer,所以真正实现的代码在AbstractIoBuffer中(这里有点儿绕,大家结合上面的图和源码一起读)。而且注意构造方法的protected关键字的使用:
01 | private ByteBuffer buf; |
03 | protected SimpleBuffer(ByteBuffer buf) { |
04 | super(SimpleBufferAllocator.this, buf.capacity()); |
06 | buf.order(ByteOrder.BIG_ENDIAN); |
09 | protected SimpleBuffer(SimpleBuffer parent, ByteBuffer buf) { |
看到了吧,底层还是用的NIO中的ByteBuffer。至于怎么实现AutoExpand这样的方法,我觉得不是源码的重点,这些都是算法上的事情,如果你不关注算法,可以稍稍看看即可,而且好多都是native的实现,也看不到。而我这边主要关注的还是他们之间的结构。
上图左边的路走通了,我们来走右边的路,右边主要看AbstractIoBuffer,他是IoBuffer的具体实现,但是它也是一个抽象类,也要被其他类继承,用于扩展。AbstractIoBuffer中,大多类都是final的。而且这里面主要的实现都是在处理limit/position/mark/capacity这之间的关系。而CachedBufferAllocator主要用于实现IoBuffer中自动扩展AutoExpand和收缩: that caches the buffers which are likely to be reused during auto-expansion of the buffers.
----------------------------------------------------------
最后,我们将上面的叙述用一个删减版的代码来模拟一下,这样有助于理解代码的结构,以后遇到类似的情况就可以类似的处理,我更希望,能在分析完所有源码之后,就能呈现一个类似的框架出来,不过这个真的只是想想,毕竟没那么多时间,如果你有时间,可以试着去阉割一下mina。
首先是IoBuffer:
01 | package org.apache.mina.core.rewrite.buffer; |
09 | public abstract class IoBuffer { |
11 | private static IoBufferAllocator allocator=new SimpleBufferAllocator(); |
12 | private static boolean direct; |
14 | protected IoBuffer() { |
18 | public static IoBuffer allocate(int capacity) { |
19 | return allocator.allocate(capacity, direct); |
22 | public static IoBuffer wrap(byte[] byteArray, int offset, int length){ |
27 | public abstract IoBuffer get(); |
29 | public abstract IoBuffer put(byte b); |
31 | public abstract boolean other(); |
然后是他的继承:
01 | package org.apache.mina.core.rewrite.buffer; |
03 | import java.nio.ByteBuffer; |
10 | public abstract class AbstractIoBuffer extends IoBuffer{ |
12 | protected AbstractIoBuffer(ByteBuffer buffer){ |
17 | public IoBuffer get() { |
23 | public IoBuffer put(byte b) { |
allocator:
01 | package org.apache.mina.core.rewrite.buffer; |
03 | import java.nio.ByteBuffer; |
10 | public interface IoBufferAllocator { |
12 | IoBuffer allocate(int capacity, boolean direct); |
14 | IoBuffer wrap(ByteBuffer nioBuffer); |
16 | ByteBuffer allocateNioBuffer(int capacity, boolean direct); |
allocator的实现:
01 | package org.apache.mina.core.rewrite.buffer; |
03 | import java.nio.ByteBuffer; |
09 | public class SimpleBufferAllocator implements IoBufferAllocator{ |
12 | public IoBuffer allocate(int capacity, boolean direct) { |
13 | return wrap(allocateNioBuffer(capacity, direct)); |
17 | public IoBuffer wrap(ByteBuffer nioBuffer) { |
19 | return new SimpleBuffer(nioBuffer); |
23 | public ByteBuffer allocateNioBuffer(int capacity, boolean direct) { |
26 | nioBuffer = ByteBuffer.allocateDirect(capacity); |
28 | nioBuffer = ByteBuffer.allocate(capacity); |
34 | public void dispose() { |
39 | private class SimpleBuffer extends AbstractIoBuffer{ |
40 | @SuppressWarnings("unused") |
42 | protected SimpleBuffer(ByteBuffer buffer){ |
48 | public boolean other() { |
55 | public String toString() { |
56 | System.out.println(buffer); |
57 | return super.toString(); |
最后是测试类和测试结果:
1 | package org.apache.mina.core.rewrite.buffer; |
4 | public static void main(String[] args) { |
5 | IoBuffer buffer=IoBuffer.allocate(1024); |
6 | System.out.println(buffer); |
控制台输出:
1 | java.nio.HeapByteBuffer[pos=0 lim=1024 cap=1024] |
2 | org.apache.mina.core.rewrite.buffer.SimpleBufferAllocator$SimpleBuffer@1da12fc0 |
-------------------------------------------------------------------
后面一篇应该会将service,就是mina中实现连接的部分,后面的更新速度可能会慢点儿,到后面越来越复杂了,我得想想怎么写才能写的号。最近在弄kafka,其实我还想写点儿kafka的东西,可是真的没有时间,kafka部分等我把分布式的弄完了再发点儿心得上来。大家将就着看吧。谢谢。


 3639
3639


 被折叠的 条评论
为什么被折叠?
被折叠的 条评论
为什么被折叠?
 到【灌水乐园】发言


