


目首页:https://github.com/simple-rtmp-server/srs-sea
SRS服务器项目:https://github.com/simple-rtmp-server/srs
在Android高版本中,特别是4.1引入了MediaCodec可以对摄像头的图像进行硬件编码,实现直播。
一般Android推流到服务器,使用ffmpeg居多,也就是软编码,实际上使用Android的硬件编码会有更好的体验。
看了下网上的文章也不少,但是都缺乏一个整体跑通的方案,特别是如何推送的服务器。本文把Android推直播流的过程梳理一遍。
AndroidPublisher提出了Android直播的新思路,主要配合SRS服务器完成,优势如下:
- 使用系统的类,不引入jni和c的库,简单可靠,一千行左右java代码就可以完成。
- 硬件编码而非软件编码,系统负载低,800kbps编码cpu使用率13%左右。
- 低延迟和RTMP一样,0.8秒到3秒,使用的协议是HTTP FLV流,原理和RTMP一样。
- 安装包小无复杂依赖,编译出来的apk都只有1405KB左右。
- 方便集成,只需要引入一个SrsHttpFlv类,进行转封装和打包发送,可以用在任何app中。
Android直播有几个大的环节:
- 打开Camera,进行Preview获取YUV图像数据,也就是未压缩的图像。
设置picture和preview大小后,计算YUV的buffer的尺寸,不能简单乘以1.5而应该按照文档计算。
获取YUV的同时,还可以进行预览,只要绑定到SurfaceHolder就可以。 - 使用MediaCodec和MediaFormat对YUV进行编码,其中MediaCodec是编码,MediaFormat是打包成annexb封装。
设置MediaCodec的colorFormat需要判断是否MediaCodec支持,也就是从MediaCodec获取colorFormat。 - 将YUV图像,送入MediaCodec的inputBuffer,并获取outputBuffer中已经编码的数据,格式是annexb。
其中queueInputBuffer时,需要指定pts,否则没有编码数据输出,会被丢弃。 - 将编码的annexb数据,发送到服务器。
一般使用rtmp(librtmp/srslibrtmp/ffmpeg),因为流媒体服务器的输入一般是rtmp。
若服务器支持http-flv流POST,那么可以直接发送给服务器。
秀一个运行起来的图:
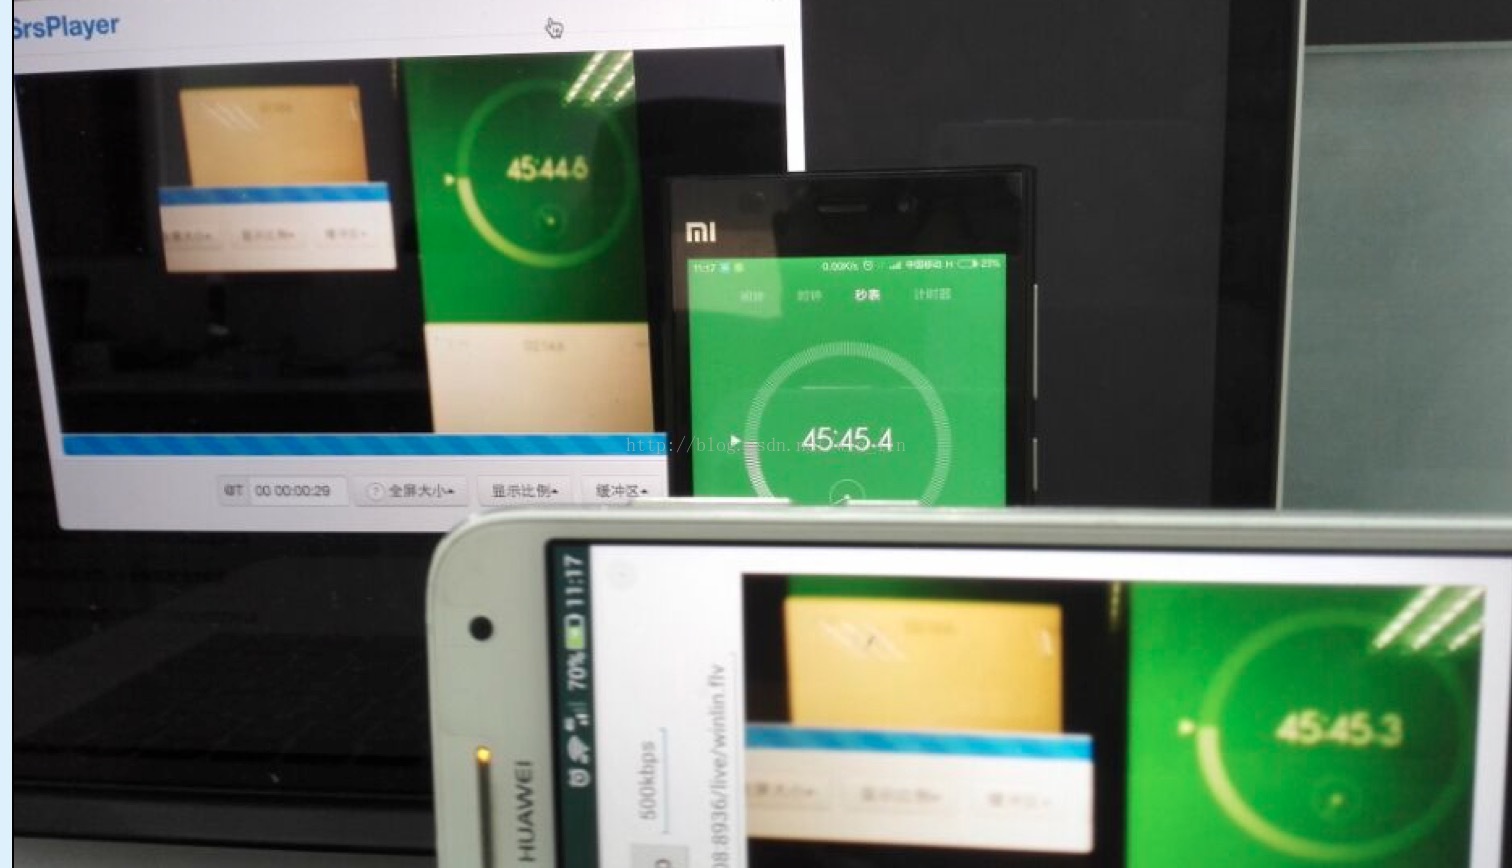
下面是各个重要环节的分解。
YUV图像
第一个环节,打开Camera并预览:
- camera = Camera.open();
- Camera.Parameters parameters = camera.getParameters();
- parameters.setFlashMode(Camera.Parameters.FLASH_MODE_OFF);
- parameters.setWhiteBalance(Camera.Parameters.WHITE_BALANCE_AUTO);
- parameters.setSceneMode(Camera.Parameters.SCENE_MODE_AUTO);
- parameters.setFocusMode(Camera.Parameters.FOCUS_MODE_AUTO);
- parameters.setPreviewFormat(ImageFormat.YV12);
- Camera.Size size = null;
- List<Camera.Size> sizes = parameters.getSupportedPictureSizes();
- for (int i = 0; i < sizes.size(); i++) {
- //Log.i(TAG, String.format("camera supported picture size %dx%d", sizes.get(i).width, sizes.get(i).height));
- if (sizes.get(i).width == 640) {
- size = sizes.get(i);
- }
- }
- parameters.setPictureSize(size.width, size.height);
- Log.i(TAG, String.format("set the picture size in %dx%d", size.width, size.height));
- sizes = parameters.getSupportedPreviewSizes();
- for (int i = 0; i < sizes.size(); i++) {
- //Log.i(TAG, String.format("camera supported preview size %dx%d", sizes.get(i).width, sizes.get(i).height));
- if (sizes.get(i).width == 640) {
- vsize = size = sizes.get(i);
- }
- }
- parameters.setPreviewSize(size.width, size.height);
- Log.i(TAG, String.format("set the preview size in %dx%d", size.width, size.height));
- camera.setParameters(parameters);
- // set the callback and start the preview.
- buffer = new byte[getYuvBuffer(size.width, size.height)];
- camera.addCallbackBuffer(buffer);
- camera.setPreviewCallbackWithBuffer(onYuvFrame);
- try {
- camera.setPreviewDisplay(preview.getHolder());
- } catch (IOException e) {
- Log.e(TAG, "preview video failed.");
- e.printStackTrace();
- return;
- }
- Log.i(TAG, String.format("start to preview video in %dx%d, buffer %dB", size.width, size.height, buffer.length));
- camera.startPreview();
计算YUV的buffer的函数,需要根据文档计算,而不是简单“*3/2”:
- // for the buffer for YV12(android YUV), @see below:
- // https://developer.android.com/reference/android/hardware/Camera.Parameters.html#setPreviewFormat(int)
- // https://developer.android.com/reference/android/graphics/ImageFormat.html#YV12
- private int getYuvBuffer(int width, int height) {
- // stride = ALIGN(width, 16)
- int stride = (int)Math.ceil(width / 16.0) * 16;
- // y_size = stride * height
- int y_size = stride * height;
- // c_stride = ALIGN(stride/2, 16)
- int c_stride = (int)Math.ceil(width / 32.0) * 16;
- // c_size = c_stride * height/2
- int c_size = c_stride * height / 2;
- // size = y_size + c_size * 2
- return y_size + c_size * 2;
- }
图像编码
第二个环节,设置编码器参数,并启动:
- // encoder yuv to 264 es stream.
- // requires sdk level 16+, Android 4.1, 4.1.1, the JELLY_BEAN
- try {
- encoder = MediaCodec.createEncoderByType(VCODEC);
- } catch (IOException e) {
- Log.e(TAG, "create encoder failed.");
- e.printStackTrace();
- return;
- }
- ebi = new MediaCodec.BufferInfo();
- presentationTimeUs = new Date().getTime() * 1000;
- // start the encoder.
- // @see https://developer.android.com/reference/android/media/MediaCodec.html
- MediaFormat format = MediaFormat.createVideoFormat(MediaFormat.MIMETYPE_VIDEO_AVC, vsize.width, vsize.height);
- format.setInteger(MediaFormat.KEY_BIT_RATE, 125000);
- format.setInteger(MediaFormat.KEY_FRAME_RATE, 15);
- format.setInteger(MediaFormat.KEY_COLOR_FORMAT, chooseColorFormat());
- format.setInteger(MediaFormat.KEY_I_FRAME_INTERVAL, 5);
- encoder.configure(format, null, null, MediaCodec.CONFIGURE_FLAG_ENCODE);
- encoder.start();
- Log.i(TAG, "encoder start");
其中,colorFormat需要从编码器支持的格式中选取,否则会有不支持的错误:
- // choose the right supported color format. @see below:
- // https://developer.android.com/reference/android/media/MediaCodecInfo.html
- // https://developer.android.com/reference/android/media/MediaCodecInfo.CodecCapabilities.html
- private int chooseColorFormat() {
- MediaCodecInfo ci = null;
- int nbCodecs = MediaCodecList.getCodecCount();
- for (int i = 0; i < nbCodecs; i++) {
- MediaCodecInfo mci = MediaCodecList.getCodecInfoAt(i);
- if (!mci.isEncoder()) {
- continue;
- }
- String[] types = mci.getSupportedTypes();
- for (int j = 0; j < types.length; j++) {
- if (types[j].equalsIgnoreCase(VCODEC)) {
- //Log.i(TAG, String.format("encoder %s types: %s", mci.getName(), types[j]));
- ci = mci;
- break;
- }
- }
- }
- int matchedColorFormat = 0;
- MediaCodecInfo.CodecCapabilities cc = ci.getCapabilitiesForType(VCODEC);
- for (int i = 0; i < cc.colorFormats.length; i++) {
- int cf = cc.colorFormats[i];
- //Log.i(TAG, String.format("encoder %s supports color fomart %d", ci.getName(), cf));
- // choose YUV for h.264, prefer the bigger one.
- if (cf >= cc.COLOR_FormatYUV411Planar && cf <= cc.COLOR_FormatYUV422SemiPlanar) {
- if (cf > matchedColorFormat) {
- matchedColorFormat = cf;
- }
- }
- }
- Log.i(TAG, String.format("encoder %s choose color format %d", ci.getName(), matchedColorFormat));
- return matchedColorFormat;
- }
第三个环节,在YUV图像回调中,送给编码器,并获取输出:
- // when got YUV frame from camera.
- // @see https://developer.android.com/reference/android/media/MediaCodec.html
- final Camera.PreviewCallback onYuvFrame = new Camera.PreviewCallback() {
- @Override
- public void onPreviewFrame(byte[] data, Camera camera) {
- //Log.i(TAG, String.format("got YUV image, size=%d", data.length));
- // feed the encoder with yuv frame, got the encoded 264 es stream.
- ByteBuffer[] inBuffers = encoder.getInputBuffers();
- ByteBuffer[] outBuffers = encoder.getOutputBuffers();
- if (true) {
- int inBufferIndex = encoder.dequeueInputBuffer(-1);
- //Log.i(TAG, String.format("try to dequeue input buffer, ii=%d", inBufferIndex));
- if (inBufferIndex >= 0) {
- ByteBuffer bb = inBuffers[inBufferIndex];
- bb.clear();
- bb.put(data, 0, data.length);
- long pts = new Date().getTime() * 1000 - presentationTimeUs;
- //Log.i(TAG, String.format("feed YUV to encode %dB, pts=%d", data.length, pts / 1000));
- encoder.queueInputBuffer(inBufferIndex, 0, data.length, pts, 0);
- }
- for (;;) {
- int outBufferIndex = encoder.dequeueOutputBuffer(ebi, 0);
- //Log.i(TAG, String.format("try to dequeue output buffer, ii=%d, oi=%d", inBufferIndex, outBufferIndex));
- if (outBufferIndex >= 0) {
- ByteBuffer bb = outBuffers[outBufferIndex];
- onEncodedAnnexbFrame(bb, ebi);
- encoder.releaseOutputBuffer(outBufferIndex, false);
- }
- if (outBufferIndex < 0) {
- break;
- }
- }
- }
- // to fetch next frame.
- camera.addCallbackBuffer(buffer);
- }
- };
MUX为FLV流
获取编码的annexb数据后,调用函数发送到服务器:
- // when got encoded h264 es stream.
- private void onEncodedAnnexbFrame(ByteBuffer es, MediaCodec.BufferInfo bi) {
- try {
- muxer.writeSampleData(videoTrack, es, bi);
- } catch (Exception e) {
- Log.e(TAG, "muxer write sample failed.");
- e.printStackTrace();
- }
- }
最后这个环节,一般会用librtmp或者srslibrtmp,或者ffmpeg发送。如果服务器能直接支持http post,那么就可以使用HttpURLConnection直接发送了。SRS3将会支持HTTP-FLV推流;因此只需要将编码的annexb格式的数据,转换成flv后发送给SRS服务器。
SRS2支持了HTTP FLV Stream caster,也就是支持POST一个flv流到服务器,就相当于RTMP的publish了。可以直接使用android-publisher提供的FlvMuxer,将annexb数据打包发送,参考:https://github.com/simple-rtmp-server/android-publisher
其中,annexb打包的过程如下:
- public void writeVideoSample(final ByteBuffer bb, MediaCodec.BufferInfo bi) throws Exception {
- int pts = (int)(bi.presentationTimeUs / 1000);
- int dts = (int)pts;
- ArrayList<SrsAnnexbFrame> ibps = new ArrayList<SrsAnnexbFrame>();
- int frame_type = SrsCodecVideoAVCFrame.InterFrame;
- //Log.i(TAG, String.format("video %d/%d bytes, offset=%d, position=%d, pts=%d", bb.remaining(), bi.size, bi.offset, bb.position(), pts));
- // send each frame.
- while (bb.position() < bi.size) {
- SrsAnnexbFrame frame = avc.annexb_demux(bb, bi);
- // 5bits, 7.3.1 NAL unit syntax,
- // H.264-AVC-ISO_IEC_14496-10.pdf, page 44.
- // 7: SPS, 8: PPS, 5: I Frame, 1: P Frame
- int nal_unit_type = (int)(frame.frame.get(0) & 0x1f);
- if (nal_unit_type == SrsAvcNaluType.SPS || nal_unit_type == SrsAvcNaluType.PPS) {
- Log.i(TAG, String.format("annexb demux %dB, pts=%d, frame=%dB, nalu=%d", bi.size, pts, frame.size, nal_unit_type));
- }
- // for IDR frame, the frame is keyframe.
- if (nal_unit_type == SrsAvcNaluType.IDR) {
- frame_type = SrsCodecVideoAVCFrame.KeyFrame;
- }
- // ignore the nalu type aud(9)
- if (nal_unit_type == SrsAvcNaluType.AccessUnitDelimiter) {
- continue;
- }
- // for sps
- if (avc.is_sps(frame)) {
- byte[] sps = new byte[frame.size];
- frame.frame.get(sps);
- if (utils.srs_bytes_equals(h264_sps, sps)) {
- continue;
- }
- h264_sps_changed = true;
- h264_sps = sps;
- continue;
- }
- // for pps
- if (avc.is_pps(frame)) {
- byte[] pps = new byte[frame.size];
- frame.frame.get(pps);
- if (utils.srs_bytes_equals(h264_pps, pps)) {
- continue;
- }
- h264_pps_changed = true;
- h264_pps = pps;
- continue;
- }
- // ibp frame.
- SrsAnnexbFrame nalu_header = avc.mux_ibp_frame(frame);
- ibps.add(nalu_header);
- ibps.add(frame);
- }
- write_h264_sps_pps(dts, pts);
- write_h264_ipb_frame(ibps, frame_type, dts, pts);
- }
至于发送到服务器,其实就是使用系统的HTTP客户端。代码如下:
- private void reconnect() throws Exception {
- // when bos not null, already connected.
- if (bos != null) {
- return;
- }
- disconnect();
- URL u = new URL(url);
- conn = (HttpURLConnection)u.openConnection();
- Log.i(TAG, String.format("worker: connect to SRS by url=%s", url));
- conn.setDoOutput(true);
- conn.setChunkedStreamingMode(0);
- conn.setRequestProperty("Content-Type", "application/octet-stream");
- bos = new BufferedOutputStream(conn.getOutputStream());
- Log.i(TAG, String.format("worker: muxer opened, url=%s", url));
- // write 13B header
- // 9bytes header and 4bytes first previous-tag-size
- byte[] flv_header = new byte[]{
- 'F', 'L', 'V', // Signatures "FLV"
- (byte) 0x01, // File version (for example, 0x01 for FLV version 1)
- (byte) 0x00, // 4, audio; 1, video; 5 audio+video.
- (byte) 0x00, (byte) 0x00, (byte) 0x00, (byte) 0x09, // DataOffset UI32 The length of this header in bytes
- (byte) 0x00, (byte) 0x00, (byte) 0x00, (byte) 0x00
- };
- bos.write(flv_header);
- bos.flush();
- Log.i(TAG, String.format("worker: flv header ok."));
- sendFlvTag(bos, videoSequenceHeader);
- }
- private void sendFlvTag(BufferedOutputStream bos, SrsFlvFrame frame) throws IOException {
- if (frame == null) {
- return;
- }
- if (frame.frame_type == SrsCodecVideoAVCFrame.KeyFrame) {
- Log.i(TAG, String.format("worker: got frame type=%d, dts=%d, size=%dB", frame.type, frame.dts, frame.tag.size));
- } else {
- //Log.i(TAG, String.format("worker: got frame type=%d, dts=%d, size=%dB", frame.type, frame.dts, frame.tag.size));
- }
- // cache the sequence header.
- if (frame.type == SrsCodecFlvTag.Video && frame.avc_aac_type == SrsCodecVideoAVCType.SequenceHeader) {
- videoSequenceHeader = frame;
- }
- if (bos == null || frame.tag.size <= 0) {
- return;
- }
- // write the 11B flv tag header
- ByteBuffer th = ByteBuffer.allocate(11);
- // Reserved UB [2]
- // Filter UB [1]
- // TagType UB [5]
- // DataSize UI24
- int tag_size = (int)((frame.tag.size & 0x00FFFFFF) | ((frame.type & 0x1F) << 24));
- th.putInt(tag_size);
- // Timestamp UI24
- // TimestampExtended UI8
- int time = (int)((frame.dts << 8) & 0xFFFFFF00) | ((frame.dts >> 24) & 0x000000FF);
- th.putInt(time);
- // StreamID UI24 Always 0.
- th.put((byte)0);
- th.put((byte)0);
- th.put((byte)0);
- bos.write(th.array());
- // write the flv tag data.
- byte[] data = frame.tag.frame.array();
- bos.write(data, 0, frame.tag.size);
- // write the 4B previous tag size.
- // @remark, we append the tag size, this is different to SRS which write RTMP packet.
- ByteBuffer pps = ByteBuffer.allocate(4);
- pps.putInt((int)(frame.tag.size + 11));
- bos.write(pps.array());
- bos.flush();
- if (frame.frame_type == SrsCodecVideoAVCFrame.KeyFrame) {
- Log.i(TAG, String.format("worker: send frame type=%d, dts=%d, size=%dB, tag_size=%#x, time=%#x",
- frame.type, frame.dts, frame.tag.size, tag_size, time
- ));
- }
- }
全部使用Java代码,最后apk编译出来才1405KB,稳定性也高很多,我已经在上班路上直播过了,除了码率低不太清楚,还没有死掉过。
Winlin


 84
84


 被折叠的 条评论
为什么被折叠?
被折叠的 条评论
为什么被折叠?
 到【灌水乐园】发言


