


前面是1.0.1的安装
下载openssl https://www.openssl.org/source/ 下载后解压
【注意】openssl代码所在目录中不要带中文,否则“nmake -f ms\ntdll.mak ”可能会提示“宏中非法字符”等错误
一、Openssl WIN7 x64 编译
环境:WIN7 64位,编译器:VS2010
需要下载 Perl(如http://downloads.activestate.com/ActivePerl/releases/5.16.3.1603/ActivePerl-5.16.3.1603-MSWin32-x64-296746.msi)和 Microsoft Platform SDK(VS2005或VS2010)
一.进入cmd,执行 C:\Program Files (x86)\Microsoft Visual Studio 10.0\VC\bin\amd64\vcvars64.bat
#拷贝 C:\Program Files (x86)\Microsoft Visual Studio 10.0\VC\bin\amd64\ml64.exe 到ms目录下(如果ml64.exe已经有了,就不需要拷贝)
1.启动VS2010的控制台,能够配置相关的环境变量——(可省略)
2.进入opensll目录,如cd c:\openssl-1.0.2d
3.x64的编译命令:
> perl Configure VC-WIN64A
> ms\do_win64a 创建Makefile文件
> nmake -f ms\ntdll.mak 编译动态库(等待时间较长)
> nmake -f ms\ntdll.mak test 检查上一步编译是否成功
> nmake -f ms\ntdll.mak install 安装编译后的openssl到指定目录
可选指令
> nmake -f ms\ntdll.mak clean 清除上次OpenSSL动态库的编译(根据需要,选择是否编译静态库)
> nmake -f ms\nt.mak 编译静态库(根据需要,选择是否编译静态库)
> nmake -f ms\nt.mak clean 清除上次OpenSSL静态库的编译(根据需要,选择是否编译静态库)
想要指定安装目录 ①可以用--prefix指定 perl Configure VC-WIN32 no-asm --prefix="C:\Program Files (x86)\OpenSSL"
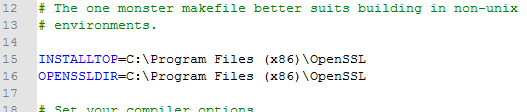
②另外也可以在nt.mak ntdll.mak执行完后 进入文本进行编辑:
安装完64位,想要继续安装32位 ,最好clean一下安装包,因为如果不清理容易,后续的编译容易出现问题
二、在windows下编译openssl(32位)
环境:WIN7 64位,编译器:VS2010
需要下载 Perl(如http://downloads.activestate.com/ActivePerl/releases/5.16.3.1603/ActivePerl-5.16.3.1603-MSWin32-x64-296746.msi)和 Microsoft Platform SDK(VS2005或VS2010)
0.进入cmd,执行 C:\Program Files (x86)\Microsoft Visual Studio 10.0\VC\bin\vcvars32.bat
#拷贝 C:\Program Files (x86)\Microsoft Visual Studio 10.0\VC\bin\ml.exe 到ms目录下(如果ml.exe已经有了,就不需要拷贝)
1.启动VS2010的控制台,能够配置相关的环境变量——(可省略)
2.进入opensll目录,如cd C:\openssl-0.9.8k
3.x86的编译命令:
> perl Configure VC-WIN32
创建Makefile文件
如用masm,运行ms\do_masm命令
如用nasm, 运行ms\do_nasm
如果什么都没用,运行ms\do_ms
> nmake -f ms\ntdll.mak 编译动态库(等待时间较长)
> nmake -f ms\ntdll.mak test 检查上一步编译是否成功
> nmake -f ms\ntdll.mak install 安装编译后的openssl到指定目录
可选指令
> nmake -f ms\ntdll.mak clean 清除上次OpenSSL动态库的编译(根据需要,选择是否编译静态库)
> nmake -f ms\nt.mak 编译静态库(根据需要,选择是否编译静态库)
> nmake -f ms\nt.mak clean 清除上次OpenSSL静态库的编译(根据需要,选择是否编译静态库)
、
win下安装openssl出现Assembling: tmp32dll\sha1-586.asm tmp32dll\sha1-586.asm(1432) 错误解决方法
perl Configure VC-WIN32 no-asm
openssl1.1.1的安装
on Windows (only pick one of the targets for configuration):
$ perl Configure { VC-WIN32 | VC-WIN64A | VC-WIN64I | VC-CE }
$ nmake
$ nmake test
$ nmake install
可以指定安装目录: perl Configure VC-WIN64A --prefix=C:\Program Files (x86)\OpenSSL
perl Configure VC-WIN64A no-asm
nmake
perl Configure VC-WIN64A no-asm no-tests --debug --prefix=e:\软件包\openssl\openssl-master\lib\debug
perl Configure VC-WIN64A no-asm no-tests --release --prefix=e:\软件包\openssl\openssl-master\lib\release
执行如下配置命令(任选一条命令): x86静态库
>perl Configure VC-WIN32 no-shared no-asm no-tests --debug --prefix=E:\WeiYi\openssl-master\bulid\static32\debug
>perl Configure VC-WIN32 no-shared no-asm no-tests --release --prefix=E:\WeiYi\openssl-master\bulid\static32\release x86位动态库
>perl Configure VC-WIN32 shared no-asm no-tests --debug --prefix=E:\WeiYi\openssl-master\bulid\share32\debug
>perl Configure VC-WIN32 shared no-asm no-tests --release --prefix=E:\WeiYi\openssl-master\bulid\share32\release x64位静态库
>perl Configure VC-WIN64A no-shared no-asm no-tests --debug --prefix=E:\WeiYi\openssl-master\bulid\static64\debug
>perl Configure VC-WIN64A no-shared no-asm no-tests --release --prefix=E:\WeiYi\openssl-master\bulid\static64\release x64位动态库
>perl Configure VC-WIN64A shared no-asm no-tests --debug --prefix=E:\WeiYi\openssl-master\bulid\share64\debug
>perl Configure VC-WIN64A shared no-asm no-tests --release --prefix=E:\WeiYi\openssl-master\bulid\share64\release IA64位静态库
>perl Configure VC-WIN64I no-shared no-asm no-tests --debug --prefix=E:\WeiYi\openssl-master\bulid\static64I\debug
>perl Configure VC-WIN64I no-shared no-asm no-tests --release --prefix=E:\WeiYi\openssl-master\bulid\static64I\release IA64位动态库
>perl Configure VC-WIN64I shared no-asm no-tests --debug --prefix=E:\WeiYi\openssl-master\bulid\share64I\debug
>perl Configure VC-WIN64I shared no-asm no-tests --release --prefix=E:\WeiYi\openssl-master\bulid\share64I\release
2) 执行安装命令:>nmake install
3) 如果想重编译,最好先清理,清理命令:>nmake distclean


 4152
4152


 被折叠的 条评论
为什么被折叠?
被折叠的 条评论
为什么被折叠?
 到【灌水乐园】发言


