


虽说Android四大组件在我们刚接触Android的时候就已经开始用了,但是我们真的有去了解过它吗?如果你还没有深刻研究过的,那就跟着我一起研究研究,从上一篇博客Android进阶之(Service详解一)我们知道了怎么去启动和关闭Service,并且研究了Service的生命周期,这篇我们主要来研究下跨进程通信AIDL以及Service的其它不为人知的地方。
在面试的时候我们经常遇到这么一个问题”Service跟Thread有什么区别?”机智的你肯定会网上一搜,然后啪啪啪的背个一通,
之所以有不少人会把它们联系起来,主要就是因为Service的后台概念。Thread我们大家都知道,是用于开启一个子线程,在这里去执行一些耗时操作就不会阻塞主线程的运行。而Service我们最初理解的时候,总会觉得它是用来处理一些后台任务的,一些比较耗时的操作也可以放在这里运行,这就会让人产生混淆了。但是,如果我告诉你Service其实是运行在主线程里的,你还会觉得它和Thread有什么关系吗?其实Service也是运行在主线程的,除了用户不可以见以外跟Activity差不多,所以如果在Service中做很耗时的操作的时候任然会报ANR错误的,但是我们可以在Service中创建一个子线程,然后去执行耗时操作,
 @Override
    public void onRebind(Intent intent) {
        Log.e(TAG, "onRebind: ");
        super.onRebind(intent);
    }
    @Override
    public void onDestroy() {
        Log.e(TAG, "onDestroy: ");
        super.onDestroy();
    }
    class MyBinder extends Binder {
        public void startDownload() {
            Log.e(TAG, "startDownload() executed");
            Toast.makeText(MyService.this, "startDownload", Toast.LENGTH_SHORT).show();
            new Thread(){
                @Override
                public void run() {
                    //download something
                }
            }.start();
        }
    }
创建前台Service
如果我们想让我们的Service一直运行,就算手动用第三方软件或者内存低了也杀不掉的时候,我们可以考虑把Service做成一个前台Service,如一些音乐播放器一样,下面我们看看具体怎么实现。
照着郭神的例子敲了下,发现到了Api4.2.2的模拟器上面不能设置为前台Service,然后查阅资料看到了一个可以兼容低版本的方案(通过反射),
/**
 * @author EX_YINQINGYANG
 * @version [Android PABank C01, @2016-09-23]
 * @date 2016-09-23
 * @description
 */
public class MyService extends Service {
    private static final String TAG = "MyService";
    private boolean mReflectFlg = false;//是否使用反射

    private static final int NOTIFICATION_ID = 1; // 如果id设置为0,会导致不能设置为前台service
    private static final Class<?>[] mSetForegroundSignature = new Class[] {
            boolean.class};
    private static final Class<?>[] mStartForegroundSignature = new Class[] {
            int.class, Notification.class};
    private static final Class<?>[] mStopForegroundSignature = new Class[] {
            boolean.class};

    private NotificationManager mNM;
    private Method mSetForeground;
    private Method mStartForeground;
    private Method mStopForeground;
    private Object[] mSetForegroundArgs = new Object[1];
    private Object[] mStartForegroundArgs = new Object[2];
    private Object[] mStopForegroundArgs = new Object[1];

    @TargetApi(Build.VERSION_CODES.JELLY_BEAN)
    @Override
    public void onCreate() {
        super.onCreate();
        ///设置前台Service start
        mNM = (NotificationManager)getSystemService(Context.NOTIFICATION_SERVICE);
        try {
            mStartForeground = MyService.class.getMethod("startForeground", mStartForegroundSignature);
            mStopForeground = MyService.class.getMethod("stopForeground", mStopForegroundSignature);
        } catch (NoSuchMethodException e) {
            mStartForeground = mStopForeground = null;
        }

        try {
            mSetForeground = getClass().getMethod("setForeground",
                    mSetForegroundSignature);
        } catch (NoSuchMethodException e) {
            throw new IllegalStateException(
                    "OS doesn't have Service.startForeground OR Service.setForeground!");
        }

        Notification.Builder builder = new Notification.Builder(this);
        PendingIntent contentIntent = PendingIntent.getActivity(this, 0,
                new Intent(this, MainActivity.class), 0);
        builder.setContentIntent(contentIntent);
        builder.setSmallIcon(R.mipmap.ic_launcher);
        builder.setTicker("Foreground Service Start");
        builder.setContentTitle("Foreground Service");
        builder.setContentText("Make this service run in the foreground.");
        Notification notification = builder.build();
        startForegroundCompat(NOTIFICATION_ID, notification);
        ///设置前台Service end
        Log.e(TAG, "onCreate: ");
    }

    @Override
    public int onStartCommand(Intent intent, int flags, int startId) {
        Log.e(TAG, "onStartCommand: ");
        return super.onStartCommand(intent, flags, startId);
    }

    @Nullable
    @Override
    public IBinder onBind(Intent intent) {
        Log.e(TAG, "onBind: ");
        return new MyBinder();
    }

    @Override
    public boolean onUnbind(Intent intent) {
        Log.e(TAG, "onUnbind: ");
        return true;
    }

    @Override
    public void onRebind(Intent intent) {
        Log.e(TAG, "onRebind: ");
        super.onRebind(intent);
    }

    @Override
    public void onDestroy() {
        Log.e(TAG, "onDestroy: ");
        stopForegroundCompat(NOTIFICATION_ID);
        super.onDestroy();
    }

    class MyBinder extends Binder {
        public void startDownload() {
            Log.e(TAG, "startDownload() executed");
            Toast.makeText(MyService.this, "startDownload", Toast.LENGTH_SHORT).show();
            new Thread() {
                @Override
                public void run() {
                    //download something
                }
            }.start();
        }
    }
    void invokeMethod(Method method, Object[] args) {
        try {
            method.invoke(this, args);
        } catch (InvocationTargetException e) {
            // Should not happen.
            Log.w("ApiDemos", "Unable to invoke method", e);
        } catch (IllegalAccessException e) {
            // Should not happen.
            Log.w("ApiDemos", "Unable to invoke method", e);
        }
    }

    /**
     * This is a wrapper around the new startForeground method, using the older
     * APIs if it is not available.
     */
    void startForegroundCompat(int id, Notification notification) {
        if (mReflectFlg) {
            // If we have the new startForeground API, then use it.
            if (mStartForeground != null) {
                mStartForegroundArgs[0] = Integer.valueOf(id);
                mStartForegroundArgs[1] = notification;
                invokeMethod(mStartForeground, mStartForegroundArgs);
                return;
            }

            // Fall back on the old API.
            mSetForegroundArgs[0] = Boolean.TRUE;
            invokeMethod(mSetForeground, mSetForegroundArgs);
            mNM.notify(id, notification);
        } else {
            /* 还可以使用以下方法,当sdk大于等于5时,调用sdk现有的方法startForeground设置前台运行,
             * 否则调用反射取得的sdk level 5(对应Android 2.0)以下才有的旧方法setForeground设置前台运行 */

            if(Build.VERSION.SDK_INT >= 5) {
                startForeground(id, notification);
            } else {
                // Fall back on the old API.
                mSetForegroundArgs[0] = Boolean.TRUE;
                invokeMethod(mSetForeground, mSetForegroundArgs);
                mNM.notify(id, notification);
            }
        }
    }

    /**
     * This is a wrapper around the new stopForeground method, using the older
     * APIs if it is not available.
     */
    void stopForegroundCompat(int id) {
        if (mReflectFlg) {
            // If we have the new stopForeground API, then use it.
            if (mStopForeground != null) {
                mStopForegroundArgs[0] = Boolean.TRUE;
                invokeMethod(mStopForeground, mStopForegroundArgs);
                return;
            }

            // Fall back on the old API.  Note to cancel BEFORE changing the
            // foreground state, since we could be killed at that point.
            mNM.cancel(id);
            mSetForegroundArgs[0] = Boolean.FALSE;
            invokeMethod(mSetForeground, mSetForegroundArgs);
        } else {
            /* 还可以使用以下方法,当sdk大于等于5时,调用sdk现有的方法stopForeground停止前台运行,
             * 否则调用反射取得的sdk level 5(对应Android 2.0)以下才有的旧方法setForeground停止前台运行 */

            if(Build.VERSION.SDK_INT >= 5) {
                stopForeground(true);
            } else {
                // Fall back on the old API.  Note to cancel BEFORE changing the
                // foreground state, since we could be killed at that point.
                mNM.cancel(id);
                mSetForegroundArgs[0] = Boolean.FALSE;
                invokeMethod(mSetForeground, mSetForegroundArgs);
            }
        }
    }
}
运行代码:
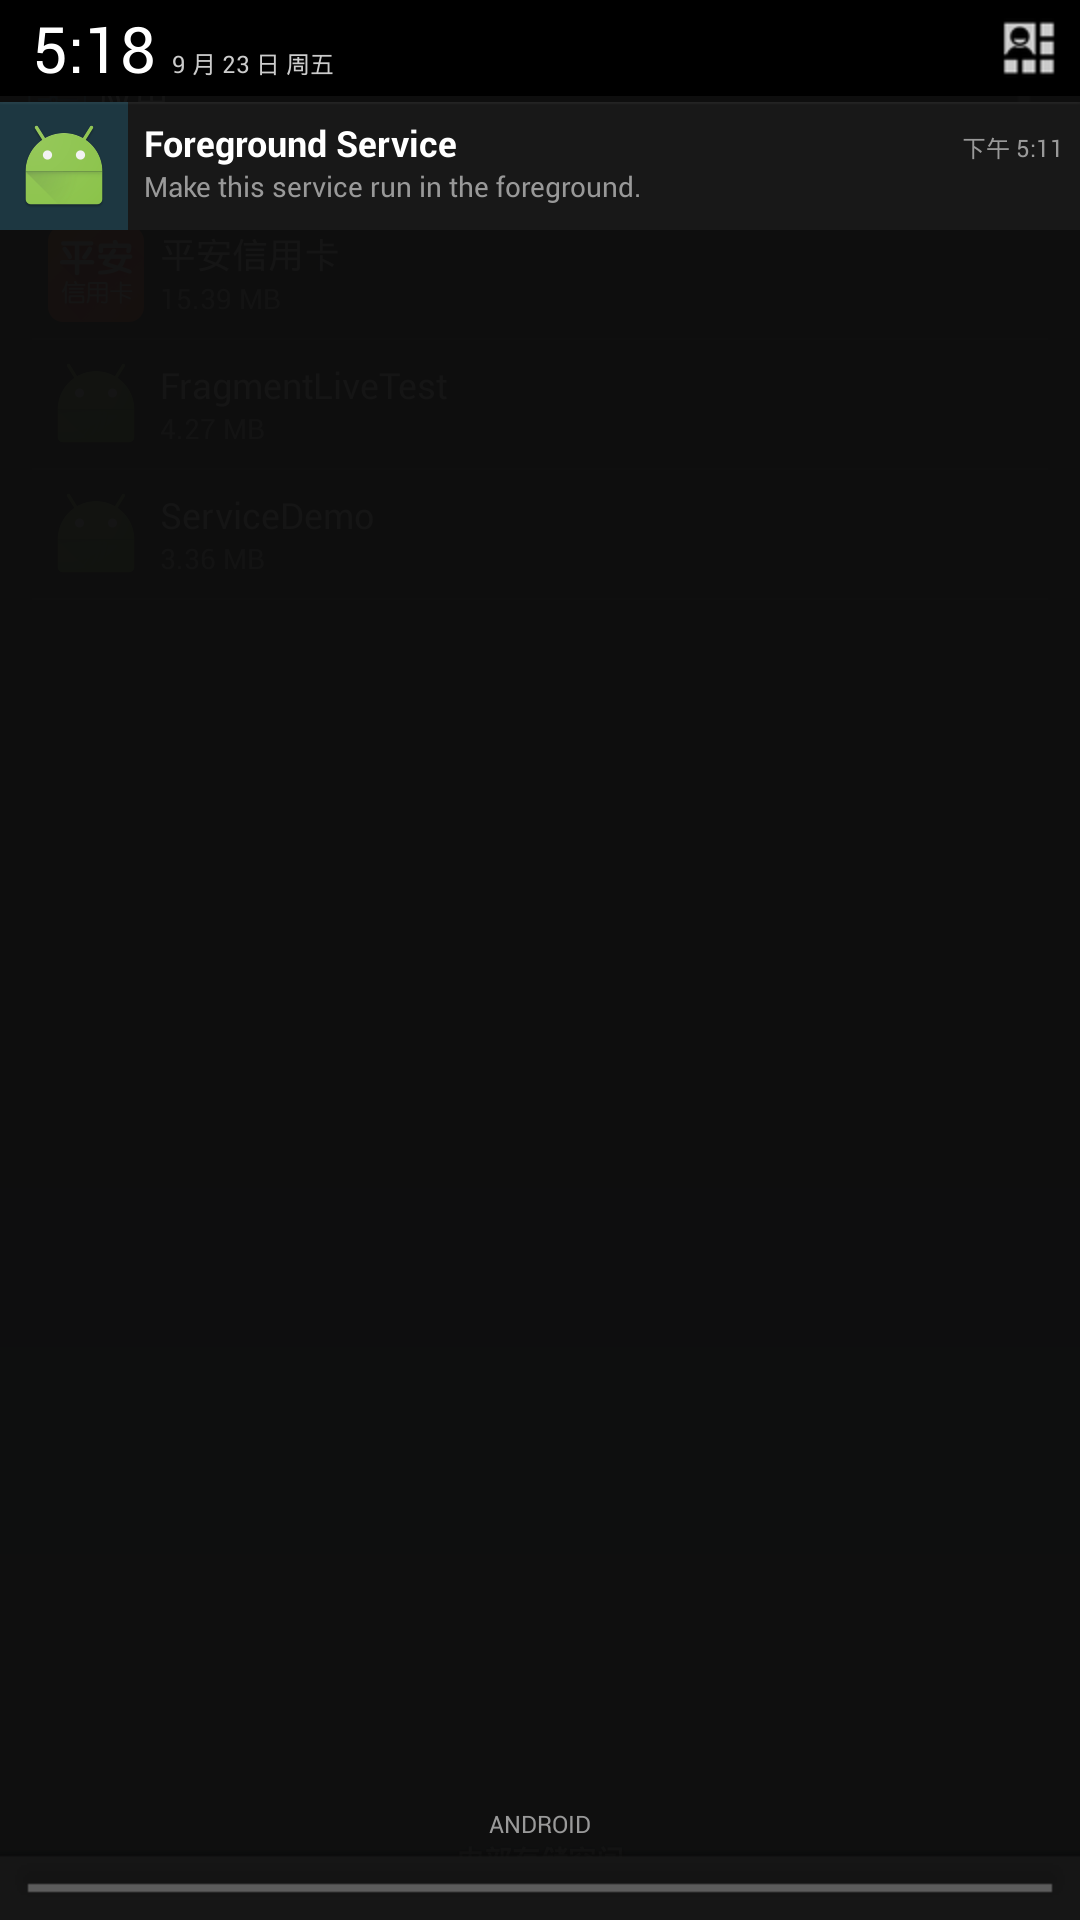
看到这个的时候,说明你的Service已经是一个前台Service了。
上面说了,当在一个进程中的时候如果在Service中做耗时的操作,那么同样会报ANR一样,但如果我们把Service变成一个远程的Service的时候(跟我们的MainActivity不在同一个进程的时候)还会报ANR异常吗?我们接下来试试!
<?xml version="1.0" encoding="utf-8"?>
<manifest xmlns:android="http://schemas.android.com/apk/res/android"
    package="com.example.servicedemo">

    <uses-permission android:name="android.permission.ACCESS_NOTIFICATION_POLICY"/>
    <uses-permission android:name="android.permission.BIND_NOTIFICATION_LISTENER_SERVICE"/>

    <application
        android:allowBackup="true"
        android:icon="@mipmap/ic_launcher"
        android:label="@string/app_name"
        android:supportsRtl="true"
        android:theme="@style/AppTheme">
        <activity android:name=".MainActivity">
            <intent-filter>
                <action android:name="android.intent.action.MAIN" />

                <category android:name="android.intent.category.LAUNCHER" />
            </intent-filter>
        </activity>
        <service android:name=".MyService" android:process=":remote"></service>
    </application>

</manifest>
这样MyService就已经变成一个远程Service了,
然后我们改改代码
 @Override
    public void onCreate() {
        super.onCreate();
        try {
            Thread.sleep(50000);
        } catch (InterruptedException e) {
            e.printStackTrace();
        }
运行代码,我们发现不会报ANR异常了。
点击startServce:
09-23 17:37:48.532 30514-30514/com.example.servicedemo E/MainActivity: startService click:然后过了15s:
09-23 17:38:03.768 31590-31590/com.example.servicedemo:remote E/MyService: onCreate:
09-23 17:38:03.768 31590-31590/com.example.servicedemo:remote E/MyService: onStartCommand:
没有报ANR(因为此时的Service跟Activity不在同一个进程中了)这说明我们的逻辑是正确的。
为了证实一下MyService现在确实已经运行在另外一个进程当中了,我们分别在MainActivity的onCreate()方法和MyService的onCreate()方法里加入一行日志,打印出各自所在的进程id,如下所示:

可以看到,不仅仅是进程id不同了,就连应用程序包名也不一样了,MyService中打印的那条日志,包名后面还跟上了:remote标识。
那既然远程Service这么好用,干脆以后我们把所有的Service都转换成远程Service吧,还省得再开启线程了。其实不然,远程Service非但不好用,甚至可以称得上是较为难用。一般情况下如果可以不使用远程Service,就尽量不要使用它。
下面就来看一下它的弊端吧,首先将MyService的onCreate()方法中让线程睡眠的代码去除掉,然后重新运行程序,并点击一下Bind Service按钮,你会发现程序崩溃了!为什么点击Start Service按钮程序就不会崩溃,而点击Bind Service按钮就会崩溃呢?这是由于在Bind Service按钮的点击事件里面我们会让MainActivity和MyService建立关联,但是目前MyService已经是一个远程Service了,Activity和Service运行在两个不同的进程当中,这时就不能再使用传统的建立关联的方式,程序也就崩溃了。
那么如何才能让Activity与一个远程Service建立关联呢?这就要使用AIDL来进行跨进程通信了(IPC)。
AIDL(Android Interface Definition Language)是Android接口定义语言的意思,它可以用于让某个Service与多个应用程序组件之间进行跨进程通信,从而可以实现多个应用程序共享同一个Service的功能。
下面我们就来一步步地看一下AIDL的用法到底是怎样的。首先需要新建一个AIDL文件,在这个文件中定义好Activity需要与Service进行通信的方法。新建MyAIDLService.aidl文件,代码如下所示:
// MyAidl.aidl
package com.example.servicedemo;

// Declare any non-default types here with import statements

interface MyAidl {
    /**
     * Demonstrates some basic types that you can use as parameters
     * and return values in AIDL.
     */
    int plus(int a, int b);
    String toUpperCase(String str);
}
在ADT中,我们直接new一个file不管在什么src的什么位置,然后gen下就会生成相应的java文件,但是在AS中了,我们AIDL文件存放的位置与JAVA文件夹平级,
第一步:右键点击创建一个AIDL文件
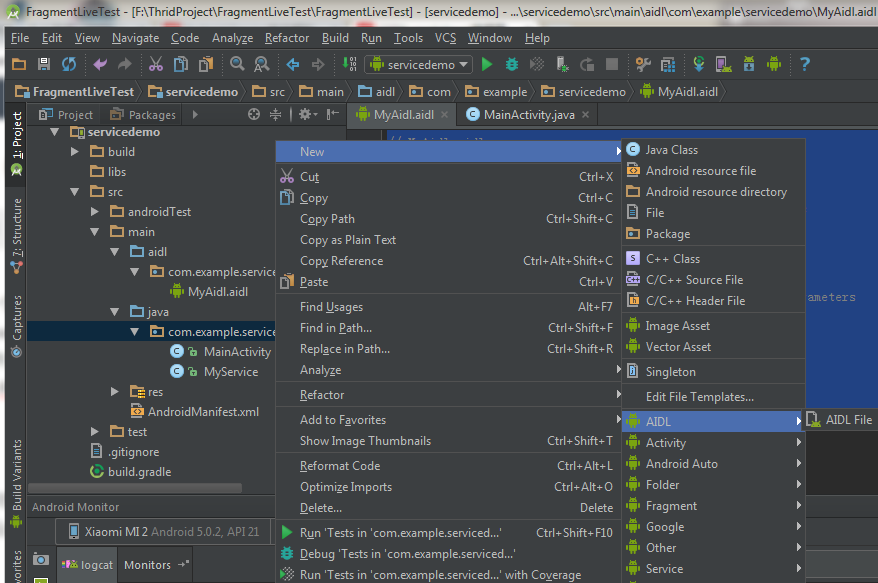
创建完后,会自动移到与JAVA平级的aidl文件夹下。
创建完后我们点击Buidl按钮下的“MAKE PROJECT”按钮
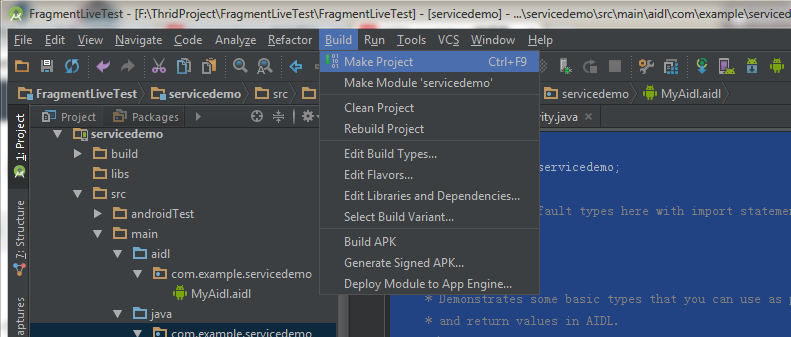
然后就可以生成对应的类文件了。
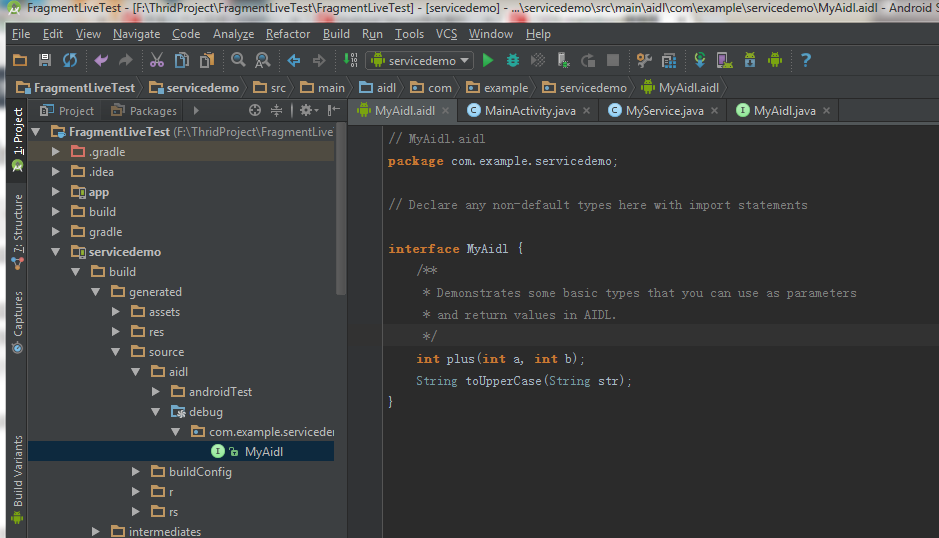
这样我们就可以使用MyAidl进行通信了,我们改改MyService中的代码:
  @Nullable
    @Override
    public IBinder onBind(Intent intent) {
        Log.e(TAG, "onBind: ");
        return mBinder;
    }
    MyAidl.Stub mBinder = new MyAidl.Stub(){

        @Override
        public int plus(int a, int b) throws RemoteException {
            Log.e(TAG, "MyService  plus----->a+b="+(a+b));
            return a+b;
        }

        @Override
        public String toUpperCase(String str) throws RemoteException {
            return str.toUpperCase();
        }
    };
我们修改下MainActivity中代码:
 conn=new ServiceConnection() {
            @Override
            public void onServiceConnected(ComponentName name, IBinder service) {
                Log.e(TAG, "onServiceConnected---->plus" );
                myAidl=MyAidl.Stub.asInterface(service);
                try {
                    myAidl.plus(1,2);
                } catch (RemoteException e) {
                    e.printStackTrace();
                }
            }

            @Override
            public void onServiceDisconnected(ComponentName name) {
                Log.e(TAG, "onServiceDisconnected:" );
            }
        };
    }
然后我们点击bindService:
09-25 21:34:40.465 14118-14118/com.example.servicedemo E/MainActivity: bindService click:
09-25 21:34:55.530 13643-13643/com.example.servicedemo:remote E/MyService: onCreate:
09-25 21:34:55.530 13643-13643/com.example.servicedemo:remote E/MyService: onBind:
09-25 21:34:55.540 14118-14118/com.example.servicedemo E/MainActivity: onServiceConnected---->plus
09-25 21:34:55.540 13643-13672/com.example.servicedemo:remote E/MyService: MyService  plus----->a+b=3
也就是我们已经成功的利用了AIDL实现了跨进程通信了。那为什么我们平时写Service不都这么做,然后把Service设置为远程Service呢?
其实不然,远程Service非但不好用,甚至可以称得上是较为难用。一般情况下如果可以不使用远程Service,就尽量不要使用它。
下面就来看一下它的弊端吧,首先将MyService的onCreate()方法中让线程睡眠的代码去除掉,然后重新运行程序,并点击一下Bind Service按钮,你会发现程序崩溃了!为什么点击Start Service按钮程序就不会崩溃,而点击Bind Service按钮就会崩溃呢?这是由于在Bind Service按钮的点击事件里面我们会让MainActivity和MyService建立关联,但是目前MyService已经是一个远程Service了,Activity和Service运行在两个不同的进程当中,这时就不能再使用传统的建立关联的方式,程序也就崩溃了。
看看我们这里bindService的代码:
public void bindService(View view){
        Log.e(TAG, "bindService click:" );
        Intent startIntent = new Intent(this, MyService.class);
        bindService(startIntent, conn, Context.BIND_AUTO_CREATE);
    }
我们传了一个MyService.class,那我们的MyService为远程Service,那么也就是说在其他应用中也可以访问到的,那如果我们就不能直接传一个MyService了,我们就得用一个隐式的Intent去bindService了,创建方法也是很简单的,
首先我们改改manifest里面的代码,给Service创建一个隐式的Action:
 <service android:name=".MyService" android:process=":remote">
            <intent-filter >
                <action android:name="com.example.servicedemo.MyAidl"></action>
            </intent-filter>
        </service>
然后我们再创建一个隐式的Intent去bindService:
 public void bindService(View view){
        Log.e(TAG, "bindService click:" );
        Intent startIntent = new Intent("com.example.servicedemo.MyAidl");
        bindService(startIntent, conn, Context.BIND_AUTO_CREATE);
    }
我们运行代码看看效果:
我们在Android5.0以上的机子跑的时候,程序直接崩了。
这又是一大巨坑啊,
经过查找相关资料,发现是因为Android5.0中service的intent一定要显性声明,当这样绑定的时候不会报错。
public void bindService(View view){
        Log.e(TAG, "bindService click:" );
       /* Intent startIntent = new Intent("com.example.servicedemo.MyAidl");
        bindService(startIntent, conn, Context.BIND_AUTO_CREATE);*/

        final Intent intent = new Intent();
        intent.setAction("com.example.servicedemo.MyAidl");
        final Intent eintent = new Intent(createExplicitFromImplicitIntent(this,intent));
        bindService(eintent,conn, Service.BIND_AUTO_CREATE);
    }
    /***
     * Android L (lollipop, API 21) introduced a new problem when trying to invoke implicit intent,
     * "java.lang.IllegalArgumentException: Service Intent must be explicit"
     *
     * If you are using an implicit intent, and know only 1 target would answer this intent,
     * This method will help you turn the implicit intent into the explicit form.
     *
     * Inspired from SO answer: http://stackoverflow.com/a/26318757/1446466
     * @param context
     * @param implicitIntent - The original implicit intent
     * @return Explicit Intent created from the implicit original intent
     */
    public static Intent createExplicitFromImplicitIntent(Context context, Intent implicitIntent) {
        // Retrieve all services that can match the given intent
        PackageManager pm = context.getPackageManager();
        List<ResolveInfo> resolveInfo = pm.queryIntentServices(implicitIntent, 0);

        // Make sure only one match was found
        if (resolveInfo == null || resolveInfo.size() != 1) {
            return null;
        }

        // Get component info and create ComponentName
        ResolveInfo serviceInfo = resolveInfo.get(0);
        String packageName = serviceInfo.serviceInfo.packageName;
        String className = serviceInfo.serviceInfo.name;
        ComponentName component = new ComponentName(packageName, className);

        // Create a new intent. Use the old one for extras and such reuse
        Intent explicitIntent = new Intent(implicitIntent);

        // Set the component to be explicit
        explicitIntent.setComponent(component);

        return explicitIntent;
    }
再次运行代码:
09-25 22:01:34.149 5361-5361/com.example.servicedemo E/MainActivity: bindService click:
09-25 22:01:34.370 5888-5888/com.example.servicedemo:remote E/MyService: onCreate:
09-25 22:01:34.370 5888-5888/com.example.servicedemo:remote E/MyService: onBind:
09-25 22:01:34.370 5361-5361/com.example.servicedemo E/MainActivity: onServiceConnected---->plus
09-25 22:01:34.370 5888-5913/com.example.servicedemo:remote E/MyService: MyService  plus----->a+b=3
我们终于看到了我们期待已久的结果了。至此,Service全部内容讲解完毕了,可能还有很多未知的小细节待我们挖掘,加油,Fighting~!!!!!
本文内容部分参考郭神博客http://blog.csdn.net/guolin_blog/article/details/11952435


 2399
2399

 被折叠的 条评论
为什么被折叠?
被折叠的 条评论
为什么被折叠?
 到【灌水乐园】发言


