


1.EventBus优缺点
EventBus 作为 Android 开发中常用的框架,拥有着许多优点:
调度灵活。不依赖于 Context,使用时无需像广播一样关注 Context 的注入与传递。父类对于通知的监听和处理可以继承给子类,这对于简化代码至关重要;通知的优先级,能够保证 Subscriber 关注最重要的通知;粘滞事件(sticky events)能够保证通知不会因 Subscriber 的不在场而忽略。可继承、优先级、粘滞,是 EventBus 比之于广播、观察者等方式最大的优点,它们使得创建结构良好组织紧密的通知系统成为可能。
使用简单。EventBus 的 Subscriber 注册非常简单,调用 eventBus 对象的 register 方法即可,如果不想创建 eventBus 还可以直接调用静态方法 EventBus.getDefault() 获取默认实例,Subscriber 接收到通知之后的操作放在 onEvent 方法里就行了。成为 Publisher 的过程就更简单了,只需要调用合适的 eventBus(自己创建的或是默认的)的 post 方法即可。
快速且轻量。作为 github 的明星项目之一, EventBus 的源代码中许多技巧来改善性能;
- eventbus的 缺点是他的代码逻辑不是很清楚,在 Subscriber 注册的时候,Subscriber 中的方法会被遍历查找以 onEvent 开头的 public 方法。这将带来一些问题,一旦对代码进行混淆,就无法查找到了。好消息是 EventBus 已经打算使用注解来实现,这应该能够解决代码混淆的问题。
但有一个缺点是观察者独有的,那就是观察者可能会造成接口的膨胀。特别是当程序要求大量形式各异的通知,而程序员有没有做出良好的抽象时,代码中会包含大量的接口,接口数量的增长又会带来命名、注释等等一大堆问题。本质上说观察者要求程序员从零开始实现事件的产生、分发与处理过程,这就要求参与者必须对整个通知过程有着良好的理解。当程序代码适量时,这是一个合理的要求,然而当程序太大时,这将成为一种负担。
下面我们实现这一一个效果,A页面跳转到B页面,B页面发送通知更新A页面的textView的字体颜色(颜色值随机),效果图如下:
2.项目结构
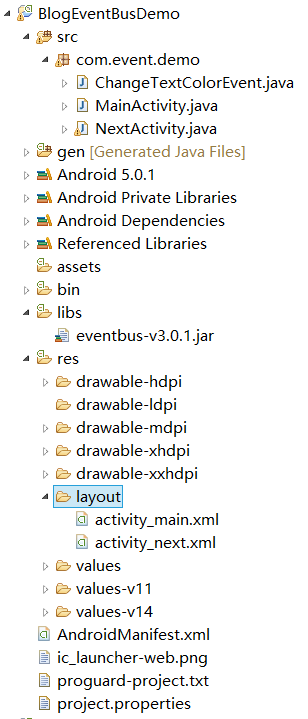
3.activity_main.xml
放了一个按钮和一个显示文字的TextView,跳转到nextactivity的按钮
<LinearLayout xmlns:android="http://schemas.android.com/apk/res/android"
    xmlns:tools="http://schemas.android.com/tools"
    android:layout_width="match_parent"
    android:layout_height="match_parent"
    android:orientation="vertical"
    android:gravity="center"
    tools:context="${relativePackage}.${activityClass}" >

    <Button
        android:id="@+id/btn"
        android:layout_width="wrap_content"
        android:layout_height="wrap_content"
        android:textSize="16sp"
        android:text="Jump NextActivity" />


    <TextView
        android:id="@+id/color_text"
        android:layout_width="match_parent"
        android:layout_height="wrap_content"
        android:layout_marginTop="20dp"
        android:textSize="18sp"
        android:text="这是一段可以被改变字体颜色的文字"
        />

</LinearLayout>
4.ChangeTextColorEvent.java
定义事件类,获取颜色和当前的activity
/**
 *
 * <改变颜色的Event>
 *
 * @author  wangkeke
 * @version  [V1.00, 2016年5月10日]
 * @see  [相关类/方法]
 * @since V1.00
 */
public class ChangeTextColorEvent
{
    private String color;

    private Activity activity;

    public ChangeTextColorEvent(String color, Activity activity)
    {
        super();
        this.color = color;
        this.activity = activity;
    }

    public String getColor()
    {
        return color;
    }

    public Activity getActivity()
    {
        return activity;
    }

}
5.MainActivity.java
代码非常简单,注册EventBus,反注册EventBus,onEventMainThread用于接收订阅的事件
public class MainActivity extends Activity
{
    private Button button;

    private TextView textView;

    @Override
    protected void onCreate(Bundle savedInstanceState)
    {
        super.onCreate(savedInstanceState);
        setContentView(R.layout.activity_main);

        //注册EventBus
        EventBus.getDefault().register(this);

        initView();
    }

    private void initView()
    {
        button = (Button)findViewById(R.id.btn);
        textView = (TextView)findViewById(R.id.color_text);

        button.setOnClickListener(new OnClickListener()
        {

            @Override
            public void onClick(View v)
            {
                //跳转到NextActivity
                Intent intent = new Intent(MainActivity.this, NextActivity.class);
                startActivity(intent);
            }
        });
    }
    /**
     * public修饰,不能使用static abstart修饰
     * 参数只能有一个
     * @param event
     * @see [类、类#方法、类#成员]
     */
    @Subscribe
    public void onEventMainThread(ChangeTextColorEvent event)
    {
        textView.setTextColor(Color.parseColor(event.getColor()));
        //finish  NextActivity
        event.getActivity().finish();
    }

    @Override
    protected void onDestroy()
    {
        super.onDestroy();
        //反注册EventBus
        EventBus.getDefault().unregister(this);
    }
}
6.activity_next.xml
定义一个发送消息的按钮
<RelativeLayout xmlns:android="http://schemas.android.com/apk/res/android"
    xmlns:tools="http://schemas.android.com/tools"
    android:layout_width="match_parent"
    android:layout_height="match_parent"
    tools:context="${relativePackage}.${activityClass}" >

    <Button
        android:id="@+id/button"
        android:layout_width="wrap_content"
        android:layout_height="wrap_content"
        android:layout_centerInParent="true"
        android:textSize="16sp"
        android:text="发送改变字体颜色的Event" />

</RelativeLayout>
7.NextActivity.java
public class NextActivity extends Activity
{
    private Button button;

    @Override
    protected void onCreate(Bundle savedInstanceState)
    {
        super.onCreate(savedInstanceState);
        setContentView(R.layout.activity_next);

        initView();
    }

    private void initView()
    {
        button = (Button)findViewById(R.id.button);
        button.setOnClickListener(new OnClickListener()
        {
            @Override
            public void onClick(View v)
            {
                Toast.makeText(NextActivity.this, getRandColorCode(), Toast.LENGTH_SHORT).show();
                //发送消息
                EventBus.getDefault().post(new ChangeTextColorEvent(getRandColorCode(), NextActivity.this));
            }
        });
    }

    /**
     * 获取十六进制的颜色代码.例如 "#6E36B4"
     *
     * @return String
     */
    public static String getRandColorCode()
    {
        String r, g, b;
        Random random = new Random();
        r = Integer.toHexString(random.nextInt(256)).toUpperCase();
        g = Integer.toHexString(random.nextInt(256)).toUpperCase();
        b = Integer.toHexString(random.nextInt(256)).toUpperCase();

        r = r.length() == 1 ? "0" + r : r;
        g = g.length() == 1 ? "0" + g : g;
        b = b.length() == 1 ? "0" + b : b;

        return "#"+r + g + b;
    }
}
8.接收函数
EventBus除了可以使用onEventMainThread()函数接收之外,其实EventBus还有另外几个不同的函数,他们分别是:
1、onEvent
2、onEventMainThread
3、onEventBackgroundThread
4、onEventAsync
四种订阅函数都是使用onEvent开头的,它们的功能稍有不同,在介绍不同之前先介绍两个概念:
告知观察者事件发生时通过EventBus.post函数实现,这个过程叫做事件的发布,观察者被告知事件发生叫做事件的接收,是通过下面的订阅函数实现的。
- onEvent:如果使用onEvent作为订阅函数,那么该事件在哪个线程发布出来的,onEvent就会在这个线程中运行,也就是说发布事件和接收事件线程在同一个线程。使用这个方法时,在onEvent方法中不能执行耗时操作,如果执行耗时操作容易导致事件分发延迟。
- onEventMainThread:如果使用onEventMainThread作为订阅函数,那么不论事件是在哪个线程中发布出来的,onEventMainThread都会在UI线程中执行,接收事件就会在UI线程中运行,这个在Android中是非常有用的,因为在Android中只能在UI线程中跟新UI,所以在onEvnetMainThread方法中是不能执行耗时操作的。
- onEventBackground:如果使用onEventBackgrond作为订阅函数,那么如果事件是在UI线程中发布出来的,那么onEventBackground就会在子线程中运行,如果事件本来就是子线程中发布出来的,那么onEventBackground函数直接在该子线程中执行。
- onEventAsync:使用这个函数作为订阅函数,那么无论事件在哪个线程发布,都会创建新的子线程在执行onEventAsync.
备注:
参考文章:


 709
709


 被折叠的 条评论
为什么被折叠?
被折叠的 条评论
为什么被折叠?
 到【灌水乐园】发言


