


AppWidget就是我们平常在桌面上见到的那种一个个的小窗口,利用这个小窗口可以给用户提供一些方便快捷的操作。下面让我们在桌面 上实现一个简单的AppWidget。
首先定义AppWidgetProviderInfo:在res/xml文件夹中定义一个名为 :myappwidgetprovider.xml。
<appwidget-provider xmlns:android="http://schemas.android.com/apk/res/android"
    android:minWidth="72dp"
    android:minHeight="72dp"
    android:updatePeriodMillis="86400000"
    android:initialLayout="@layout/myappwidget">
</appwidget-provider>
然后为App Widget指定样式和布局:myappwidget.xml 和我们平时的布局文件一样,可以设置自己喜欢的类型。
<?xml version="1.0" encoding="utf-8"?>
<LinearLayout xmlns:android="http://schemas.android.com/apk/res/android"
    android:layout_width="match_parent"
    android:layout_height="match_parent"
    android:background="#ffffff"
    android:gravity="center"
    android:orientation="vertical" >

    <ImageView
        android:id="@+id/imageView1"
        android:layout_width="wrap_content"
        android:layout_height="wrap_content"
        android:src="@drawable/ic_launcher" />

    <Button
        android:id="@+id/button"
        android:layout_width="wrap_content"
        android:layout_height="wrap_content"
        android:text="Button" />

</LinearLayout>public class ExampleAppWidgetProvider extends AppWidgetProvider {
@Override
public void onUpdate(Context context, AppWidgetManager appWidgetManager,
int[] appWidgetIds) {
// TODO Auto-generated method stub
final int N = appWidgetIds.length;
for (int i=0; i<N; i++) {
int appWidgetId = appWidgetIds[i];
Intent intent = new Intent(context, SimpleDemoActivity.class);
PendingIntent pendingIntent = PendingIntent.getActivity(context, 0, intent, 0);
RemoteViews views = new RemoteViews(context.getPackageName(), R.layout.myappwidget);
views.setOnClickPendingIntent(R.id.button, pendingIntent);
// Tell the AppWidgetManager to perform an update on the current app widget
appWidgetManager.updateAppWidget(appWidgetId, views);
}
}
@Override
public void onReceive(Context context, Intent intent) {
// TODO Auto-generated method stub
super.onReceive(context, intent);
}
}
最后在manifest中加入:
    <application
        android:icon="@drawable/ic_launcher"
        android:label="@string/app_name" >
        <activity
            android:label="@string/app_name"
            android:name=".SimpleDemoActivity" >
            <intent-filter >
                <action android:name="android.intent.action.MAIN" />

                <category android:name="android.intent.category.LAUNCHER" />
            </intent-filter>
        </activity>

        <receiver android:name="ExampleAppWidgetProvider" >
            <intent-filter >
                <action android:name="android.appwidget.action.APPWIDGET_UPDATE" />
            </intent-filter>

            <meta-data
                android:name="android.appwidget.provider"
                android:resource="@xml/myappwidgetprovider" />
        </receiver>
    </application>
这样就完成了一个简单了Widgets,运行这个工程。
看下效果:
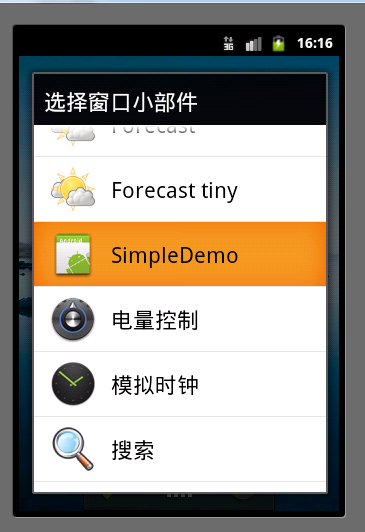
这样就有了我们自己的窗口小部件,选中。
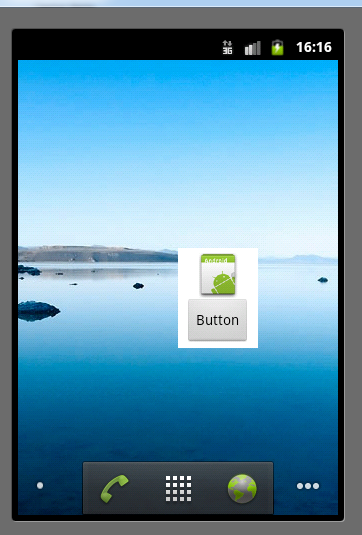
这就是我们刚才布局的窗口小部件。点击button按钮会相应我们绑定的intent事件。
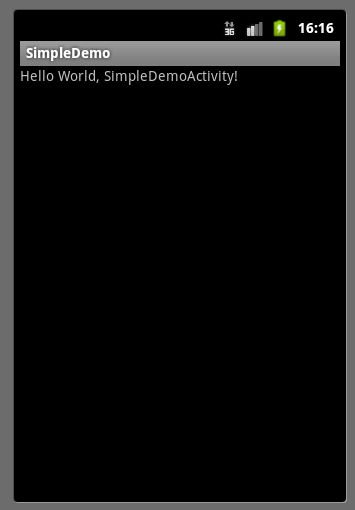
这只是一个简单的体验,以后会实现一个复杂的AppWidget。


 3561
3561

 被折叠的 条评论
为什么被折叠?
被折叠的 条评论
为什么被折叠?
 到【灌水乐园】发言


