


为了方便查看代码以及调试代码,使用Visual Studio Code工具来处理。
- 本文主要是在Mac下安装以及调试。
1 安装Visual Studio Code工具
在官网上下载安装
2 调试GPORCA
2.1 编译源码,按照GPORCA学习笔记(0)步骤进行编译。
2.2 Visual Studio Code Debug
点击启动调试,弹出一个launch.json文件,填写好调试需要的程序文件。
如
{
    // 使用 IntelliSense 了解相关属性。
    // 悬停以查看现有属性的描述。
    // 欲了解更多信息,请访问: https://go.microsoft.com/fwlink/?linkid=830387
    "version": "0.2.0",
    "configurations": [

        {
            "name": "C++ Launch",
            "type": "cppdbg",
            "request": "launch",
            "program": "/Users/wlz/src/gporca/build/server/gporca_test",
            "args": ["-d/Users/wlz/src/gporca/data/dxl/minidump/CJoinOrderDPTest/JoinOrderWithDP.mdp"],
            "stopAtEntry": false,
            "cwd": "${workspaceRoot}",
            "environment": [],
            此处省略...
    ]
}
主要是添加program路径以及程序参数。
- 注意:args这里,如果输入需要跑的Test,”-d”后面直接跟Test路径名字,不需要空格,如果有空格,则会出错。
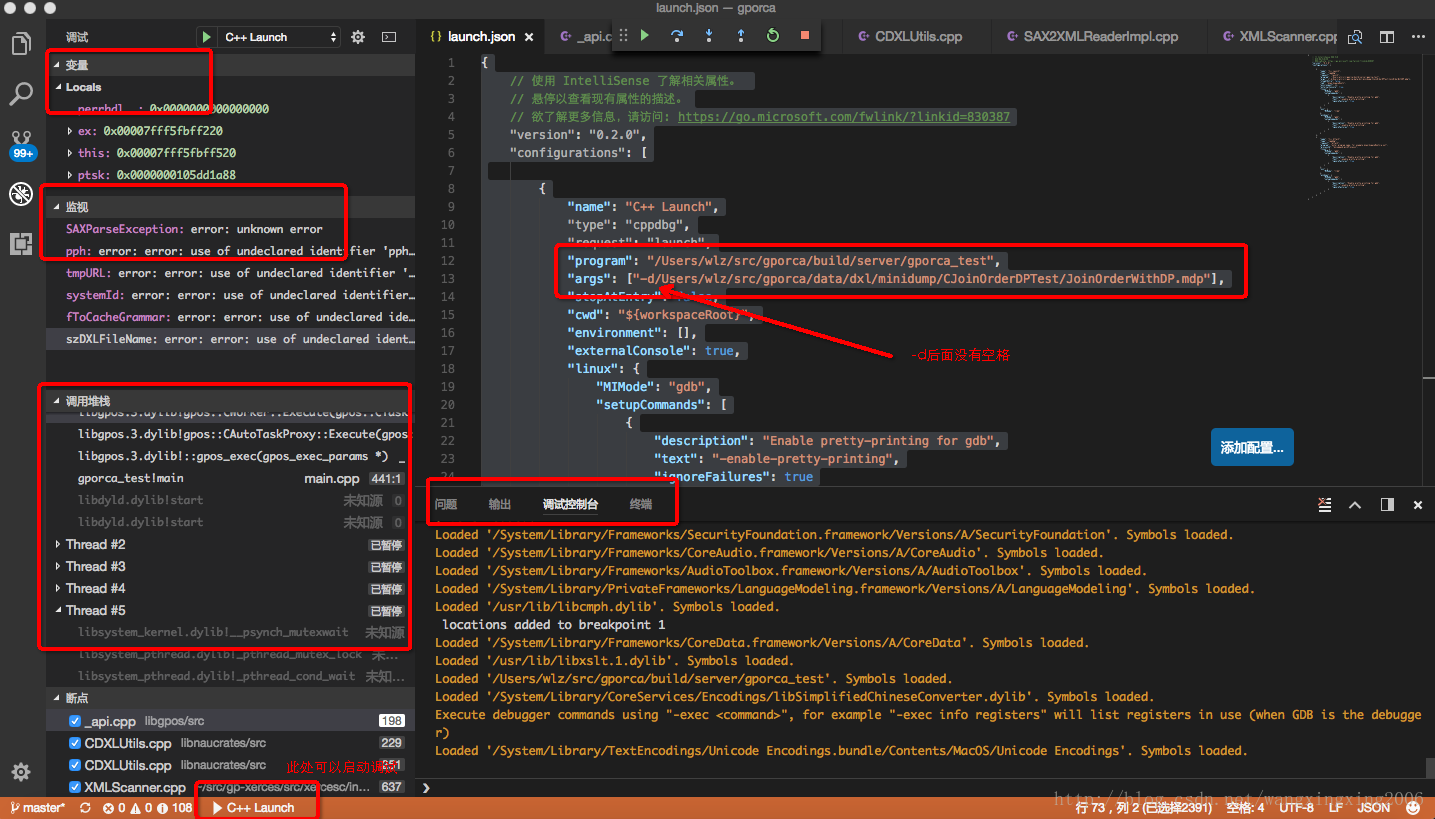
图片给出了Debug时,需要查看的相关信息,如堆栈、监控、线程、Console等。
系列文章
* GPORCA学习笔记(0)——GPORCA编译及源码分析
* GPORCA学习笔记(1)——Visual Studio Code Debug ORCA


 3471
3471


 被折叠的 条评论
为什么被折叠?
被折叠的 条评论
为什么被折叠?
 到【灌水乐园】发言


