


实际开发中并不会需要你将代码转为配置文件的形式去呈现,但是,我写着一系列博文的目的并不是教你如何去项目中进行开发,因为包括之前的几篇博文中你会发现并不是在讲项目的实践的,我的想法是这样的:为一些对Spring有所了解但是并不深入的朋友拓宽知识面,让你不仅仅会用Spring而且要懂要知道他的更多的东西,我在接下来的日子里会继续拓展关于Spring的知识,同时可能会在适时的讲解一些怎么在项目中用的实践篇,然后准备研究下设计模式,再回来继续发布关于Spring更深入的博文。也就意味着后面会有段时间我在研究设计模式,可能Spring这一块的相关知识更新频率会降低。在设计模式完成后,依然会继续更新Spring相关博文。
实例一
下面看一个例子:
凡是有些编程基础的,应该都可以看懂的,我三段代码不加说明了。
<strong>package com.siti.spring20160311;

public class WangYang {

	private int age;

	public int getAge() {
		return age;
	}

	public void setAge(int age) {
		this.age = age;
	}

	@Override
	public String toString() {
		return "WangYang [age=" + age + "]";
	}

}</strong>
<span style="font-size:14px;">package com.siti.spring20160311;

public class Person {

	private int age;
	private WangYang wy;

	public WangYang getWy() {
		return wy;
	}

	public void setWy(WangYang wy) {
		this.wy = wy;
	}

	public int getAge() {
		return age;
	}

	public void setAge(int age) {
		this.age = age;
	}

}</span><span style="font-size:18px;">
</span>
package com.siti.spring20160311;
public class MainTest {
public static void main(String[] args) {
WangYang wy = new WangYang();
wy.setAge(10);
Person person = new Person();
person.setAge(20);
person.setWy(wy);
System.out.println(person.getWy());
}
}
打印的信息如图:

下面我们通过配置文件的形式将上面的代码实现
<span style="font-size:14px;"><?xml version="1.0" encoding="UTF-8"?>
<beans xmlns="http://www.springframework.org/schema/beans"
       xmlns:xsi="http://www.w3.org/2001/XMLSchema-instance"
       xsi:schemaLocation="
http://www.springframework.org/schema/beans http://www.springframework.org/schema/beans/spring-beans.xsd">

	  <!--
	  WangYang wy = new WangYang();
	  wy.setAge(10);
	      产生一个wy的实例对象,并设置age为10
	  -->
	  <bean id = "wy" class="com.siti.spring20160311.WangYang">
	  		<property name="age" value="10"></property>
	  </bean>

	  <!--
	  Person person = new Person();
	  person.setAge(20);
	  person.setWy(wy);
	      产生一个person的实例对象,并设置age为20,Wy对象为上面配置好的wy
	  -->
	  <bean id = "person" class="com.siti.spring20160311.Person">
	  		<property name="age" value="20"></property>
	  		<property name="wy" ref="wy"></property>
	  </bean>

	  <!-- 这里需要注意了,我们在之前的代码中是用的person.getWy()这个方式得到的 -->
	  <!--
	  	PropertyPathFactoryBean用于获取目标bean的属性值
	  	使用它来获取属性的值即调用get方法的话需要制定几个项:
	  	setPropertyPath(propertyPath);指定你使用哪个get方法。
	  	setTargetObject(Object targetObject); 指定获取哪个对象的属性值。
	  	这里同样是通过Spring容器为PropertyPathFactoryBean类中的属性赋值。
	   -->
	  <bean name = "wyTest" class = "org.springframework.beans.factory.config.PropertyPathFactoryBean">
	  	 	<!-- 指定调用哪个get方法  -->
	  	 	<property name="propertyPath" value = "wy"></property>

	  	 	<!-- 指定去找哪个对象,调用哪个对象的属性 -->
	  	 	<property name="targetBeanName" value = "person"></property>
	  </bean>
</beans></span>
测试类:
package com.siti.spring20160311;

import org.springframework.context.ApplicationContext;
import org.springframework.context.support.ClassPathXmlApplicationContext;

public class MainTest4SpringConf {

	public static void main(String[] args) {
		ApplicationContext context = new ClassPathXmlApplicationContext("applicationContext20160311.xml");
		System.out.println(context.getBean("wyTest"));
	}
}
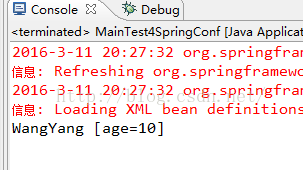
输出结果:
实例二
如下的一段代码
package com.siti.spring20160311;

import java.awt.BorderLayout;

import javax.swing.JButton;
import javax.swing.JFrame;
import javax.swing.JPanel;
import javax.swing.JScrollPane;
import javax.swing.JTextArea;

public class MainTest4Window {

	public static void main(String[] args) {
		JFrame frame = new JFrame("窗体");

		JTextArea textArea = new JTextArea(10,20);
		frame.add(new JScrollPane(textArea));

		JPanel panel = new JPanel();
		frame.add(panel, BorderLayout.SOUTH);

		JButton buttonYes = new JButton("Yes");
		panel.add(buttonYes);

		JButton buttonNo = new JButton("No");
		panel.add(buttonNo);

		frame.pack();
		frame.setVisible(true);
	}
}
运行结果如下图

用配置文件来实现上面的代码:
<pre name="code" class="java"><?xml version="1.0" encoding="UTF-8"?>
<beans xmlns="http://www.springframework.org/schema/beans"
       xmlns:xsi="http://www.w3.org/2001/XMLSchema-instance"
       xmlns:util="http://www.springframework.org/schema/util"
       xsi:schemaLocation="
		http://www.springframework.org/schema/beans
		http://www.springframework.org/schema/beans/spring-beans.xsd
		http://www.springframework.org/schema/util
		http://www.springframework.org/schema/util/spring-util-4.0.xsd">

	  <!--
	  	JFrame frame = new JFrame("窗体");
	  	frame.setVisible(true);
	   -->
	  <bean name = "frame" class = "javax.swing.JFrame">
	  		<constructor-arg value = "窗体"></constructor-arg>
	  		<property name="visible" value="true"></property>
	  </bean>

	  <!--
	  	JTextArea textArea = new JTextArea(10,20);
	   -->
	  <bean name = "textArea" class = "javax.swing.JTextArea">
	  		<constructor-arg value = "10"></constructor-arg>
	  		<constructor-arg value = "20"></constructor-arg>
	  </bean>

	  <!--
	    frame.add(new JScrollPane(textArea));
	  	通过MethodInvokingFactoryBean工厂Bean,可以将指定方法返回值注入成为目标Bean的属性值,
	  	MethodInvokingFactoryBean用来获得指定方法的返回值,该方法可以是静态方法 也可以是实例方法。
		获得的方法返回值既可以被注入到指定Bean实例的指定属性,也可以直接定义成Bean实例。
		targetObject指定了目标对象
		targetMethod指定了目标方法
	  -->
	  <bean class = "org.springframework.beans.factory.config.MethodInvokingFactoryBean">
	  		<property name="targetObject" ref = "frame"></property>
	  		<property name="targetMethod" value="add"></property>
	  		<property name="arguments">
	  			<list>
	  				<bean class = "javax.swing.JScrollPane">
	  					<constructor-arg ref="textArea"></constructor-arg>
	  				</bean>
	  			</list>
	  		</property>
	  </bean>

	  <!--
	  	JPanel panel = new JPanel();
	   -->
	  <bean name = "panel" class = "javax.swing.JPanel"></bean>

	  <!-- frame.add(panel, BorderLayout.SOUTH); -->
	  <bean class = "org.springframework.beans.factory.config.MethodInvokingFactoryBean">
	  		<property name="targetObject" ref = "frame"></property>
	  		<property name="targetMethod" value="add"></property>
	  		<property name="arguments">
	  			<list>
	  				<ref bean = "panel"/>
	  				<util:constant static-field = "java.awt.BorderLayout.SOUTH"/>
	  			</list>
	  		</property>
	  </bean>

	  <!--
	    JButton buttonYes = new JButton("Yes");
	   -->
	  <bean name = "buttonYes" class = "javax.swing.JButton">
	  		<constructor-arg value="Yes" type="java.lang.String"></constructor-arg>
	  </bean>

	  <!-- panel.add(buttonYes); -->
	  <bean class = "org.springframework.beans.factory.config.MethodInvokingFactoryBean">
	  		<property name="targetObject" ref = "panel"></property>
	  		<property name="targetMethod" value="add"></property>
	  		<property name="arguments">
	  			<list>
	  				<ref bean = "buttonYes"/>
	  			</list>
	  		</property>
	  </bean>

	  <!--
	    JButton buttonNo = new JButton("No");
	   -->
	  <bean name = "buttonNo" class = "javax.swing.JButton">
	  		<constructor-arg value="No" type="java.lang.String"></constructor-arg>
	  </bean>

	  <!-- panel.add(buttonNo); -->
	  <bean class = "org.springframework.beans.factory.config.MethodInvokingFactoryBean">
	  		<property name="targetObject" ref = "panel"></property>
	  		<property name="targetMethod" value="add"></property>
	  		<property name="arguments">
	  			<list>
	  				<ref bean = "buttonNo"/>
	  			</list>
	  		</property>
	  </bean>

	  <!--
		frame.pack();
	  -->
	  <bean class = "org.springframework.beans.factory.config.MethodInvokingFactoryBean">
	  		<property name="targetObject" ref = "frame"></property>
	  		<property name="targetMethod" value="pack"></property>
	  </bean>


</beans>
测试类
package com.siti.spring20160311;

import org.springframework.context.ApplicationContext;
import org.springframework.context.support.ClassPathXmlApplicationContext;

public class MainTest4Swing {

	public static void main(String[] args) {
		ApplicationContext context = new ClassPathXmlApplicationContext("applicationContext201603114Swing.xml");
	}
}
输出结果

这两个例子用来体会下Spring的强大就好。


 4万+
4万+

 被折叠的 条评论
为什么被折叠?
被折叠的 条评论
为什么被折叠?
 到【灌水乐园】发言


