


Android 中使用自定义属性的一般步骤:
- 定义declare-styleable,添加attr
- 使用TypedArray获取自定义属性
- 设置到View上
Sample
注意:
- attr可以单独定义,不放在styleable中
- 可以使用android内置attr,而不用声明format
- 可以不用TypedArray来获取
attrs.xml
<?xml version="1.0" encoding="utf-8"?>
<resources>
    <declare-styleable name="test">
        <attr name="size" format="dimension" />
        <attr name="android:textColor" />
    </declare-styleable>
</resources>
MyView:
/**
 * Created by bobomee on 16/1/25.
 */
public class MyView extends View {

    String T = this.getClass().getSimpleName();

    private float mSize;
    private int mBackGround;
    private Paint mPaint;

    public MyView(Context context) {
        this(context, null);
    }

    public MyView(Context context, AttributeSet attrs) {
        this(context, attrs, 0);
    }

    public MyView(Context context, AttributeSet attrs, int defStyleAttr) {
        super(context, attrs, defStyleAttr);
        handleAttrs(context, attrs, defStyleAttr);
    }

    @TargetApi(Build.VERSION_CODES.LOLLIPOP)
    public MyView(Context context, AttributeSet attrs, int defStyleAttr, int defStyleRes) {
        super(context, attrs, defStyleAttr, defStyleRes);
        handleAttrs(context, attrs, defStyleAttr);
    }

    private void handleAttrs(Context context, AttributeSet attrs, int defStyleAttr) {
        //Retrieve styles attributes
        TypedArray ta = context.obtainStyledAttributes(attrs, R.styleable.test, defStyleAttr, 0);

        int defaultSize = (int) TypedValue.applyDimension(TypedValue.COMPLEX_UNIT_SP, 20, context.getResources().getDisplayMetrics());
        mSize = ta.getDimension(R.styleable.test_size, defaultSize);
        mBackGround = ta.getColor(R.styleable.test_android_textColor, Color.WHITE);

        mPaint = new Paint();
        mPaint.setAntiAlias(true);
        mPaint.setColor(mBackGround);

        Log.d(T, "mSize = " + mSize + " , mBackGround = " + mBackGround);
        ta.recycle();
    }


    @Override
    protected void onDraw(Canvas canvas) {
        super.onDraw(canvas);
        canvas.drawCircle(0,0,mSize,mPaint);
    }
}
activity.xml
<?xml version="1.0" encoding="utf-8"?>
<RelativeLayout xmlns:android="http://schemas.android.com/apk/res/android"
    xmlns:app="http://schemas.android.com/apk/res-auto"
    android:layout_width="match_parent"
    android:layout_height="match_parent"
    android:gravity="center"
    android:background="@color/colorAccent">

    <com.bobomee.android.attrstest.MyView
        android:layout_width="200dp"
        android:layout_height="200dp"
        android:background="@color/colorPrimary"
        android:textColor ="#00ffab"
        app:size="50dp" />
</RelativeLayout>
其中declare-styleable不是自定义View
android:textColor是内置属性,没有指定format
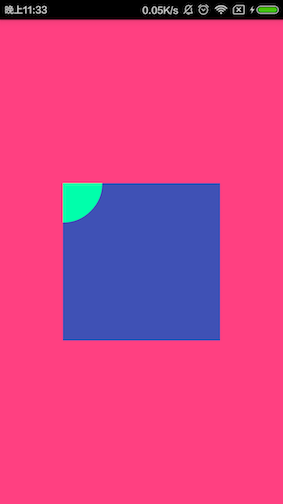
运行效果如下:
AttributeSet&&TypedArray
在自定义View中,除了第一个构造函数,都包含一个参数AttributeSet(View属性),可以通过它来获取属性,而不用TypedArray
  private void handleAttrs(Context context, AttributeSet attrs, int defStyleAttr) {
        //Retrieve styles attributes
//        TypedArray a = context.obtainStyledAttributes(attrs, R.styleable.test, defStyleAttr, 0);
//
//        int defaultSize = (int) TypedValue.applyDimension(TypedValue.COMPLEX_UNIT_SP, 20, context.getResources().getDisplayMetrics());
//        mSize = a.getDimension(R.styleable.test_size, defaultSize);
//
//        mBackGround = a.getColor(R.styleable.test_android_textColor, Color.WHITE);
//
//        mPaint = new Paint();
//        mPaint.setAntiAlias(true);
//        mPaint.setColor(mBackGround);

//        Log.d(T, "mSize = " + mSize + " , mBackGround = " + mBackGround);

        int count = attrs.getAttributeCount();
        for (int i = 0; i < count; i++) {
            String attrName = attrs.getAttributeName(i);
            String attrVal = attrs.getAttributeValue(i);
            Log.e(T, "attrName = " + attrName + " , attrVal = " + attrVal);
        }
    }


    @Override
    protected void onDraw(Canvas canvas) {
        super.onDraw(canvas);
//        canvas.drawCircle(0,0,mSize,mPaint);
    }
logcat信息:
01-25 23:45:04.989 16613-16613/com.bobomee.android.attrstest E/MyView: attrName = textColor , attrVal = #ff00ffab
01-25 23:45:04.989 16613-16613/com.bobomee.android.attrstest E/MyView: attrName = background , attrVal = @2131427347
01-25 23:45:04.989 16613-16613/com.bobomee.android.attrstest E/MyView: attrName = layout_width , attrVal = 200.0dip
01-25 23:45:04.989 16613-16613/com.bobomee.android.attrstest E/MyView: attrName = layout_height , attrVal = 200.0dip
01-25 23:45:04.989 16613-16613/com.bobomee.android.attrstest E/MyView: attrName = size , attrVal = 50.0dip
layout.xml
  <com.bobomee.android.attrstest.MyView
        android:layout_width="200dp"
        android:layout_height="200dp"
        android:background="@color/colorPrimary"
        android:textColor ="#00ffab"
app:size="50dp" />可见,background是一个ID:@2131427347,其他的都是实际值。
有了id,就可以通过id来得到具体值了。
修改代码如下:
dimens.xml
 <dimen name="width">200dp</dimen>
    <dimen name="height">200dp</dimen>
    <dimen name="size">50dp</dimen>
activity_main.xml
<com.bobomee.android.attrstest.MyView
        android:layout_width="@dimen/width"
        android:layout_height="@dimen/height"
        app:size="@dimen/size" />
MyView
int count = attrs.getAttributeCount();
        for (int i = 0; i < count; i++) {
            String attrName = attrs.getAttributeName(i);
            int resId = attrs.getAttributeResourceValue(i, 0);
            float attrVal = getResources().getDimension(resId);
            Log.e(T, "attrName = " + attrName + " , attrVal = " + attrVal);
        }
logcat信息:
01-26 00:21:14.189 28485-28485/com.bobomee.android.attrstest E/MyView: attrName = layout_width , attrVal = 400.0
01-26 00:21:14.189 28485-28485/com.bobomee.android.attrstest E/MyView: attrName = layout_height , attrVal = 400.0
01-26 00:21:14.189 28485-28485/com.bobomee.android.attrstest E/MyView: attrName = size , attrVal = 100.0
可以看到自定义属性值获取到了,可见TypedArray可以直接获取到引用类型的值,而不是id
declare-styleable
既然说attr不一定要定义在styleable中,那我么来尝试一下。
attr.xml
<?xml version="1.0" encoding="utf-8"?>
<resources>
    <!--<declare-styleable name="test">-->
        <attr name="size" format="dimension" />
        <!--<attr name="android:textColor" />-->
    <!--</declare-styleable>-->
</resources>
android:textColor如果不注釋掉,會報如下錯誤,也就是定义好的属性就可以直接使用了
Error:(3) Attribute "android:textColor" has already been definedlayout
 <com.bobomee.android.attrstest.MyView
        android:layout_width="@dimen/width"
        android:layout_height="@dimen/height"
        android:background="@color/colorPrimary"
        app:size="@dimen/size"
        android:textColor ="@color/textColor"
        android:textSize = "30sp"
        />
MyView
/**
 * Created by bobomee on 16/1/25.
 */
public class MyView extends View {

    String T = this.getClass().getSimpleName();

    private float mSize;
    private int mBackGround;
    private Paint mPaint;
    private float mTextSize;

    final int[] custom_attrs = {android.R.attr.textSize,android.R.attr.textColor,R.attr.size};
    final int TSIZE = 0;
    final int BACKGROUNG = 1;
    final int SIZE = 2;

    public MyView(Context context) {
        this(context, null);
    }

    public MyView(Context context, AttributeSet attrs) {
        this(context, attrs, 0);
    }

    public MyView(Context context, AttributeSet attrs, int defStyleAttr) {
        super(context, attrs, defStyleAttr);
        handleAttrs(context, attrs, defStyleAttr);
    }

    @TargetApi(Build.VERSION_CODES.LOLLIPOP)
    public MyView(Context context, AttributeSet attrs, int defStyleAttr, int defStyleRes) {
        super(context, attrs, defStyleAttr, defStyleRes);
        handleAttrs(context, attrs, defStyleAttr);
    }

    private void handleAttrs(Context context, AttributeSet attrs, int defStyleAttr) {
        //Retrieve styles attributes
//        TypedArray ta = context.obtainStyledAttributes(attrs, R.styleable.test, defStyleAttr, 0);
//
          int defaultSize = (int) TypedValue.applyDimension(TypedValue.COMPLEX_UNIT_SP, 20, context.getResources().getDisplayMetrics());
//        mSize = ta.getDimension(R.styleable.test_size, defaultSize);
//
//        mBackGround = ta.getColor(R.styleable.test_android_textColor, Color.WHITE);

        TypedArray ta = context.obtainStyledAttributes(attrs,custom_attrs);
        mSize = ta.getDimension(SIZE, defaultSize);
        mBackGround = ta.getColor(BACKGROUNG, Color.WHITE);
        mTextSize = ta.getDimension(TSIZE,defaultSize);

        mPaint = new Paint();
        mPaint.setAntiAlias(true);
        mPaint.setColor(mBackGround);

        Log.d(T, "mSize = " + mSize + " , mBackGround = " + mBackGround+ " , mTextSize = " + mTextSize);

//        int count = attrs.getAttributeCount();
//        for (int i = 0; i < count; i++) {
//            String attrName = attrs.getAttributeName(i);
//            int resId = attrs.getAttributeResourceValue(i, 0);
//            float attrVal = getResources().getDimension(resId);
//            Log.e(T, "attrName = " + attrName + " , attrVal = " + attrVal);
//        }

        ta.recycle();
    }


    @Override
    protected void onDraw(Canvas canvas) {
        super.onDraw(canvas);
        canvas.drawCircle(0, 0, mSize, mPaint);
    }
}
logcat
13541-13541/com.bobomee.android.attrstest D/MyView: mSize = 100.0 , mBackGround = -16711765 , mTextSize = 60.0運行效果同上圖
在这里我们定义了一个attr数组,这里需要注意的是android本身定义的attr,需要放在数组的前面,如果有多个android属性,角标和数组定义需要对应即可,不用管layout中定义的顺序。
如果按照传统的方式,我们到android自动生成的R文件下看一下,会发现
  public final class R {
        public static final class attr {
            public static final int size=0x7f010110;
        }
        public static final class styleable {
            public static final int[] test = {
                    0x01010095, 0x01010098, 0x7f010110
            };
            public static final int test_android_textColor = 1;
            public static final int test_android_textSize = 0;
            public static final int test_size = 2;
        }
    }
通过declare-styleable可以在R文件下自动生成一个attr id 的数组 和下标,此外declare-styleable可以将相关属性分组,方便管理,同时以自定义View的名称命名,可以方便找到。
总结
- 在android我们在attr下面申明属性,即可在R文件中生成相应的id,我们同时可以引用android定义好的attr属性。
- 通过declare-styleable,可以在R文件中生成一个相应的attr集合的数组和角标,方便获取和分组管理,可以不用声明
- TypedArray可以通过AttributeSet获取styleable数组中的自定义属性集合,从而获取属性值


 1424
1424


 被折叠的 条评论
为什么被折叠?
被折叠的 条评论
为什么被折叠?
 到【灌水乐园】发言


