


Android LayoutInflater 使用说明及原理介绍
在看了郭大神的博客之后,打算自己总结一下,加深一下印象,如有问题欢迎指正哦!
LayoutInflater 使用说明
LayoutInflater 主要用于加载布局,在Activity中我们可以直接用setContentView()来加载布局文件,因为setContentView()的内部也是使用LayoutInflater来加载布局的,只不过这部分源码是internal的,我们不容易看到而已。通常我们在用Fragment的时候会用LayoutInflater来加载布局文件。
那么到底LayoutInflater如何使用呢,下面就介绍一下它的使用步骤:
获取实例
获取LayoutInflater实例的方法有两种 :方式一:LayoutInflater layoutInflater = LayoutInflater.from(context);
方式二:LayoutInflater layoutInflater = (LayoutInflater) context
.getSystemService(Context.LAYOUT_INFLATER_SERVICE);
方式一其实是方式二的一种简单写法,Android为我们做了一下封装,内部的实现是一样的调用inflate方法
inflate()方法一般接收两个参数,第一个参数是要加载的布局的id;第二个参数是给该布局嵌套的父布局,如果不需要直接传null;调用inflate()方法之后得到一个View对象,显示出来就可以了。 当然inflate()方法还可以接收三个参数,参数一是要加载的布局id,参数二是给该布局嵌套的父布局(root),参数三是一个boolean值(attachToRoot),这个值的意义需要根据参数二来确定。 在不设置attachToRoot参数的情况下,如果root不为空,attachToRoot默认为true。
| root | attachToRoot |
|---|---|
| null | 失去作用,设置任何值都没有意义 |
| 不为null | true 会给加载的布局文件制定一个父布局,即root |
| 不为null | false 会将布局文件的最外层所有layout属性进行设置,当该view被添加到父view时,这些layout属性自动生效。 |
LayoutInflater原理介绍
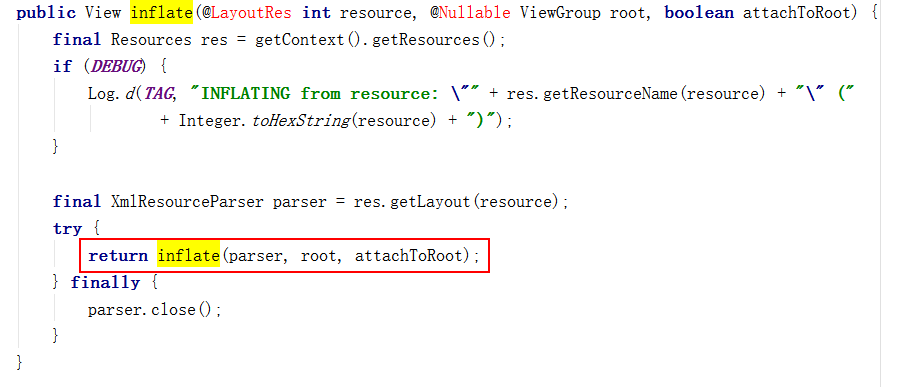
查看LayoutInflater的源码,我们可以发现无论我们调用的是inflate()的几个参数的方法,最后在内部都会调用如下代码
 public View inflate(XmlPullParser parser, @Nullable ViewGroup root, boolean attachToRoot) {
        synchronized (mConstructorArgs) {
            Trace.traceBegin(Trace.TRACE_TAG_VIEW, "inflate");

            final Context inflaterContext = mContext;
            final AttributeSet attrs = Xml.asAttributeSet(parser);
            Context lastContext = (Context) mConstructorArgs[0];
            mConstructorArgs[0] = inflaterContext;
            View result = root;

            try {
                // Look for the root node.
                int type;
                while ((type = parser.next()) != XmlPullParser.START_TAG &&
                        type != XmlPullParser.END_DOCUMENT) {
                    // Empty
                }

                if (type != XmlPullParser.START_TAG) {
                    throw new InflateException(parser.getPositionDescription()
                            + ": No start tag found!");
                }

                final String name = parser.getName();

                if (DEBUG) {
                    System.out.println("**************************");
                    System.out.println("Creating root view: "
                            + name);
                    System.out.println("**************************");
                }

                if (TAG_MERGE.equals(name)) {
                    if (root == null || !attachToRoot) {
                        throw new InflateException("<merge /> can be used only with a valid "
                                + "ViewGroup root and attachToRoot=true");
                    }

                    rInflate(parser, root, inflaterContext, attrs, false);
                } else {
                    // Temp is the root view that was found in the xml
                    final View temp = createViewFromTag(root, name, inflaterContext, attrs);

                    ViewGroup.LayoutParams params = null;

                    if (root != null) {
                        if (DEBUG) {
                            System.out.println("Creating params from root: " +
                                    root);
                        }
                        // Create layout params that match root, if supplied
                        params = root.generateLayoutParams(attrs);
                        if (!attachToRoot) {
                            // Set the layout params for temp if we are not
                            // attaching. (If we are, we use addView, below)
                            temp.setLayoutParams(params);
                        }
                    }

                    if (DEBUG) {
                        System.out.println("-----> start inflating children");
                    }

                    // Inflate all children under temp against its context.
                    rInflateChildren(parser, temp, attrs, true);

                    if (DEBUG) {
                        System.out.println("-----> done inflating children");
                    }

                    // We are supposed to attach all the views we found (int temp)
                    // to root. Do that now.
                    if (root != null && attachToRoot) {
                        root.addView(temp, params);
                    }

                    // Decide whether to return the root that was passed in or the
                    // top view found in xml.
                    if (root == null || !attachToRoot) {
                        result = temp;
                    }
                }

            } catch (XmlPullParserException e) {
                InflateException ex = new InflateException(e.getMessage());
                ex.initCause(e);
                throw ex;
            } catch (Exception e) {
                InflateException ex = new InflateException(
                        parser.getPositionDescription()
                                + ": " + e.getMessage());
                ex.initCause(e);
                throw ex;
            } finally {
                // Don't retain static reference on context.
                mConstructorArgs[0] = lastContext;
                mConstructorArgs[1] = null;
            }

            Trace.traceEnd(Trace.TRACE_TAG_VIEW);

            return result;
        }
    }
从上面的源码中不难看出,LayoutInflater是使用Android系统提供的pull解析方式来解析xml布局的(Android xml解析详解),其中createViewFromTag()方法,传入节点名和参数,根据节点名创建view对象,然后再createViewFromTag()内部又调用了createView()方法,使用反射的方式创建出view的对象并返回,这里只是创建除了一个跟布局,随后调用rInflate()方法循环遍历跟布局下的子元素。


 1394
1394


 被折叠的 条评论
为什么被折叠?
被折叠的 条评论
为什么被折叠?
 到【灌水乐园】发言


