


onMeasure()方法的作用就是测量View需要多大的空间,就是宽和高。
大家可能会有这样的疑问。就是我在xml文件中已经指定好了某个View宽高尺寸了,那么自定义View时不就没有必要再次获取宽高并设置宽高吗?onMeasure方法不就没有了吗?
其实不然,我们就知道,在xml布局文件中,我们的layout_width和layout_height参数可以不用写具体的尺寸,而是wrap_content或者是match_parent。其意思我们都知道,就是将尺寸设置为“包住内容”和“填充父布局给我们的所有空间”。这两个设置并没有指定View的真正大小,可是我们绘制到屏幕上的View必须是要有具体的宽高的,正是因为这个原因,我们必须自己去处理和设置尺寸。当然了,View类给了默认的处理,但是如果View类的默认处理不满足我们的要求,我们就得重写onMeasure函数。
一.View类的默认处理
布局文件
<RelativeLayout xmlns:android="http://schemas.android.com/apk/res/android"
    xmlns:tools="http://schemas.android.com/tools"
    android:layout_width="match_parent"
    android:layout_height="match_parent" >


    <com.example.eventbusdemo.MyView
        android:layout_width="match_parent"
        android:layout_height="match_parent"
        android:background="#FFFF77" />

</RelativeLayout>
自定义View (onMeasure方法没有任何操作)
public class MyView extends View {


    //构造方法1
    public MyView(Context context) {
        super(context);
    }


    //构造方法2
    public MyView(Context context, AttributeSet attrs) {
        super(context, attrs);
    }


    //构造方法3
    public MyView(Context context, AttributeSet attrs, int defStyleAttr) {
        super(context, attrs, defStyleAttr);
    }


    @Override
    protected void onMeasure(int widthMeasureSpec, int heightMeasureSpec) {
        super.onMeasure(widthMeasureSpec, heightMeasureSpec);
    }

}
效果

即:全屏
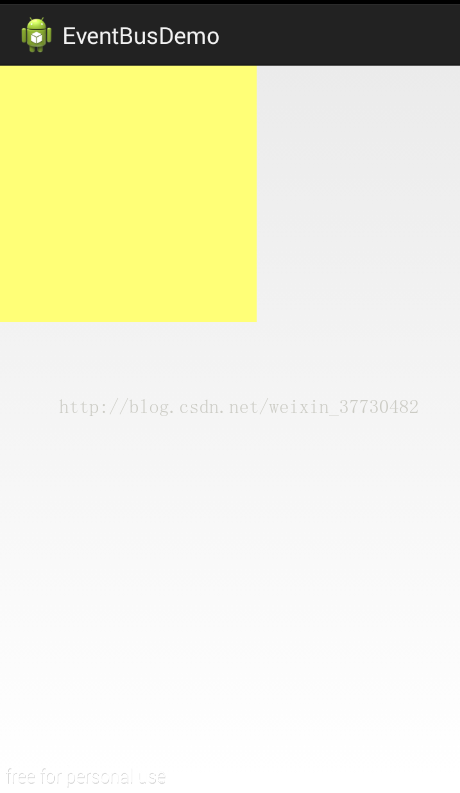
当xml为
<RelativeLayout xmlns:android="http://schemas.android.com/apk/res/android"
    xmlns:tools="http://schemas.android.com/tools"
    android:layout_width="match_parent"
    android:layout_height="match_parent" >

    <com.example.eventbusdemo.MyView
        android:layout_width="wrap_content"
        android:layout_height="wrap_content"
        android:background="#FFFF77" />

</RelativeLayout>
运行结果

即:全屏
当xml为
<RelativeLayout xmlns:android="http://schemas.android.com/apk/res/android"
    xmlns:tools="http://schemas.android.com/tools"
    android:layout_width="match_parent"
    android:layout_height="match_parent" >

    <com.example.eventbusdemo.MyView
        android:layout_width="200dp"
        android:layout_height="200dp"
        android:background="#FFFF77" />

</RelativeLayout>
运行结果
由此可以得一下结论
<1> View默认的测量规则是当android:layout_width和android:layout_height为match_parent或者wrap_content时,是填充全屏的。
<2> android:layout_width和android:layout_height设置为具体值时,那么是多少,宽高就是多少。
二.onMeasure方法模式以及大小
onMeasure方法
@Override
protected void onMeasure(int widthMeasureSpec, int heightMeasureSpec) {
    super.onMeasure(widthMeasureSpec, heightMeasureSpec);
}
参数中的widthMeasureSpec和heightMeasureSpec看起来很像width和height,没错,这两个参数就是包含宽和高的信息。
但和传统的宽高不同,即widthMeasureSpec和heightMeasureSpec不仅包含宽高还包含测量模式。也就是说,一个int整数,里面放了测量模式和尺寸大小。
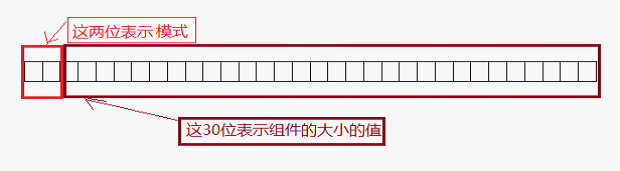
那么一个数怎么放两个信息呢?我们知道,我们在设置宽高时有3个选择:wrap_content、match_parent以及指定固定尺寸。而测量模式也有3种:UNSPECIFIED(未指明的),EXACTLY(完全),AT_MOST(最多),当然,他们并不是一一对应关系。但测量模式无非就是这3种情况,我们知道int型数据占用32个bit,而google实现的是,将int数据的前面2个bit用于区分不同的布局模式,后面30个bit存放的是尺寸的数据。
三种测量模式及其 含义:如下
<1> 精确模式 MeasureSpec.EXACTLY
在这种模式下,尺寸的值是多少,那么这个组件的长或宽就是多少。
<2> 最大模式 MeasureSpec.AT_MOST
这个也就是父组件,能够给出的最大的空间,当前组件的长或宽最大只能为这么大,当然也可以比这个小。
<3> 未指定模式 MeasureSpec.UNSPECIFIED
这个就是说,当前组件,可以随便用空间,不受限制。
可能有很多人想不通,一个int型整数怎么可以表示两个东西(大小模式和大小的值),一个int类型我们知道有32位。而模式有三种,要表示三种状态,至少得2位二进制位。于是系统采用了最高的2位表示模式。如图:
最高两位是00的时候表示"未指定模式"。即MeasureSpec.UNSPECIFIED
最高两位是01的时候表示"'精确模式"。即MeasureSpec.EXACTLY
最高两位是11的时候表示"最大模式"。即MeasureSpec.AT_MOST
测量模式跟我们的布局时的wrap_content、match_parent以及写成固定的尺寸有什么对应关系呢
match_parent--->UNSPECIFIED(未指定):match_parent就是要利用父View给我们提供的所有剩余空间,而父View剩余空间是确定的,也就是这个测量模式的整数里面存放的尺寸。
wrap_content--->AT_MOST(最大):就是我们想要将大小设置为包裹我们的view内容,那么尺寸大小就是父View给我们作为参考的尺寸,只要不超过这个尺寸就可以啦,具体尺寸就根据我们的需求去设定。
固定尺寸(100*200)--->EXACTLY(精准):用户自己指定了尺寸大小,我们就不用再去干涉了,以指定的大小为主。
至于如何从int数据中提取测量模式和尺寸 Android内置类MeasureSpec帮我们写好。
//宽度的测量模式
int widthMode = MeasureSpec.getMode(widthMeasureSpec);
//宽度
int widthSize = MeasureSpec.getSize(widthMeasureSpec);


//高度的测量模式
int heightMode = MeasureSpec.getMode(heightMeasureSpec);
//高度
int heightSize = MeasureSpec.getSize(heightMeasureSpec);
三.代码实践
1.自定义View,通过Measure方法得到一个正方形
自定义View类
public class SquareView extends View {

    public SquareView(Context context) {
        super(context);
    }

    public SquareView(Context context, AttributeSet attrs) {
        super(context, attrs);
    }

    @Override
    protected void onMeasure(int widthMeasureSpec, int heightMeasureSpec) {
        super.onMeasure(widthMeasureSpec, heightMeasureSpec);
        int width = getRealSize(100, widthMeasureSpec);
        int height = getRealSize(100, heightMeasureSpec);
        int size = Math.min(width, height);
        setMeasuredDimension(size, size);
    }

    private int getRealSize(int defaultSize, int measureSpec) {
        int size;
        int mode = MeasureSpec.getMode(measureSpec);
        int realSize = MeasureSpec.getSize(measureSpec);
        switch (mode) {
            //未定义的 父View不限制子View大小
            case MeasureSpec.EXACTLY://完全  即算出的宽高就是View的宽高
            case MeasureSpec.AT_MOST://最多 即子View最宽最高就是算出来的宽高
                size = realSize;
                break;
            default:
                size = defaultSize;
                break;
        }
        return size;
    }

}
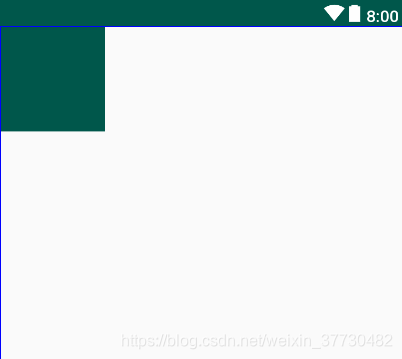
布局
<?xml version="1.0" encoding="utf-8"?>
<LinearLayout xmlns:android="http://schemas.android.com/apk/res/android"
    xmlns:myviewssss="http://schemas.android.com/apk/res-auto"
    android:layout_width="match_parent"
    android:layout_height="match_parent"
    android:orientation="vertical">

    <com.wjn.myview.view.SquareView
        android:layout_width="match_parent"
        android:layout_height="100dp"
        android:background="@color/colorPrimaryDark" />


</LinearLayout>
效果
2.ScrollView嵌套ListView问题
项目中遇到过ScrollView嵌套ListView问题,解决冲突。方法如下:
@Override
protected void onMeasure(int widthMeasureSpec, int heightMeasureSpec) {
   int expandSpec= MeasureSpec.makeMeasureSpec(Integer.MAX_VALUE >> 2, View.MeasureSpec.AT_MOST);
   super.onMeasure(widthMeasureSpec, expandSpec);
}
int expandSpec= MeasureSpec.makeMeasureSpec(Integer.MAX_VALUE >> 2, View.MeasureSpec.AT_MOST);
makeMeasureSpec方法源码:
public static int makeMeasureSpec(@IntRange(from = 0, to = (1 << MeasureSpec.MODE_SHIFT) - 1) int size,@MeasureSpecMode int mode) {
    if (sUseBrokenMakeMeasureSpec) {
        return size + mode;
    } else {
        return (size & ~MODE_MASK) | (mode & MODE_MASK);
    }
}
sUseBrokenMakeMeasureSpec 布尔值操作:
sUseBrokenMakeMeasureSpec = targetSdkVersion <= Build.VERSION_CODES.JELLY_BEAN_MR1;即项目中配置的目标版本是否低于17。
MODE_MASK:
private static final int MODE_MASK = 0x3 << MODE_SHIFT;expandSpec:-1610612737
总结:MeasureSpec静态类 常用的三个静态方法
<1> MeasureSpec.getMode(widthMeasureSpec):获取Mode。
<2> MeasureSpec.getSize(widthMeasureSpec):获取大小。
<3> MeasureSpec.makeMeasureSpec(Integer.MAX_VALUE >> 2, View.MeasureSpec.AT_MOST):嵌套时使用。
这个是由我们给出的尺寸大小和模式生成一个包含这两个信息的int变量。
3.自定义ViewGroup
如果是一个ViewGroup,重写onMeasure时要注意首先,结合上面所述,来测量自身的宽高。
测量父类
方法1:
int measureWidth = MeasureSpec.getSize(widthMeasureSpec);
int measureHeight = MeasureSpec.getSize(heightMeasureSpec);
setMeasuredDimension(measureWidth, measureHeight);
方法2:
super.onMeasure(widthMeasureSpec, heightMeasureSpec);
然后,需要测量子View的宽高。
自定义ViewGroup常用方法
<1> 方法:getChildAt(int index)
作用:拿到index上的子view。
<2> 方法:getChildCount()
作用:子view的数目
<3> 方法: measureChild(subView, int wSpec, int hSpec);
作用:某一个子view,多宽,多高, 内部加上了viewGroup的padding值。
<4> 方法:measureChildren(int wSpec, int hSpec);
作用:所有子view 都是 多宽,多高, 内部调用了measureChild方法。
<5> 方法:measureChildWithMargins(subView, intwSpec, int wUsed, int hSpec, int hUsed);
作用:某一个子view,多宽,多高, 内部加上了viewGroup的padding值、margin值和传入的宽高wUsed、hUsed


 1640
1640


 被折叠的 条评论
为什么被折叠?
被折叠的 条评论
为什么被折叠?
 到【灌水乐园】发言


