


iOS中左右滑动切换,滑动标签页导航的设计思路
iOS开发中经常(几乎每个APP都含有这样的页面吧,几乎!UI设计师也都是这样抄来抄去…..)
demo见Github:https://github.com/zhengwenming/SliderTab
估计很多人都会说,直接用第三方就可以了,很多人封装过,很好用。而且这样的页面用第三方2分钟搞定,省时省力。
笔者也曾用过第三方,但是屡屡出bug。而且不好修改。所以只能自己写,bug少,代码通俗易懂,童叟无欺。
这里介绍一个第三方DLSlideView,Github地址:
https://github.com/agdsdl/DLSlideView,目前达到200多个star。但是中间出了一次bug,说是tableView左滑动删除有问题,后来这个原作者更新了版本,修复了这个bug。但是我使用的过程中又发现一个新bug,就是里面放UIScrollView的时候也有问题。
所以此文章不对代码进行封装,仅提供思路和代码。这样才能真正适配光大开发者(授之以鱼不如授之以渔),因为笔者认为每个页面都有不同,我们需要掌握思路,这样万变不离其宗,任何复杂的UI页面都可以用这个思路去写出来。下面我们来实现这样的一个比较时髦的效果,在导航上面加三个tab(其实就是三个button),支持手势切换,支持点击tab切换。
1.理论分析。
先观察这个效果图,三个UIButton和一个滑动的UILabel,UILabel给一个动画,让他的frame跟随某一个UIButton就可以了。至于跟踪哪个UIButton,当然是点击到的那个UIButton了,那么没点击只是滑动怎么办?UIScrollView的代理里面获取当前获得焦点的UIButton就可以了。三个UIButton分别对应不同的页面,每个页面可能逻辑很多很复杂,这样的话如果写在一个VC里面就显得臃肿了,我们要想办法分离代码,易于维护,并把逻辑分离,这样的话,就要对应3个ViewController。既然支持手势滑动,我们想到的就是UIScrollView,它有分页效果,很6 很87。我们可以把三个vc中的view拿出来,分别贴到UIScrollView上面去(就是addSubView)。理论到此完毕,下面上代码。
2.代码实现。
我们要在HomeViewController里面放一个UIScrollView,然后初始化三个VC,分别拿到三个VC.view,最后把VC.view贴到UIScrollView上面,实现UIScrollView的分页滑动。
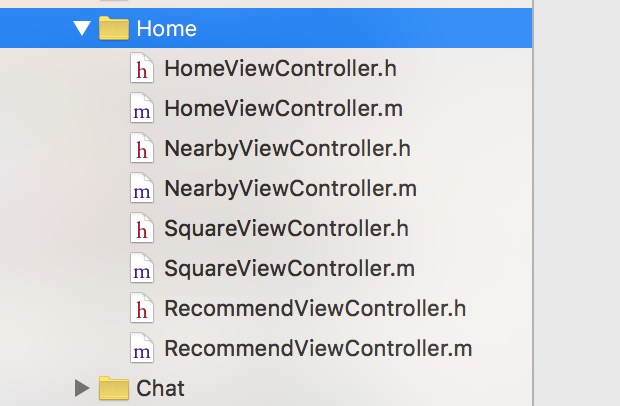
#import "HomeViewController.h"
#import "NearbyViewController.h"
#import "SquareViewController.h"
#import "RecommendViewController.h"

@interface HomeViewController ()<UIActionSheetDelegate,UIScrollViewDelegate>{
UIBarButtonItem *leftButton;
NearbyViewController *nearbyVC;
SquareViewController *squareVC;
RecommendViewController *recommendVC;
UIScrollView *mainScrollView;
UIView *navView;
UILabel *sliderLabel;
UIButton *nearbyBtn;
UIButton *squareBtn;
UIButton *recommendBtn;
}

@end

@implementation HomeViewController

//懒加载三个VC
-(NearbyViewController *)nearbyVC{
if (nearbyVC==nil) {
        nearbyVC = [[NearbyViewController alloc]init];
}
return nearbyVC;
}

-(SquareViewController *)squareVC{
if (squareVC==nil) {
    squareVC = [[SquareViewController alloc]init];

}
return squareVC;
}


-(RecommendViewController *)recommendVC{
if (recommendVC==nil) {
    recommendVC = [[RecommendViewController alloc]init];

}
return  recommendVC;
}
//初始化三个UIBtton和一个滑动的UILabel,命名为sliderLabel,三个btn放倒一个UIView上面navView。
-(void)initUI{
 navView = [[UIView alloc]initWithFrame:CGRectMake(0, 0, kScreenWidth, 40)];
nearbyBtn = [UIButton buttonWithType:UIButtonTypeCustom];
nearbyBtn.frame = CGRectMake(0, 0, kScreenWidth/4, navView.frame.size.height);
nearbyBtn.titleLabel.font = [UIFont boldSystemFontOfSize:19];
[nearbyBtn addTarget:self action:@selector(sliderAction:) forControlEvents:UIControlEventTouchUpInside];
[nearbyBtn setTitle:@"附近" forState:UIControlStateNormal];
nearbyBtn.tag = 1;
[navView addSubview:nearbyBtn];


squareBtn = [UIButton buttonWithType:UIButtonTypeCustom];
squareBtn.frame = CGRectMake(nearbyBtn.frame.origin.x+nearbyBtn.frame.size.width, nearbyBtn.frame.origin.y, kScreenWidth/4, navView.frame.size.height);
squareBtn.titleLabel.font = [UIFont systemFontOfSize:16];
[squareBtn addTarget:self action:@selector(sliderAction:) forControlEvents:UIControlEventTouchUpInside];
[squareBtn setTitle:@"广场" forState:UIControlStateNormal];
squareBtn.tag = 2;
[navView addSubview:squareBtn];


recommendBtn = [UIButton buttonWithType:UIButtonTypeCustom];
recommendBtn.frame = CGRectMake(squareBtn.frame.origin.x+squareBtn.frame.size.width, squareBtn.frame.origin.y, kScreenWidth/4, navView.frame.size.height);
recommendBtn.titleLabel.font = [UIFont systemFontOfSize:16];
[recommendBtn addTarget:self action:@selector(sliderAction:) forControlEvents:UIControlEventTouchUpInside];
[recommendBtn setTitle:@"推荐" forState:UIControlStateNormal];
recommendBtn.tag = 3;
[navView addSubview:recommendBtn];


sliderLabel = [[UILabel alloc]initWithFrame:CGRectMake(0, 40-2, kScreenWidth/4, 4)];
sliderLabel.backgroundColor = kBackgroundColor;
[navView addSubview:sliderLabel];
self.navigationItem.titleView = navView;
leftButton = [[UIBarButtonItem alloc]initWithTitle:@"筛选" style:UIBarButtonItemStylePlain target:self action:@selector(leftBarButtonItemPressed:)];
leftButton.tintColor = [UIColor whiteColor];
self.navigationItem.leftBarButtonItem = leftButton;

}

-(UIButton *)theSeletedBtn{
if (nearbyBtn.selected) {
    return nearbyBtn;
}else if (squareBtn.selected){
    return squareBtn;
}else if (recommendBtn.selected){
    return recommendBtn;
}else{
    return nil;
    }
}


- (void)viewDidLoad {
[super viewDidLoad];
[self initUI];
[self setMainScrollView];
}
    //初始化UIScrollView
-(void)setMainScrollView{
mainScrollView = [[UIScrollView alloc]initWithFrame:CGRectMake(0, 0, kScreenWidth, kScreenHeight-kTabBarHeight)];
mainScrollView.delegate = self;
mainScrollView.backgroundColor = [UIColor whiteColor];
mainScrollView.pagingEnabled = YES;
mainScrollView.showsHorizontalScrollIndicator = NO;
mainScrollView.showsVerticalScrollIndicator = NO;
[self.view addSubview:mainScrollView];
NSArray *views = @[self.nearbyVC.view, self.squareVC.view,self.recommendVC.view];
for (int i = 0; i < views.count; i++){
    //添加背景,把三个VC的view贴到mainScrollView上面
    UIView *pageView = [[UIView alloc]initWithFrame:CGRectMake(kScreenWidth * i, 0, mainScrollView.frame.size.width, mainScrollView.frame.size.height)];
    [pageView addSubview:views[i]];
    [mainScrollView addSubview:pageView];
}
mainScrollView.contentSize = CGSizeMake(kScreenWidth * (views.count), 0);
}
-(UIButton *)buttonWithTag:(NSInteger)tag{
if (tag==1) {
    return nearbyBtn;
}else if (tag==2){
    return squareBtn;
}else if (tag==3){
    return recommendBtn;
}else{
    return nil;
}
}
-(void)sliderAction:(UIButton *)sender{
[self sliderAnimationWithTag:sender.tag];
[UIView animateWithDuration:0.3 animations:^{
    mainScrollView.contentOffset = CGPointMake(kScreenWidth * (sender.tag - 1), 0);
} completion:^(BOOL finished) {

}];

}
-(void)scrollViewDidScroll:(UIScrollView *)scrollView{
double index_ = scrollView.contentOffset.x / kScreenWidth;
[self sliderAnimationWithTag:(int)(index_+0.5)+1];
}
#pragma mark - sliderLabel滑动动画
- (void)sliderAnimationWithTag:(NSInteger)tag{
nearbyBtn.selected = NO;
squareBtn.selected = NO;
recommendBtn.selected = NO;
UIButton *sender = [self buttonWithTag:tag];
sender.selected = YES;
//动画
[UIView animateWithDuration:0.3 animations:^{
    sliderLabel.frame = CGRectMake(sender.frame.origin.x, sliderLabel.frame.origin.y, sliderLabel.frame.size.width, sliderLabel.frame.size.height);

} completion:^(BOOL finished) {
    nearbyBtn.titleLabel.font = [UIFont systemFontOfSize:16];
    squareBtn.titleLabel.font = [UIFont systemFontOfSize:16];
    recommendBtn.titleLabel.font = [UIFont systemFontOfSize:16];

    sender.titleLabel.font = [UIFont boldSystemFontOfSize:19];
}];

}

@end
好,思路和代码都有了。可以自己去实现了,真的不难,真的不需要用第三方。其实我本可以封装一个给大家用的,但是我没有封装,目的是让每个iOS都能对付UI设计师的这样的页面设计!!
最后欢迎大家关注文明的iOS开发公众号:
方式1、搜索:“iOS开发by文明”
方式2、扫描下方二维码

另外博主维护一个iOS开发技术支持群:


 1057
1057


 被折叠的 条评论
为什么被折叠?
被折叠的 条评论
为什么被折叠?
 到【灌水乐园】发言


