


前言:
写了几篇博文,说实话自己很不满意,都觉得很空洞,写的也不是很好,只能硬着头皮继续写,写多了希望能好些,这一系列都是基础+练手系列,大神无视,不管怎么样,希望能对大家有点帮助吧。
本系列主要是介绍一些使用绘制view方式来自定义view实现的一些效果,很多是我之前学别人实现的一些效果,作为基础入门篇。
概要:
记得之前学习hy大神的博文,大神说自定义VIew三大步骤:
1)自定义View的属性;
2)在构造方法中获取到属性;
3)重写onMeasure,onDraw,onLayout方法。
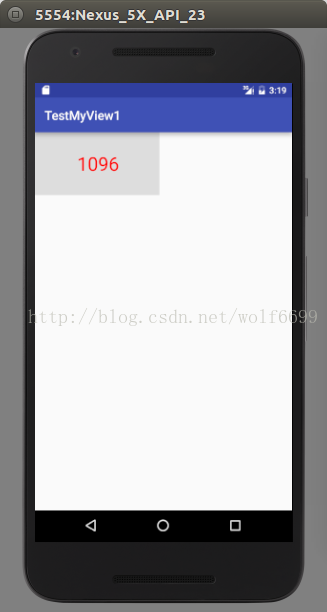
我一直秉承着大神的意志学习前进着,觉得还是蛮有用的,至少不会无从下手。本文将实现一个类似点击随机生成验证码的效果,比较简单。效果如图:
正文:
首先分析下我们会用到的属性,这里需要用到按钮背景色,文字颜色,字体大小。现在我们开始自定义属性,在values文件夹下创建一个attrs.xml文件,在里面定义我们的属性,声明我们的样式。
<?xml version="1.0" encoding="utf-8"?>
<resources>
    <declare-styleable name="MyViewAttrs">
        <attr name="bgColor" format="color">#dddddd</attr>
        <attr name="textColor" format="color">#ff0000</attr>
        <attr name="textSize" format="dimension">30</attr>
    </declare-styleable>
</resources>现在声明自定义View,在布局文件中引入自定义View。
<?xml version="1.0" encoding="utf-8"?>
<RelativeLayout xmlns:android="http://schemas.android.com/apk/res/android"
    xmlns:custom="http://schemas.android.com/apk/res/com.example.liujibin.testmyview1"
    xmlns:tools="http://schemas.android.com/tools"
    android:layout_width="match_parent"
    android:layout_height="match_parent"
    tools:context="com.example.liujibin.testmyview1.MainActivity">

    <com.example.liujibin.testmyview1.MyView
        android:layout_width="wrap_content"
        android:layout_height="wrap_content" />

</RelativeLayout>
public class MyView extends View {

    //背景色
    private int bgColor;
    //文字色
    private int textColor;
    //文字大小
    private int textSize;

    public MyView(Context context) {
        this(context,null);
    }

    public MyView(Context context, AttributeSet attrs) {
        this(context, attrs,0);
    }

    public MyView(Context context, AttributeSet attrs, int defStyleAttr) {
        super(context, attrs, defStyleAttr);

        TypedArray ta = context.obtainStyledAttributes(attrs,R.styleable.MyViewAttrs,defStyleAttr,0);
        bgColor = ta.getColor(R.styleable.MyViewAttrs_bgColor, Color.BLACK);
        textColor = ta.getColor(R.styleable.MyViewAttrs_textColor,Color.WHITE);
        textSize = ta.getDimensionPixelSize(R.styleable.MyViewAttrs_textSize,30);
        ta.recycle();

    }

}然后重写onMeasure,onDraw,这里用不到onLayout。绘制View,还需要画笔(Paint)和画布(Canvas),画布在onDraw中有封装,直接用就好了,我们自己创建一个Paint对象。因为要在指定区域内绘制文字,所以我们还需要创建Rect对象,在构造函数中实例化,不要在onDraw中实例化。
private Paint paint;

private Rect r;
paint = new Paint();
r = new Rect();@Override
protected void onDraw(Canvas canvas) {
super.onDraw(canvas);
//绘制矩形区域
paint.setColor(bgColor);
paint.setStrokeWidth(3);
paint.setAntiAlias(true);
canvas.drawRect(0,0,getMeasuredWidth(),getMeasuredHeight(),paint);
}效果如图:
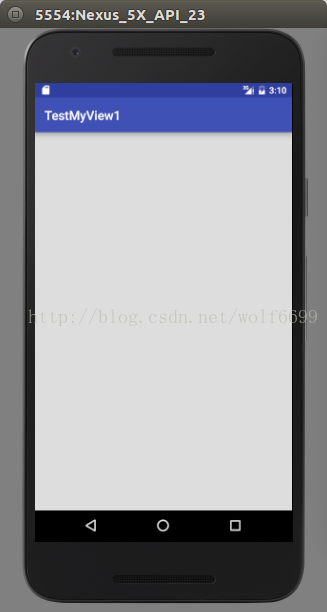
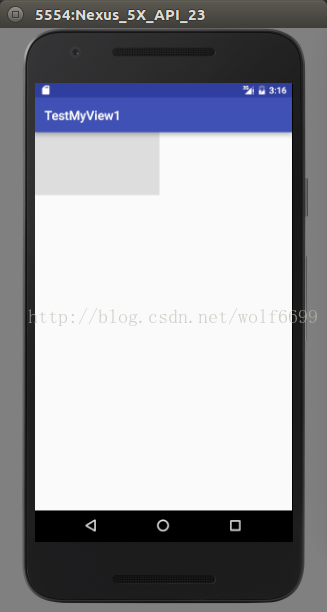
我们发现这个区域是全屏的,我们不需要这么大,只需要按钮大小,此时就需要用到onMeasure了。根据模式设置默认大小。
@Override
protected void onMeasure(int widthMeasureSpec, int heightMeasureSpec) {
super.onMeasure(widthMeasureSpec, heightMeasureSpec);
int widthMode = MeasureSpec.getMode(widthMeasureSpec);
int widthSize = MeasureSpec.getSize(widthMeasureSpec);
int heightMode = MeasureSpec.getMode(heightMeasureSpec);
int heightSize = MeasureSpec.getSize(heightMeasureSpec);
if(widthMode == MeasureSpec.EXACTLY){
}else{
widthSize = (int)TypedValue.applyDimension(TypedValue.COMPLEX_UNIT_DIP,300,getResources().getDisplayMetrics());
}
if(heightMode == MeasureSpec.EXACTLY){
}else{
heightSize = (int)TypedValue.applyDimension(TypedValue.COMPLEX_UNIT_DIP,200,getResources().getDisplayMetrics());
}
setMeasuredDimension(widthSize,heightSize);
}
然后我们需要给画笔设置文字,设置字体,获取文字的宽高。
private String str = "4232";//获取文字宽高,绘制文字
paint.setTextSize(textSize);
paint.setColor(textColor);
paint.getTextBounds(str,0,str.length(),r);
canvas.drawText(str,getWidth()/2-r.width()/2,getHeight()/2+r.height()/2,paint);
下面需要实现点击变化文字,实现View的点击事件,我们这里取四位随机数,然后点击后设置给绘制的字符串。

//生成随机字符串
private String changeText(){
Random random = new Random();
String num = "";
for(int i = 0;i < 4;i++){
num = num + random.nextInt(10);
}
return num;
}附上全部View的代码:
public class MyView extends View implements View.OnClickListener{
//背景色
private int bgColor;
//文字色
private int textColor;
//文字大小
private int textSize;
private Paint paint;
private Rect r;
private String str = "4232";
public MyView(Context context) {
this(context,null);
}
public MyView(Context context, AttributeSet attrs) {
this(context, attrs,0);
}
public MyView(Context context, AttributeSet attrs, int defStyleAttr) {
super(context, attrs, defStyleAttr);
TypedArray ta = context.obtainStyledAttributes(attrs,R.styleable.MyViewAttrs,defStyleAttr,0);
bgColor = ta.getColor(R.styleable.MyViewAttrs_bgColor, Color.BLACK);
textColor = ta.getColor(R.styleable.MyViewAttrs_textColor,Color.WHITE);
textSize = ta.getDimensionPixelSize(R.styleable.MyViewAttrs_textSize,(int) TypedValue.applyDimension(TypedValue.COMPLEX_UNIT_SP,
30,getResources().getDisplayMetrics()));
ta.recycle();
setOnClickListener(this);
paint = new Paint();
r = new Rect();
}
@Override
protected void onMeasure(int widthMeasureSpec, int heightMeasureSpec) {
super.onMeasure(widthMeasureSpec, heightMeasureSpec);
int widthMode = MeasureSpec.getMode(widthMeasureSpec);
int widthSize = MeasureSpec.getSize(widthMeasureSpec);
int heightMode = MeasureSpec.getMode(heightMeasureSpec);
int heightSize = MeasureSpec.getSize(heightMeasureSpec);
if(widthMode == MeasureSpec.EXACTLY){
}else{
widthSize = (int)TypedValue.applyDimension(TypedValue.COMPLEX_UNIT_DIP,200,getResources().getDisplayMetrics());
}
if(heightMode == MeasureSpec.EXACTLY){
}else{
heightSize = (int)TypedValue.applyDimension(TypedValue.COMPLEX_UNIT_DIP,100,getResources().getDisplayMetrics());
}
setMeasuredDimension(widthSize,heightSize);
}
@Override
protected void onDraw(Canvas canvas) {
super.onDraw(canvas);
//绘制矩形区域
paint.setColor(bgColor);
paint.setStrokeWidth(3);
paint.setAntiAlias(true);
canvas.drawRect(0,0,getMeasuredWidth(),getMeasuredHeight(),paint);
//获取文字宽高,绘制文字
paint.setTextSize(textSize);
paint.setColor(textColor);
paint.getTextBounds(str,0,str.length(),r);
canvas.drawText(str,getWidth()/2-r.width()/2,getHeight()/2+r.height()/2,paint);
}
//生成随机字符串
    private String changeText(){

        Random random = new Random();
        String num = "";
        for(int i = 0;i < 4;i++){
            num = num + random.nextInt(10);
        }

        return num;
    }
@Override
public void onClick(View view) {
str = changeText();
invalidate();
}
}


 1万+
1万+


 被折叠的 条评论
为什么被折叠?
被折叠的 条评论
为什么被折叠?
 到【灌水乐园】发言


