


Button
类结构图:
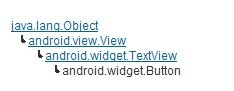
由类结构图,可以看出Button是继承于TextView的,所以TextView的一些属性也适用于Button控件。对于Button控件,相信大多数开发人员是再熟悉不过了,那么废话不多说,直接应用实践吧
实践演练:
1、 如何设置按钮的样式?
通过Android:background设置
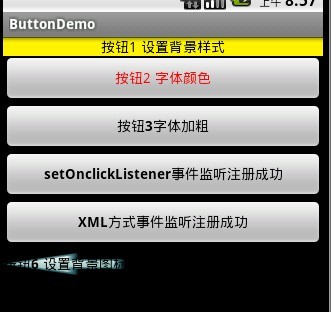
 <Button android:id="@+id/myBtn1" android:text="按钮1 设置背景样式"

      android:layout_width="fill_parent" android:layout_height="wrap_content"

      android:background="#fff000" />
2、如何设置背景图标:
<Button android:id="@+id/myBtn6" android:text="按钮6 设置背景图标"

      android:layout_width="wrap_content" android:layout_height="wrap_content"

      android:textStyle="bold" android:background="@drawable/back_48"

       />
3、 如何设置按钮的文字颜色
通过Android:textColor
 <Button android:id="@+id/myBtn2" android:text="按钮2 字体颜色"

      android:layout_width="fill_parent" android:layout_height="wrap_content"

      android:textColor="#ff0000" />
4、 如何设置按钮的文字样式
通过android:textStyle
 <Button android:id="@+id/myBtn3" android:text="按钮3字体加粗"

      android:layout_width="fill_parent" android:layout_height="wrap_content"

      android:textColor="#ff0000" android:textStyle="bold" />
5、 如何为按钮添加监听器注册事件
方式1:通过setOnClickListener方式
myBtn4.setOnClickListener(new OnClickListener() {


                     @Override

                     public void onClick(View v) {

                            myBtn4.setText("setOnclickListener事件监听注册成功");


                     }

              });
方式2:通过XML文件的Android:onClick指定方法
<Button android:id="@+id/myBtn4" android:text="按钮4 通过setOnclickListener注册监听事件"

      android:layout_width="fill_parent" android:layout_height="wrap_content"

      android:textStyle="bold" android:onClick="selfDestruct" />
指定了sefDestrut
所以在Activity写上一个这样的方法就可以了
public void selfDestruct(View v) {


      myBtn5.setText("XML方式事件监听注册成功");

      System.out.println("------view v--------");


   }
上面的综合例子效果图为:
ImageButton
类结构图:

ImageButton就是用一个图标代表了一些文字,它没Android:text属性。它由Android:src指定图标的位置
android:src="@drawable/back_48"
其他属性都和Button差不多
实践演练:
1、 怎么样设置ImageButton的图标位置
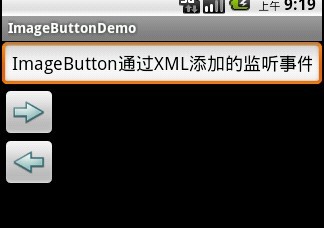
   <ImageButton android:id="@+id/imgBtn01" android:src="@drawable/forward_48"

      android:layout_width="wrap_content" android:layout_height="wrap_content" />
2、 怎么样为ImageButton添加监听器注册事件
与Button一样它照样有两种方式设置
方式1:通过onClickListener
imgBtn01.setOnClickListener(new OnClickListener() {


        @Override

        public void onClick(View v) {


           myTextView.setText("ImageButton的监听事件");

        }

      });
方式2:通过XML文件设置
<ImageButton android:id="@+id/imgBtn02" android:src="@drawable/back_48"

      android:layout_width="wrap_content" android:layout_height="wrap_content"

      android:onClick="ImageButtonXml" />
最终效果:
1、 设置透明度
imgBtn01.setAlpha(50);//设置透明度


 6493
6493


 被折叠的 条评论
为什么被折叠?
被折叠的 条评论
为什么被折叠?
 到【灌水乐园】发言


