


文章作为学习“第一行代码”笔记
什么指的是动态的添加碎片?我们在上篇Android之Fragment入门一中的效果是固定的是死的,那么我们的动态指的是我们执行一个指令,那么相应的一会产生与这个指令相关的事物变化,我们模拟一个场景来理解一下:点击一个Button,相应的右边的Fragment替换成另外一个Fragment
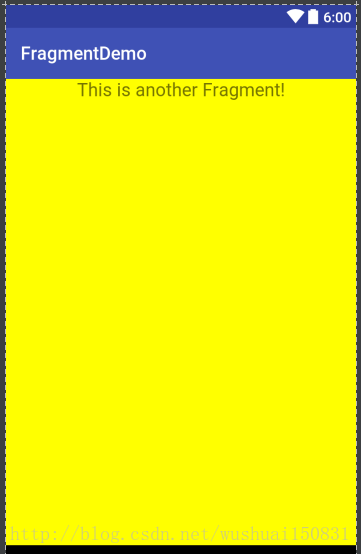
效果图
简介:
1.三个Fragment,分别为LeftFragment,RightFragment,AnotherFragment
其中LeftFragment为一个Button,RightFragment,AnotherFragment都只有
一个TextView,并且RightFragment背景为绿色,AnotherFragment背景黄色
每个Fragment都含有相应的xml文件,比如,LeftFragment对应left_fragment等
2.点击button则代表原来的RightFragment被AnotherFragment所代替
布局区
another_fragment.xml
    <?xml version="1.0" encoding="utf-8"?>
<LinearLayout xmlns:android="http://schemas.android.com/apk/res/android"
    android:layout_width="match_parent"
    android:layout_height="match_parent"
    android:orientation="vertical"
    android:background="#ffff00"
    >


    <TextView
        android:textSize="20sp"
        android:text="This is another Fragment!"
        android:layout_width="wrap_content"
        android:layout_height="wrap_content"
        android:id="@+id/button"
        android:layout_gravity="center_horizontal" />
</LinearLayout>
AnotherFragment
public class AnotherFragment extends Fragment
{
    @Nullable
    @Override
    public View onCreateView(LayoutInflater inflater, @Nullable ViewGroup container, @Nullable Bundle savedInstanceState) {
        View view=inflater.inflate(R.layout.another_fragment,container,false);
        return view;
    }
}上面的只是关于AnotherFragment部分的代码布局等,详细的LeftFragment,RightFragment的代码布局可以看我的Android之Fragment入门一即可
把我们的多个Fragment放入MainActivity中
首先activity_main布局
<?xml version="1.0" encoding="utf-8"?>
<LinearLayout xmlns:android="http://schemas.android.com/apk/res/android"
    xmlns:tools="http://schemas.android.com/tools" android:id="@+id/activity_main"
    android:layout_width="match_parent" android:layout_height="match_parent"
   android:orientation="horizontal">

    <fragment
        android:id="@+id/left_fragment"
        android:layout_width="0dp"
        android:layout_height="match_parent"
        android:layout_weight="1"
        android:name="history.six.com.fragmentdemo.LeftFragment"
        />


//!!!!FrameLayout相当于一个容器,记住他的ID为!!!!right_layout
    <FrameLayout
        android:id="@+id/right_layout"
        android:layout_width="0dp"
        android:layout_height="match_parent"
        android:layout_weight="1"
        >
        <fragment
            android:id="@+id/right_fragment"
            android:layout_width="match_parent"
            android:layout_height="match_parent"
android:name="history.six.com.fragmentdemo.RightFragment"
            />

    </FrameLayout>


</LinearLayout>
MainActivity中的代码
import android.support.v4.app.Fragment;
import android.support.v4.app.FragmentManager;
import android.support.v4.app.FragmentTransaction;
import android.support.v7.app.AppCompatActivity;
import android.os.Bundle;
import android.view.View;
import android.widget.Button;

public class MainActivity extends AppCompatActivity implements View.OnClickListener
{

    @Override
    protected void onCreate(Bundle savedInstanceState)
    {
        super.onCreate(savedInstanceState);
        setContentView(R.layout.activity_main);

        //找到按钮
        Button btn= (Button) findViewById(R.id.button);
        btn.setOnClickListener(this);


    }

    @Override
    public void onClick(View view)
    {
        switch (view.getId())
        {
            case R.id.button:
            //当我们点击Button时,就调用执行替换Fragment的方法changeFragment,传入的参数就是我们的AnotherFragment对象
                changeFragment(new AnotherFragment());

                break;
            default:
                break;
        }
    }

    private void changeFragment(Fragment fragment)
    {
        //1.得到Fragment管理者
        FragmentManager fragmentManager=getSupportFragmentManager();
        //2.通过Fragment管理者开启一个事务
        FragmentTransaction fragmentTransaction=fragmentManager.beginTransaction();
        //3.通过事务来执行替换操作,参数一:所需替换的容器的ID,参数二:待添加的碎片实例
        fragmentTransaction.replace(R.id.right_layout,fragment);
        //4.事务提交(必备)
        fragmentTransaction.commit();
    }
}
总结
- 关于FrameLayout布局的应用要关注
- -
动态添加碎片的5步骤:
1.实例化待执行替换,添加等操作的Fragment2.通过getSupportFragmentManager()获取Fragment管理器,并用FragmentManager进行接收
3.通过Fragment管理者来开启一个事务,管理者调用beginTransaction()来开启,
4.向容器添加或者替换碎片,一般使用replace()方法实现,需要传入容器的id和待添加的碎片实例
5.最后一步不能忘-提交事务,调用commit()方法开启


 647
647

 被折叠的 条评论
为什么被折叠?
被折叠的 条评论
为什么被折叠?
 到【灌水乐园】发言


