


企业中常用的web服务,用来提供htp://(超文本传输协议)
##http:// ----nginx异步非阻塞模式 apache同步阻塞模式##
2.apache的安装与部署
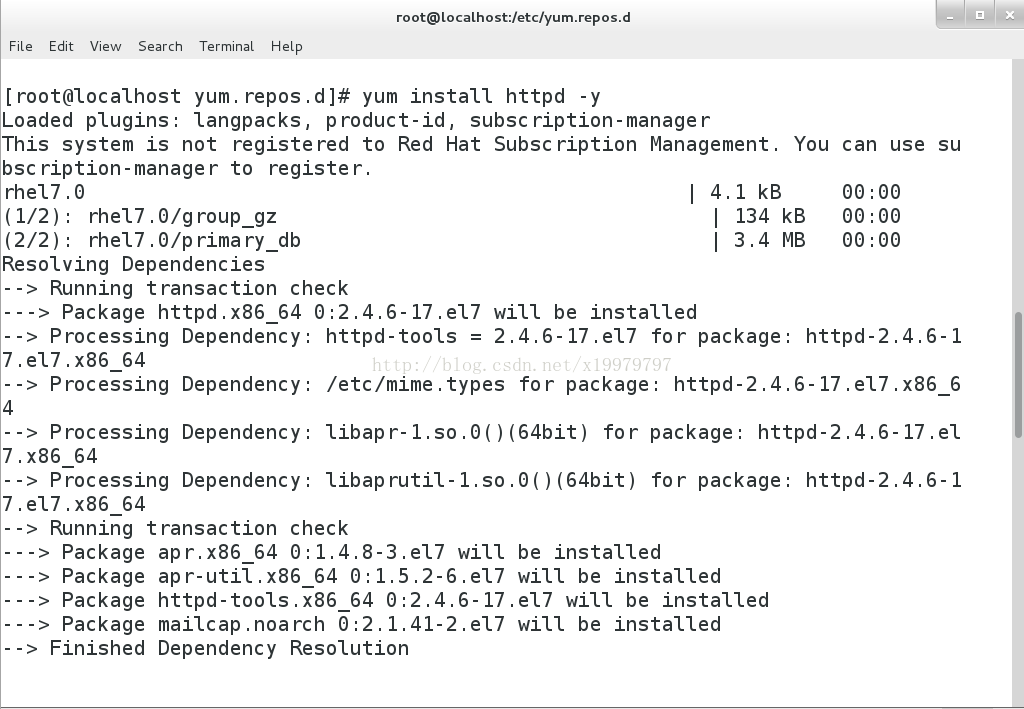
(1)yum install httpd -y --安装apache服务
(2)yum install httpd-manual -y (httpd-manual是一个网页帮助手册,帮助你更好的使用apache服务)

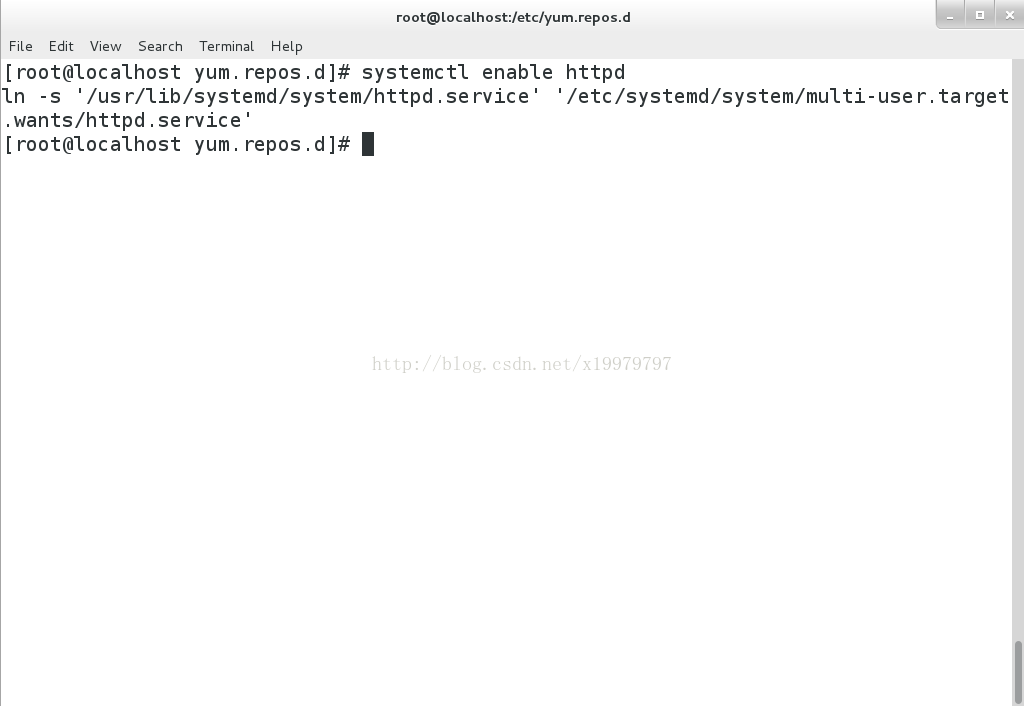
(3)systemctl enable httpd --使http服务开机自动启动
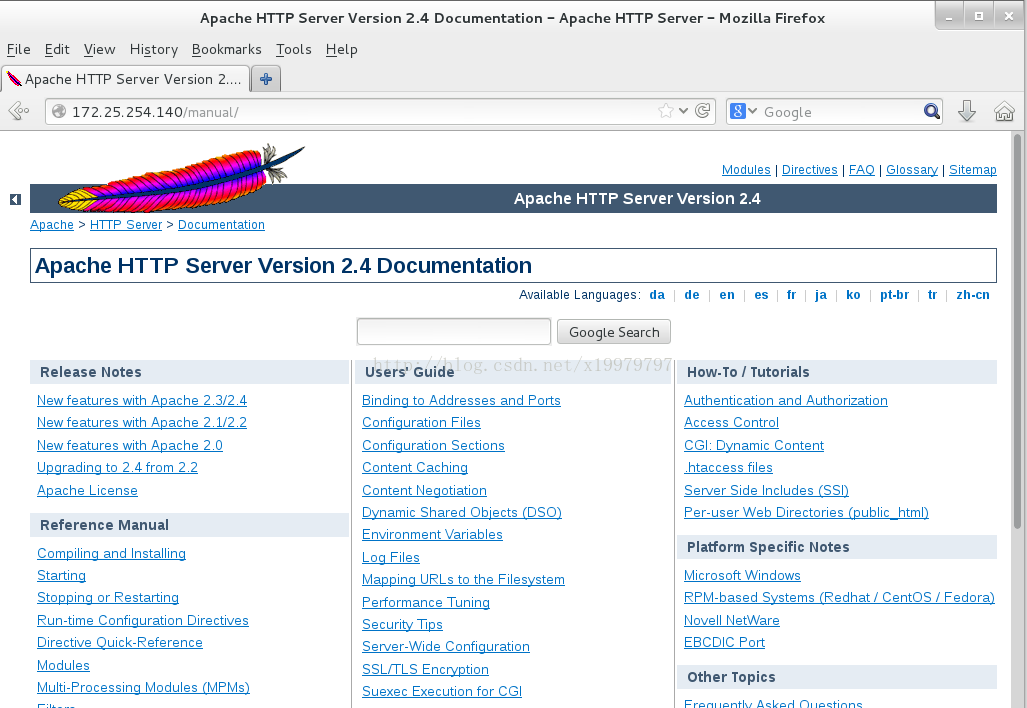
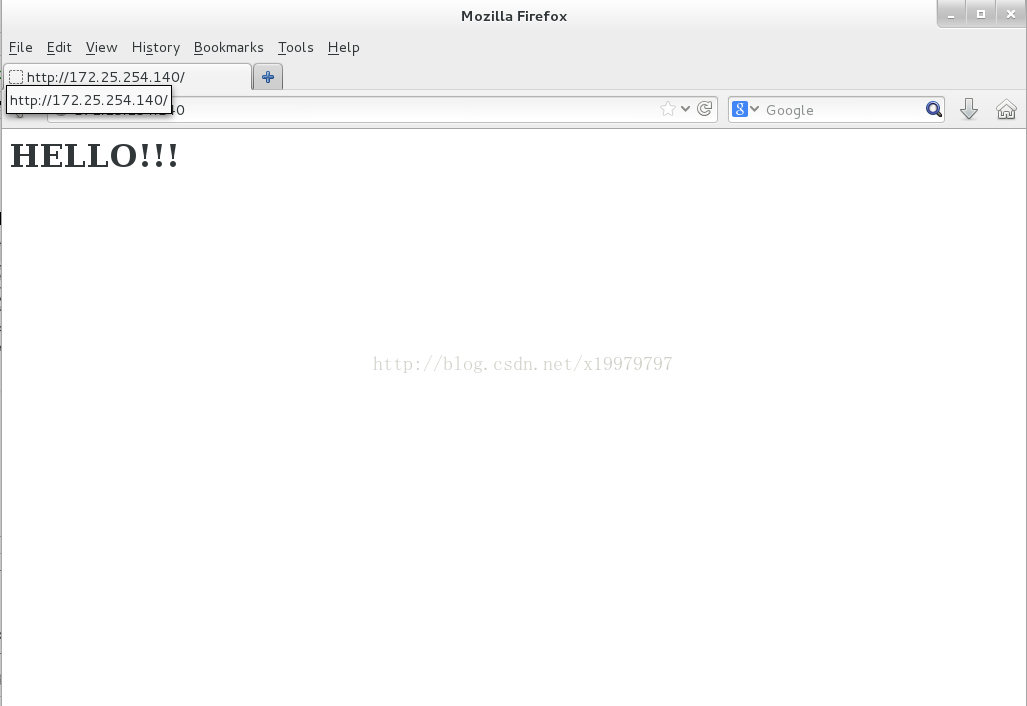
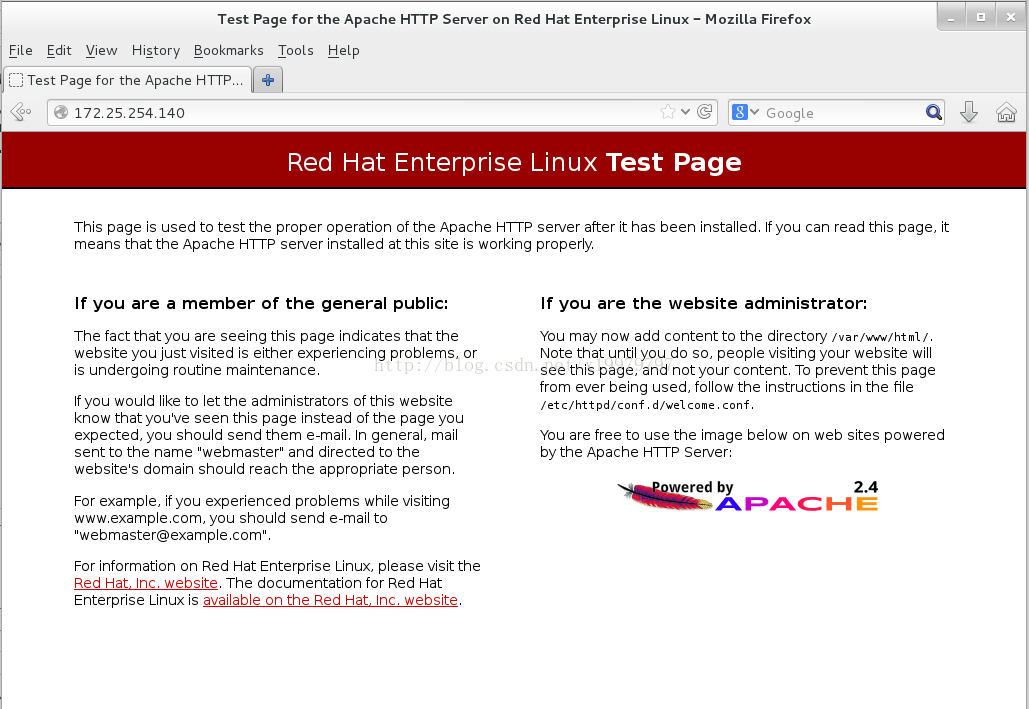
(4)测试
http://172.25.254.140
http://172.25.254.140/manual

3.apache的基础信息
主配置目录: /etc/httpd/conf
主配置文件: /etc/httpd/conf/httpd.conf
子配置目录: /etc/httpd/conf.d
子配置文件: /etc/httpd/conf.d/*.conf
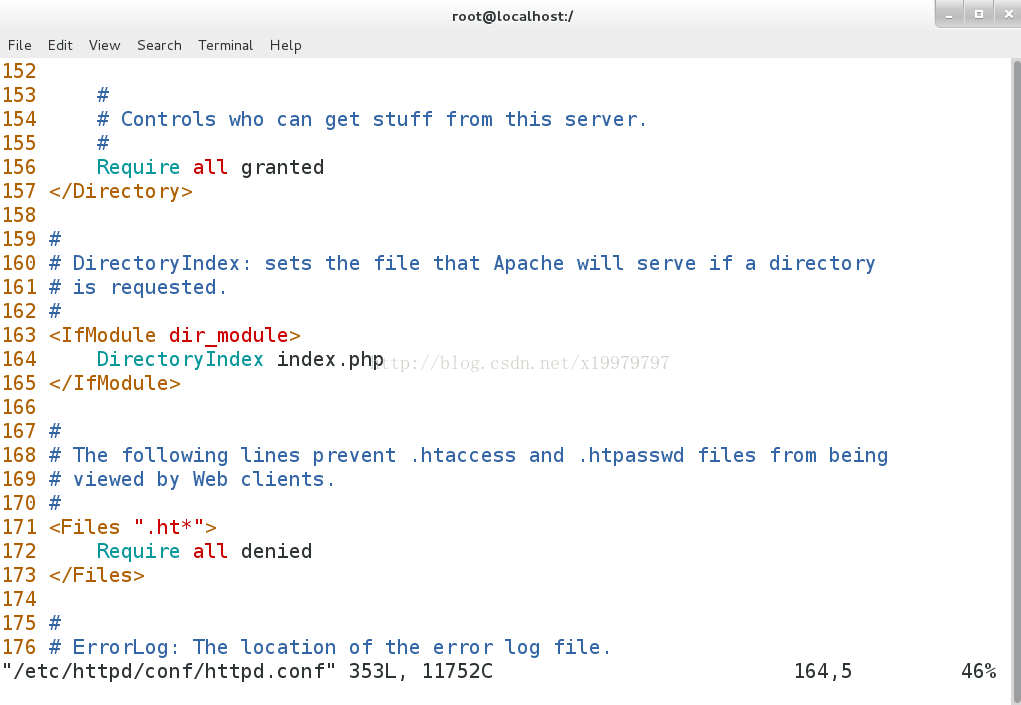
默认发布目录: /var/www/html
默认发布文件: index.html
默认端口: 80
默认安全上下文: httpd_sys_content_t
程序开启默认用户: apache
apache日志: /etc/hhttpd/logs/*
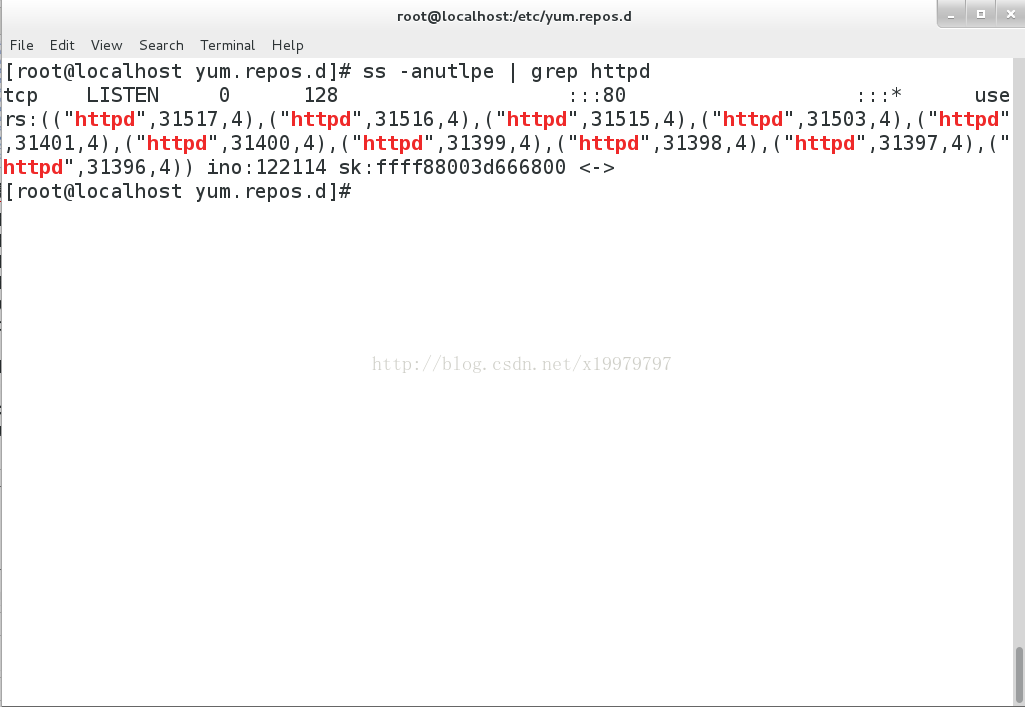
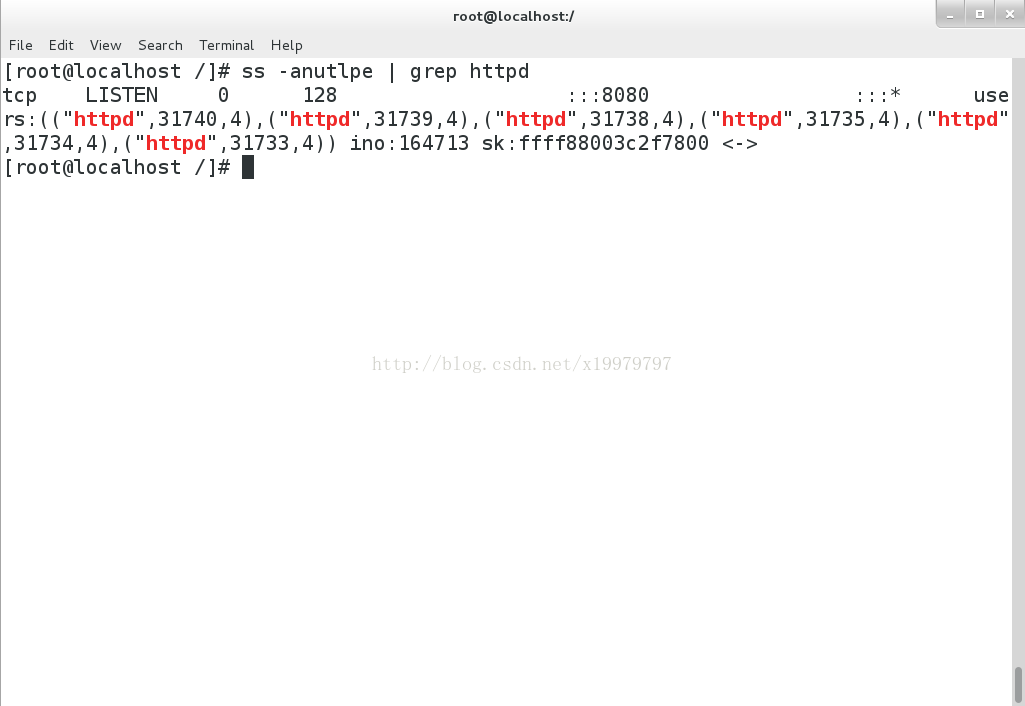
【查看端口 ss -anutlpe | grep httpd
4.apache基础信息的设置
##设置皆在vim /etc/httpd/conf/httpd.conf中操作,进行更改后要重启apache服务##
(1)修改默认端口
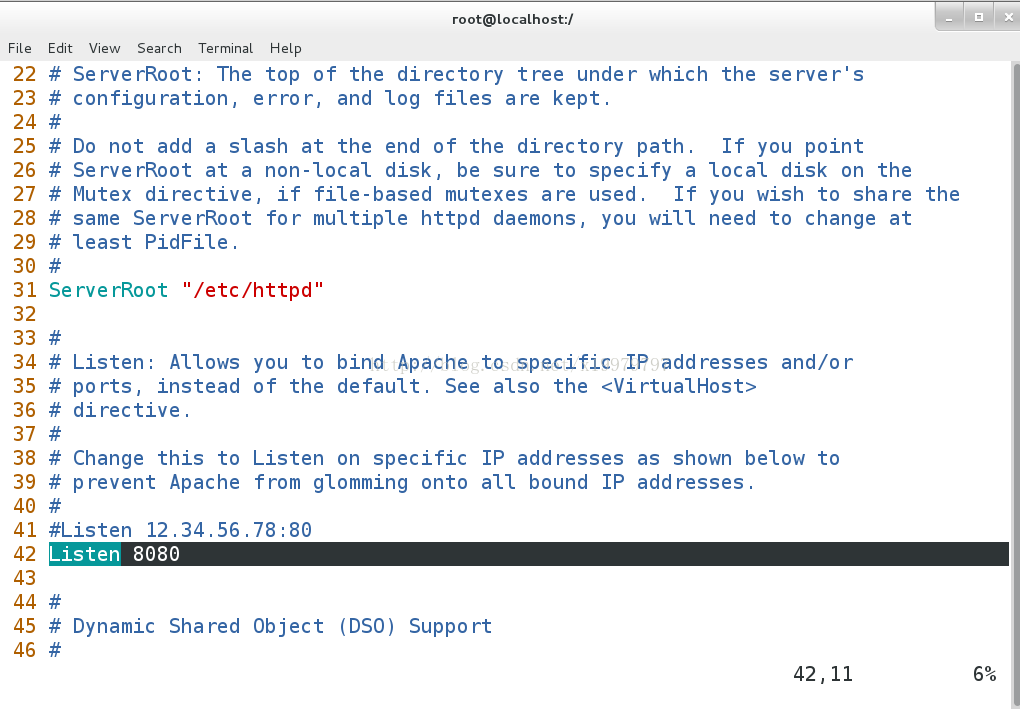
ss -anutlpe | grep httpd
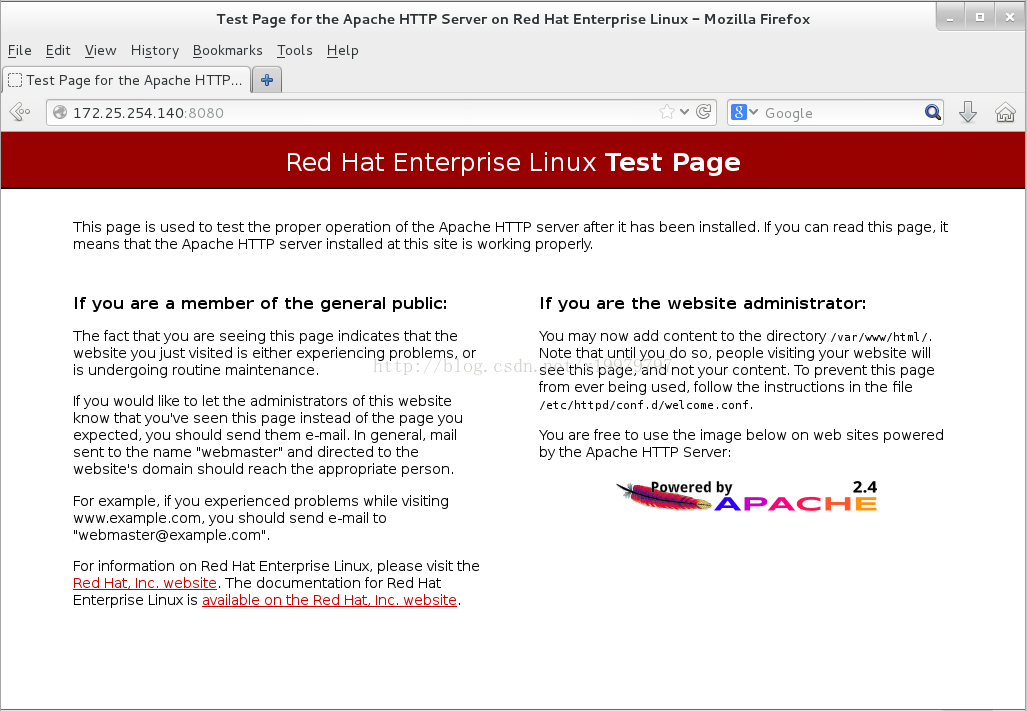
##在默认端口更改后,因为在其他程序中默认的端口为80,所以需在网络地址后加上:端口号 才可进行查看##
(2)修改默认发布文件
默认发布文件 --及访问apashe时没有指定文件名称时默认访问的文件
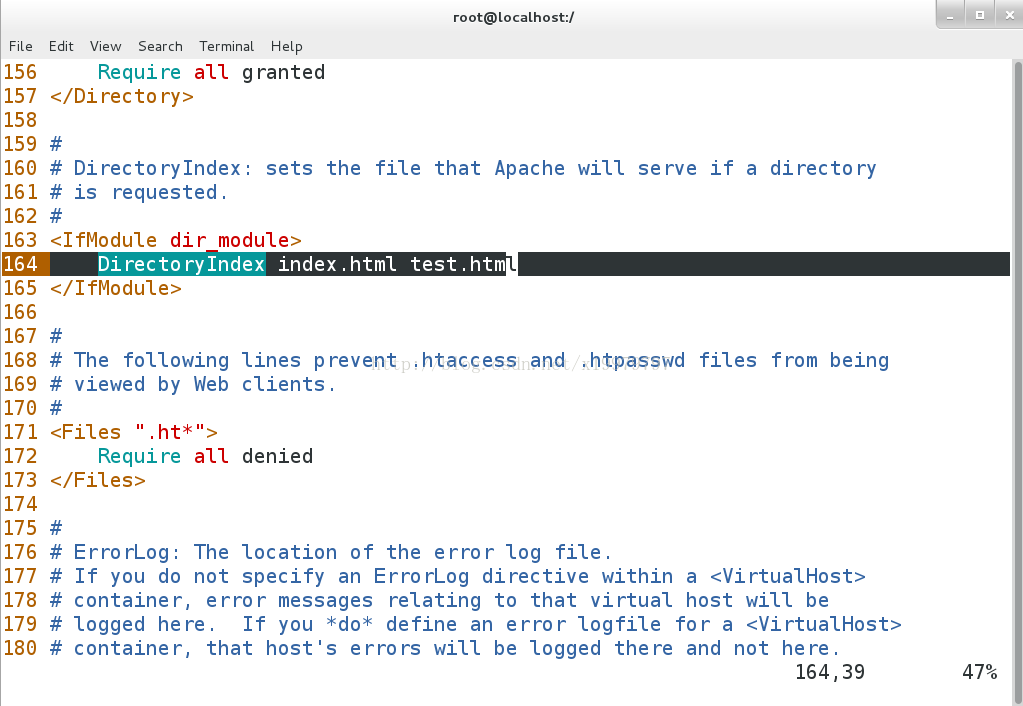
默认发布目录是有访问顺序的--从左至右
如图:表示先访问index.html,若没有index.html则访问test.html。
***index.html等文件需在/var/www/html(默认发布目录)中***
(3)修改默认发布目录
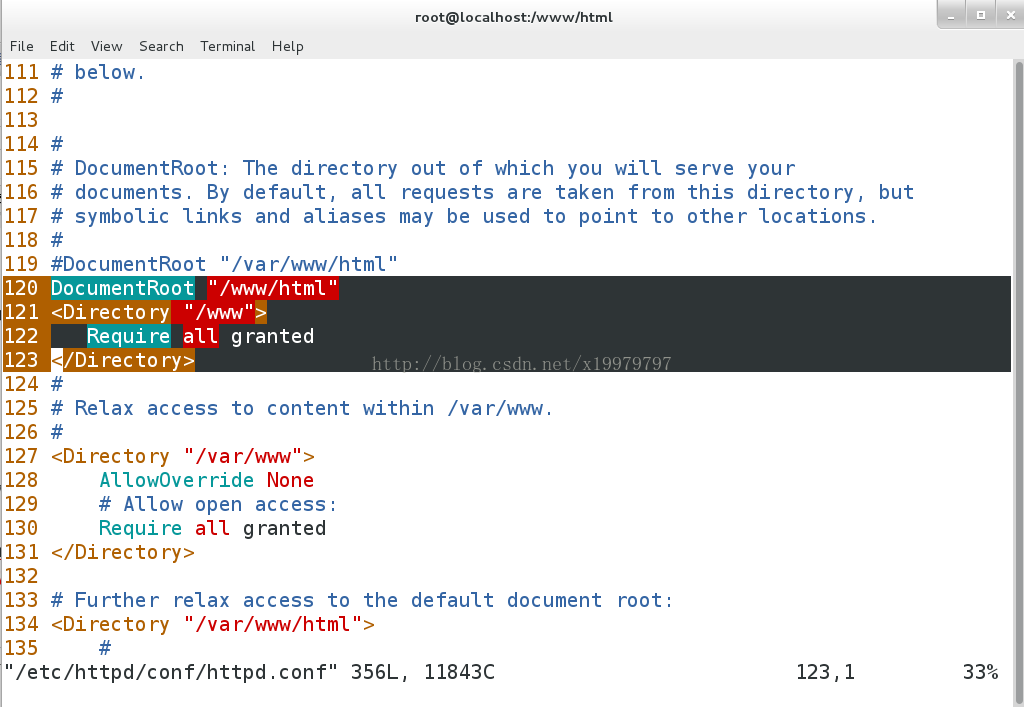
更改安全上下文为apache默认安全上下文
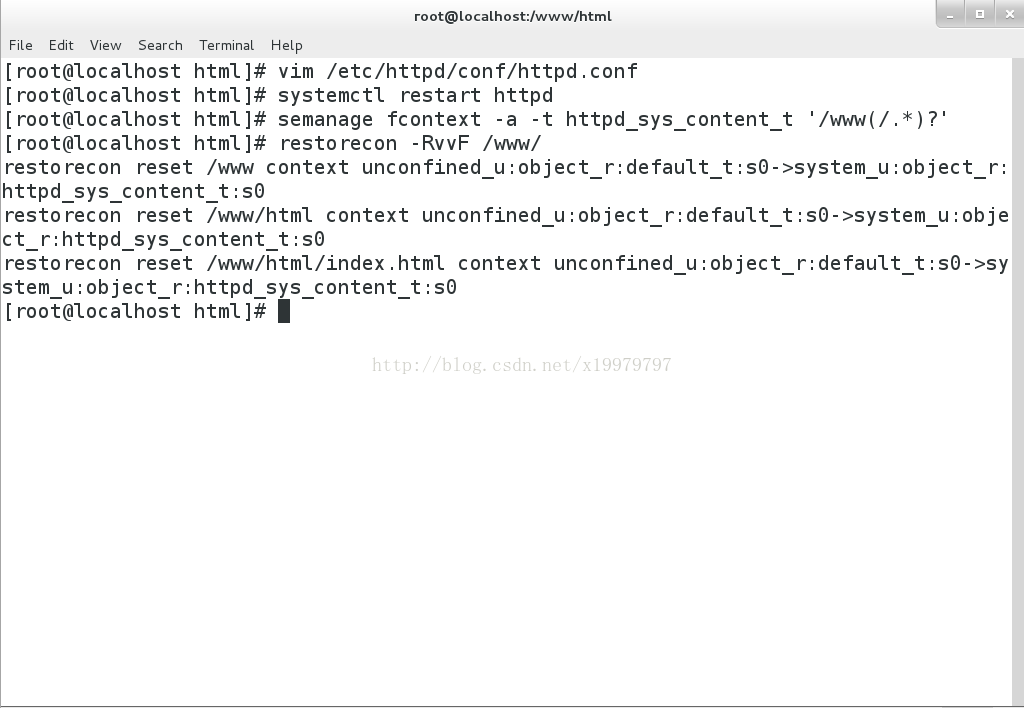
semanage fcontext -a -t httpd_sys_content_t '/www(/.*)?' ----添加安全上下文
restorecon -RvvF /www/ ----刷新安全上下文
5.apache的虚拟主机
(1)创建虚拟主机访问目录以及访问内容
mkdir /var/www/virtual/iop.com/html -p
mkdir /var/www/virtual/ppp.com/html -p
vim /var/www/virtual/iop.com/html/index.html
vim /var/www/virtual/ppp.com/html/index.html
(2)配置默认访问目录文件
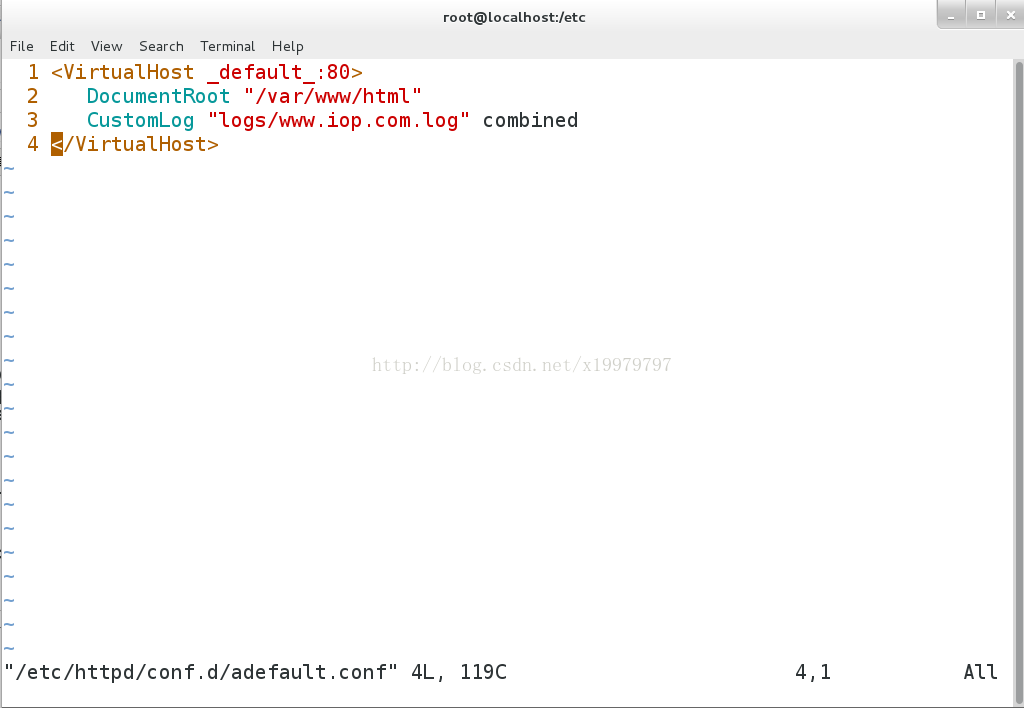
#vim /etc/httpd/conf.d/adefault.conf ----默认访问目录
<VirtualHost _default_:80>
DocumentRoot "/var/www/html"
CustomLog "logs/www.xxx.com.log" combined ----站点日志 combined:表示四种日志的结合
</VirtualHost>
(3)配置其他访问目录文件
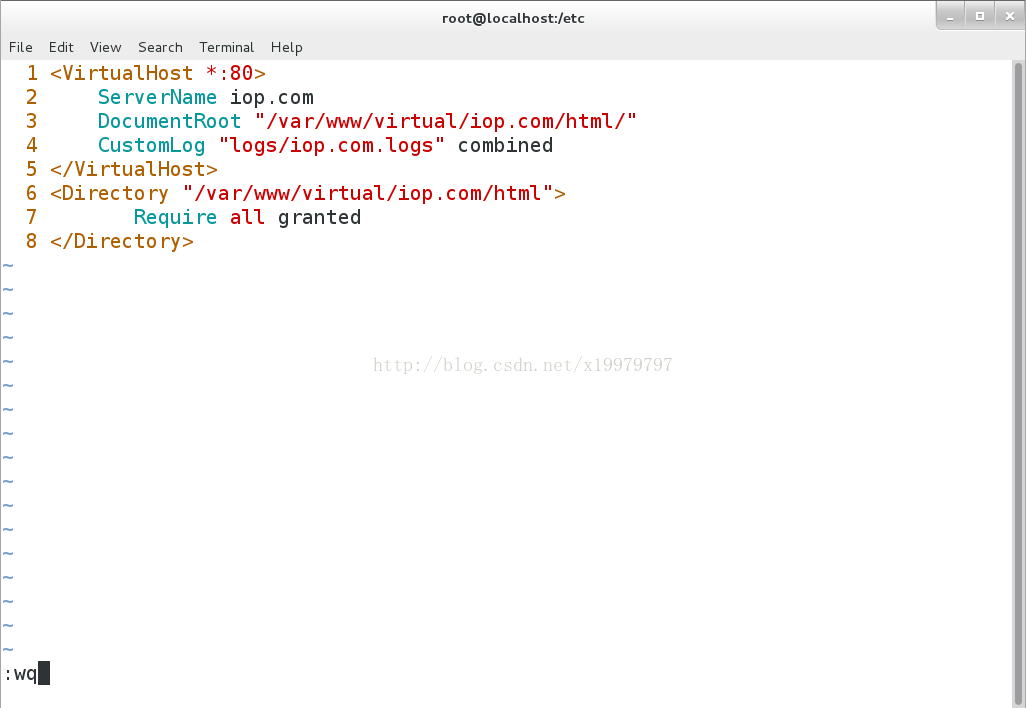
#vim /etc/httpd/conf.d/iop.conf
<VirtualHost *:80>
ServerName iop.com ---指定站点名称
DocumentRoot "/var/www/virtual/iop.com/html/" 『站点默认发布目录』
CustomLog "logs/iop.com.logs" combined
</VirtualHost>
<Directory "/var/www/virtual/linux.westos.com/html/">
Require all granted
</Directory>
#vim /etc/httpd/conf.d/ppp.conf
<VirtualHost *:80>
ServerName ppp.com
DocumentRoot "/var/www/virtual/ppp.com/html/"
CustomLog "logs/ppp.com.logs" combined
</VirtualHost>
<Directory "/var/www/virtual/ppp.com/html/">
Require all granted
</Directory>
(4)配置测试主机解析文件
在测试主机上修改本地解析文件
vim /etc/hosts
172.25.254.140 iop.com ppp.com www.xxx.com
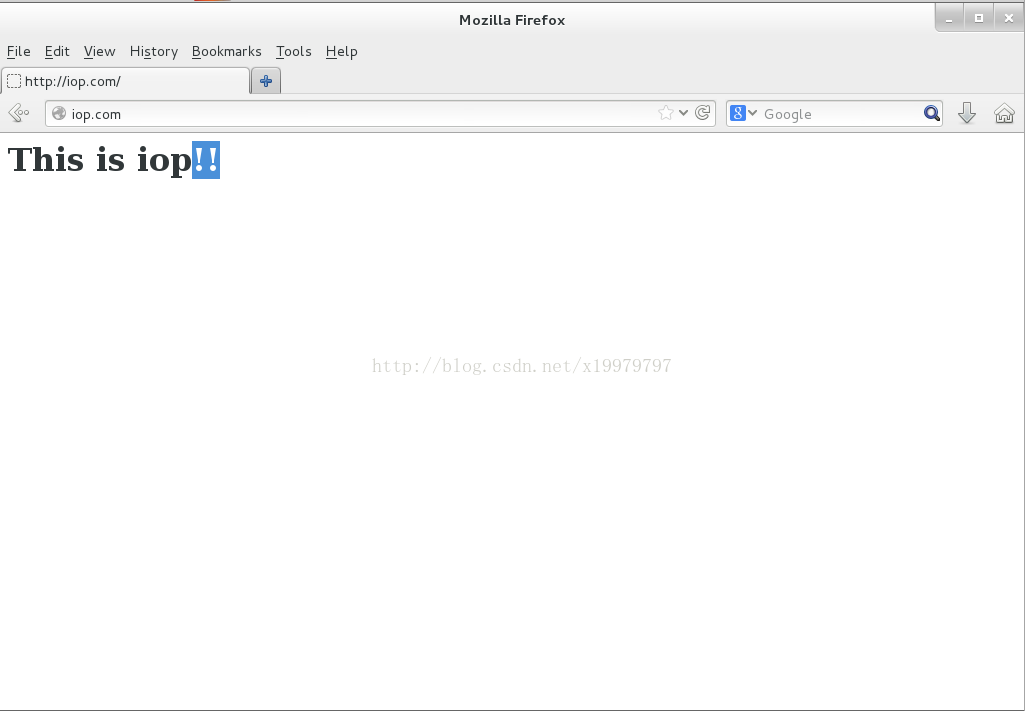
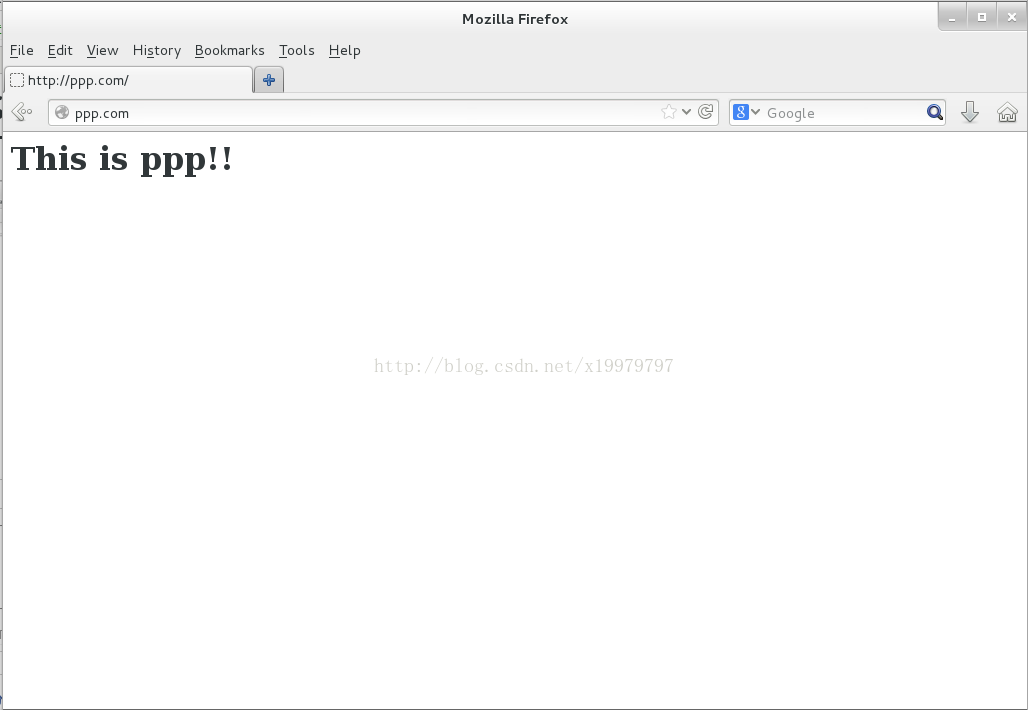
(5)测试
6.apache内部的访问控制
(1)针对主机的访问控制
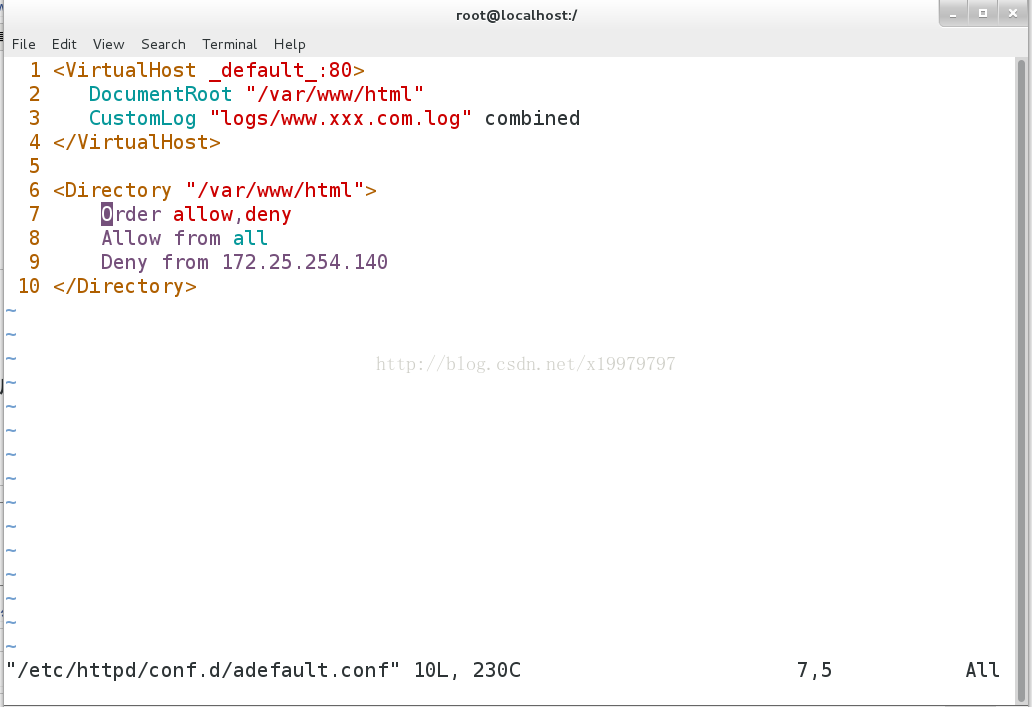
vim /etc/httpd/conf.d/adefault.conf
<Directory "/var/www/html/">
Order allow,deny ----列表读取顺序,后读取的列表会覆盖先读取的内容的列表
Allow from all
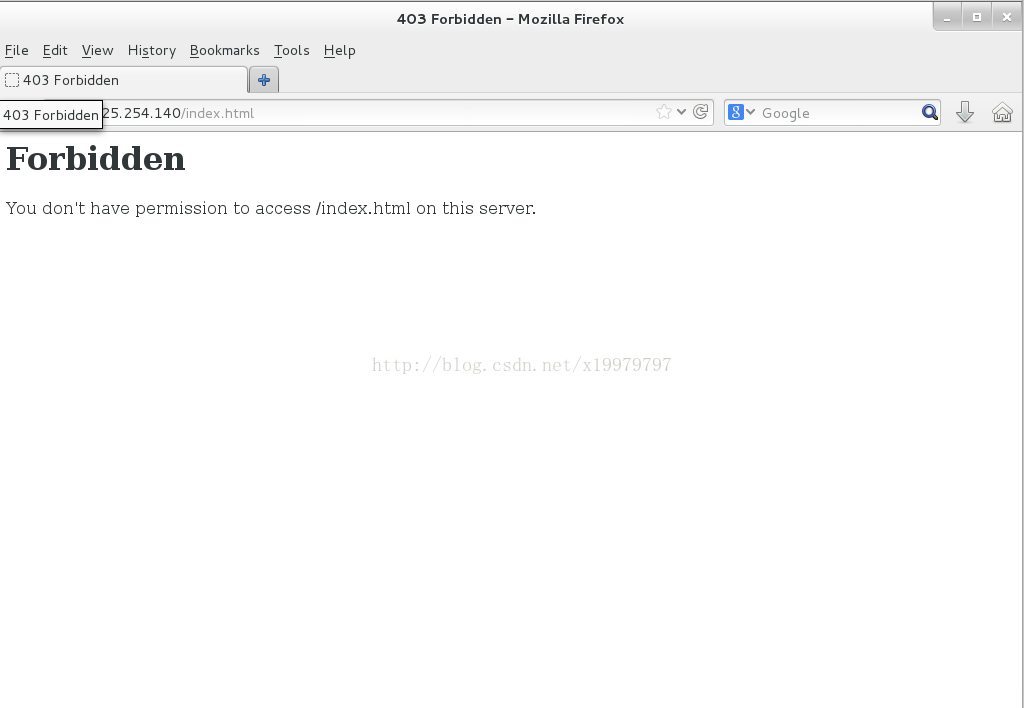
Deny from 172.25.254.140
</Directory>
(2)用户方式的访问控制
htpasswd -cm /etc/httpd/userpass admin ----常见认证用户
htpasswd -m /etc/httpd/userpass admin1 ----添加新的认证用户
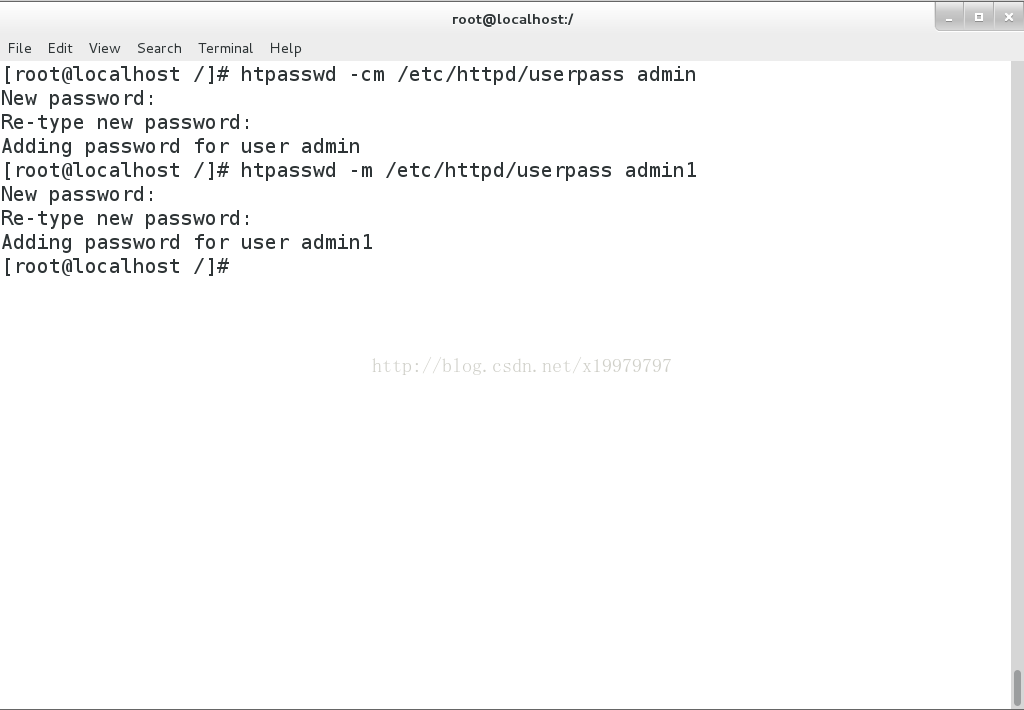
***若在添加新的认证用户时使用了 -cm 则之前创建的用户都会删除***
编辑配置文件
vim /adefault.conf
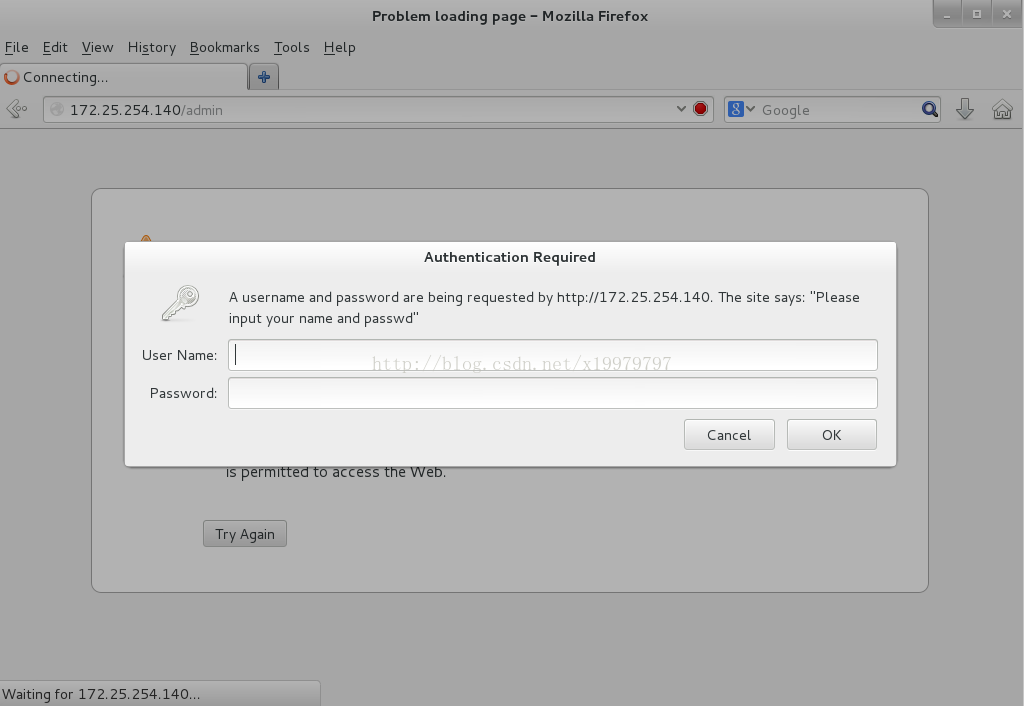
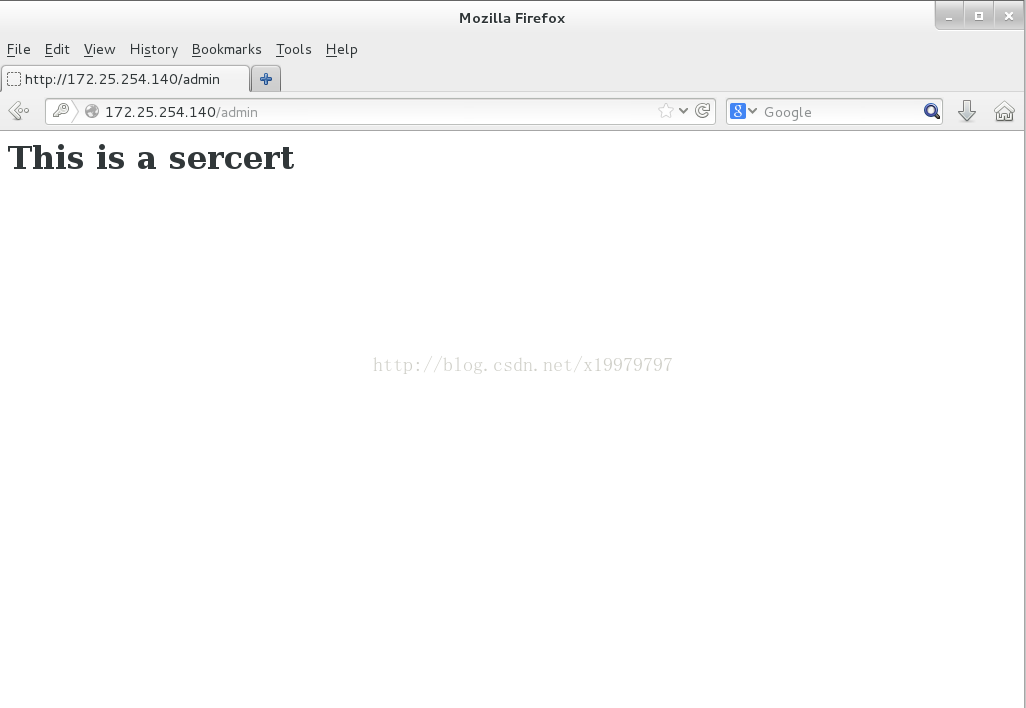
<Directory "/var/www/html/admin">
AuthUserFile /etc/httpd/userpass
AuthName "Please input your name and passwd"
AuthType basic
Require user admin ----针对用户admin
Require valid-user ----针对有效用户
</Directory>
7.apache支持的语言
(1)html
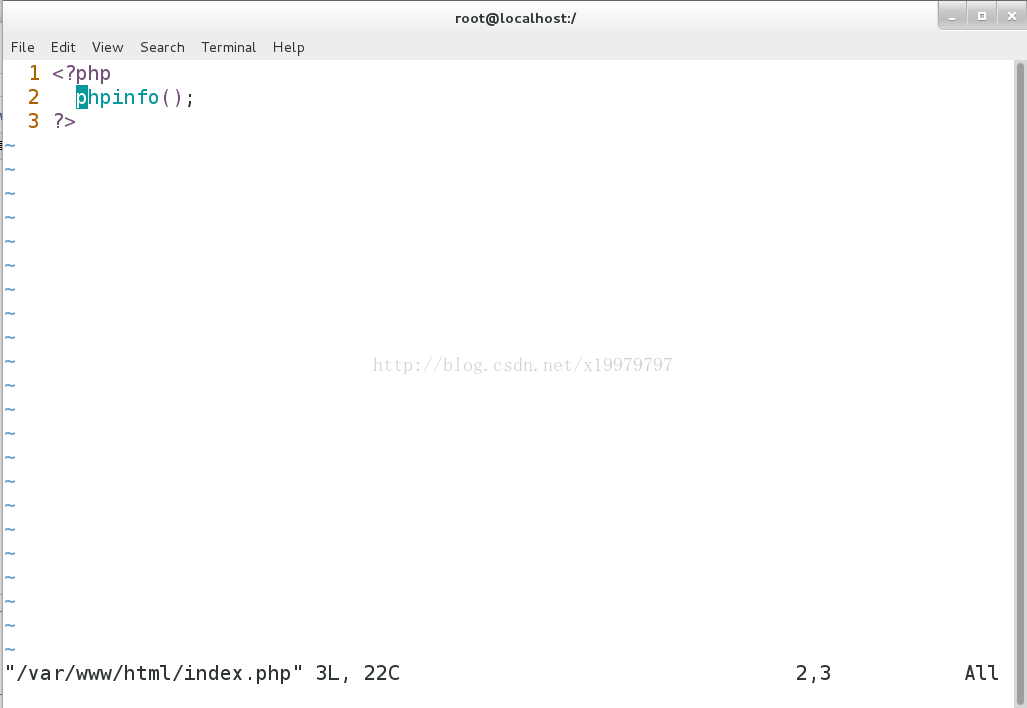
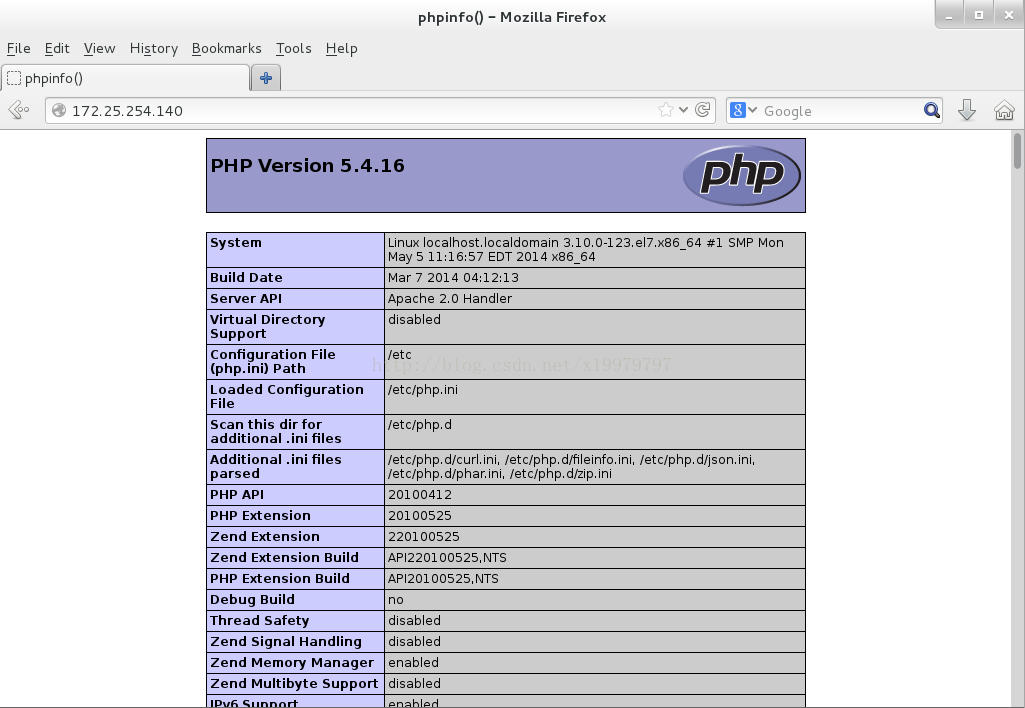
(2)php
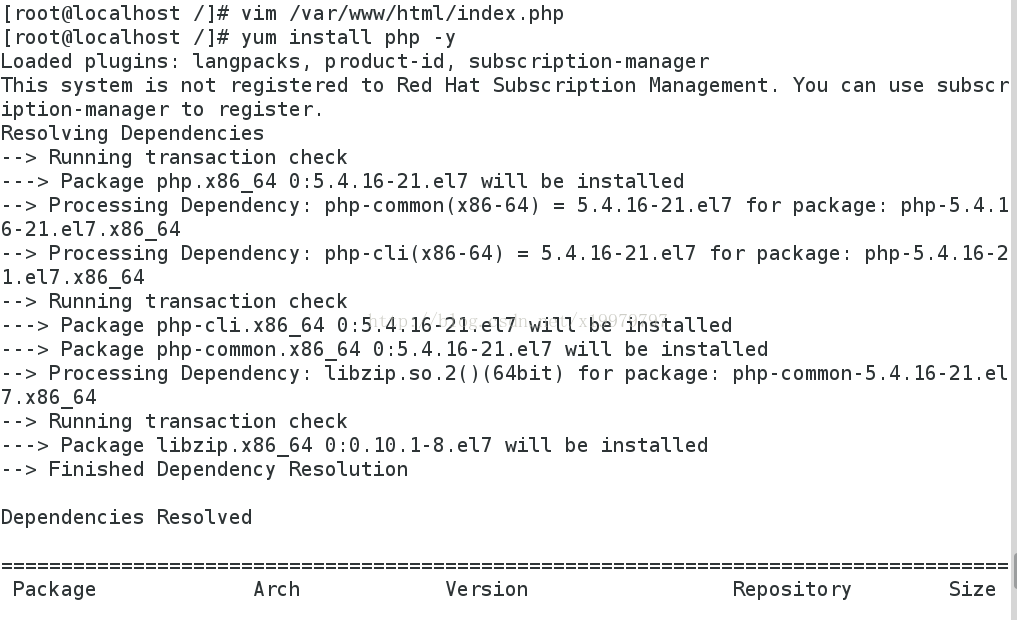
vim /var/www/html/index.php
<?php
phpinfo();
?>
修改http配置文件
yum install php -y ----安装php
测试:172.25.254.40
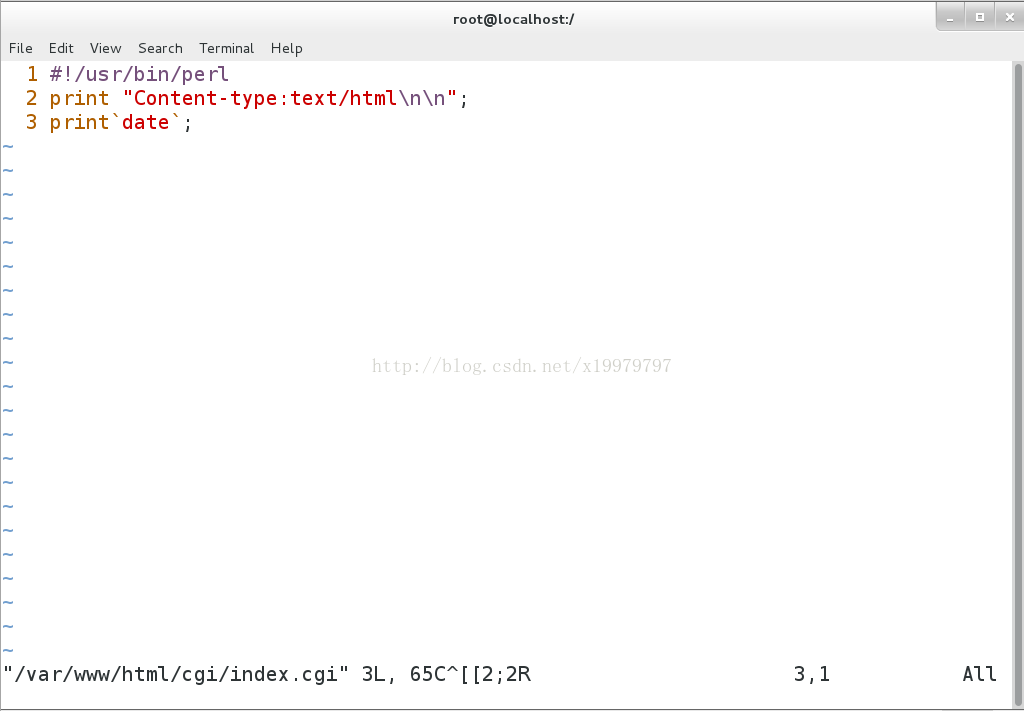
(3)cgi
创建cgi目录以及在下创建一个显示当前时间的脚本
#!/usr/bin/perl
print "Content-type:text/html\n\n";
print`date`;
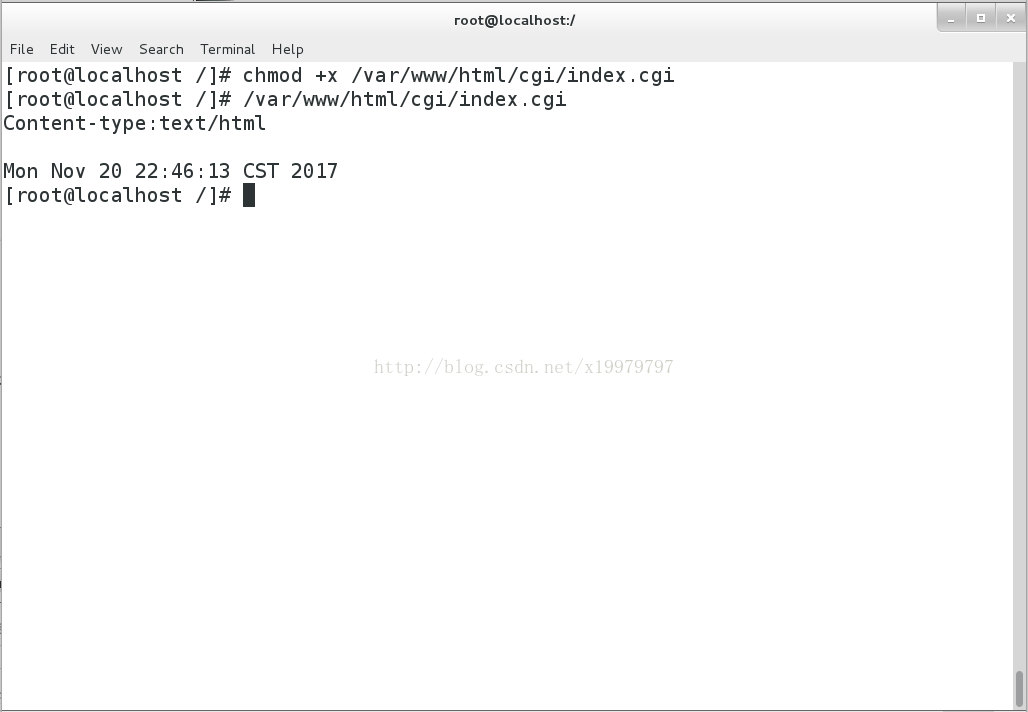
加权限并试运行脚本
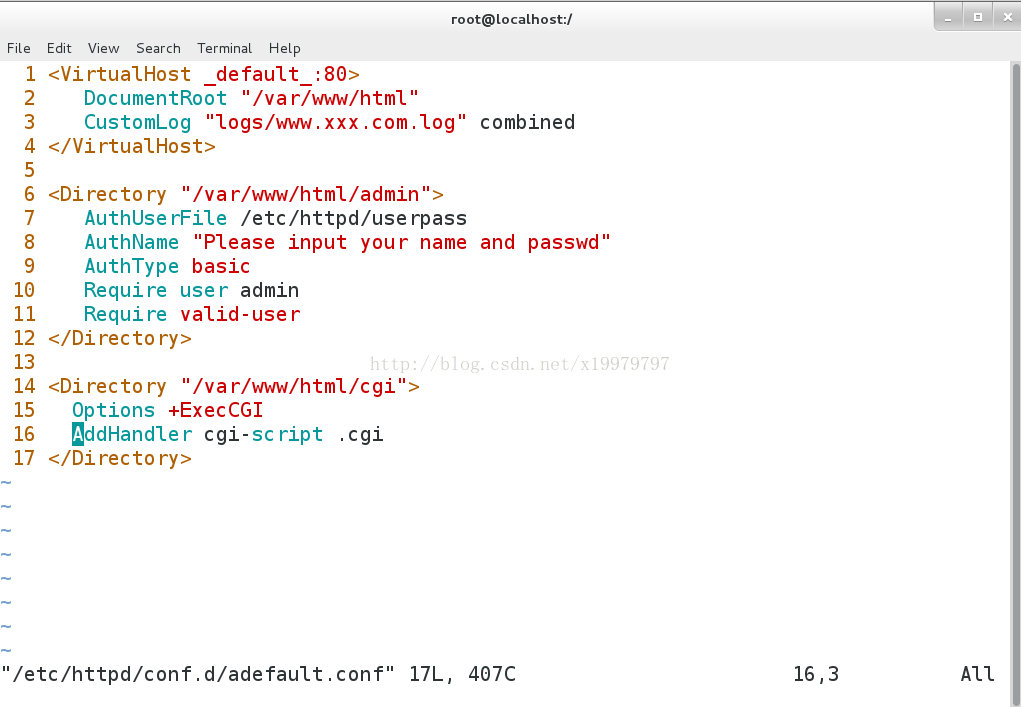
编辑cgi配置文件
vim adefatul.conf
<Directory "/var/www/html/cgi">
Options +ExecCGI
AddHandler cgi-script .cgi
</Directory>
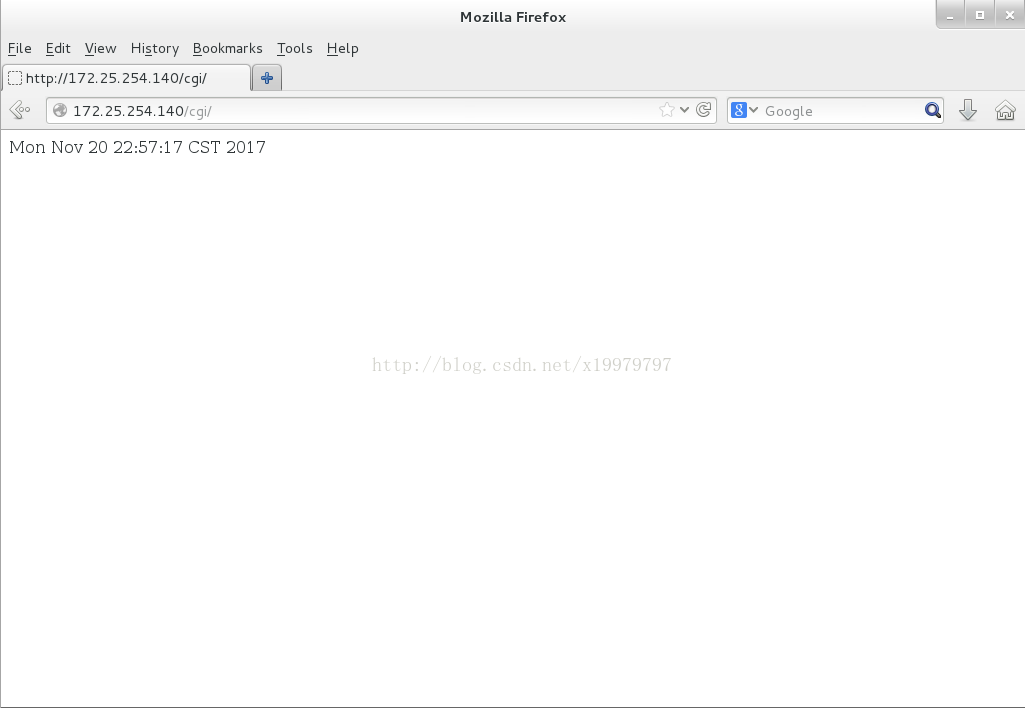
测试:172.25.254.140/cgi
8.https
HTTPS(全称:Hyper Text Transfer Protocol over Secure Socket Layer),是以安全为目标的HTTP通道,简单讲是HTTP的安全版。即HTTP下加入SSL层,HTTPS的安全基础是SSL,因此加密的详细内容就需要SSL。 它是一个URI scheme(抽象标识符体系),句法类同http:体系。用于安全的HTTP数据传输。https:URL表明它使用了HTTP,但HTTPS存在不同于HTTP的默认端口及一个加密/身份验证层(在HTTP与TCP之间)。这个系统的最初研发由网景公司(Netscape)进行,并内置于其浏览器Netscape Navigator中,提供了身份验证与加密通讯方法。现在它被广泛用于万维网上安全敏感的通讯,例如交易支付方面。
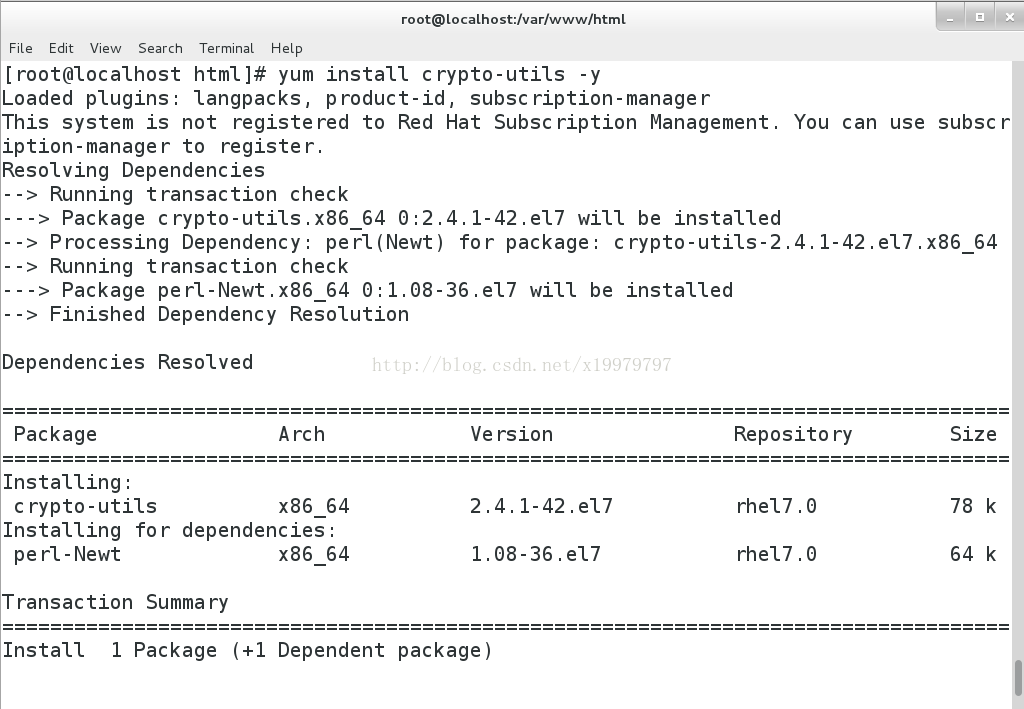
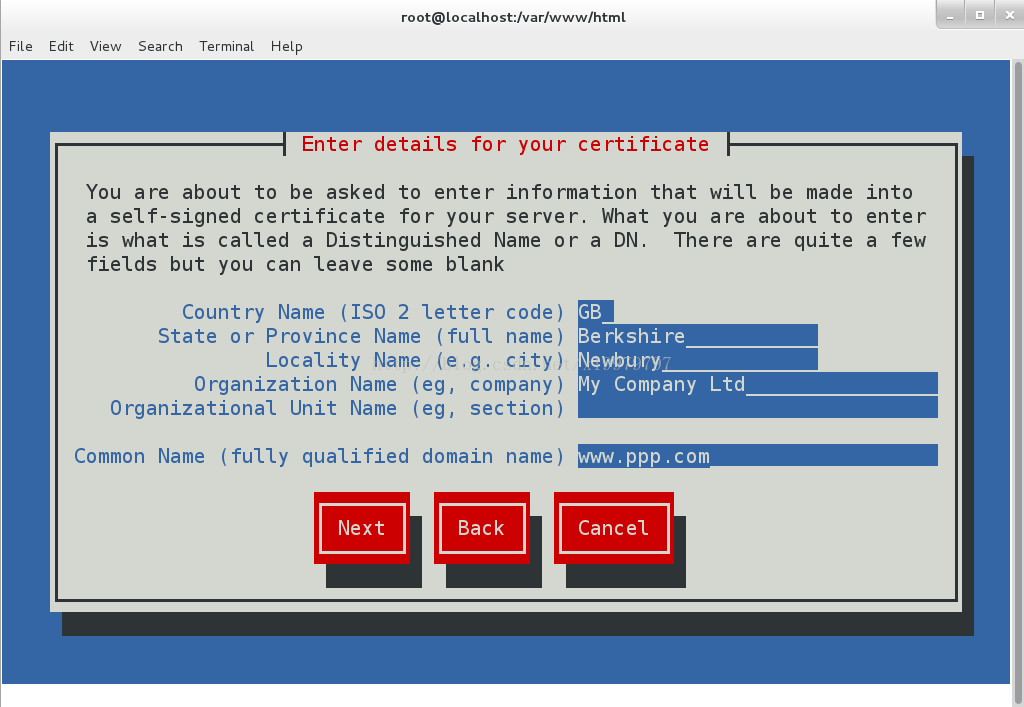
(1)yum install crypto-utils -y ----安装创建网络安全证书软件
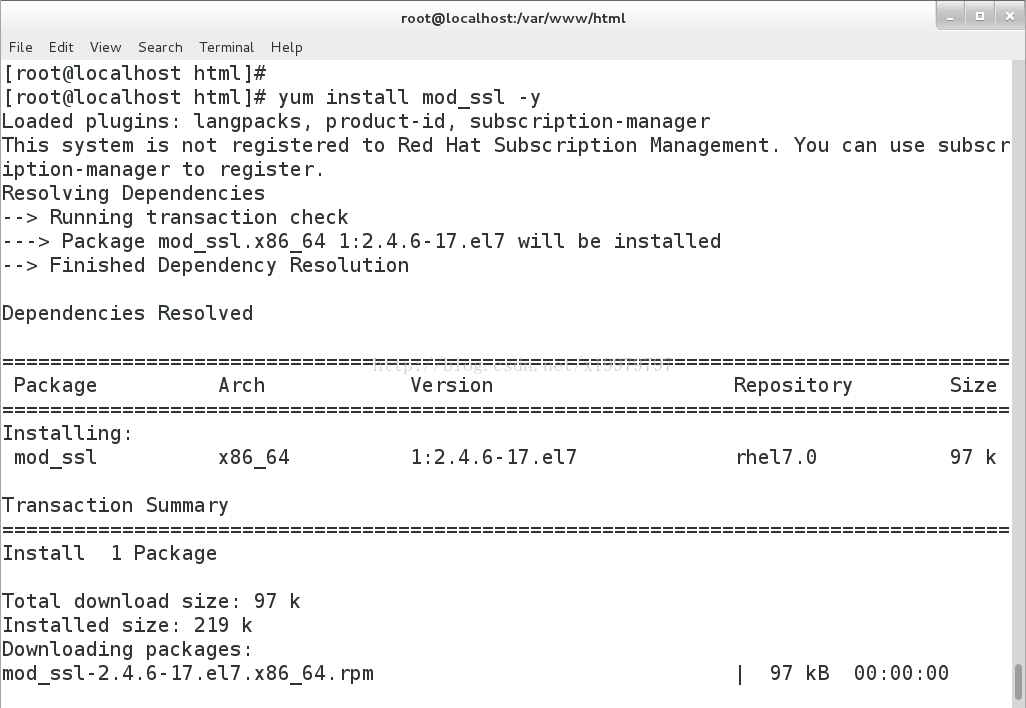
(2)yum install mod_ssl -y ----安装ssl层
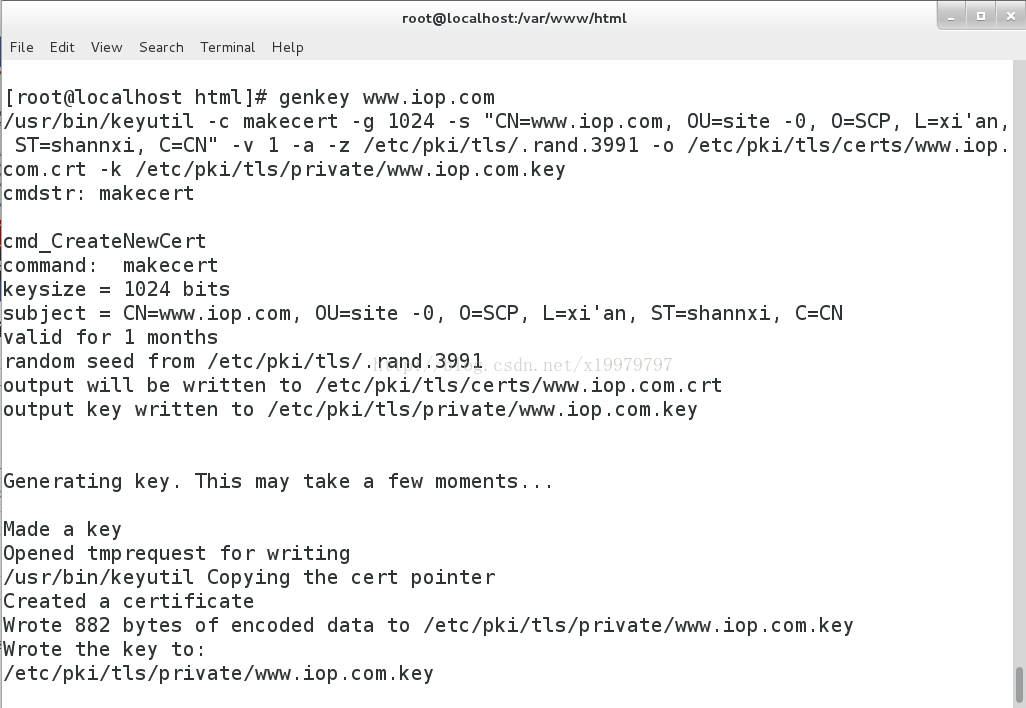
(3)genkey www.iop.com ----创建www.iop.com的网络安全证书
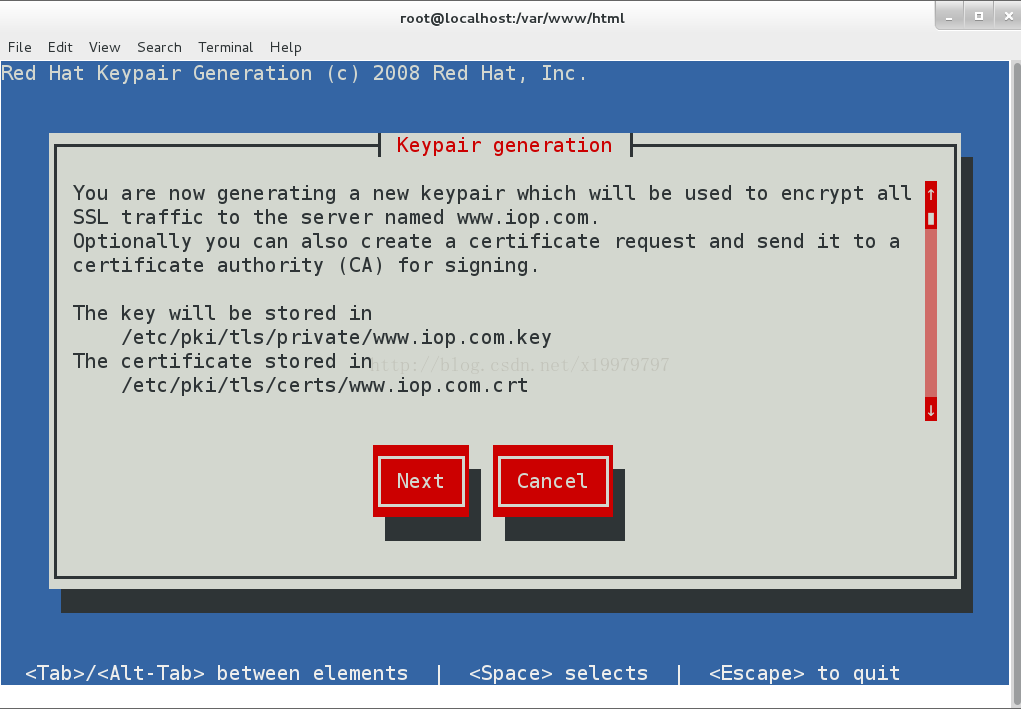

创建完成 会弹出证书和密钥
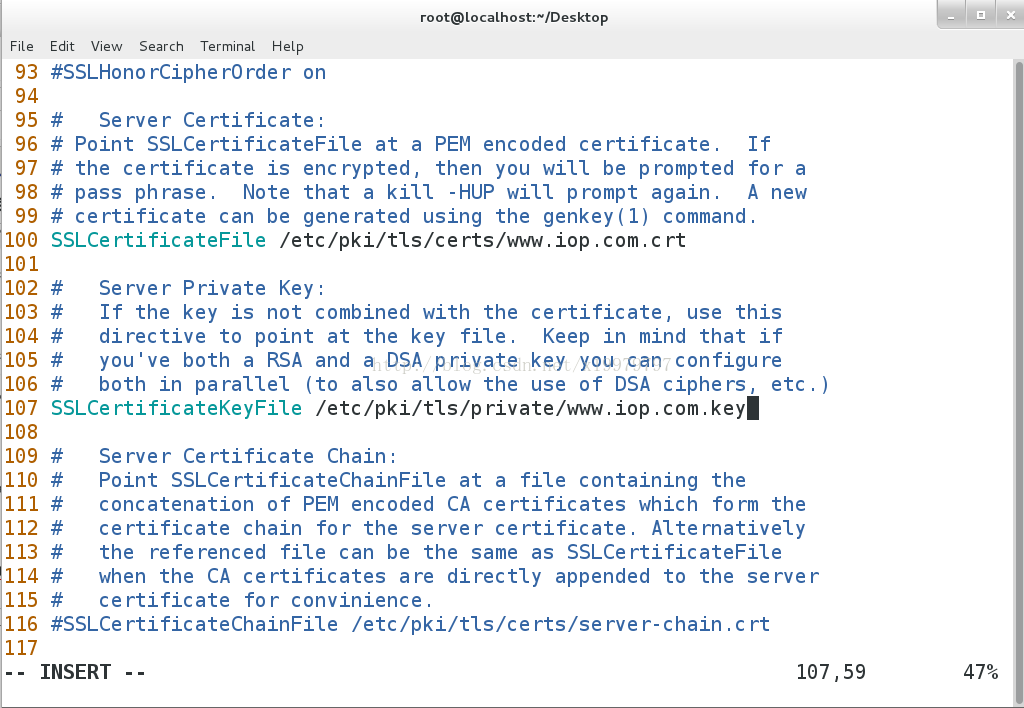
更改默认证书与密钥
vim /etc/httpd/conf.d/ssl.conf
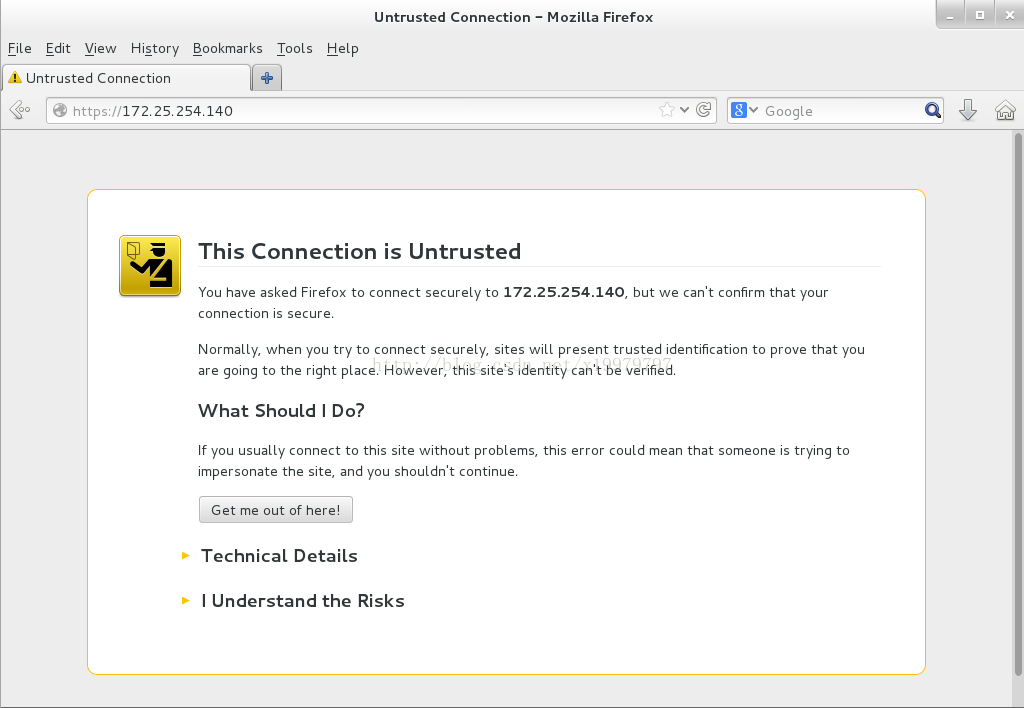
测试:https://172.25.254.140
9.设定https虚拟主机并设定网页重写
(1)编辑发布目录与网页内容
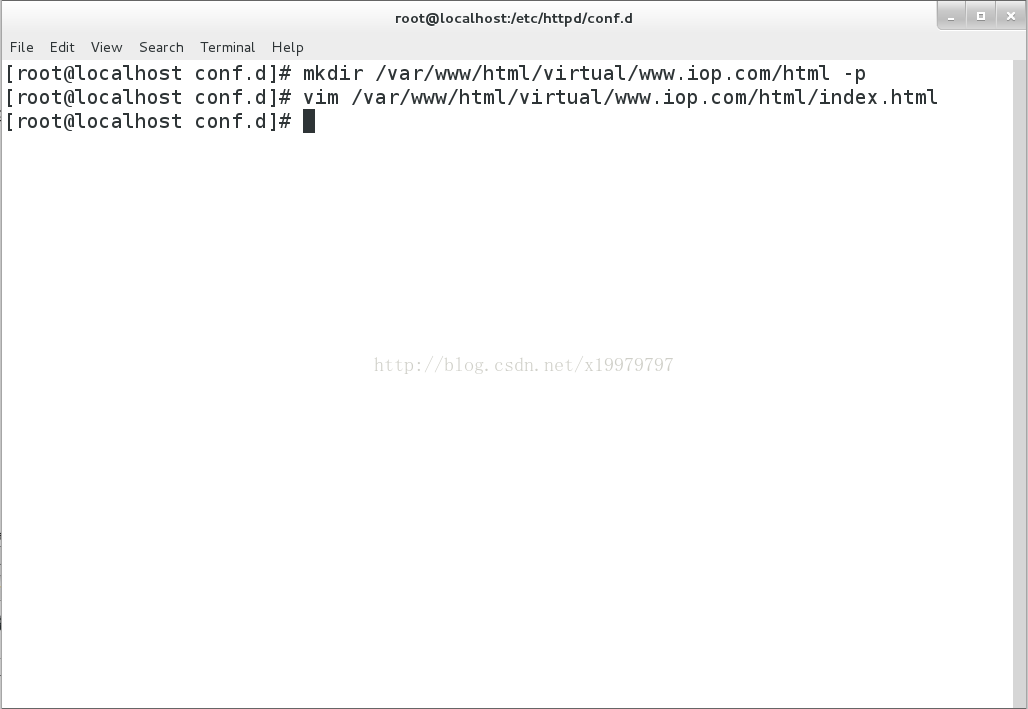
(2)编辑配置文件
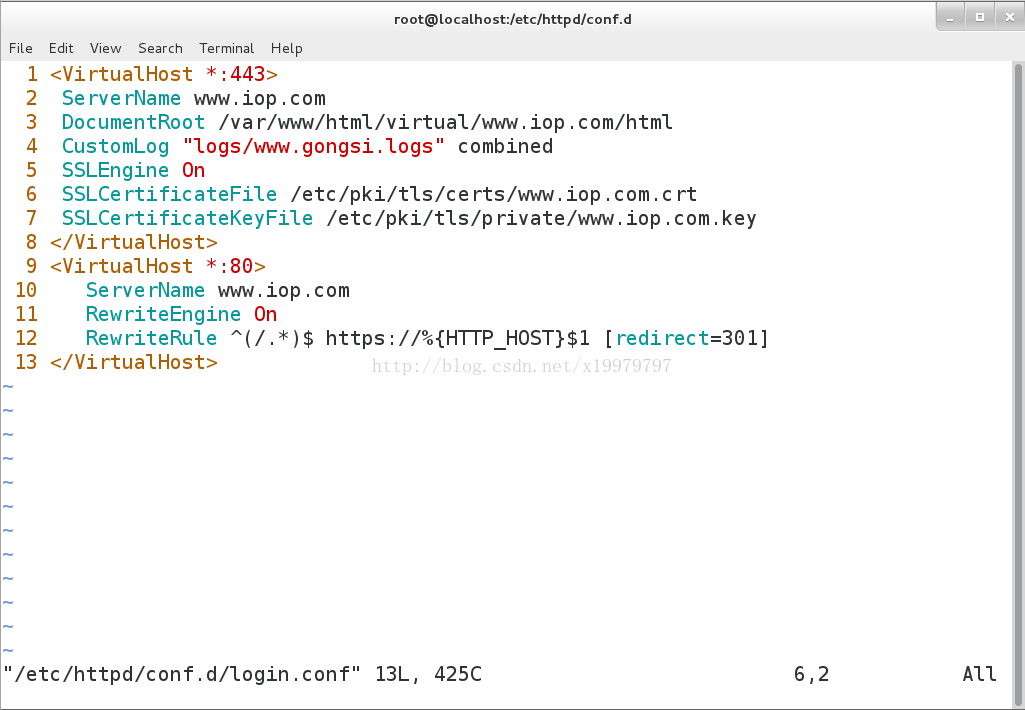
vim /etc/httpd/conf.d/login.conf
<VirtualHost *:443>
ServerName login.iop.com
DocumentRoot /var/www/html/virtual/login.iop.com/html
CustomLog "logs/login.logs" combined
SSLEngine on
SSLCertificateFile /etc/pki/tls/certs/www.iop.com.crt
SSLCertificateKeyFile /etc/pki/tls/private/www.iop.com.key
</VirtualHost>
<Directory "/var/www/html/virtual/login.iop.com/html">
Require all granted
</Directory>
<VirtualHost *:80>
ServerName login.iop.com
RewriteEngine On
RewriteRule ^(/.*)$ https://%{HTTP_HOST}$1 [redirect=301]
</VirtualHost>
####
^(/.*)$ ----客户在浏览器地址栏中输入的所有字符
https:// ----强制客户加密访问
%{HTTP_HOST} ----客户请求主机
$1 ----“$1”表示 ^(/.*)$的值
[redirect=301] ----临时重写 302永久重写 ######
配置完成后在测试主机上修改本地解析文件
vim /etc/hosts
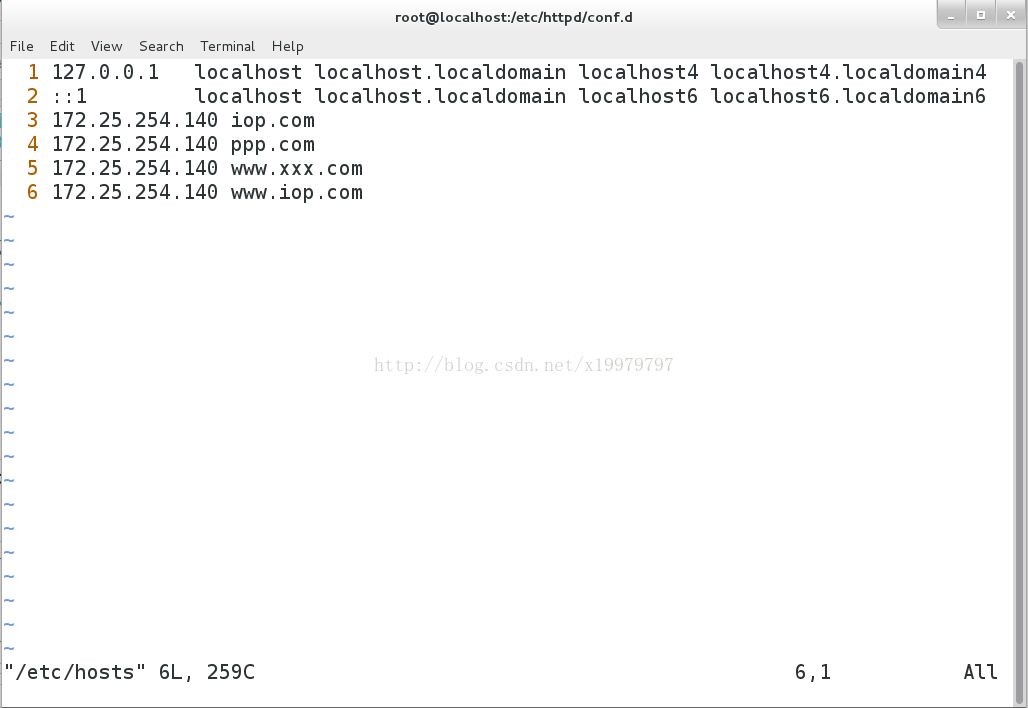
测试:www.iop.com

最后访问结果
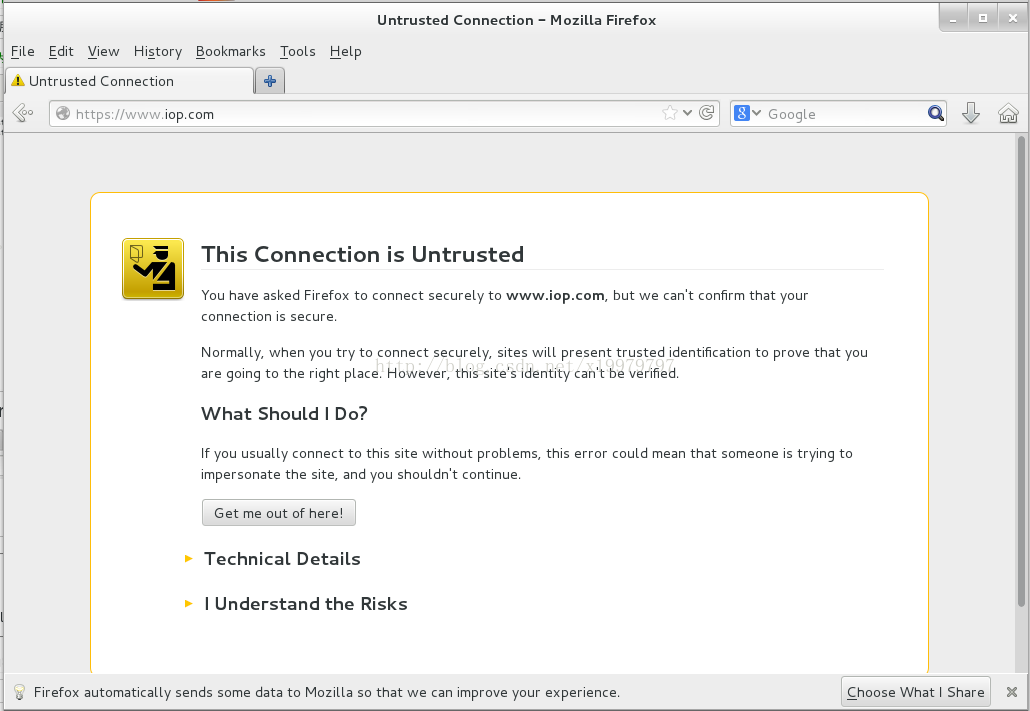
跳转完成


 3998
3998


 被折叠的 条评论
为什么被折叠?
被折叠的 条评论
为什么被折叠?
 到【灌水乐园】发言


