


最后新添加Apache HTTPS 的虚拟主机设置 和 网站重写设置
检测网站后台技术
首先,linux自带的curl命令可以查看一些网站的后台服务器情况,其中包括
具体命令:
curl -I xxx.com //检测某网站使用后台技术
例:检测www.baudu.com
[root@mazha1 桌面]# curl -I www.baidu.com
HTTP/1.1 200 OK
Server: bfe/1.0.8.18
Date: Thu, 08 Dec 2016 11:22:50 GMT
Content-Type: text/html
Content-Length: 277
Last-Modified: Mon, 13 Jun 2016 02:50:08 GMT
Connection: Keep-Alive
ETag: "575e1f60-115"
Cache-Control: private, no-cache, no-store, proxy-revalidate, no-transform
Pragma: no-cache
Accept-Ranges: bytes
Apache具体使用方法介绍
1.安装http服务
yum install httpd -y
2.默认web访问目录为
/var/www/html
默认访问文件为:
index.html
3.主配置文件
/etc/httpd/conf/httpd.conf
注:查看apache帮助
安装 yum install httpd-mannul
4.在主配置文件中可以更改 默认访问目录,默认访问文件和访问端口
更改默认访问目录:
DocumentRoot "/www/html"更改默认访问文件:
<IfModule dir_module>
    #DirectoryIndex index.html
     DirectoryIndex mypage.htmlindex.html test
</IfModule>
更改访问端口:
#Listen 12.34.56.78:80
Listen 80
5.selinux设置
开启selinux时,在更改默认访问目录后需要添加安全上下文标签:
ls -Z 查看源目录的安全上下文标签
[root@server www]# ls -Z
drwxr-xr-x. root root system_u:object_r:httpd_sys_script_exec_t:s0cgi-bin
drwxr-xr-x. root root system_u:object_r:httpd_sys_content_t:s0 html
修改新目录安全上下文标签
[root@server www]# semanage fcontext -a -t httpd_sys_content_t'/www/html(/.*)?'6.拒绝或允许访问名单:
<Directory "/www/html">
    Require all granted
    order Deny,Allow  //order表示拒绝或允许读取顺序,有可能导致拒绝名单失效
    Deny from  All
    Allow from 172.25.254.2
</Directory>7.特定用户访问(帐号密码登陆)
(1).修改配置文件
<Directory "/www/html">
    #Require all granted
    AllowOverride All    //打开认证功能
    Authuserfile /etc/httpd/httpdpwd    //帐号信息文件
    Authname "给我一个吻~啊,可以不可以~"  //提示信息
    Authtype basic   //验证方式
    #Require user mazha
    Require valid-user  //允许访问用户列表
</Directory>(2)使用htpasswd命令创建账户文件
[root@server httpd]# htpasswd -cm httpdpwd mazha
New password:
Re-type new password:
Adding password for user mazha
[root@server httpd]# htpasswd -m httpdpwd mz
New password:
Re-type new password:
Adding password for user mz[root@server httpd]# cat httpdpwd
mazha:$apr1$fAd3kKEj$fiZZopfPVnI3NYucER9z9/
mz:$apr1$UpdHVUIk$dTfUQ5ptc49/N0SNdAJgR/(3)重启服务
systemctl restart httpd
8.指定多个不同的默认目录对应不同域名
1).修改主配置文件:
 # Load config files in the"/etc/httpd/conf.d" directory, if any.
IncludeOptional conf.d/*.conf //默认为开启的2).在/etc/httpd/conf.d中配置默认目录文件,以.conf结尾
[root@server conf.d]# cat index.conf
<Virtualhost _default_:80>
    Documentroot /www/html
    Customlog "logs/index.log"combined
</Virtualhost>
<Directory "/www/html">
    Require all granted
</Directory>3).配置分默认目录:
read 目录:
 [root@server conf.d]# cat read.conf
<Virtualhost *:80>
    Servername read.mazha.com
        Documentroot/www/virt/read/html
        Customlog"logs/read.log" combined
</Virtualhost>
<Directory "/www/virt/read/html">
        Require all granted
</Directory>
music目录:
[root@server conf.d]# cat music.conf
<Virtualhost *:80>
        Servername music.mazha.com
        Documentroot/www/virt/music/html
        Customlog"logs/music.log" combined
</Virtualhost>
<Directory "/www/virt/music/html">
        Require all granted
</Directory>4).添加dns
注:需要将分域名servername写入DNS服务器或者本地/etc/hosts文件中
9.使用https协议并制作证书
(1)需要安装两个服务:
mod_ssl //使apache支持https协议
crypto-utils //生成ca证书
(2)使用 genkey xxx.zzz.com 生成自己证书
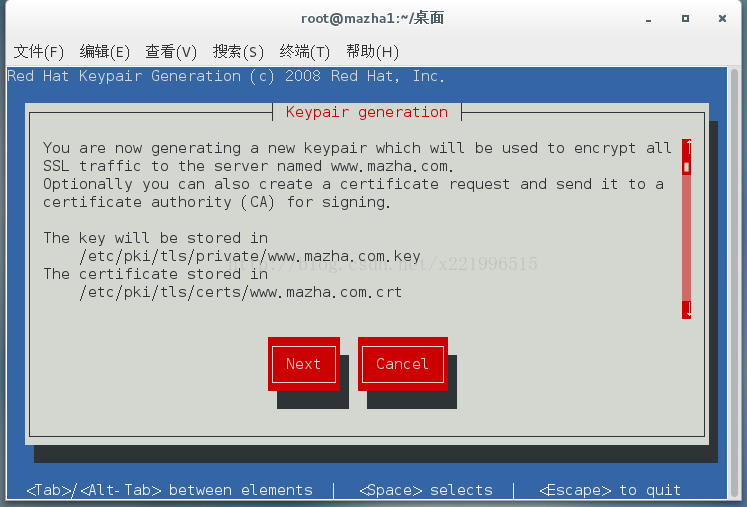
按照提示信息填写即可
(3)配置/etc/httpd/conf.d/ssl.conf
 SSLCertificateFile /etc/pki/tls/certs/www.mazha.com.crt
 SSLCertificateKeyFile /etc/pki/tls/private/www.mazha.com.key
使用刚生成的证书
(4)重启服务,浏览
10.虚拟主机的https设置:
首先virtulhost要打开443端口,
并且授权证书
设置如下:
vim /etc/httpd/conf.d/xxx.conf

<Virtualhost *:80>
        Servername news.mazha.com
        Documentroot/var/www/virt/news/html
        Customlog"logs/news.log" combined
</Virtualhost>
<Directory "/var/www/virt/news/html">
        Require all granted
</Directory>
<Virtualhost *:443>
        Servername news.mazha.com
        Documentroot/var/www/virt/news/html
        Customlog "logs/news-443.log"combined
        SSLEngine on
        SSLCertificateFile/etc/pki/tls/certs/www.mazha.com.crt
        SSLCertificateKeyFile/etc/pki/tls/private/www.mazha.com.key
</Virtualhost>11.网页重写功能:
输入http://www.xxx.com 进入https://www.xxx.com,更加安全
<Virtualhost *:80>
        Servername news.mazha.com
       Rewriteengine on
        Rewriterule ^(/.*)$https://%{HTTP_HOST}$1 [redirect=301]
</Virtualhost>
<Directory "/var/www/virt/news/html">
        Require all granted
</Directory>
<Virtualhost *:443>
        Servername news.mazha.com
        Documentroot/var/www/virt/news/html
        Customlog"logs/news-443.log" combined
        SSLEngine on
        SSLCertificateFile/etc/pki/tls/certs/www.mazha.com.crt
        SSLCertificateKeyFile/etc/pki/tls/private/www.mazha.com.key
</Virtualhost>
<Virtualhost *:80>
Servername news.mazha.com
Rewriteengine on
Rewriterule ^(/.*)$https://%{HTTP_HOST}$1 [redirect=301]
</Virtualhost>
<Directory "/var/www/virt/news/html">
Require all granted
</Directory>
<Virtualhost *:443>
Servername news.mazha.com
Documentroot/var/www/virt/news/html
Customlog"logs/news-443.log" combined
SSLEngine on
SSLCertificateFile/etc/pki/tls/certs/www.mazha.com.crt
SSLCertificateKeyFile/etc/pki/tls/private/www.mazha.com.key
</Virtualhost>12.apache还默认可以识别php和cgi两种文件
php:直接安装php,重启apache
默认文件为:index.php
cgi:
1)创建/var/www/html/cgi
查看帮助文档,修改分配置文件:
<Virtualhost _default_:80>
        Documentroot /var/www/html
        Customlog"logs/default.log" combined
</Virtualhost>
<Directory "/var/www/html/cgi">
        Options +ExecCGI    //可运行cgi脚本
        AddHandler cgi-script .cgi
</Directory>
2)修改 /var/www/html/cgi安全上下文
semanage fcontext -a -t httpd_sys_script_exec_t '/var/www/html/cgi(/.*)?'
restorecon -RvvF /var/www/html/cgi
3) 在/var/www/html/cgi下编写cgi脚本
例:
#!/usr/bin/perl
print "Content-type: text/html\n\n";
print "Hello, World.";
4)脚本给可执行权限:
chmod +x index.cgi


 63万+
63万+


 被折叠的 条评论
为什么被折叠?
被折叠的 条评论
为什么被折叠?
 到【灌水乐园】发言


