


小弟初次写blog,文笔很普通,如有不当之处请多多谅解。话不多说,直接进入正题。
转载请标明出处:http://blog.csdn.net/x498980642/article/details/11890947
首先需要准备的装备以及工具是:
1.Android 2.2以上SDK
2.测试手机一台(数据线自备)
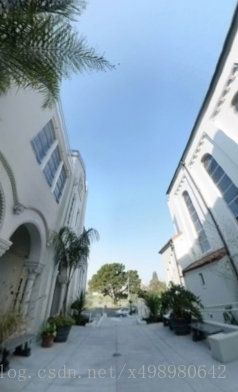
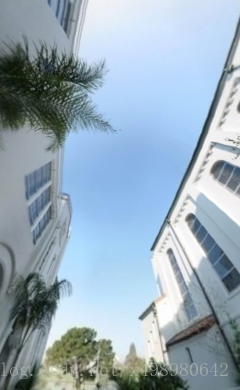
3.360度全景图片一张(项目源码中有,图片全部引用与网络)
360度的全景图片展示,需要面对的问题是,如何将一张全景图片转换为能够在手机上展示的立体图像,对于立体的3D图像,我们首先想到的是地球仪,在这里我需要介绍的是怎样将图片绑定在一个球上面,然后展示出来:
1.绘制球体:
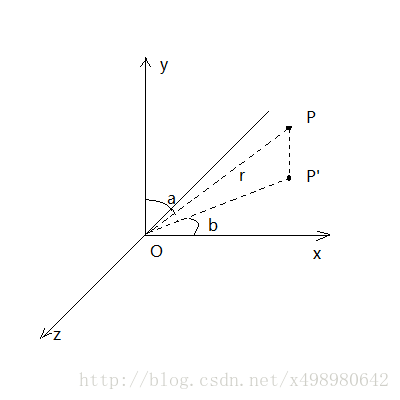
在OpenGL ES中基本上所有的立体图像都是通过一个个的小三角形拼接而成的(关于OpenGL的基础知识我就不过多介绍了,CSDN中有关于OpenGL基础的专栏,大家可以去瞅瞅),我们知道球面上面的每一个点(P(x,y,z))都会满足方程组(球的极坐标方程):
x = r * sin(a) *cos(b)
y = r * cos(a)
z = r * sin(a)*sin(b)
其中 r为球的半径,a为线段 OP与 z轴正方向所夹角,b为 OP在xoy平面的投影 OP‘ 与x的正方向所夹角
我们可以根据这个方程组,通过控制∠a和∠b的变化,从上到下,逆时针的取得我们需要用来组合称三角形的点,然后我们需要将全景图片上的点与我们在球上面选取的点一一对应起来(注意:球的坐标是3维坐标,图片的坐标是2维坐标)
		int perVertex = 36;

		double perRadius = 2 * Math.PI / (float) perVertex;
		double perW = 1 / (float) perVertex;
		double perH = 1 / (float) (perVertex);

		ArrayList<Float> vetexList = new ArrayList<Float>();
		ArrayList<Float> textureList = new ArrayList<Float>();
		for (int a = 0; a < perVertex; a++) {
			for (int b = 0; b < perVertex; b++) {
				float w1 = (float) (a * perH);
				float h1 = (float) (b * perW);

				float w2 = (float) ((a + 1) * perH);
				float h2 = (float) (b * perW);

				float w3 = (float) ((a + 1) * perH);
				float h3 = (float) ((b + 1) * perW);

				float w4 = (float) (a * perH);
				float h4 = (float) ((b + 1) * perW);

				textureList.add(h1);
				textureList.add(w1);

				textureList.add(h2);
				textureList.add(w2);

				textureList.add(h3);
				textureList.add(w3);

				textureList.add(h3);
				textureList.add(w3);

				textureList.add(h4);
				textureList.add(w4);

				textureList.add(h1);
				textureList.add(w1);

				float x1 = (float) (Math.sin(a * perRadius / 2) * Math.cos(b
						* perRadius));
				float z1 = (float) (Math.sin(a * perRadius / 2) * Math.sin(b
						* perRadius));
				float y1 = (float) Math.cos(a * perRadius / 2);

				float x2 = (float) (Math.sin((a + 1) * perRadius / 2) * Math
						.cos(b * perRadius));
				float z2 = (float) (Math.sin((a + 1) * perRadius / 2) * Math
						.sin(b * perRadius));
				float y2 = (float) Math.cos((a + 1) * perRadius / 2);

				float x3 = (float) (Math.sin((a + 1) * perRadius / 2) * Math
						.cos((b + 1) * perRadius));
				float z3 = (float) (Math.sin((a + 1) * perRadius / 2) * Math
						.sin((b + 1) * perRadius));
				float y3 = (float) Math.cos((a + 1) * perRadius / 2);

				float x4 = (float) (Math.sin(a * perRadius / 2) * Math
						.cos((b + 1) * perRadius));
				float z4 = (float) (Math.sin(a * perRadius / 2) * Math
						.sin((b + 1) * perRadius));
				float y4 = (float) Math.cos(a * perRadius / 2);

				vetexList.add(x1);
				vetexList.add(y1);
				vetexList.add(z1);

				vetexList.add(x2);
				vetexList.add(y2);
				vetexList.add(z2);

				vetexList.add(x3);
				vetexList.add(y3);
				vetexList.add(z3);

				vetexList.add(x3);
				vetexList.add(y3);
				vetexList.add(z3);

				vetexList.add(x4);
				vetexList.add(y4);
				vetexList.add(z4);

				vetexList.add(x1);
				vetexList.add(y1);
				vetexList.add(z1);
			}
		}
		mSize = vetexList.size() / 3;
		float texture[] = new float[mSize * 2];
		for (int i = 0; i < texture.length; i++) {
			texture[i] = textureList.get(i);
		}
		textureBuff = ByteBuffer.allocateDirect(texture.length * 4)
				.order(ByteOrder.nativeOrder()).asFloatBuffer();
		textureBuff.put(texture);
		textureBuff.position(0);

		float vetex[] = new float[mSize * 3];
		for (int i = 0; i < vetex.length; i++) {
			vetex[i] = vetexList.get(i);
		}
		vertexBuff = ByteBuffer.allocateDirect(vetex.length * 4)
				.order(ByteOrder.nativeOrder()).asFloatBuffer();
		vertexBuff.put(vetex);
		vertexBuff.position(0);

	}
	public static int initTexture(Context context, int drawableId)// textureId
	{
		int[] textures = new int[1];
		glGenTextures(1, textures, 0);
		int textureId = textures[0];
		glBindTexture(GL_TEXTURE_2D, textureId);
		glTexParameterf(GL_TEXTURE_2D, GL_TEXTURE_MIN_FILTER, GL_NEAREST);
		glTexParameterf(GL_TEXTURE_2D, GL_TEXTURE_MAG_FILTER, GL_LINEAR);
		glTexParameterf(GL_TEXTURE_2D, GL_TEXTURE_WRAP_S, GL_CLAMP_TO_EDGE);
		glTexParameterf(GL_TEXTURE_2D, GL_TEXTURE_WRAP_T, GL_CLAMP_TO_EDGE);

		InputStream is = context.getResources().openRawResource(drawableId);
		Bitmap bitmapTmp;
		try {
			bitmapTmp = BitmapFactory.decodeStream(is);
		} finally {
			try {
				is.close();
			} catch (IOException e) {
				e.printStackTrace();
			}
		}
		GLUtils.texImage2D(GL_TEXTURE_2D, 0, bitmapTmp, 0);
		bitmapTmp.recycle();

		return textureId;
	}
glActiveTexture(GLES20.GL_TEXTURE0);
glBindTexture(GL_TEXTURE_2D, textrueID);
		mProgram = TimGL2Utils.getProgram(mContext);
		glUseProgram(mProgram);

		mAPositionHandler = glGetAttribLocation(mProgram, "aPosition");
		mUProjectMatrixHandler = glGetUniformLocation(mProgram,
				"uProjectMatrix");
		mATextureCoordHandler = glGetAttribLocation(mProgram, "aTextureCoord");

		System.out.println("mAPositionHandler:" + mAPositionHandler);
		System.out.println("mUProjectMatrixHandler:" + mUProjectMatrixHandler);
		System.out.println("mATextureCoordHandler:" + mATextureCoordHandler);
		textrueID = TimGL2Utils.initTexture(mContext, R.drawable.p3);
		System.out.println("textureID:" + textrueID);

		glVertexAttribPointer(mAPositionHandler, 3, GL_FLOAT, false, 0,
				vertexBuff);
		glVertexAttribPointer(mATextureCoordHandler, 2, GL_FLOAT, false, 0,
				textureBuff);

		glEnableVertexAttribArray(mAPositionHandler);
		glEnableVertexAttribArray(mATextureCoordHandler);
glUniformMatrix4fv(mUProjectMatrixHandler, 1, false,
getfinalMVPMatrix(), 0);
glDrawArrays(GL_TRIANGLES, 0, mSize);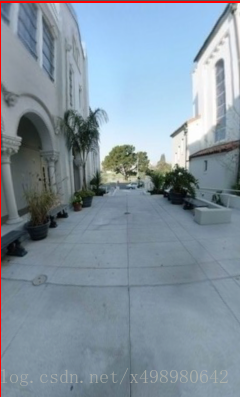


 1587
1587


 被折叠的 条评论
为什么被折叠?
被折叠的 条评论
为什么被折叠?
 到【灌水乐园】发言


