


个人感觉微信小程序的IDE用起来有时候不太方便,可能是之前用惯了Eclipse的原因吧。微信小程序的开发工具不支持直接将文件拷贝到目录下,所以首先要将图片文件导入到本地目录下,然后编写工具类获取屏幕的宽度和高度,具体步骤如下图。
1、本地图片导入
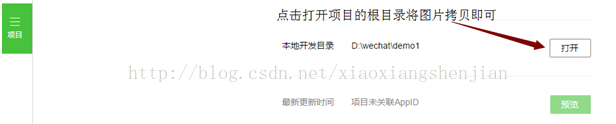
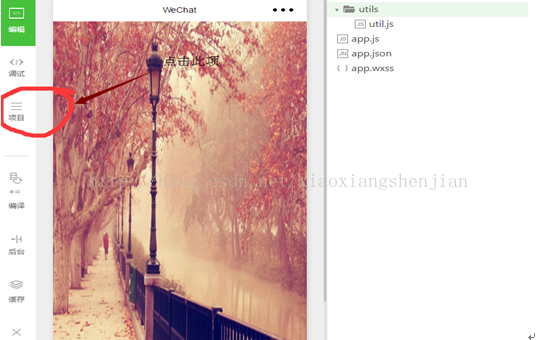
步骤一:选择最左侧的菜单中的项目

步骤二:选择打开后将图片直接拷贝到新建的image文件夹下
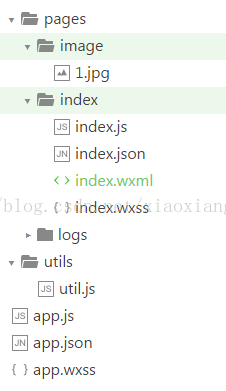
图片导入完成后,项目的整体目录结构如下图所示,
2、按屏幕尺寸自适应图片宽和高
步骤一:编写工具函数,返回封装后的屏幕高度和宽度
打开根目录下的utils文件夹下的utils.js文件,个人感觉这个类似Java里面的工具类,具体代码如下:
/**
 * 获取移动端显示屏的宽和高,
 * 参数:e,
 * return viewSize (包含显示屏的宽和高)
 */
function getViewWHInfo(e){
    var viewSize={};
    var originalWidth = e.detail.width;//图片原始宽
    var originalHeight = e.detail.height;//图片原始高
    wx.getSystemInfo({
      success: function (res) {
        //读取系统宽度和高度
        var viewWidth = res.windowWidth;
        var viewHeight = res.windowHeight;
        console.log(originalWidth + " " + originalHeight);
        console.log("宽:" + viewWidth + "高" + viewHeight);
        viewSize.width = viewWidth;
        viewSize.height = viewHeight;
      }
    });
    return viewSize;
}
//导出接口--必须要写
module.exports = {
  getViewWHInfo: getViewWHInfo
}
步骤二:编辑脚本文件
打开index文件夹下的index.js文件,将原有的内容全部删除,并将下列代码直接复制,首先调用require函数将工具类进行实例化,其中data里面设置的是我们在index.wxml文件中需要读取的变量,imageLoad函数将绑定图片加载事件bindLoad, imageUtil.getViewWHInfo(e)该句调用了上面自定义的函数。
//index.js
//获取应用实例
//获取工具类的应用实例
var imageUtil = require('../../utils/util.js');
var app = getApp()
Page({
  data:{
    imageUrl:"../image/1.jpg",
    viewHeigh:"",
    viewWidth:""
  },
  onLoad: function () {
  },
  imageLoad:function(e){
    var viewSize = imageUtil.getViewWHInfo(e);
    //console.log(viewSize.heigh);
    this.setData({
      viewHeigh: viewSize.height,
      viewWidth: viewSize.width
    });

  }
})
步骤三:编辑图片标签
打开index文件夹下的index.wxml文件,删除原有的全部内容,将下面的图片插入代码直接复制粘贴,其中style表示的是标签的样式,width:{{viewWidth}}表示图片的宽度是取index.js文件中所赋的值,height和src同理,bindload事件表示该图片加载的时候绑定了index.js文件imageLoad函数,并且在图片加载时执行该函数。
 <image
 style="width: {{viewWidth}}px; height: {{viewHeigh}}px;" src="{{imageUrl}}" bindload="imageLoad">
 </image>
最后效果图:


 650
650

 被折叠的 条评论
为什么被折叠?
被折叠的 条评论
为什么被折叠?
 到【灌水乐园】发言


