


写这篇文章前,自己踩过很多坑,希望能助大家一步跨坑。
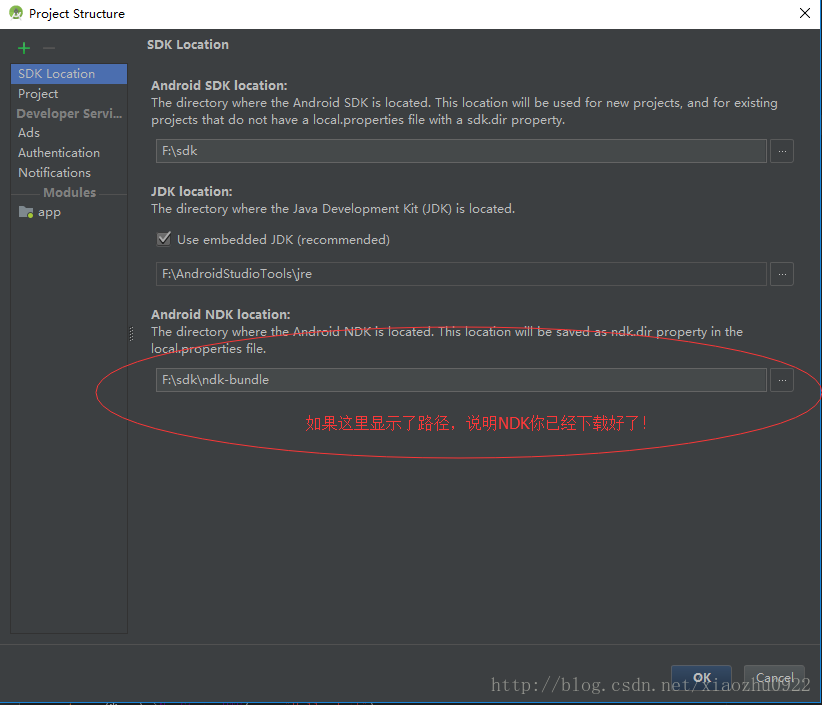
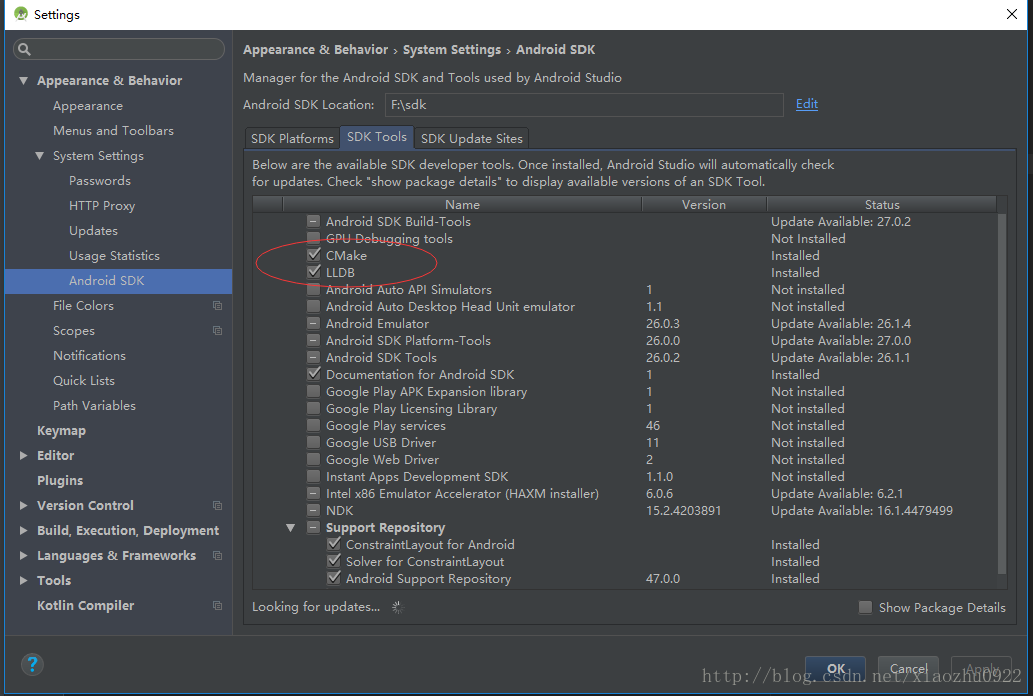
1、环境搭建:通过SDKManager-SDK Tools下载NDK插件,下载后到SDK Location里面检查里面的NDK路径:
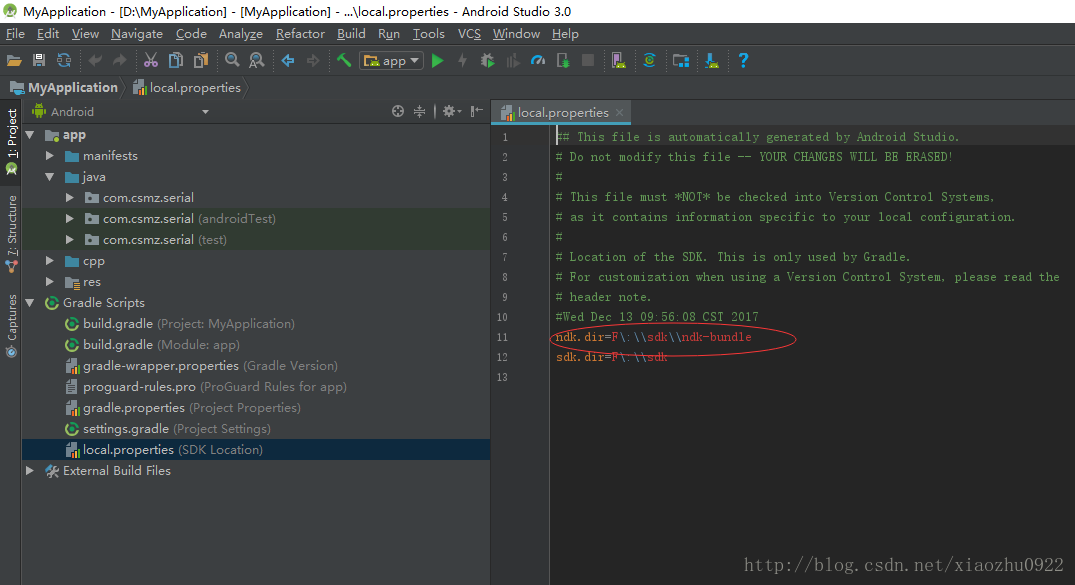
检查local.properties文件里面有没有NDK路径:
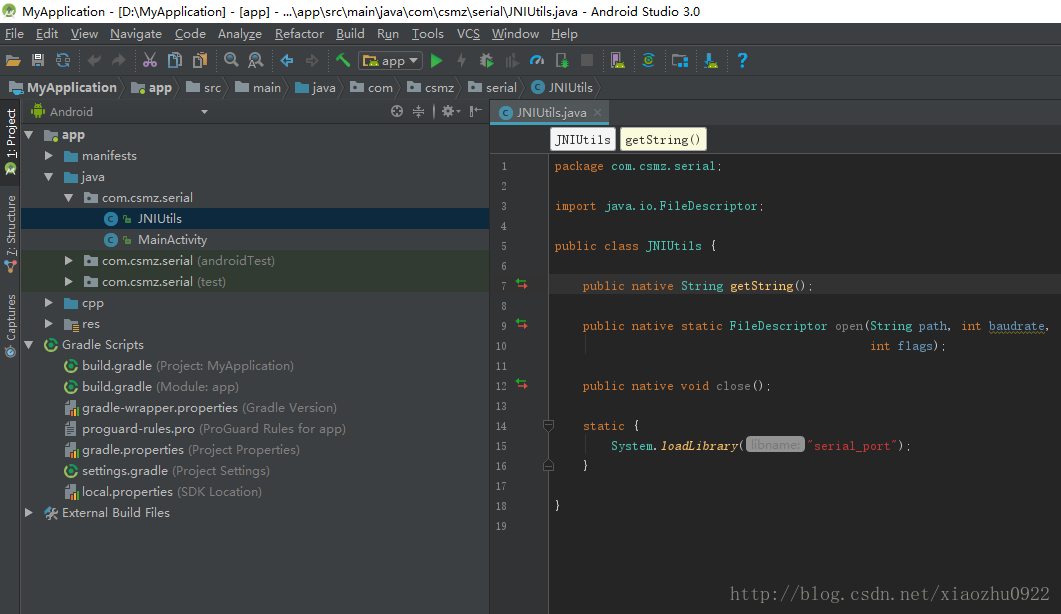
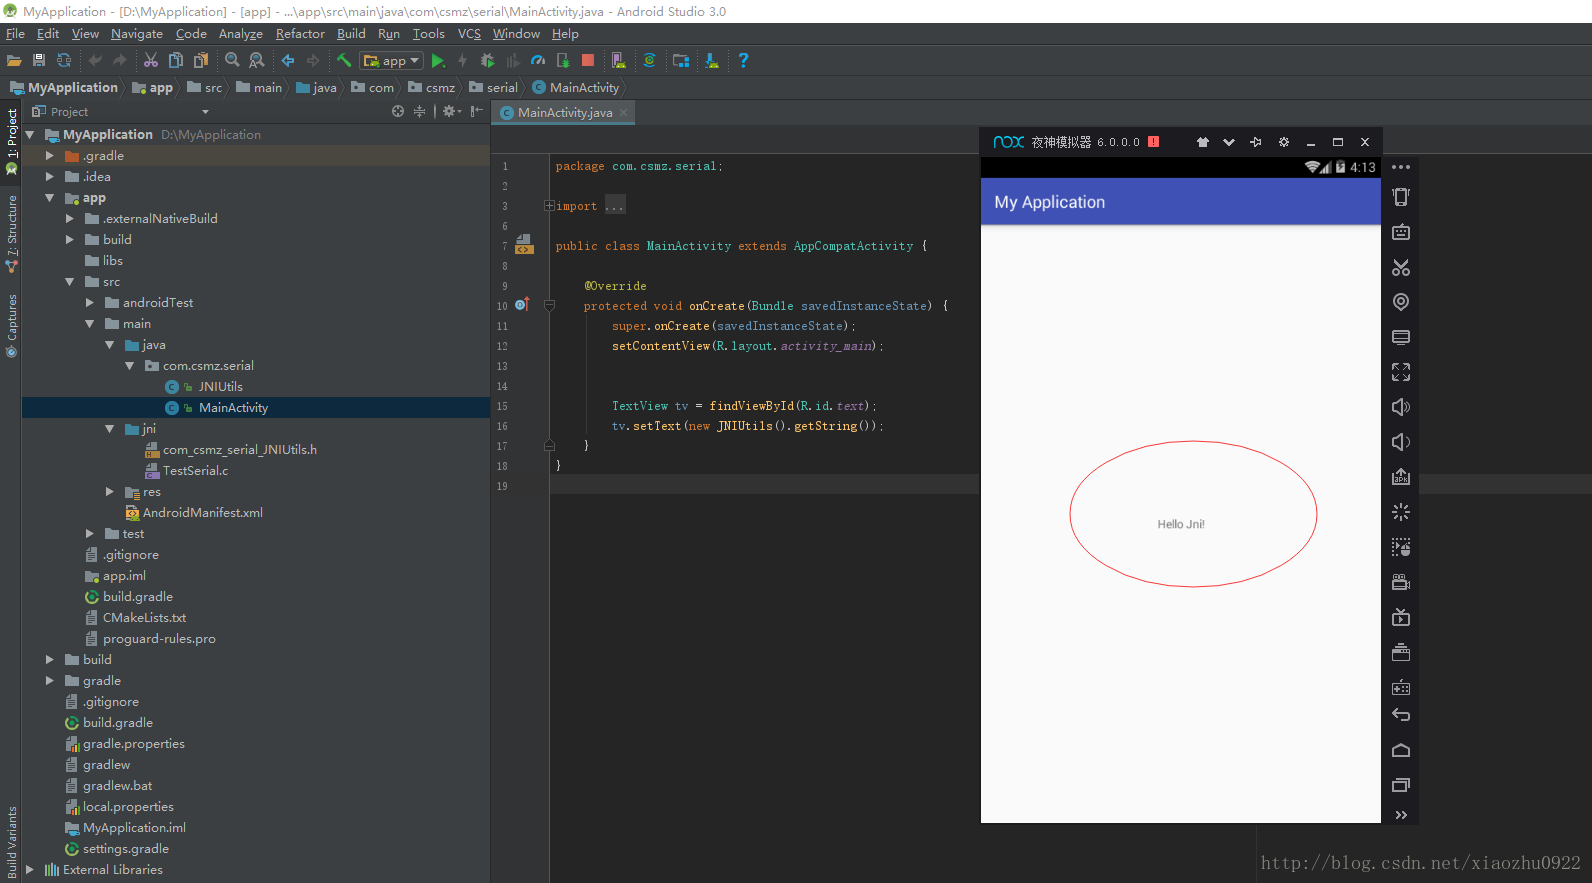
2、使用native关键字编写JNI接口:
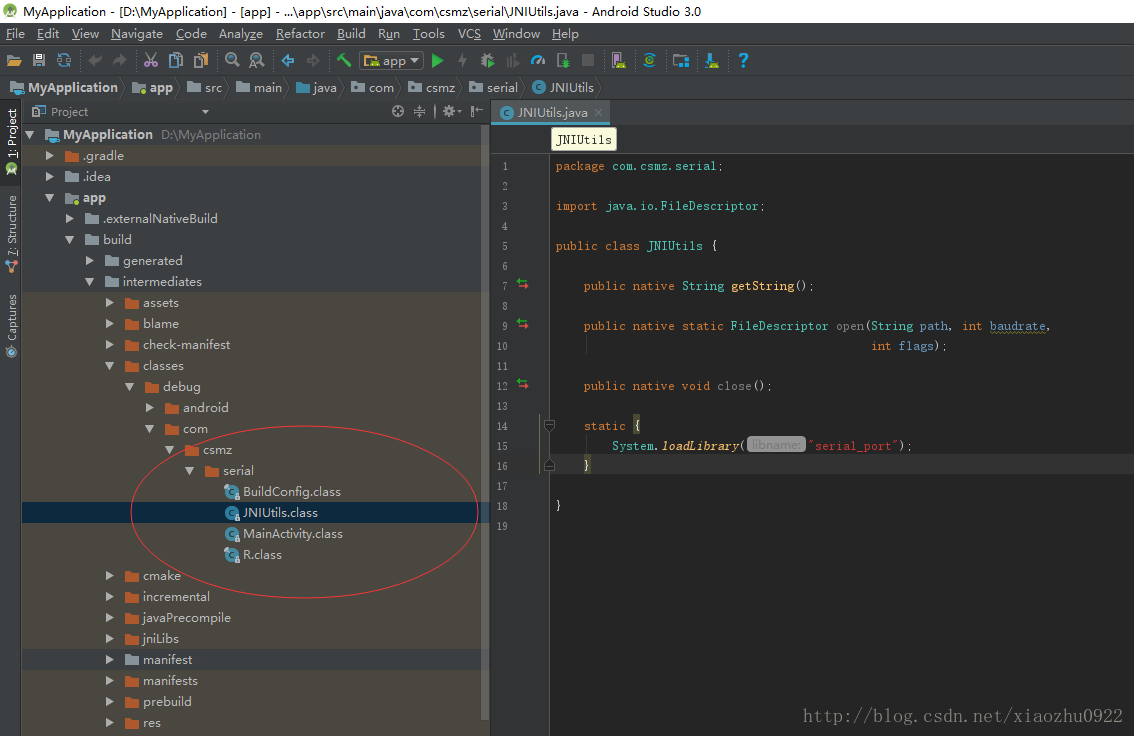
编写之后,make project,再到工程目录E:\work\MyApplication\stujni\build\intermediates\classes\debug\com\huazi\stujni\jni中看到自己编译后的class文件JNIUtils.class如下图所示:
3、使用javah生成.h头文件 步骤如下:
1.打开Terminal,然后在命令行中先进入到工程的main目录下 cd app/src/main。
2.输入命令:javah -d jni -classpath (刚才生成class文件的绝对路径)
例如:javah -d jni -classpath E:\work\MyApplication\stujni\build\intermediates\classes\debug com.huazi.stujni.jni.JNIUtils(注意debug后的空格)
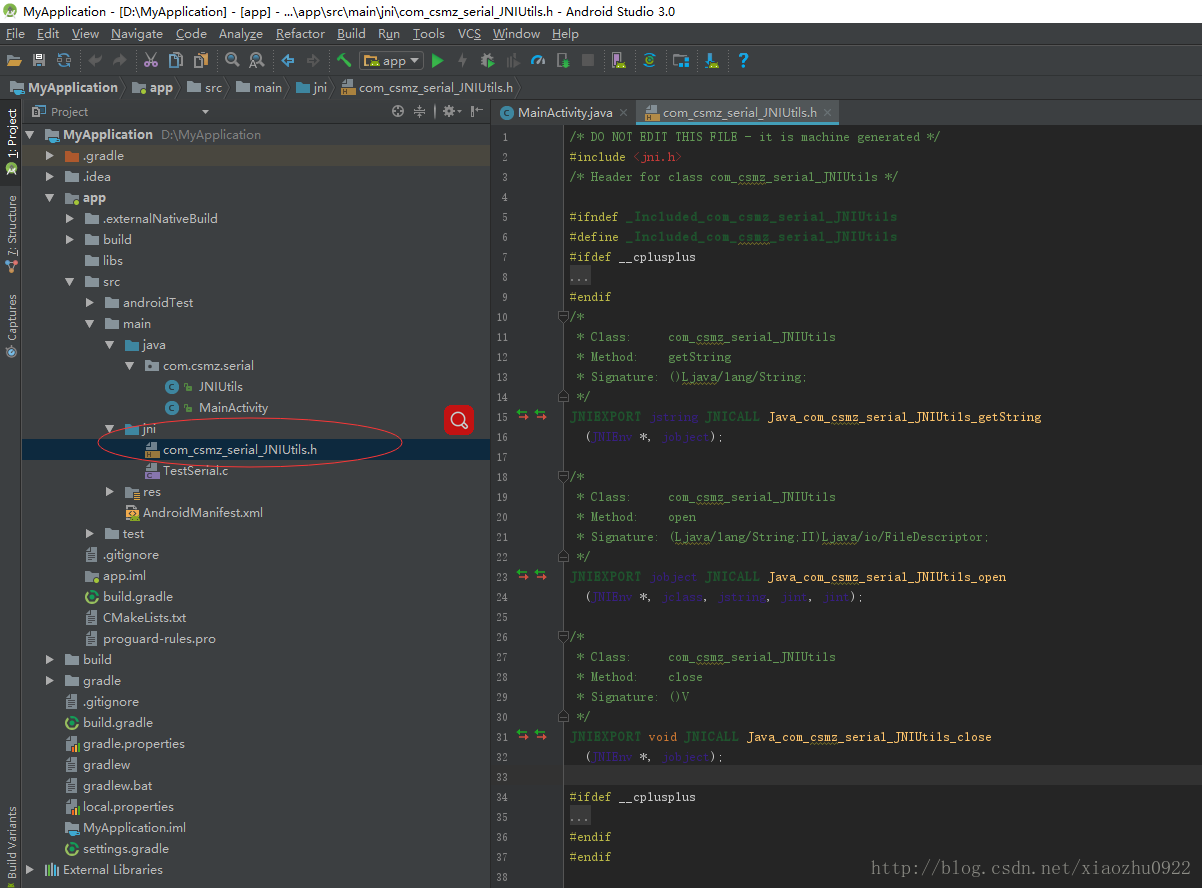
这个文件.h文件不需要做任何修改,默认即可。
现在我们来写一个test的C文件TestSerial.c同.h文件一样放到jni文件夹下
然后在TestSerial.c文件里面引入生成.h文件:
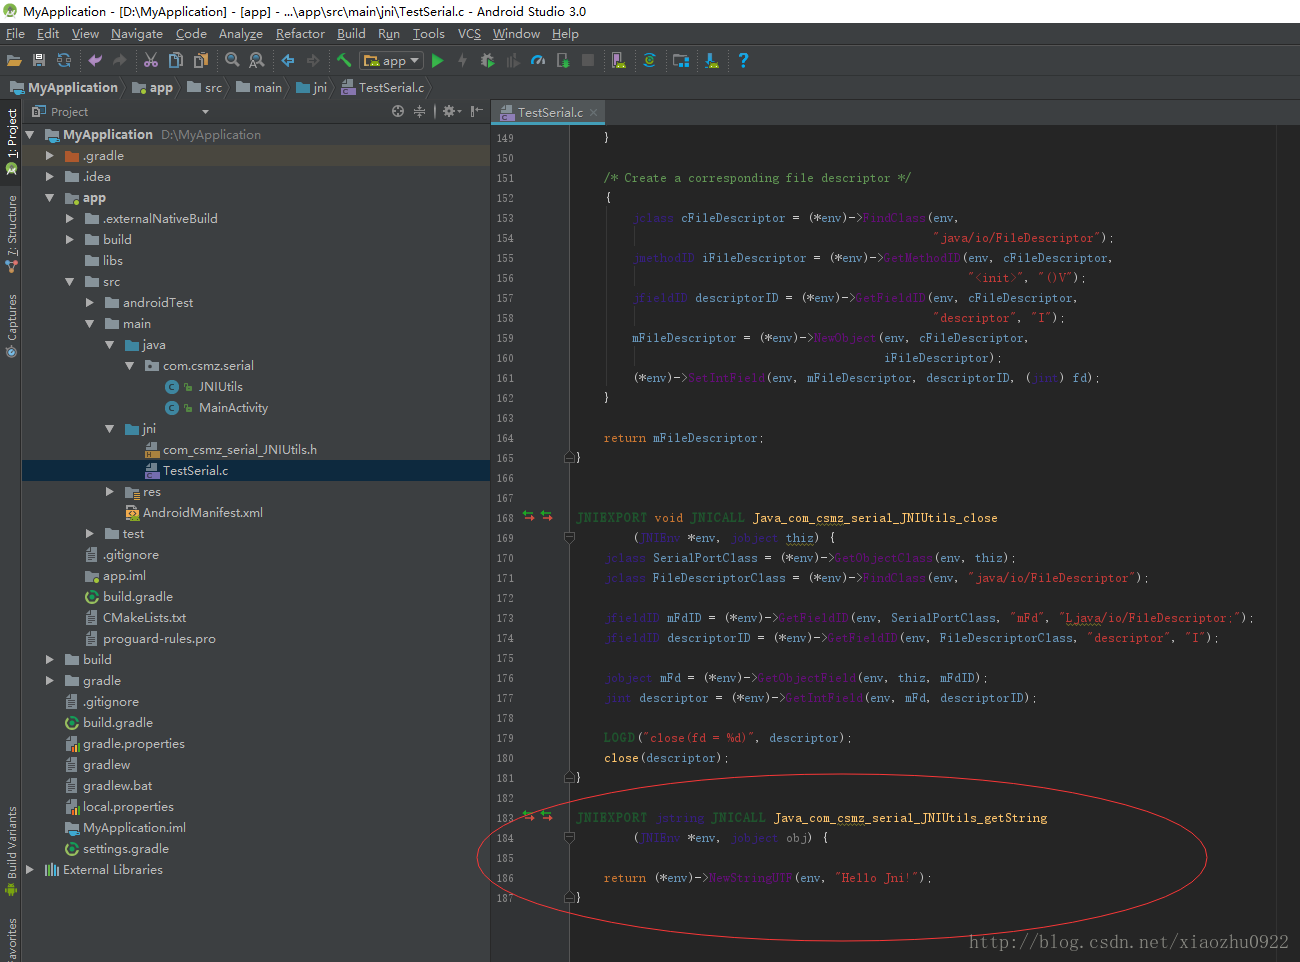
到这里我们的方法就实现完毕了 直接调用看结果:
最重要的生成.so文件:
gradle3.0以前生成方式:
在根目录gradle.properties下面加上:
android.useDeprecatedNdk=true意思就是允许使用低版本的NDK
在module下面的build.gradle下面加上ndk节点如下图:
ndk {
moduleName “serial_port”//定义自己Ndklibrary的名字
ldLibs “log” //添加log库
// 设置支持的SO库架构
abiFilters ‘armeabi’
}
需要这两步就可以运行生成so文件了,然儿,并没有想象的那么顺利,报错了,我顿时心中飞过一万只草泥玛,上log:
Error:Execution failed for task ‘:app:compileDebugNdk’.
Error: Flag android.useDeprecatedNdk is no longer supported and will be removed in the next version of Android Studio. Please switch to a supported build system.
Consider using CMake or ndk-build integration. For more information, go to:
https://d.android.com/r/studio-ui/add-native-code.html#ndkCompile
To get started, you can use the sample ndk-build script the Android
plugin generated for you at:
/Users/apple/Desktop/AndroidJNITest/app/build/intermediates/ndk/debug/Android.mk
Alternatively, you can use the experimental plugin:
https://developer.android.com/r/tools/experimental-plugin.html
To continue using the deprecated NDK compile for another 60 days, set
android.deprecatedNdkCompileLease=1512283120054 in gradle.properties
百思不得其解,我之前一直是这样搞的呀,为什么现在不行了呢。
遇到错误不要慌张,程序员就是不怕事。
仔细看了下log,大概意思说:
android.useDeprecatedNdk不再支持了
让使用CMake or ndk-build
然后还有链接
考虑使用CMake或ndk构建集成。要了解更多信息,请访问:
https://d.android.com/r/studio-ui/add-native-code.html#ndkCompile
首先,您可以使用Android的ndk构建脚本示例插件为您生成:
/Users/apple/Desktop/AndroidJNITest/app/build/intermediates/ndk/debug/Android.mk
或者,你可以使用实验插件:
https://developer.android.com/r/tools/experimental-plugin.html
继续使用已弃用的NDK编译60天,设置
在gradle.properties
android.deprecatedNdkCompileLease = 1512283120054(这个测试不起作用)
经过各种查资料,发现原来在gradle3.0以上以前这种方法不在支持
学习过程就不详细描述了,直接上结果:
先通过SDKManager下载:CMake和LLDB
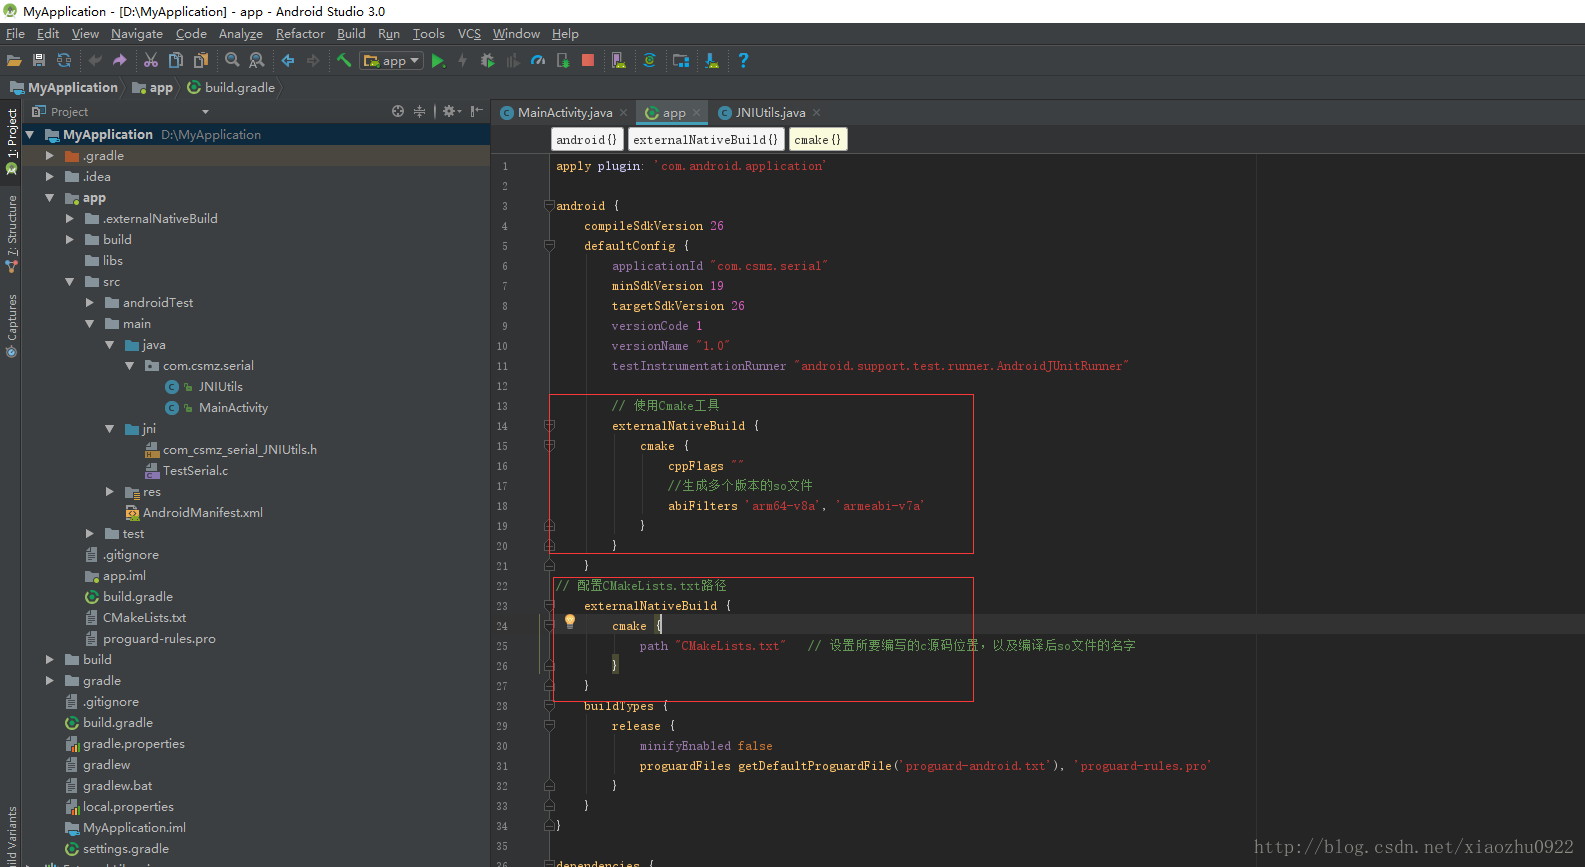
在build.gradle的defaultConfig节点下加入:
// 使用Cmake工具
externalNativeBuild {
cmake {
cppFlags “serial_port”
//生成多个版本的so文件
abiFilters ‘arm64-v8a’, ‘armeabi-v7a’
}
}
在build.gradle的android节点下加入:
// 配置CMakeLists.txt路径
externalNativeBuild {
cmake {
path “CMakeLists.txt” //编译后so文件的名字
}
}
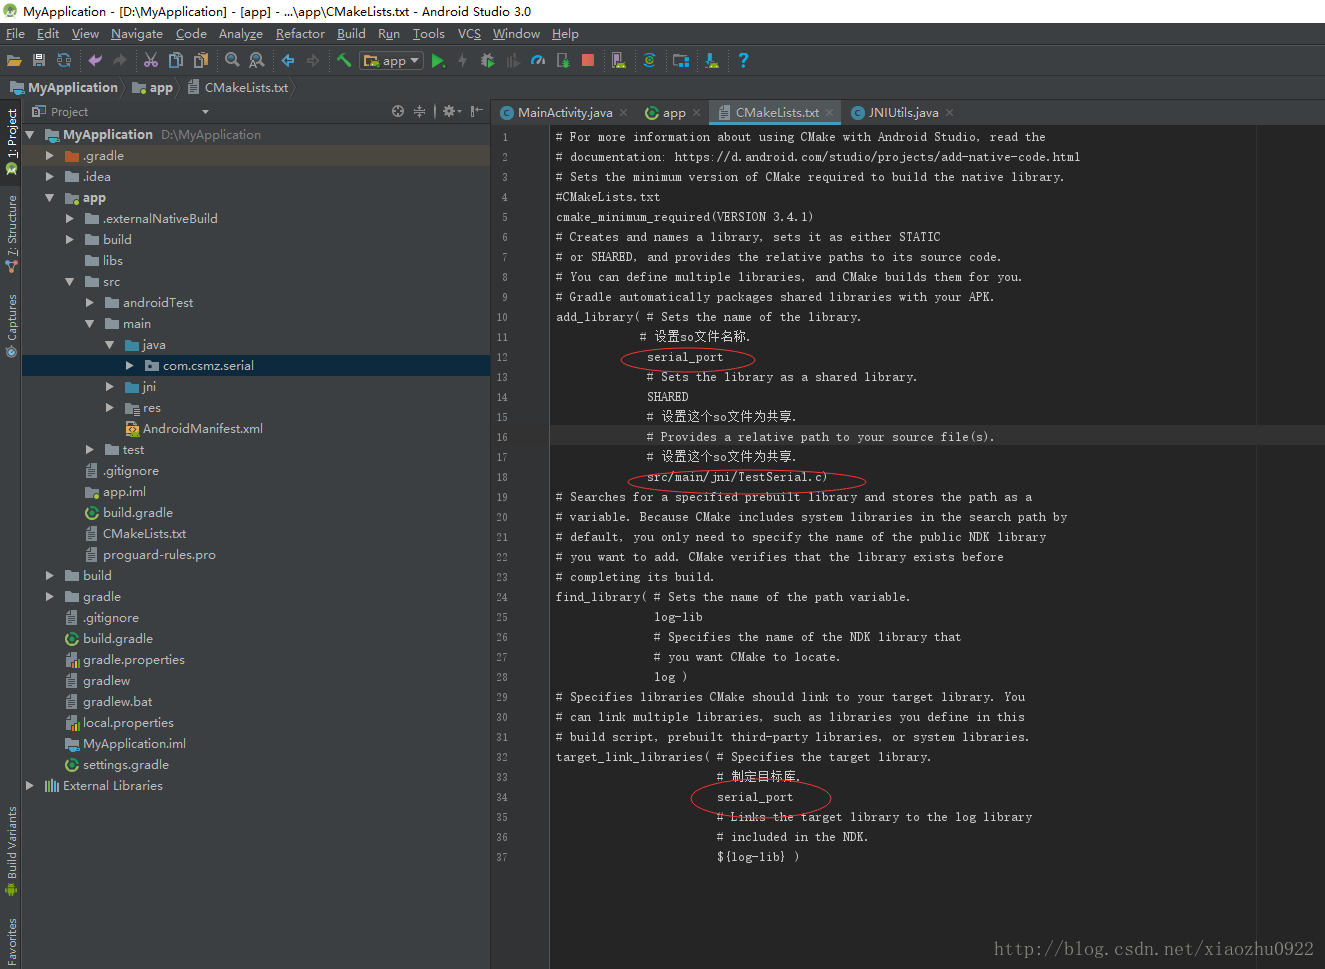
添加CMakeLists.txt文件到build.gradle文件同级目录下,具体内容如下:
# For more information about using CMake with Android Studio, read the
documentation: https://d.android.com/studio/projects/add-native-code.html
Sets the minimum version of CMake required to build the native library.
CMakeLists.txt
cmake_minimum_required(VERSION 3.4.1)
Creates and names a library, sets it as either STATIC
or SHARED, and provides the relative paths to its source code.
You can define multiple libraries, and CMake builds them for you.
Gradle automatically packages shared libraries with your APK.
add_library( # Sets the name of the library.
# 设置so文件名称.
serial_port
# Sets the library as a shared library.
SHARED
# 设置这个so文件为共享.
# Provides a relative path to your source file(s).
# 设置这个so文件为共享.
src/main/jni/TestSerial.c)
Searches for a specified prebuilt library and stores the path as a
variable. Because CMake includes system libraries in the search path by
default, you only need to specify the name of the public NDK library
you want to add. CMake verifies that the library exists before
completing its build.
find_library( # Sets the name of the path variable.
log-lib
# Specifies the name of the NDK library that
# you want CMake to locate.
log )
Specifies libraries CMake should link to your target library. You
can link multiple libraries, such as libraries you define in this
build script, prebuilt third-party libraries, or system libraries.
target_link_libraries( # Specifies the target library.
# 制定目标库.
serial_port
# Links the target library to the log library
# included in the NDK.
${log-lib} )
所有流程都搞定,接下见证奇迹:
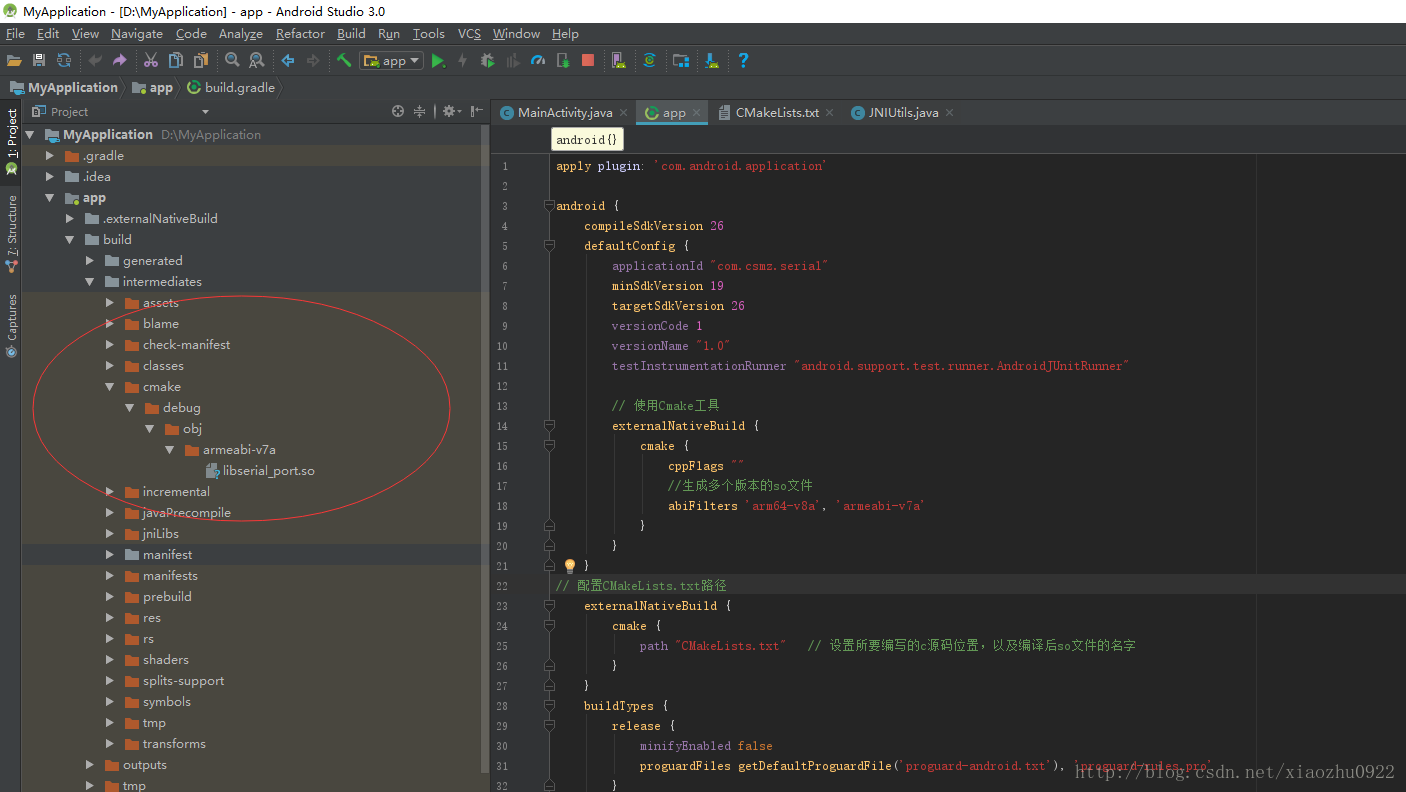
调用编译过的.so库
上边编译完成了,有人会问:我要的是编译后的.so库,别人用的时候直接拿来用就可以了,那该怎么办呢,直接把上面的so文件复制到相应的文件夹就ok了:
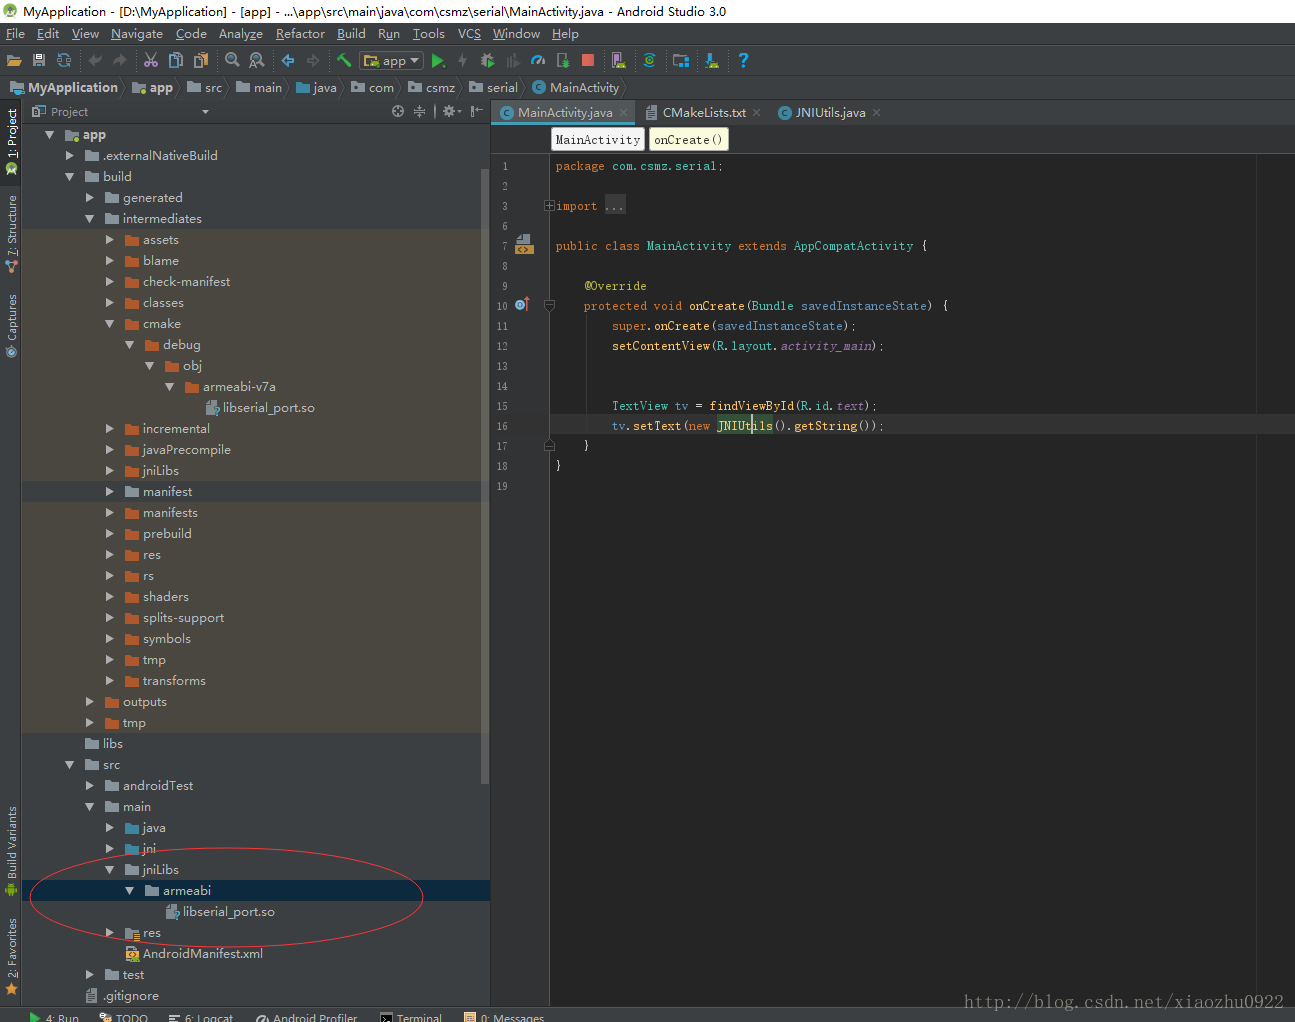
到这里,整个jni的调用过程就结束了,包括调用jni需要的环境以及调用的过程,最后.so文件的导出,都在上边了,都是自己踩过的坑总结的。


 5万+
5万+


 被折叠的 条评论
为什么被折叠?
被折叠的 条评论
为什么被折叠?
 到【灌水乐园】发言


