


在上一节中我们讲了如何创建一个简单WCF Service并以添加新网站的方式发布到IIS中,这一节我们将如何创建webpart并在webpart中调用WCF Service。
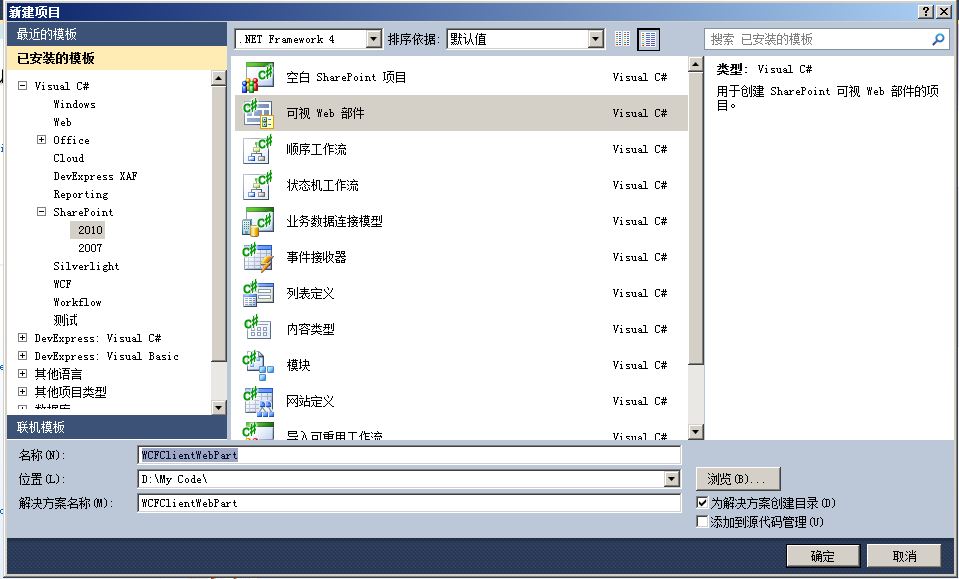
接上一节,第二步,我们先来创建一个webpart。打开VS2010,选择sharepoint-->2010-->可视web部件,并命名为WCFClientWebpart
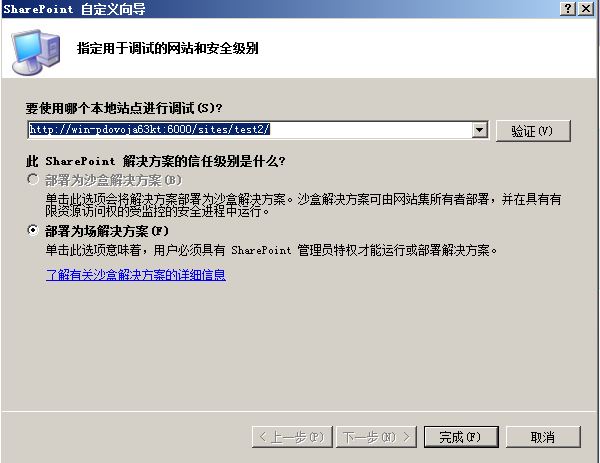
2.点击确定后,在配置向导填入一个已有的sharepoint站点,并选择部署为场解决方案。然后点击完成。
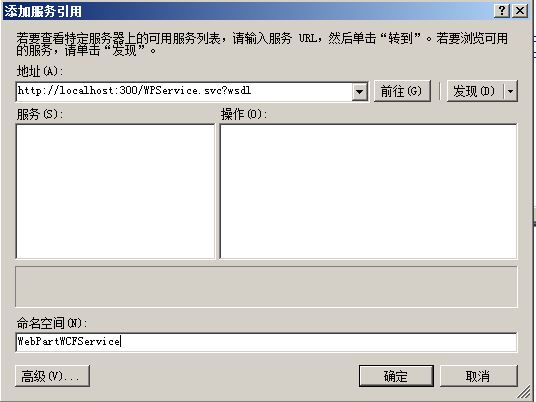
3.右键点击引用,选择添加服务引用,并将之前创建好的WCF地址填入,在命名空间一栏中填入WebPartWCFService,点击确定。
4.修改webpart前台和后台代码
前台VisualWebPart1UserControl.ascx文件内容为:
<%@ Assembly Name="$SharePoint.Project.AssemblyFullName$" %>
<%@ Assembly Name="Microsoft.Web.CommandUI, Version=14.0.0.0, Culture=neutral, PublicKeyToken=71e9bce111e9429c" %>
<%@ Register Tagprefix="SharePoint" Namespace="Microsoft.SharePoint.WebControls" Assembly="Microsoft.SharePoint, Version=14.0.0.0, Culture=neutral, PublicKeyToken=71e9bce111e9429c" %>
<%@ Register Tagprefix="Utilities" Namespace="Microsoft.SharePoint.Utilities" Assembly="Microsoft.SharePoint, Version=14.0.0.0, Culture=neutral, PublicKeyToken=71e9bce111e9429c" %>
<%@ Register Tagprefix="asp" Namespace="System.Web.UI" Assembly="System.Web.Extensions, Version=3.5.0.0, Culture=neutral, PublicKeyToken=31bf3856ad364e35" %>
<%@ Import Namespace="Microsoft.SharePoint" %>
<%@ Register Tagprefix="WebPartPages" Namespace="Microsoft.SharePoint.WebPartPages" Assembly="Microsoft.SharePoint, Version=14.0.0.0, Culture=neutral, PublicKeyToken=71e9bce111e9429c" %>
<%@ Control Language="C#" AutoEventWireup="true" CodeBehind="VisualWebPart1UserControl.ascx.cs" Inherits="WCFClientWebPart.VisualWebPart1.VisualWebPart1UserControl" %>
<asp:TextBox ID="TextBox1" runat="server" Height="20px" Width="20px"></asp:TextBox>
+
<asp:TextBox ID="TextBox2" runat="server" Height="20px" Width="20px"></asp:TextBox>
=
<asp:TextBox ID="TextBox3" runat="server" Height="20px" Width="20px"></asp:TextBox>
<br/>
<asp:Button ID="Button1" runat="server" Text="求和" οnclick="Button1_Click" />
后台VisualWebPart1UserControl.ascx.cs中的代码为:
using System;
using System.Web.UI;
using System.Web.UI.WebControls;
using System.Web.UI.WebControls.WebParts;
using WCFClientWebPart.WebPartWCFService;
namespace WCFClientWebPart.VisualWebPart1
{
public partial class VisualWebPart1UserControl : UserControl
{
protected void Page_Load(object sender, EventArgs e)
{
TextBox1.Text = "0";
TextBox2.Text = "0";
}
protected void Button1_Click(object sender, EventArgs e)
{
WPServiceClient wpclient = new WPServiceClient();
TextBox3.Text = wpclient.Add(Convert.ToInt32(TextBox1.Text), Convert.ToInt32(TextBox2.Text)).ToString();
wpclient.Close();
}
}
}
5.修改完代码后,打开项目栏中的app.config文件,并把<system.serviceModel>结点下的内容
<bindings>
<basicHttpBinding>
<binding name="BasicHttpBinding_IWPService" closeTimeout="00:01:00"
openTimeout="00:01:00" receiveTimeout="00:10:00" sendTimeout="00:01:00"
allowCookies="false" bypassProxyOnLocal="false" hostNameComparisonMode="StrongWildcard"
maxBufferSize="65536" maxBufferPoolSize="524288" maxReceivedMessageSize="65536"
messageEncoding="Text" textEncoding="utf-8" transferMode="Buffered"
useDefaultWebProxy="true">
<readerQuotas maxDepth="32" maxStringContentLength="8192" maxArrayLength="16384"
maxBytesPerRead="4096" maxNameTableCharCount="16384" />
<security mode="None">
<transport clientCredentialType="None" proxyCredentialType="None"
realm="" />
<message clientCredentialType="UserName" algorithmSuite="Default" />
</security>
</binding>
</basicHttpBinding>
</bindings>
<client>
<endpoint address="http://localhost:300/WPService.svc" binding="basicHttpBinding"
bindingConfiguration="BasicHttpBinding_IWPService" contract="WebPartWCFService.IWPService"
name="BasicHttpBinding_IWPService" />
</client>
复制到对应sharepoint webapp下的web.config文件的<system.serviceModel>结点下,然后保存。
web.config文件可以在C:\inetpub\wwwroot\wss\VirtualDirectories这个路径的对应端口文件夹下找到
6.然后直接在vs中点击运行调试webpart,打开对应的站点后,编辑当前页,并插入webpart。
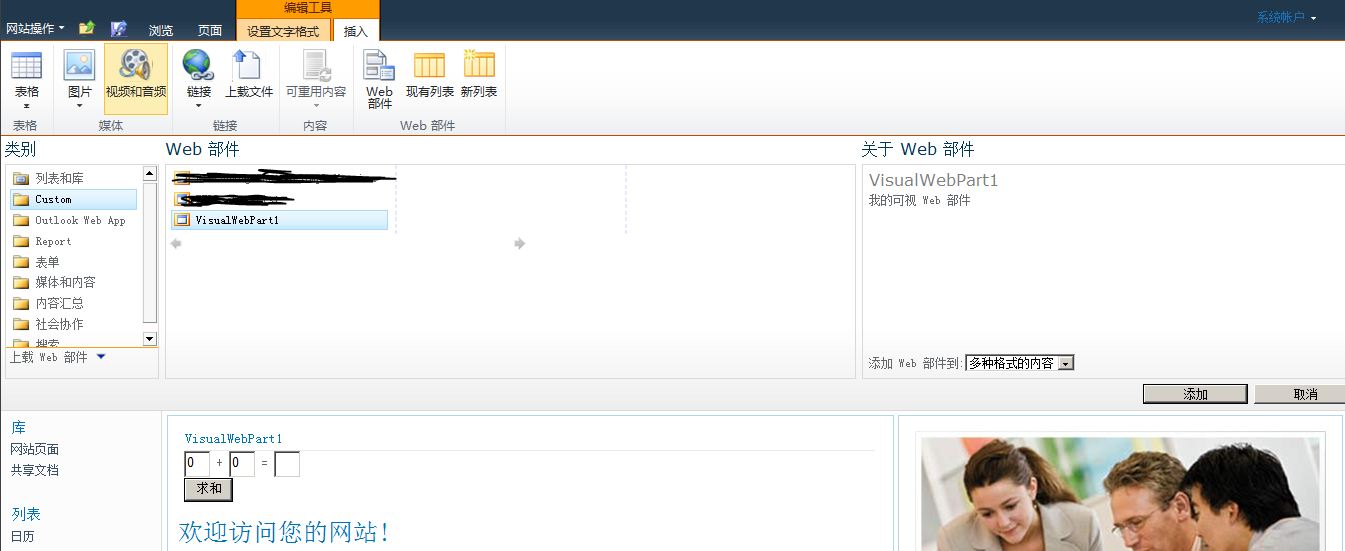
7.保存后,在前两个textbox中随便输入两个数,就可以调用WCFService并求出两个数的和。
以上就是一个简单的在webpart中调用WCF服务的小例子。如果有对此方面问题有兴趣或者有疑问,欢迎大家共同探讨!


 936
936


 被折叠的 条评论
为什么被折叠?
被折叠的 条评论
为什么被折叠?
 到【灌水乐园】发言


