


上文中,我们提到要在一个具体的工程里面调用我们已经封装好的DS18B20来获取当前的温度。那么就来看看在下面的例子里面怎样调用已经写好的getTemp函数来实现测量温度的功能。
首先,我们的设计包括以下几点:
1.利用DS18B20数字式温度传感器获取当前温度值。
2.在数码管上显示当前温度值。
3.利用51单片机的串口通信功能,将温度值发送到上位机端。
下面,我们就来看看具体实现:
我们的思想还是模块化,将工程要实现的目的分为几个部分:DS18B20模块,数码管控制模块,串口通信模块。其中DS18B20模块在上篇文章中已经封装好了,而数码管和串口通信模块也在我前面的文章中有所介绍,所以我们先分模块给出各自部分的代码:
1.总体布局
总体布局中主要是写了几个重要的头文件。这几个头文件是最基础的东西,每个模块都要包含它们。
(1)common.h文件
作用:定义工程中常用的宏定义等。
代码如下:
#ifndef _COMMON_H_
#define _COMMON_H_

#define BIT(n)  (0x01<<n)     //用于位运算

#define EnableInterrupt (EA=1)   //开中断
#define DisableInterrupt (EA=0)	 //关中断

typedef	unsigned char uchar;
typedef unsigned int uint;

void delay(uchar time);

#endif
在comon.h头文件里面,还声明了一个delay函数作为通用的一个延时函数,这个函数的定义要在common.c里面去实现。
common.c文件的内容如下:
#include "common.h"

void delay(uchar time)
{
	uchar i=0;
	for(;i<time;i++)
		;
}
(2)includes.h文件
作用:定义工程中其他代码文件共同包含的头文件。
#ifndef _INCLUDE_H_
#define _INCLUDE_H_

#include <reg52.h>
#include "common.h"

#endif
2.DS18B20模块
(1)头文件DS18B20.h
作用:为外部函数调用DS18B20模块的功能提供接口。
#ifndef _DS18B20_H_
#define _DS18B20_H_

#include <reg52.h>

//ROM操作指令
#define start_ZH         0x44
#define read_ROM    	 0x33
#define match_ROM   	 0x55
#define skip_ROM    	 0xcc
#define search_ROM  	 0xf0
#define alarm_SEARCH 	 0xec
#define write_RAM 		 0x4e
#define read_RAM 		 0xbe
#define copy_RAM 		 0x48
#define recall_EPROM 	 0xb8
#define read_POWER 	     0xb4

sbit ds=P2^2;

/*********************************
功能:初始化设备函数
参数:无
返回值:无
*********************************/
void Init_ds18b20();

/*********************************
功能:等待设备应答
参数:无
返回值:无
*********************************/
void Wait_ds18b20();

/*********************************
功能:读DS18B20的一位
参数:无
返回值:读取的一位数据
*********************************/
bit read_ds18b20_bit();

/*********************************
功能:读DS18B20的一字节
参数:无
返回值:读取的一个字节
*********************************/
uchar read_ds18b20_byte();

/*********************************
功能:写DS18B20的一位
参数:要写入的一位
返回值:无
*********************************/
void write_ds18b20_bit(bit dat);

/*********************************
功能:写DS18B20的一字节
参数:要写入的一个字节
返回值:无
*********************************/
void write_ds18b20_byte(uchar dat);

/*********************************
功能:发布指令
参数:指令字节
返回值:无
*********************************/
void write_ds18b20_command(uchar com);

/*********************************
功能:得到当前温度值
参数:无
返回值:当前温度值
*********************************/
int getTemp();

#endif
(2)DS18B20.c文件
作用:对应头文件中函数声明的具体实现。
#include "includes.h"
#include "ds18b20.h"

/*********************************
功能:初始化设备函数
参数:无
返回值:无
备注:调用Wait_ds18b20()来接收DS18B20的回应
*********************************/
void Init_ds18b20()
{
	uint i=100;
	//总线拉低
	ds=0;
	//延时480us以上
	while(i)
	{
		i--;
	}
	//总线拉高,等待DS18B20应答
	ds=1;
}

/*********************************
功能:等待设备应答
参数:无
返回值:无
*********************************/
void Wait_ds18b20()
{
    //等待应答
	while(ds)    ;
	while(~ds)   ;
}
/*********************************
功能:读DS18B20的一位
参数:无
返回值:读取的一位数据
*********************************/
bit read_ds18b20_bit()
{
	uint i=1;
	bit res;
	ds=0;
    i++;
	//停止拉低总线,读取DQ引脚的值
	ds=1;
	//15us后读数据
	i++;
	i++;
	res=ds;
	//延时
	i=10;
	while(i)
	{
		i--;
	}
	return res;
}
/*********************************
功能:读DS18B20的一字节
参数:无
返回值:读取的一个字节
*********************************/
uchar read_ds18b20_byte()
{
	uchar res=0;
	uchar tem=0;
	uint i=0;
	for(;i<8;i++)
	{
		tem=read_ds18b20_bit();
		//第i次读进来的是第i位
		res |= (tem<<i);
	}
	return res;
}

/*********************************
功能:写DS18B20的一位
参数:要写入的一位
返回值:无
*********************************/
void write_ds18b20_bit(bit dat)
{
	uint j=0;
	//总线拉低
	ds=0;
	j++;j++;
	//延时后把数据放到总线
	ds=dat;
	j=8;
	while(j>0)
	{
		j--;
	}
	//待18B20读取数据后把总线拉高
	ds=1;
	j++;
}
/*********************************
功能:写DS18B20的一字节
参数:要写入的一个字节
返回值:无
*********************************/
void write_ds18b20_byte(uchar dat)
{
	uint i=0;
	for(;i<8;i++)
	{
		//即取dat的最后一位,来决定写1或者写0
		if((dat>>i)&BIT(0))
			write_ds18b20_bit(1);
		else
			write_ds18b20_bit(0);
	}
}
/*********************************
功能:发布指令
参数:指令字节
返回值:无
*********************************/
void write_ds18b20_command(uchar com)
{
	bit flag=0;
	if(EA==1)
	{
		flag=1;
	}
	//先关中断,防止中断影响时序
	DisableInterrupt;
	//初始化DS18B20
	Init_ds18b20();
	//等待回应
	Wait_ds18b20();
	//跳过ROM
	write_ds18b20_byte(skip_ROM);
	//写指令字节
	write_ds18b20_byte(com);
	//开中断
	if(flag==1)
	{
	 	EnableInterrupt;
	}
}
/*********************************
功能:得到当前温度值
参数:无
返回值:当前温度值
*********************************/
int getTemp()
{
	uchar low,high;
	int value=0;
	float tmp=0.0;
	bit flag=0;
	//发布命令,启动转换
	write_ds18b20_command(start_ZH);
	if(EA==1)
	{
		flag=1;
	}
	DisableInterrupt;
	//读RAM获取温度
	write_ds18b20_command(read_RAM);
	low=read_ds18b20_byte();
	high=read_ds18b20_byte();
	//得到int
	value = (high<<8|low);
	//得到真实温度
	tmp=value*0.0625;
	//将真实的温度扩大100倍返回整形,即是取小数点后两位
	value=(int)(tmp*100);
	if(flag==1)
	{
		EnableInterrupt;
	}
	return value;
}
3.数码管模块
数码管模块在以前的文章中已经写到过,这里直接拿来用就可以,这也体现了模块化的好处。
(1)shumaguan.h文件
#ifndef _SHUMAGUAN_H_
#define _SHUMAGUAN_H_

#include "includes.h"
#define shuma_PORT P0
#define shuma_NUM 6

sbit dula=P2^6;
sbit wela=P2^7;

/************************
数码管采用共阴极接法
*************************/
uchar shuma_style[]=
{
0x3f,0x06,0x5b,0x4f,0x66,
0x6d,0x7d,0x27,0x7f,0x6f,
0x77,0x7c,0x39,0x5e,0x79,
0x71,0x00
};

#endif
同样,这个头文件中定义了对开发板上数码管进行操作的变量。
这个模块没有.c文件。
4.串口通信UART模块
51单片机与其他单片机或是电脑等上位机进行通信的方法就是利用片内外设UART,我们的这个模块提供了对UART的封装。
(1)UART.h头文件
#ifndef _UART_H_
#define _UART_H_

#define EnableInterrupt_UART (ES=1)
#define DisableInterrupt_UART (ES=0)

/****************************************
功能:初始化设置工作方式和波特率
参数:工作方式,波特率
返回值:无
*****************************************/
void Init_UART(int workStyle,int BoRate);

/***************************************
功能:发送一个字节
参数:发送字节
返回值:无
****************************************/
void Send_UART_byte(uchar dat);

#endif
(2)UART.c文件
#include "includes.h"
#include "uart.h"

void Init_UART(int workStyle,int BoRate)
{
	switch(workStyle)
	{
	case 0:
		break;
	case 1:
		SCON |= BIT(6);
		break;
	case 2:
		SCON |= BIT(7);
	case 3:
		SCON |= (BIT(6) | BIT(7));
	default:
		break;
	}
	SCON |= BIT(4);
	TMOD |= BIT(5);     //开启计数器1的工作方式2
	switch(BoRate)
	{
	case 9600:
		  TH1=0xfd;
  		  TL1=0xfd;
		  break;
	case 4800:
	 	  TH1=0xfa;
		  TL1=0xfa;
		  break;

	//还有其他波特率,这里不再一一列举,
	//可参照数据手册进行设置
	}
   TR1=1;
}

void Send_UART_byte(uchar dat)
{
	SBUF=dat;
	while(!TI) ;
	TI=0;
}
5.主函数的编写
这些模块都已经封装好,我们下一步就是在主函数里面去调用它们,实现相应的目的。
主函数在执行后,首先进行板上资源和变量的初始化操作,然后进入while的死循环。在这个循环里面,我们不断利用getTemp函数去查询当前温度,并将该温度发送到电脑的串口。由于实际中发现发送速度过快,所以考虑过一定的时间间隔再发。同时,数码管要想实现动态扫描显示,需要定时刷新,所以就用到了单片机的定时器。
#include "includes.h"
#include "shumaguan.h"
#include "ds18b20.h"
#include "uart.h"
int temp;
uchar code th0=0xfe;
uchar code tl0=0x33;
uchar dispbuf[6];
volatile uchar count=0;
volatile uchar uart_count=0;
bit flag=0;
//初始化定时器0
void Init_timer0()
{
TMOD=0x01;
TH0=th0;
TL0=tl0;
EnableInterrupt;
ET0=1;
TR0=1;
}
//初始化操作
void Init()
{
Init_timer0();
Init_UART(1,9600);
}
//向串口发送一个四位数
void Send_UART(int dat)
{
uchar qian=dat/1000;
uchar bai=dat%1000/100;
uchar shi=dat%100/10;
uchar ge=dat%10;
Send_UART_byte(qian+'0');
Send_UART_byte(bai+'0');
Send_UART_byte(shi+'0');
Send_UART_byte(ge+'0');
Send_UART_byte('E');
}
int main()
{
int value_temp;
Init();
while(1)
{
value_temp=getTemp();
temp=value_temp>0?value_temp:-value_temp;
//定时时间到,发送数据到串口
if(flag)
{
flag=0;
Send_UART(temp);
}
}
return 0;
}
//数码管的显示函数,在定时器的中断服务函数中被调用
void display(int dat)
{
uchar style=0x00;
//分别存储高到低位
dispbuf[0]=dat/1000;
dispbuf[1]=dat%1000/100;
dispbuf[2]=dat%100/10;
dispbuf[3]=dat%10;
//位选
wela=1;
shuma_PORT =~BIT(count); //亮起第几个数码管
wela=0;
//段选
dula=1;
if(count==0||count==shuma_NUM-1)
{
style=shuma_style[0];
}
else
{
style=shuma_style[dispbuf[count-1]];
if(count==2)
{
style |= BIT(7); //亮起小数点,就是把最高位置为1
}
}
shuma_PORT = style;
}
//定时器0的中断服务函数
//调用display使数码管显示当前温度
//计时判断是否该向串口发送数据,修改flag标志位
void timer0_ser() interrupt 1
{
uart_count++;
if(uart_count==200)
{
flag=1;
uart_count=0;
}
count++;
if(count==shuma_NUM)
{
count=0;
}
display(temp);
TH0=th0;
TL0=tl0;
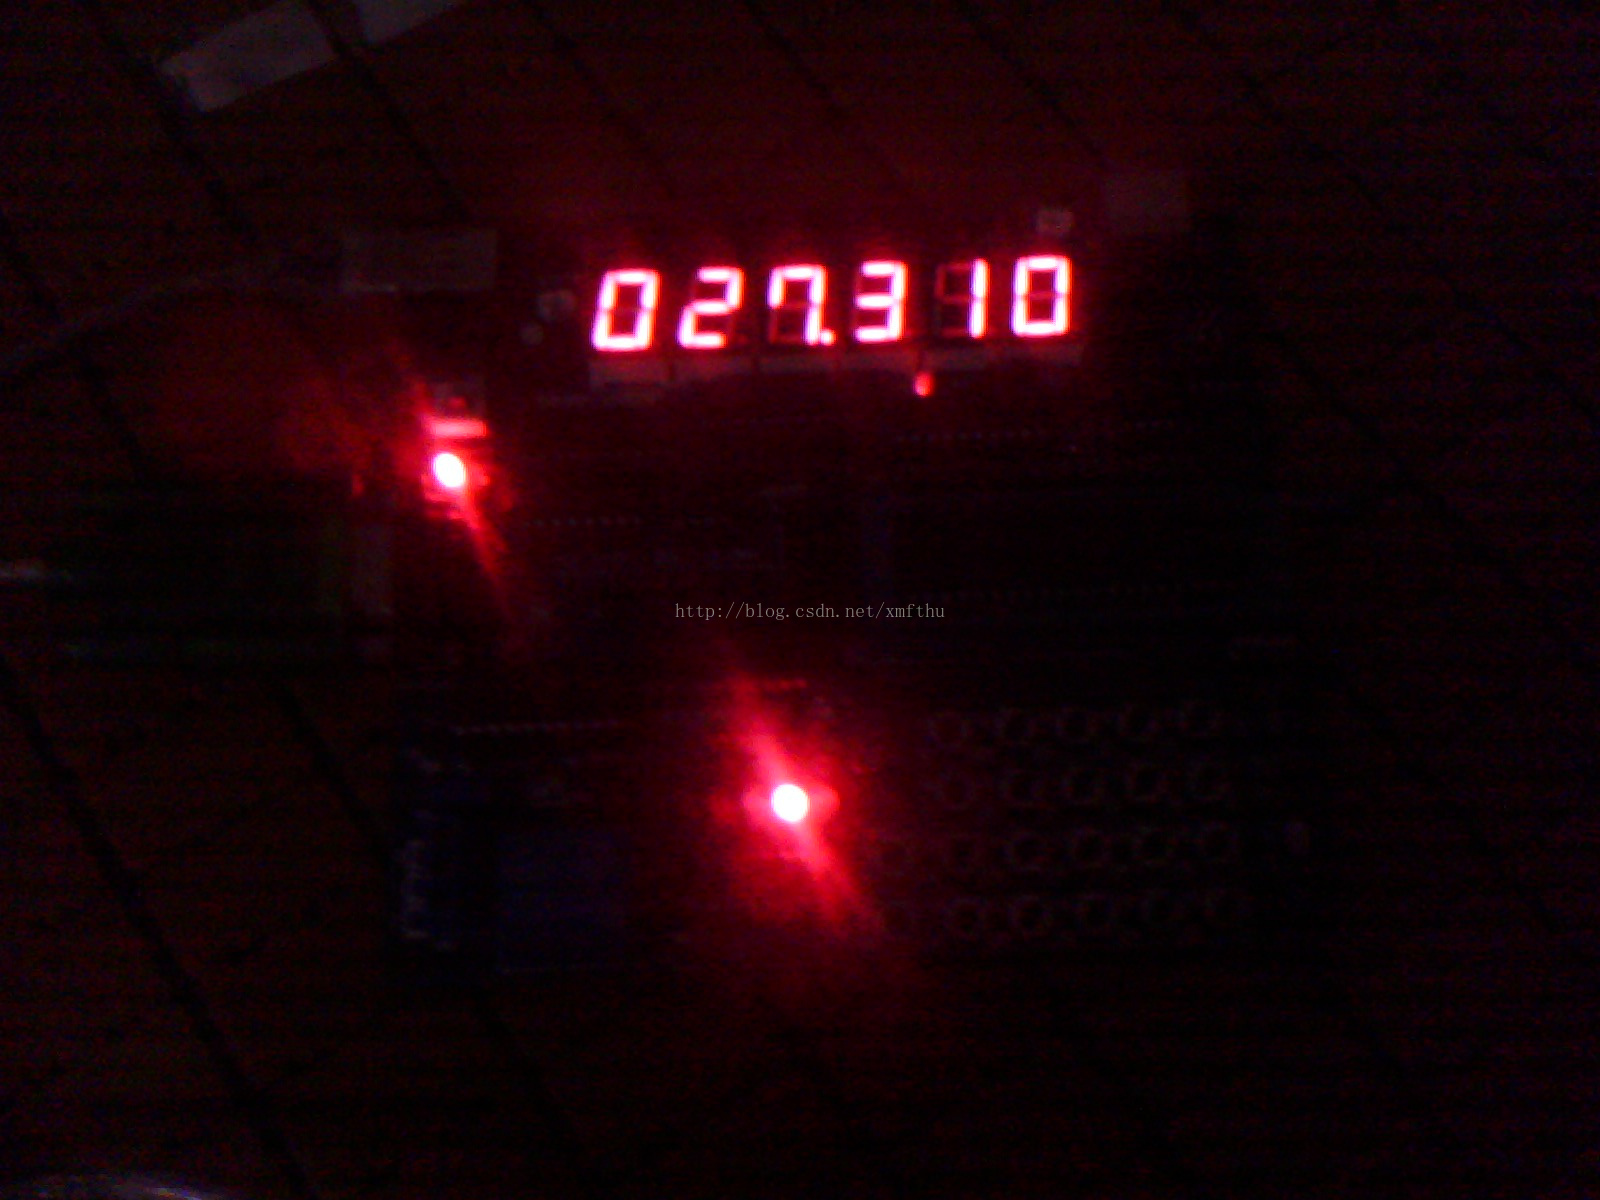
}如此这般,我们就实现了所要实现的功能。下面是一张实际效果图:


 1988
1988


 被折叠的 条评论
为什么被折叠?
被折叠的 条评论
为什么被折叠?
 到【灌水乐园】发言


