


一.以下均在mac环境下,Linux系统中的操作:
1. 配置Python环境
$ python --version
Python 2.7.6
2.安装sphinxsudo easy_install sphinx
可能因为不匹配因此用这个命令无法下载相应的版本,在众多信息的最后一行显示错误如下:error: Download error for https://pypi.python.org/packages/source/s/sphinx_rtd_theme/sphinx_rtd_theme-0.1.9.tar.gz#md5=86a25c8d47147c872e42dc84cc66f97b: _ssl.c:492: The handshake operation timed out
所以我特意声明了安装的版本
sudo easy_install-2.7 Sphinx
如果还安装不成功,那么先安装macPorts
http://www.macports.org/install.php
然后参照这个网页进行安装
http://www.sphinx-doc.org/en/stable/install.html#mac-os-x-install-sphinx-using-macports
二.基本配置
2.1切换到你的共做目录下:执行命令:
sphinx-quickstart
会一次询问你一些信息:这些信息具体后面在补充吧Welcome to the Sphinx 1.3.3 quickstart utility.
Please enter values for the following settings (just press Enter to
accept a default value, if one is given in brackets).
Enter the root path for documentation.
> Root path for the documentation [.]: MyAPI
You have two options for placing the build directory for Sphinx output.
Either, you use a directory "_build" within the root path, or you separate
"source" and "build" directories within the root path.
> Separate source and build directories (y/n) [n]: y
Inside the root directory, two more directories will be created; "_templates"
for custom HTML templates and "_static" for custom stylesheets and other static
files. You can enter another prefix (such as ".") to replace the underscore.
> Name prefix for templates and static dir [_]: API
The project name will occur in several places in the built documentation.
> Project name: MerchantAPI
> Author name(s): lidan
Sphinx has the notion of a "version" and a "release" for the
software. Each version can have multiple releases. For example, for
Python the version is something like 2.5 or 3.0, while the release is
something like 2.5.1 or 3.0a1. If you don't need this dual structure,
just set both to the same value.
> Project version: 3.0
> Project release [3.0]: 3.0.0
If the documents are to be written in a language other than English,
you can select a language here by its language code. Sphinx will then
translate text that it generates into that language.
For a list of supported codes, see
http://sphinx-doc.org/config.html#confval-language.
> Project language [en]:
The file name suffix for source files. Commonly, this is either ".txt"
or ".rst". Only files with this suffix are considered documents.
> Source file suffix [.rst]:
One document is special in that it is considered the top node of the
"contents tree", that is, it is the root of the hierarchical structure
of the documents. Normally, this is "index", but if your "index"
document is a custom template, you can also set this to another filename.
> Name of your master document (without suffix) [index]: index
Sphinx can also add configuration for epub output:
> Do you want to use the epub builder (y/n) [n]: n
Please indicate if you want to use one of the following Sphinx extensions:
> autodoc: automatically insert docstrings from modules (y/n) [n]: y
> doctest: automatically test code snippets in doctest blocks (y/n) [n]: y
> intersphinx: link between Sphinx documentation of different projects (y/n) [n]:n
> todo: write "todo" entries that can be shown or hidden on build (y/n) [n]: n
> coverage: checks for documentation coverage (y/n) [n]: n
> pngmath: include math, rendered as PNG images (y/n) [n]: n
> mathjax: include math, rendered in the browser by MathJax (y/n) [n]: n
> ifconfig: conditional inclusion of content based on config values (y/n) [n]: n
> viewcode: include links to the source code of documented Python objects (y/n) [n]:n
A Makefile and a Windows command file can be generated for you so that you
only have to run e.g. `make html' instead of invoking sphinx-build
directly.
> Create Makefile? (y/n) [y]: y
> Create Windows command file? (y/n) [y]: y
然后在这个目录下就会自动生成一下几个文件,如图:

2.2 终端切换到MyAPI 运行
make html
│  make.bat                         # 编译脚本
│  Makefile                         # Linux下Makefile文件
│
├─build         # make编译后产生的网页目录在build/html目录下
└─source                             # 文档源码目录
    │  conf.py                      # 配置文件
    │  index.rst                    # 文档源文件入口
    ├─_static               # 编译过程产生的一些图片之类的
    └─_templates                    # 模板
会在build下生成 doctrees 和 html 文件:
2.3 修改html的样式:
在 conf.py中可以修改 sphinx的风格,还有文档名、作者等。一般使用过sphinx-quickstart创建一个工程后,以后新建工程,可以直接拷贝文件夹,只修改conf.py就行。这里看下常用的风格,
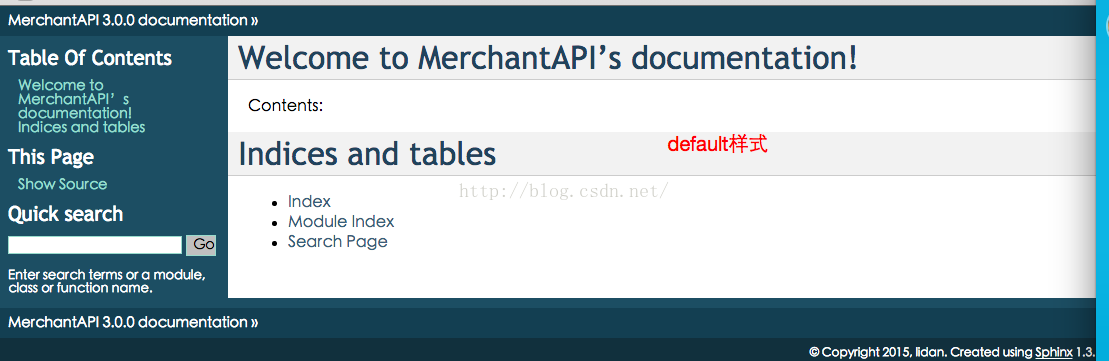
#html_theme = ‘default’
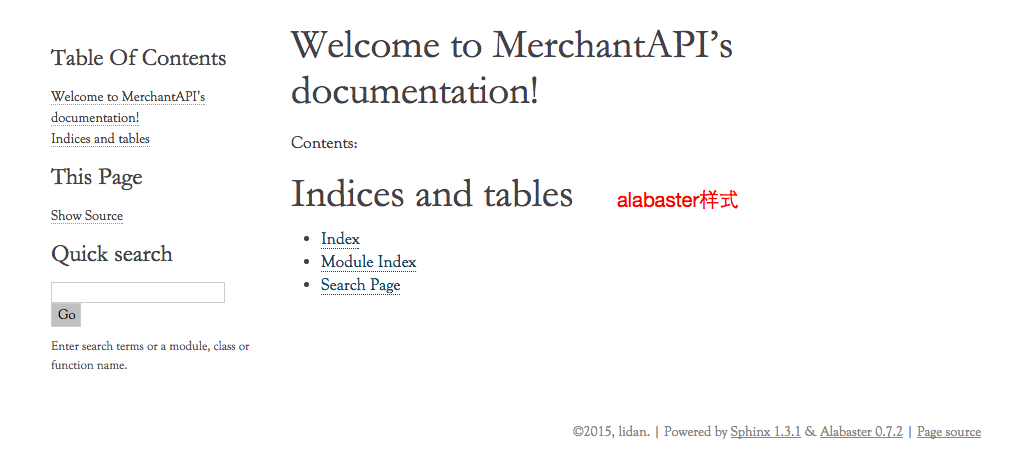
#html_theme = ‘alabaster’
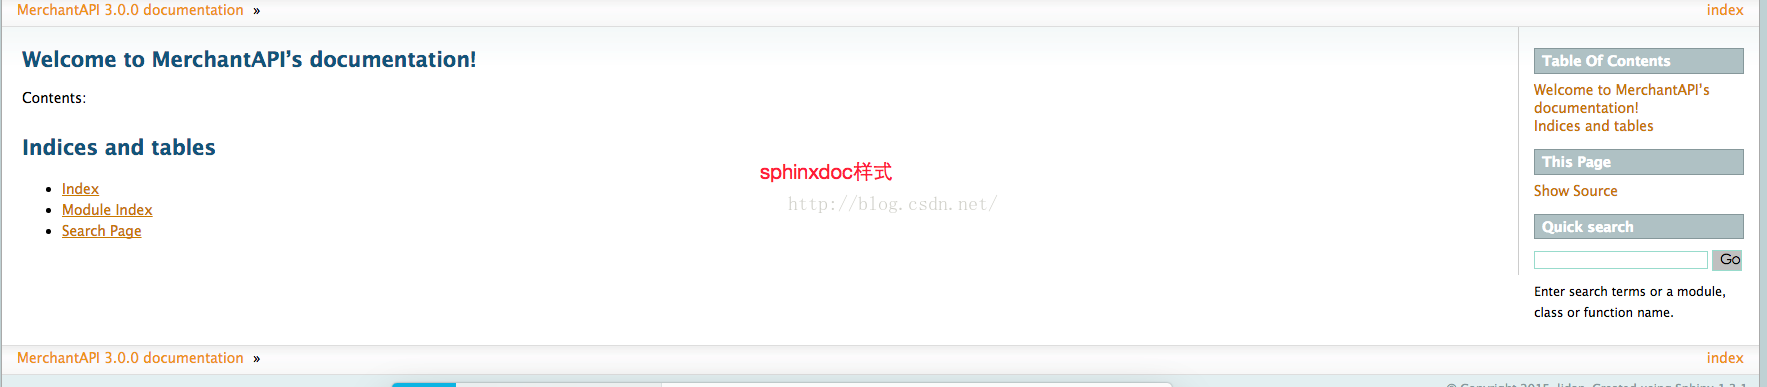
html_theme = ‘sphinxdoc’
更改完样式以后要通过 make html命令才能生效
2.3 标题
上面,我们把每个章节单放在一个独立的rst文件中了,章节标题即一级标题,一级标题只要在标题名字下面加====就行了,=号的个数要超过标题的长度,否则会告警。几类标题的符号依次如下,使用的方式与一级标题一样:
一级标题: =
二级标题: -
三级标题: +
四级标题: ^
一下是四种标题书写格式以及对应的html样式:
第一部分   (一级标题)
========================================================


第一章  (二级标题)
--------------------------------------------------
            二级标题的内容。。。。。

1.1.1 章节    (三级标题)
+++++++++++++++++++++++++++++++++++++++++++++++++

                 三级标题的内容(1.1.1)

1.1.1.1   节  (四级标题)
^^^^^^^^^^^^^^^^^^^^^^^^^^^^^^^^^^^^^^^^^^^^^^

     四级标题内容


1.1.2 章节
++++++++++++++++++++++++++++++++++++

     章节的内容(1.1.2)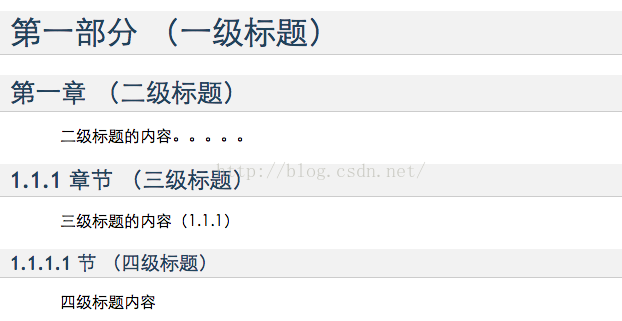
2.4 插入图片:
新建一个imsges目录 ,将图片放在此目录下 ,此目录与source目录属于同一级
在rst 中引用图片格式
.. image:: ../images/1.jpg
   :width: 500
   :height: 500
设置宽高一定要空三个空格 ,通过设置宽高来控制图片的尺寸
2.5 编写API 的json数据
格式以及对应的样式如下:
.. code-block:: javascript

   {
     update_date_time:'2015-1-20'
    }
第一个{ 前必须空三个空格,样式如下:

2.6 如果json数据过长处理
json数据所占的篇幅比较大,那么可以单独写一个js文件,将json数据格式化以后放在js文件中(假设此文件名为test.js)那么在rst 文件中引用这个js文件的时候只要写成:
.. literalinclude:: test.js
   :language: javascript
那么在make html 后在这个页面会显示完整的json数据
2.7 测试接口
测试接口一般会有参数的拼接,如果不采用一定格式,那么参数中的双引号复制下来粘贴到网址的时候就会出现问题,不能请求到参数,
没有设置格式的时候是这样显示的:

这样的格式复制下来要手动修改每一个双引号,非常麻烦,即使编译的时候双引号用的是英文格式下的,呈现在html上的也是像上面一样的,正确的格式设置应该如下:
.. code-block:: html


   http://localhost:64984/ItemAdd?data={"orderID":7394,"addItems":[{"menuID":522,"count":2,"isPaid":false,"addPriceByRestaurant":0,"remark":"",priceOptions:[{"priceOptionID":19,"addPrice":1,"count":"2"}]}]}}
呈现在html的样式就如下,可以直接复制,在浏览器的地址上请求,不要再手动修改 双引号(注意:http前要空三个空格)

2.8 编辑一个层级的API
呈现在html上的结构如下: 这个接口分成两个部分 order 和 message
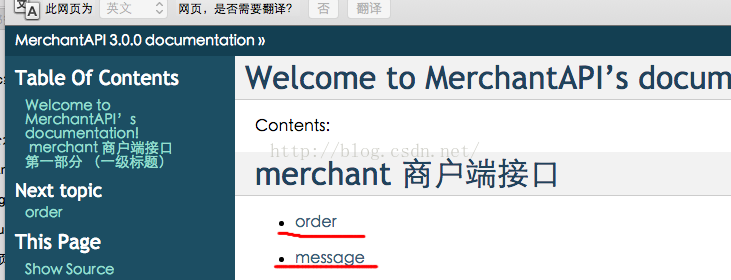
点击order进去的界面:
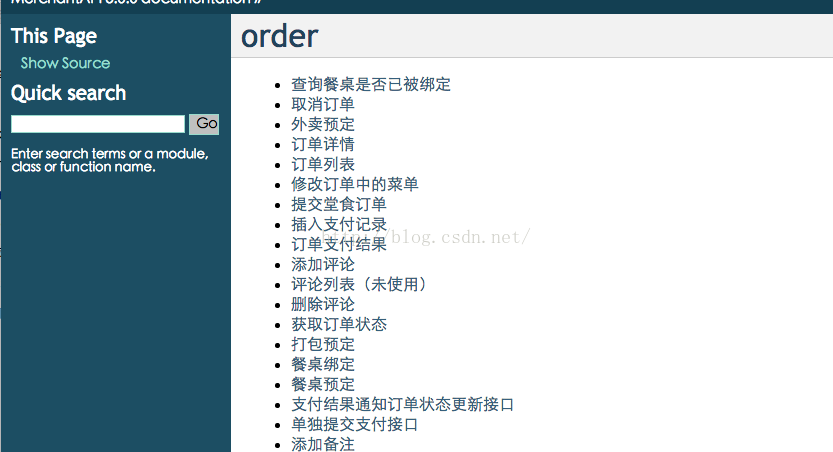
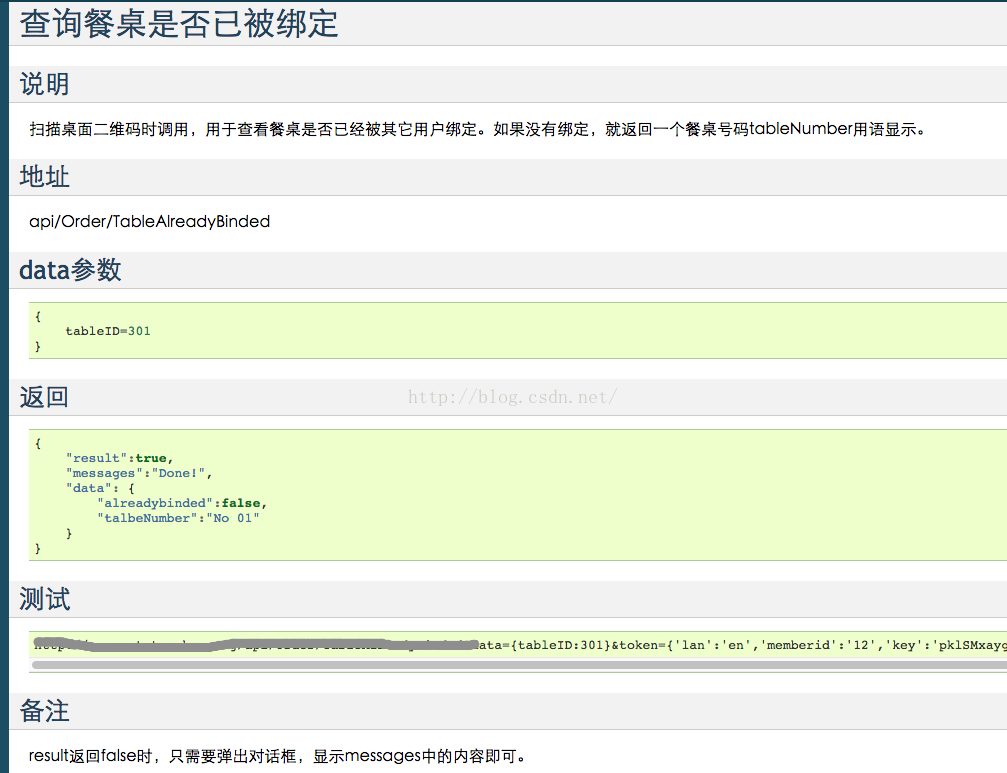
选中其中一项查看一个具体的接口:
大致结构如上,下面看怎么完成order部分:每个文件下除了必要的rst文件,就是各个具体的接口,其中js文件是json较长数据,供rst文件直接引用,上面已经提到过,rst和js的编写上面都说过了,此处就不在多说,重点是index文件怎样处理
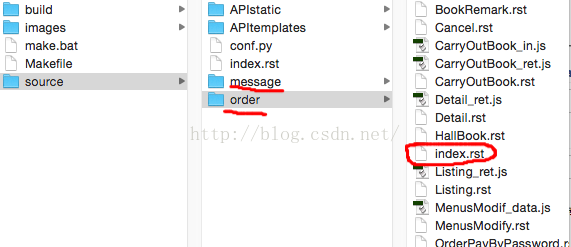
这是order/index 中的格式。message中的结构也是一样的。
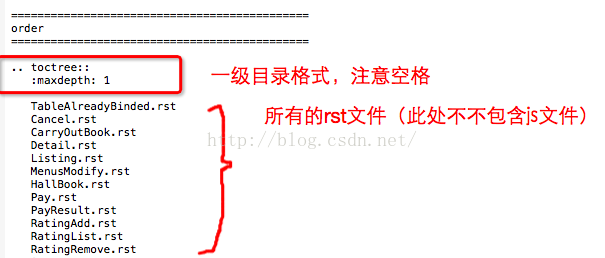
source下的index(html 入口index)结构如下:两个目录结构分别指向它们的 index.rst文件
 merchant  商户端接口
==============================================


.. toctree::
   :maxdepth: 1

   order/index.rst

.. toctree::
   :maxdepth: 1

   message/index.rst
注意:
每次有更改一定要用 make html 命令编译一次,才会在html 生效
API入口的在build/html/index.html 查看
终于搞定了
PS:找时间录制一个使用的视频吧
date: 2015-12-4 周五


 1130
1130


 被折叠的 条评论
为什么被折叠?
被折叠的 条评论
为什么被折叠?
 到【灌水乐园】发言


