


修改UITextField的占位符文字颜色主要有三个方法:
使用attributedPlaceholder属性
@property(nullable, nonatomic,copy) NSAttributedString *attributedPlaceholder NS_AVAILABLE_IOS(6_0); // default is nil重写drawPlaceholderInRect方法
- (void)drawPlaceholderInRect:(CGRect)rect;修改UITextField内部placeholderLaber的颜色
[textField setValue:[UIColor grayColor] forKeyPath@"placeholderLaber.textColor"];具体实现
给定场景,如在注册登录中,要修改手机号和密码TextField的placeholder的文字颜色。
效果对比
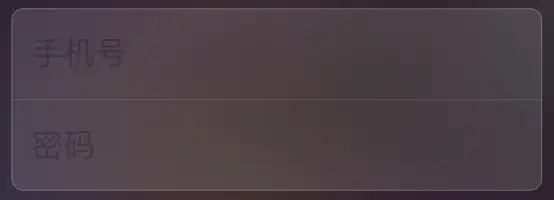
使用前
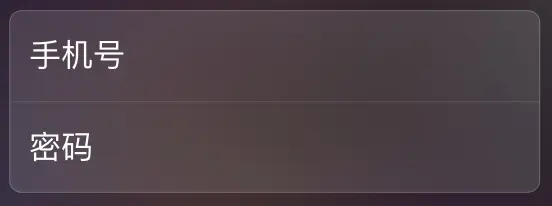
使用后
使用attributedPlaceholder
自定义GYLLoginRegisterTextField类,继承自UITextField;实现awakeFromNib()方法,如果使用storyboard,那么修改对应的UITextField的CustomClass为GYLLoginRegisterTextField即可,具体代码如下:
#import "GYLLoginRegisterTextField.h"
@implementation GYLLoginRegisterTextField

- (void)awakeFromNib
{
    self.tintColor = [UIColor whiteColor];      //设置光标颜色

    //修改占位符文字颜色
    NSMutableDictionary *attrs = [NSMutableDictionary dictionary];
    attrs[NSForegroundColorAttributeName] = [UIColor whiteColor];
    self.attributedPlaceholder = [[NSAttributedString alloc] initWithString:self.placeholder attributes:attrs];
}

@end
重写drawPlaceholderInRect方法
与方法一同样,自定义GYLLoginRegisterTextField,继承自UITextField,重写drawPlaceholderInRect方法,后续相同,代码如下:
#import "GYLLoginRegisterTextField.h"

@implementation GYLLoginRegisterTextField

- (void)awakeFromNib
{
    self.tintColor = [UIColor whiteColor];      //设置光标颜色
}

- (void)drawPlaceholderInRect:(CGRect)rect
{
    NSMutableDictionary *attrs = [NSMutableDictionary dictionary];
    attrs[NSForegroundColorAttributeName] = [UIColor whiteColor];
    attrs[NSFontAttributeName] = self.font;

    //画出占位符
    CGRect placeholderRect;
    placeholderRect.size.width = rect.size.width;
    placeholderRect.size.height = rect.size.height;
    placeholderRect.origin.x = 0;
    placeholderRect.origin.y = (rect.size.height - self.font.lineHeight) * 0.5;
    [self.placeholder drawInRect:placeholderRect withAttributes:attrs];

    //或者
    /*
    CGPoint placeholderPoint = CGPointMake(0, (rect.size.height - self.font.lineHeight) * 0.5);
    [self.placeholder drawAtPoint:placeholderPoint withAttributes:attrs];
    */
}

@end
修改UITextField内部placeholderLaber的颜色
使用KVC机制,找到UITextField内部的修改站位文字颜色的属性:placeholderLaber.textColor,代码如下:
#import "GYLLoginRegisterTextField.h"
@implementation GYLLoginRegisterTextField

- (void)awakeFromNib
{
    self.tintColor = [UIColor whiteColor];      //设置光标颜色

    //修改占位符文字颜色
    [self setValue:[UIColor grayColor] forKeyPath@"placeholderLaber.textColor"];
}

@end第三种方法比较简单,建议可以将此封装:扩展UITextField,新建category,添加placeholderColor属性,使用KVC重写set和get方法。有需要的同学可以邮箱联系。


 884
884

 被折叠的 条评论
为什么被折叠?
被折叠的 条评论
为什么被折叠?
 到【灌水乐园】发言


