


功能:
mybatis-generator 是mybatis提供的根据数据库生成,实体类、mapper、还有dao层的。
使用说明
步骤一:下载jar包
1:mybatis-generator
2:数据库驱动包(这里选择的是MySQL)mysql-connector-java-5.1.5-bin.jar
说明:mybatis-generator 放在项目下,mysql-connector-java-5.1.5-bin.jar随便放个位置在generatorConfig.xml指向他就行。
所用的包在后面附件里有。ps:附件是整个测试项目。
步骤二:编写generator 配置的xml 取名为:generatorConfig.xml (这个名字可以随便取和后面对应就行)
其中包括数据库的信息、生成文件的路径等等 内容举例如下:
<?xml version="1.0" encoding="UTF-8"?>
<!DOCTYPE generatorConfiguration
  PUBLIC "-//mybatis.org//DTD MyBatis Generator Configuration 1.0//EN"
  "http://mybatis.org/dtd/mybatis-generator-config_1_0.dtd">
<generatorConfiguration>

	<!-- 数据库驱动-->
	<classPathEntry	location="d:\mysql-connector-java-5.1.5-bin.jar"/>

	<context id="DB2Tables"	targetRuntime="MyBatis3">
		<commentGenerator>
			<property name="suppressDate" value="true"/>
			<!-- 是否去除自动生成的注释 true:是 : false:否 -->
			<property name="suppressAllComments" value="false"/>
		</commentGenerator>

		<!--数据库链接URL,用户名、密码 -->
		<jdbcConnection driverClass="com.mysql.jdbc.Driver" connectionURL="jdbc:mysql://localhost/xujw" userId="root" password="123456">
		</jdbcConnection>

		<javaTypeResolver>
			<property name="forceBigDecimals" value="false"/>
		</javaTypeResolver>

		<!-- 生成模型的包名和位置-->
		<javaModelGenerator targetPackage="com.dms.model" targetProject="src">
			<property name="enableSubPackages" value="true"/>
			<property name="trimStrings" value="false"/>
		</javaModelGenerator>

		<!-- 生成映射文件的包名和位置-->
		<sqlMapGenerator targetPackage="com.dms.mapping" targetProject="src">
			<property name="enableSubPackages" value="true"/>
		</sqlMapGenerator>

		<!-- 生成DAO的包名和位置-->
		<javaClientGenerator type="XMLMAPPER" targetPackage="com.dms.dao" targetProject="src">
			<property name="enableSubPackages" value="true"/>
		</javaClientGenerator>

		<!-- 要生成哪些表-->
		<table tableName="dms_department" domainObjectName="Department" enableCountByExample="false" enableUpdateByExample="false" enableDeleteByExample="false" enableSelectByExample="false" selectByExampleQueryId="false"></table>
		<table tableName="dms_log" domainObjectName="Log" enableCountByExample="false" enableUpdateByExample="false" enableDeleteByExample="false" enableSelectByExample="false" selectByExampleQueryId="false"></table>
		<table tableName="dms_menu" domainObjectName="Menu" enableCountByExample="false" enableUpdateByExample="false" enableDeleteByExample="false" enableSelectByExample="false" selectByExampleQueryId="false"></table>
		<table tableName="dms_permission" domainObjectName="Permission" enableCountByExample="false" enableUpdateByExample="false" enableDeleteByExample="false" enableSelectByExample="false" selectByExampleQueryId="false"></table>
		<table tableName="dms_user" domainObjectName="User" enableCountByExample="false" enableUpdateByExample="false" enableDeleteByExample="false" enableSelectByExample="false" selectByExampleQueryId="false"></table>

	</context>
</generatorConfiguration>
有多种方法,这里取的是用Java类生成 代码如下:
package com.dms.generator;

import java.io.File;
import java.util.ArrayList;
import java.util.List;

import org.mybatis.generator.api.MyBatisGenerator;
import org.mybatis.generator.config.Configuration;
import org.mybatis.generator.config.xml.ConfigurationParser;
import org.mybatis.generator.internal.DefaultShellCallback;
public class MybatisGeneratorUtil {
	public static void main(String[] args) {
		try {
			List<String> warnings = new ArrayList<String>();
			boolean overwrite = true;
			File configFile = new File(MybatisGeneratorUtil.class.getResource("/generatorConfig.xml").getFile());
			ConfigurationParser cp = new ConfigurationParser(warnings);
			Configuration config = cp.parseConfiguration(configFile);
			DefaultShellCallback callback = new DefaultShellCallback(overwrite);
			MyBatisGenerator myBatisGenerator = new MyBatisGenerator(config, callback, warnings);
			myBatisGenerator.generate(null);
			System.out.println("生成完毕,请刷新项目!");
		} catch (Exception e) {
			e.printStackTrace();
		}
	}
}
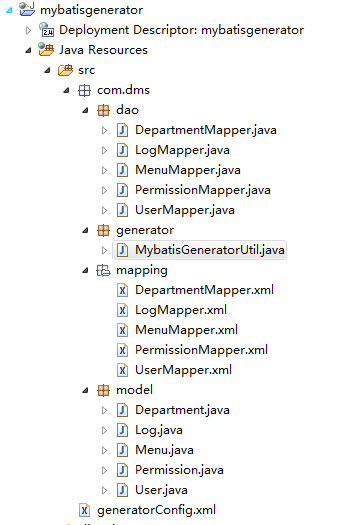
附件:项目代码举例


 14万+
14万+

 被折叠的 条评论
为什么被折叠?
被折叠的 条评论
为什么被折叠?
 到【灌水乐园】发言


