


自己研究的安卓app签核系统,目前公司内部用着好像也相对稳定,就用这篇文章记录一下
补充说明:实际签核系统是鼎新的EasyFlow,此处数据库与实际签核动作都是用EasyFlow自带的.
工具环境:
Eclipse4.2 ADT23.0 JDK1.8.0 服务端vs2010
简单介绍一下功能,后面会把源码贴上
此App只做查看及签核,数据库是公司内部签核系统
UI框架参考 http://download.csdn.net/detail/yanjinfu175/9590345
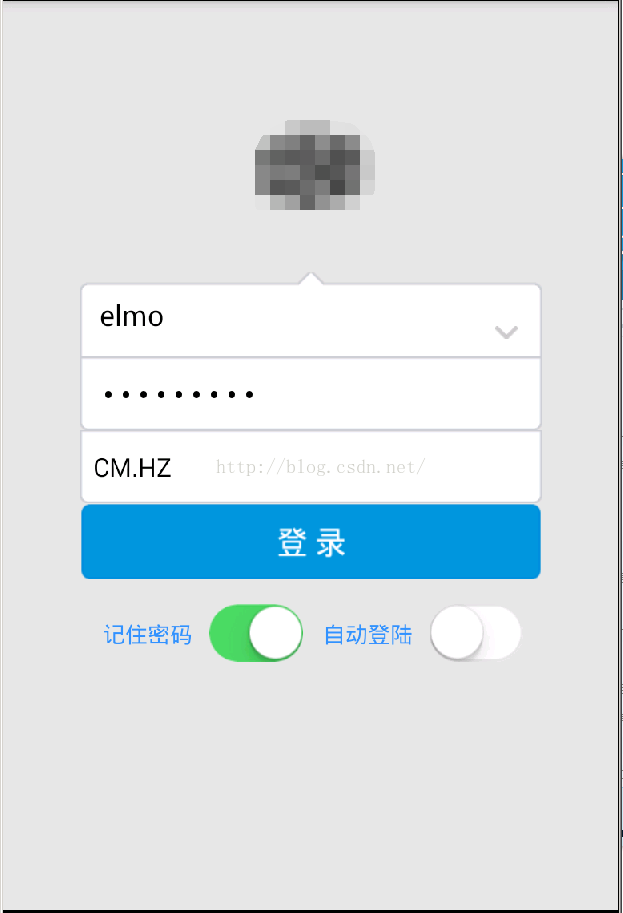
1.登陆界面
账号密码及网域选择,
记住密码是将登陆成功后的资讯存在SharedPreferences里,后面源码内会有
自动登陆是启动app检测SharedPreferences是否有,有的话检查通过后直接执行登陆事件
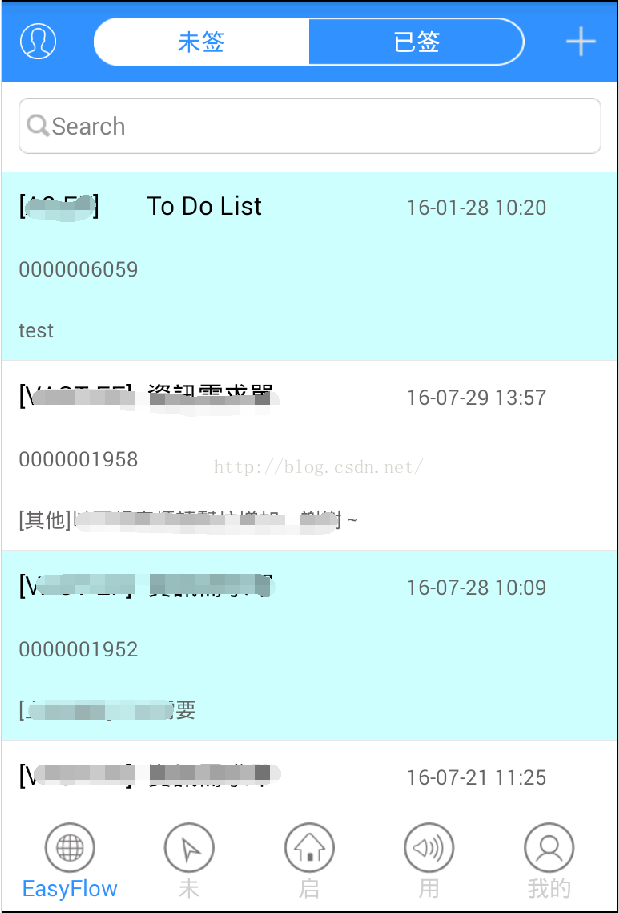
2.主界面,签核List
ListView展示数据库内未签及已签表单明细,点击进入详细界面
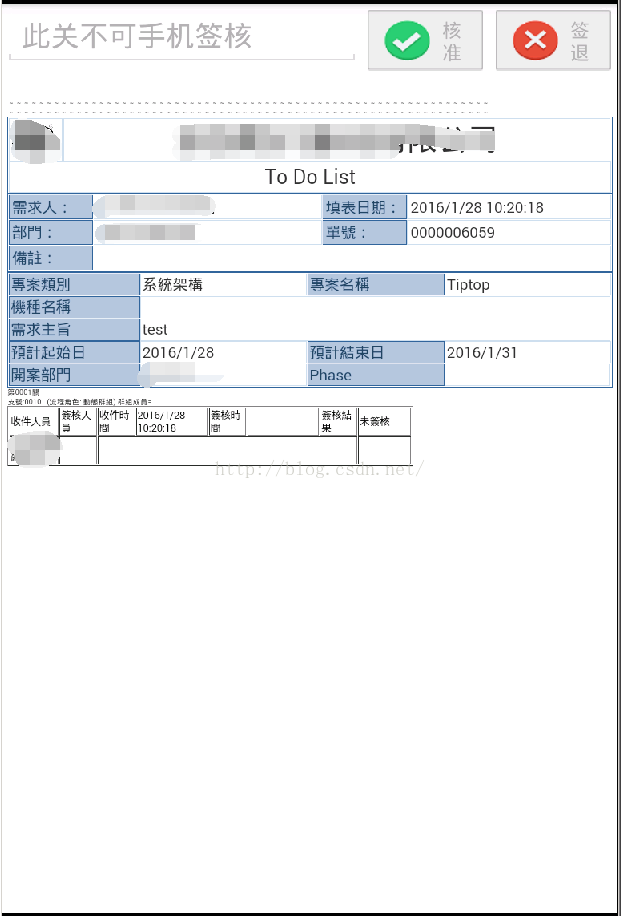
3.签核表单画面
webview装载放在服务端的asp档案,核准及签核按钮都只是执行url,一样是在服务端执行
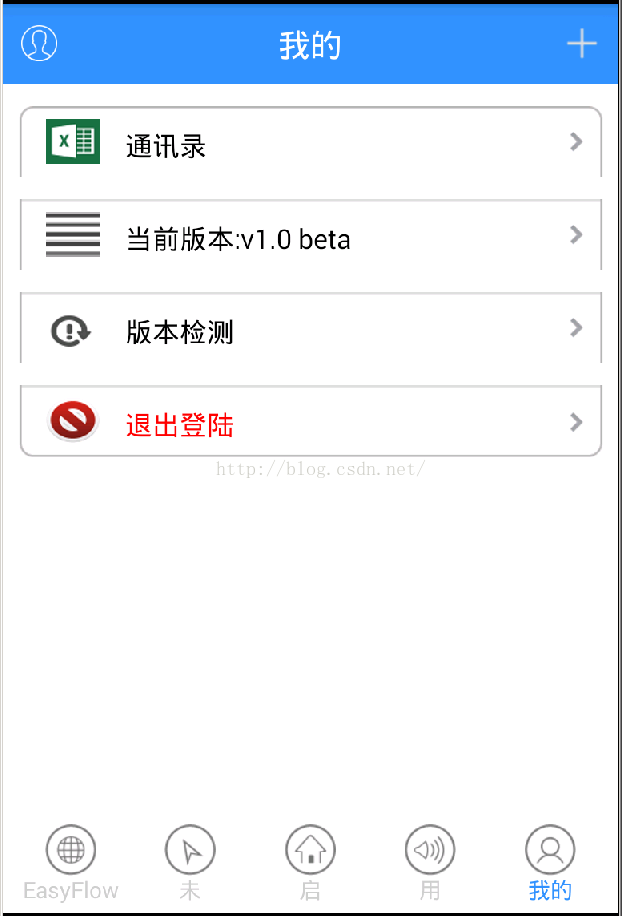
4.个人设定界面
画面大概就这几个,接下来贴一贴源码
登陆界面XML画面
<LinearLayout xmlns:android="http://schemas.android.com/apk/res/android"
    xmlns:tools="http://schemas.android.com/tools"
    android:layout_width="match_parent"
    android:layout_height="match_parent"
    android:background="#e6e6e6"
    android:orientation="vertical"
    tools:context=".MainActivity" >

    <ImageView
        android:id="@+id/iv1"
        android:layout_width="wrap_content"
        android:layout_height="wrap_content"
        android:layout_gravity="center"
        android:layout_marginTop="80dp"
        android:src="@drawable/logo" />

   	<LinearLayout
   	    android:id="@+id/ll"
        android:layout_width="290dp"
        android:layout_height="wrap_content"
        android:layout_gravity="center"
        android:layout_marginLeft="15dp"
        android:layout_marginTop="220dp"
        android:orientation="horizontal" >

		<TextView
            android:layout_width="wrap_content"
            android:layout_height="wrap_content"
            android:layout_marginTop="20dp"
            android:text="记住密码   "
            android:textColor="#3291fa" />
		<ToggleButton
		        android:id="@+id/mTogBtn"
		        android:layout_width="wrap_content"
		        android:layout_height="wrap_content"
            	android:layout_marginTop="20dp"
		        android:background="@android:color/transparent"
		        style="@style/MyToggleButton"
		        android:checked="false"
		        android:text=""
		        android:textColor="#3291fa"
		        android:textOff=""
		        android:textOn="" />

		<TextView
            android:layout_width="wrap_content"
            android:layout_height="wrap_content"
            android:layout_marginTop="20dp"
            android:text="  自动登陆   "
            android:textColor="#3291fa" />
		<ToggleButton
		        android:id="@+id/mTogBtn1"
		        android:layout_width="wrap_content"
		        android:layout_height="wrap_content"
            	android:layout_marginTop="20dp"
		        android:background="@android:color/transparent"
		        style="@style/MyToggleButton"
		        android:checked="false"
		        android:text=""
		        android:textColor="#3291fa"
		        android:textOff=""
		        android:textOn="" />
       <!--  <TextView
            android:layout_width="wrap_content"
            android:layout_height="wrap_content"
            android:layout_marginTop="10dp"
            android:text="Cooler Master"
            android:textColor="#3291fa" />-->
    </LinearLayout>

    <RelativeLayout
        android:id="@+id/rl"
        android:layout_width="wrap_content"
        android:layout_height="wrap_content"
        android:layout_gravity="center"
        android:layout_marginTop="-250dp" >

        <RelativeLayout
            android:id="@+id/relativeLayout1"
            android:layout_width="wrap_content"
            android:layout_height="wrap_content" >

            <EditText
                android:id="@+id/multi_txt"
                android:layout_width="wrap_content"
                android:layout_height="wrap_content"
                android:background="@drawable/edittext_up"
                android:drawableLeft="@drawable/ww"
                android:hint="账号"
                android:singleLine="true"
                android:textColorHint="#999999" />

            <ImageView
                android:id="@+id/btn"
                android:layout_width="wrap_content"
                android:layout_height="wrap_content"
                android:layout_alignBaseline="@+id/multi_txt"
                android:layout_alignRight="@+id/multi_txt"
                android:layout_marginRight="15dp"
                android:layout_marginTop="5dp"
                android:src="@drawable/btn" />
        </RelativeLayout>

        <EditText
            android:id="@+id/passwd_txt"
            android:layout_width="wrap_content"
            android:layout_height="wrap_content"
            android:layout_alignParentLeft="true"
            android:layout_below="@+id/relativeLayout1"
            android:background="@drawable/edittext_down"
            android:drawableLeft="@drawable/ww"
            android:ems="10"
            android:hint="密码"
            android:password="true"
            android:singleLine="true"
            android:textColorHint="#999999" />


		<Spinner android:id="@+id/domain_txt"
		  android:layout_width="wrap_content"
		  android:layout_height="wrap_content"
		  android:layout_below="@+id/passwd_txt"
            android:background="@drawable/edittext_down"
            android:drawableLeft="@drawable/ww"
            android:hint="网域"
		  android:entries="@array/ADArray"/>
      <Button
          android:id="@+id/login"
          android:layout_width="wrap_content"
          android:layout_height="wrap_content"
          android:layout_alignParentLeft="true"
          android:layout_below="@+id/domain_txt"
          android:background="@drawable/button_style1"
          android:onClick="onLogin" />

    </RelativeLayout>

</LinearLayout>
登陆界面.Java源文件
有做一些简单的输入特殊字符检查,密码输错3次自动退出的卡关
public class LoginActivity extends Activity implements OnClickListener{
	private String url;
       //private String url="http://192.168.2.66:1295/Handler/Elmo20160527.ashx"; 这个是服务端url
	private ImageView btn;
	private Animation my_Translate;// 位移动画
	private Animation my_Rotate;// 旋转动画
	private RelativeLayout rl;
	private LinearLayout ll;
	private Button btn_login;
	private TextView txt=null;
	private TextView txtpwd=null;
	private ToggleButton rem_pwd;
	private ToggleButton auto_login;
	private SharedPreferences sp;
	private Spinner sr;
	private String isauto;
    ImageView imageview;
    int count = 0;
    private TelephonyManager telephonyManager;


	private Handler handler=new Handler(){
		@Override
		public void handleMessage(Message msg) {
			// TODO Auto-generated method stub
			if (msg.what==1) {
				//txt.setText(msg.obj.toString());
				btn_login.setTextColor(0xFFFFFFFF);
                <span style="white-space:pre">		</span>btn_login.setEnabled(true);
                <span style="white-space:pre">		</span>txt.setEnabled(true);
				txtpwd.setEnabled(true);
				sr.setEnabled(true);
				rem_pwd.setEnabled(true);
				auto_login.setEnabled(true);
				if (msg.obj.toString().contains("3"))
				{
					Toast.makeText(getBaseContext(), "账号密码输错3次,程序自动退出..", Toast.LENGTH_LONG).show();
					finish();
				}else{
					Toast.makeText(getBaseContext(), msg.obj.toString(), Toast.LENGTH_LONG).show();
				}
			}
		}
	};
// 初始化 JPush。如果已经初始化,但没有登录成功,则执行重新登录。
	private void init(){
		 JPushInterface.init(getApplicationContext());
	}
	@Override
	protected void onResume() {
		super.onResume();
		JPushInterface.onResume(this);
	}
	@Override
    protected void onPause() {
        super.onPause();
        JPushInterface.onPause(this);
    }
	@Override
	protected void onCreate(Bundle savedInstanceState) {
		super.onCreate(savedInstanceState);
		requestWindowFeature(Window.FEATURE_NO_TITLE);
		setContentView(R.layout.login);
		CloseActivityClass.activityList.add(this);
		url=getResources().getString(R.string.webservice);
		//CloseActivityClass.activityList.add(this);
		Bundle bundle = this.getIntent().getExtras();
		isauto="N";
		if(bundle != null){
			isauto = bundle.getString("YN");
			if(isauto==null||!isauto.equals("Y"))
		    {
				isauto="N";
		    }
		}

		UpdateManager mUpdateManger = new UpdateManager(LoginActivity.this);
		mUpdateManger.checkUpdateInfo();
		initview();
		anim();
		rl.startAnimation(my_Translate);// 载人时的动画
		ll.startAnimation(my_Translate);
	}

	private void initview() {
		rl = (RelativeLayout) findViewById(R.id.rl);
		ll = (LinearLayout) findViewById(R.id.ll);
		txt=(TextView)this.findViewById(R.id.multi_txt);
		txtpwd=(TextView)this.findViewById(R.id.passwd_txt);
		btn = (ImageView) findViewById(R.id.btn);
		btn.setOnClickListener(this);
		btn_login = (Button) findViewById(R.id.login);
		btn_login.setOnClickListener(this);
		sr = (Spinner) super.findViewById(R.id.domain_txt);
		/*记住密码功能*/
		sp = getSharedPreferences("config", MODE_PRIVATE);
		String uid = sp.getString("uid", "");
        String password = sp.getString("password", "");
        int srcnt =sp.getInt("domain", 0);

        txt.setText(uid);
        txtpwd.setText(password);
        sr.setSelection(srcnt,true);
		rem_pwd = (ToggleButton) findViewById(R.id.mTogBtn); // 获取到控件
		auto_login = (ToggleButton) findViewById(R.id.mTogBtn1); // 获取到控件
		rem_pwd.setChecked(sp.getBoolean("chk",false));
		rem_pwd.setOnCheckedChangeListener(new OnCheckedChangeListener() {
		    @Override
		    public void onCheckedChanged(CompoundButton buttonView,boolean isChecked) {
		        // TODO Auto-generated method stub
		        if(isChecked){
		            //选中
		        	Toast.makeText(getBaseContext(), "记住密码", Toast.LENGTH_LONG).show();

		        }else{
		            //未选中
		        	Toast.makeText(getBaseContext(), "取消记住密码", Toast.LENGTH_LONG).show();
		        }
		    }
		});// 添加监听事件
		auto_login.setChecked(sp.getBoolean("auto",false));
		auto_login.setOnCheckedChangeListener(new OnCheckedChangeListener() {
		    @Override
		    public void onCheckedChanged(CompoundButton buttonView,boolean isChecked) {
		        // TODO Auto-generated method stub
		        if(isChecked){
		            //选中
		        	Toast.makeText(getBaseContext(), "自动登陆", Toast.LENGTH_LONG).show();
		        }else{
		            //未选中
		        	Toast.makeText(getBaseContext(), "取消自动登陆", Toast.LENGTH_LONG).show();
		        }
		    }
		});// 添加监听事件
		//自动登陆
		if(rem_pwd.isChecked()&&auto_login.isChecked()&&isauto.equals("N"))
		{
			btnPost();
		}
	}

	private void anim() {
		my_Translate = AnimationUtils.loadAnimation(this, R.anim.my_translate);
		my_Rotate = AnimationUtils.loadAnimation(this, R.anim.my_rotate);
	}

	@Override
	public void onClick(View v) {
		boolean flag = false;
		switch (v.getId()) {
		case R.id.btn:
			Toast.makeText(getBaseContext(), "旋转", Toast.LENGTH_LONG).show();
			btn.startAnimation(my_Rotate);
			break;
		case R.id.login:
			//Toast.makeText(getBaseContext(), "登录", Toast.LENGTH_LONG).show();

			if(txt.getText().toString().equals("")||txtpwd.getText().toString().equals(""))
			{
				Toast.makeText(getBaseContext(), "请输入账号及密码", Toast.LENGTH_LONG).show();
			}else{
				if (txt.getText().toString().matches("[A-Za-z0-9_]+")) {
					txt.setEnabled(false);
					txtpwd.setEnabled(false);
					sr.setEnabled(false);
					btn_login.setTextColor(0xFFD0EFC6);
	                btn_login.setEnabled(false);
	                rem_pwd.setEnabled(false);
	                auto_login.setEnabled(false);

					btnPost();
	                /*Intent intent = new Intent(LoginActivity.this,MainActivity.class);
	                LoginActivity.this.startActivity(intent);
					overridePendingTransition(R.anim.zoomin, R.anim.zoomout);*/
				}else{

					Toast.makeText(getBaseContext(), "账号只可输入字母/数字/下划线", Toast.LENGTH_LONG).show();
				}

			}
			break;
		default:
			break;
		}
	}
	private void btnPost()
	{
		new Thread(new Runnable() {

			@Override
			public void run() {
				// TODO Auto-generated method stub

				List<BasicNameValuePair> list=new ArrayList<BasicNameValuePair>();
				list.add(new BasicNameValuePair("action", "login"));
				list.add(new BasicNameValuePair("para", "[{\"uid\":\""+txt.getText()+"\",\"pwd\":\""+txtpwd.getText()+"\",\"domain\":\""+sr.getSelectedItem().toString()+"\"}]"));
				String result= NetUtils.postRequest(url, list);
				//String result="OK";
				if (result.equals("OK")) {
					Editor editor = sp.edit();
					String uid = txt.getText().toString();
	                String password = txtpwd.getText().toString();
	                int domain=sr.getSelectedItemPosition();
					if (rem_pwd.isChecked()) {
	                    editor.putString("uid", uid);
	                    editor.putString("password",password);
	                    editor.putInt("domain", domain);
	                    editor.putBoolean("chk", true);
	                    if(auto_login.isChecked())
	                    {
	                    	editor.putBoolean("auto", true);
	                    }else{
	                    	editor.putBoolean("auto", false);
	                    }
	                    // 把数据给保存到sp里面
	                    editor.commit();
					}else{
						editor.putString("uid", uid);
	                    editor.putString("password","");
	                    editor.putBoolean("chk", false);
	                    editor.putBoolean("auto", false);
	                    // 把数据给保存到sp里面
	                    editor.commit();
					}
					Intent intent = new Intent(LoginActivity.this,MainActivity.class);
				    //用Bundle携带数据
				    Bundle bundle=new Bundle();
				    //传递name参数为tinyphp
				    bundle.putString("uid", txt.getText().toString());
				    bundle.putString("pwd", txtpwd.getText().toString());
				    bundle.putString("domain", sr.getSelectedItem().toString());
				    intent.putExtras(bundle);
				    LoginActivity.this.startActivity(intent);
					overridePendingTransition(R.anim.zoomin, R.anim.zoomout);
					//Toast.makeText(getBaseContext(), result, Toast.LENGTH_LONG).show();
				}
				else{
					if(++count >= 3){
						result=count+"";
					}
					Message msg=Message.obtain(handler, 1, result);
					handler.sendMessage(msg);
				}
			}
		}).start();

	}


}
登陆界面对应的服务端ASHX验证代码,只要打开VS新增专案再贴进去就可以用,AD域验证要注意的就是要改成实际的域跟IP
public void ProcessRequest(HttpContext context)
        {
            context.Response.ContentType = "text/plain";
            string action = context.Request["action"];
            if (string.IsNullOrEmpty(action))
            {
                context.Response.Write("not action");
            }
            else
            {
                switch (action)
                {
                    case "login":
                        context.Response.Write(Log());
                        break;
                    default:
                        break;
                }
            }
        }
public string Log()
        {
            string uid = "";
            string pwd = "";
            string domain = "";
            string phone = "";
            string paras = "";
            try
            {
                paras = HttpContext.Current.Request["para"];
                if (string.IsNullOrEmpty(paras))
                {
                    return "Null";
                }
                //return paras;
                HttpContext context = HttpContext.Current;
                List<Users> users = new List<Users>();
                users = Newtonsoft.Json.JsonConvert.DeserializeObject<List<Users>>(paras);
                Users user = new Users();
                for (int i = 0; i < users.Count; i++)
                {
                    user = users[i];
                }
                uid = user.uid;
                pwd = user.pwd;
                domain = user.domain;
                phone = user.phonenumber;
                string ComputerName="";

                Regex reg = new Regex(@"^\w+$");
                if (!reg.IsMatch(uid))
                {
                    applog(uid, domain, "登陆", "失败:登陆账号有特殊字符");
                    return "失败:登陆账号有特殊字符";
                }
                if (domain == "XX.XX") //域名
                {
                    ComputerName = "192.168.1.1"; //域服务器IP
                }
                else if (domain == "ZZ.ZZ")
                {
                    ComputerName = "10.170.0.1";
                }
                else if (domain == "YY.YY")
                {
                    ComputerName = "192.168.168.168";
                }
                string[] alldc = domain.Split(new string[] { "." }, StringSplitOptions.RemoveEmptyEntries);
                string Dc = "/dc=" + string.Join(",dc=", alldc);

                DirectoryEntry AD = new DirectoryEntry("LDAP://"+ComputerName+Dc, uid, pwd);
                AD.RefreshCache();
            }
            catch (Exception e)
            {
                applog(uid, domain, "登陆", "失败:"+ e.Message);
                return "登陆失败:账号或密码错误";

            }
            applog(uid, domain, "登陆", "成功");
            return "OK";

        }
NetUtils.postRequest部分关键代码
public static String postRequest(String urlString,List<BasicNameValuePair> params) {
    String rmsg="";
        try {
            HttpClient client = getNewHttpClient();
            client.getParams().setParameter(CoreConnectionPNames.CONNECTION_TIMEOUT,8000);
            client.getParams().setParameter(CoreConnectionPNames.SO_TIMEOUT,10000);
            HttpPost postMethod = new HttpPost(urlString);
            postMethod.setEntity(new UrlEncodedFormEntity(params, HTTP.UTF_8));
            HttpResponse response = client.execute(postMethod);
            //RequestConfig requestConfig = RequestConfig.custom().setSocketTimeout(2000).setConnectTimeout(2000).build();//设置请求和传输超时时间
            int statueCode = response.getStatusLine().getStatusCode();
            if (statueCode == 200) {
                System.out.println(statueCode);
                return EntityUtils.toString(response.getEntity());
            }
        } catch (Exception e) {
        rmsg="Err:"+e.getMessage();
        return rmsg;
        }
        return "登陆失败,请检查网络或是否正常";
    }
以上登陆的部分就全部完成,其他部分参考文章开头的UI框架,要依照公司内部不同需求做客制化了


 1543
1543


 被折叠的 条评论
为什么被折叠?
被折叠的 条评论
为什么被折叠?
 到【灌水乐园】发言


