


前言:
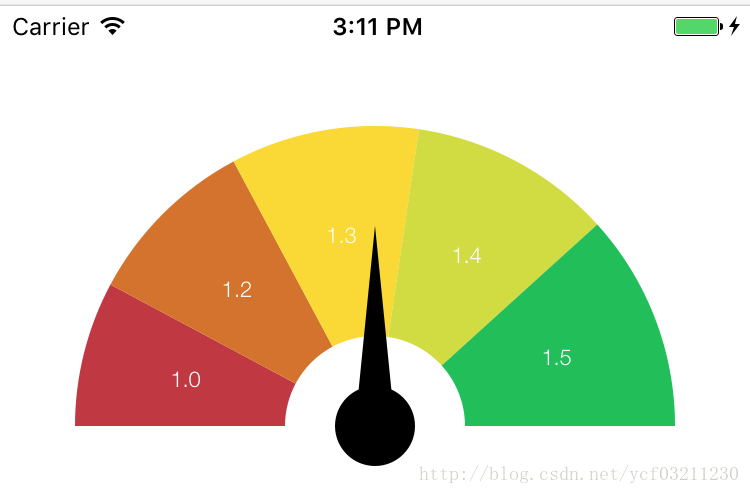
在项目中使用到了饼图,指针指向当前饼图的数值。先看下效果图
1、在oc的项目中如何添加swift写的Charts控件,请看之前的一篇文章
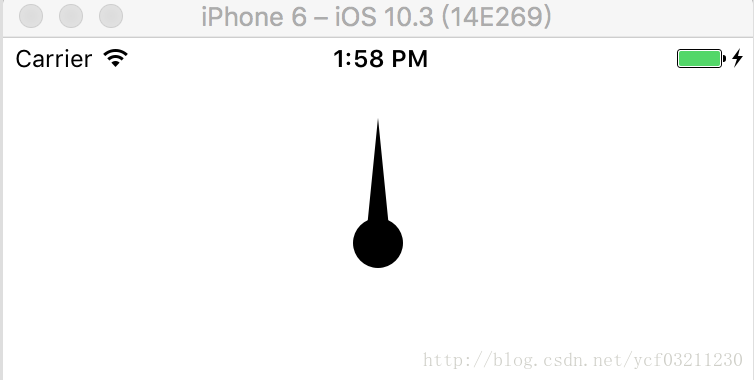
2、饼图的话,我们直接使用Charts的PieChartView,我们先来看图中的指针如何绘制,看下单独绘制的指针图
3、绘制指针,实际上是在一个矩形内,绘制一个内切圆,然后在与内切圆平行的宽边上,选择中间点,绘制而成
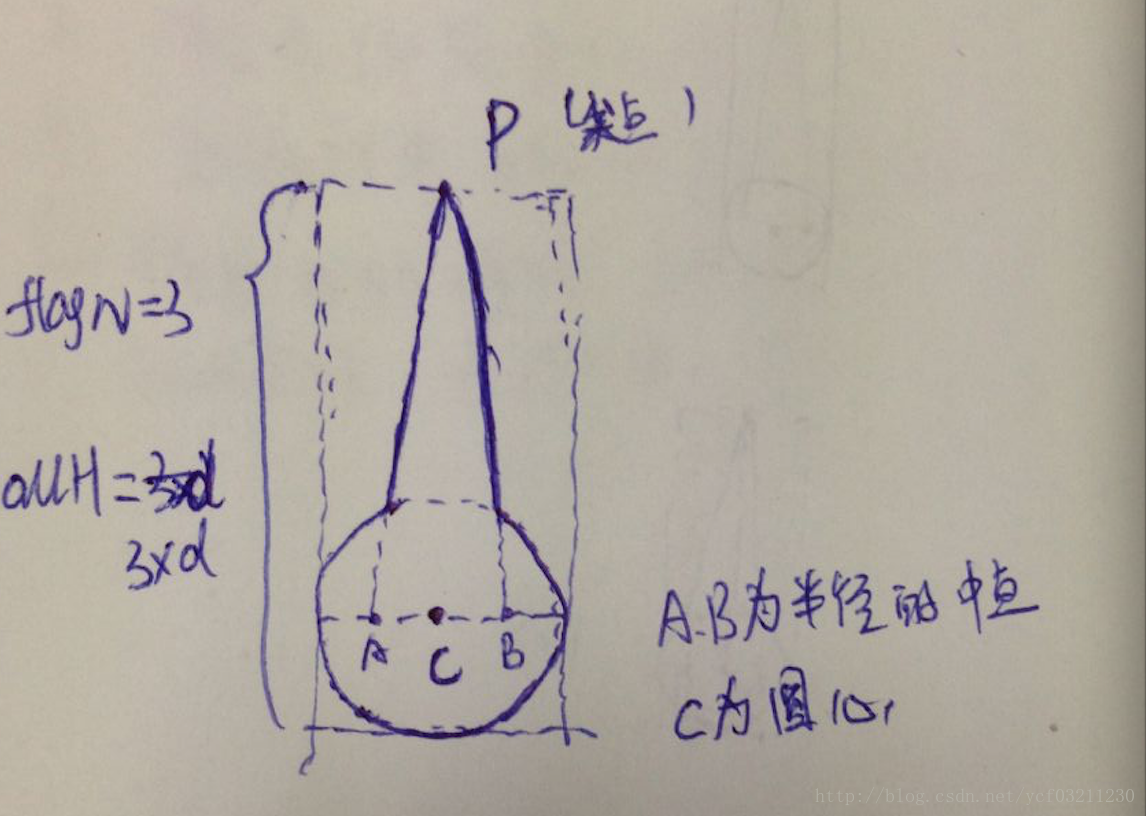
自己手动画的,大家凑合看吧,字丑、图丑,别见怪(cry~)
看图:我们只要找到圆心(c),指针的顶点(p,p为宽边的中点),与p相连的点(A是左边半斤的中点,B是右边边半斤的中点),连接就可绘制出来了,接下来看下代码
- (void)drawRect:(CGRect)rect {
    CGFloat spaHeight = rect.size.height;//高
    CGFloat spawidth = rect.size.width;//圆直径
    CGFloat radius = rect.size.width/2;//半径

    //1.获取上下文
    CGContextRef contextRef = UIGraphicsGetCurrentContext();
    //保存上下文
    CGContextSaveGState(contextRef);

    //2.bezierPathWithOvalInRect 构造一个矩形内切圆
    //构造一个矩形内切圆
    UIBezierPath * path = [UIBezierPath bezierPathWithOvalInRect:CGRectMake(0, spaHeight-spawidth, spawidth, spawidth)];
    [[UIColor blackColor ] setFill];
    [path fill];

    //绘制尖角
    UIBezierPath *rectanglePath = [[UIBezierPath alloc] init];
    [rectanglePath moveToPoint:CGPointMake(radius/2, spaHeight-radius)];
    [rectanglePath addLineToPoint:CGPointMake(radius+radius/2, spaHeight-radius)];
    [rectanglePath addLineToPoint:CGPointMake(radius, 0)];
    [rectanglePath addLineToPoint:CGPointMake(radius, 0)];
    [rectanglePath addLineToPoint:CGPointMake(radius/2, spaHeight-radius)];
    [rectanglePath closePath];

    [[UIColor blackColor] setFill];
    [rectanglePath fill];

    //恢复没有阴影效果
    CGContextRestoreGState(contextRef);

    /*
     注意:
     绘制的指针效果,实际上就是绘制一个矩形的内切圆,然后在宽中间取一点,连接起来就是我们想要的效果了
     尖角的点在矩形宽中间的点,与其连接的两点是内切圆与宽平行直接上的点,左边点的位置在左边半径上的中点,右边在右半径的中点,连接起来就是三角形,再与圆形重叠就是我们的指针啦
     */
}
4、在VC中显示出来
- (ArrowPointView *)pointView{
if (!_pointView) {
_pointView = [[ArrowPointView alloc] initWithFrame:CGRectZero];
_pointView.backgroundColor = [UIColor clearColor];
}
return _pointView;
}
- (void)createPoint {
float dia = 25.0;//直径
float flagN = 3.0;
CGFloat spaAllH = dia*flagN;//该view的总高度
[self.view addSubview:self.pointView];
_pointView.frame = CGRectMake((CGRectGetWidth(self.view.frame)- dia)/2, 40, dia, spaAllH);
CGFloat roate = (flagN*2-1)/(flagN*2);//此时指针高度占总高度的5/6,其实是可以计算的
/*
设置锚点(以视图上的哪一点为旋转中心,(0,0)是左下角,(1,1)是右上角,(0.5,0.5)是中心)
(0.5,roate)就是指针底部圆的圆心位置,我们旋转就是按照这个位置在旋转
*/
[self setAnchorPoint:CGPointMake(0.5, roate) forView:_pointView];
}
//设置瞄点后 恢复frame位置
- (void)setAnchorPoint:(CGPoint)anchorpoint forView:(UIView *)view{
CGRect oldFrame = view.frame;
view.layer.anchorPoint = anchorpoint;
view.frame = oldFrame;
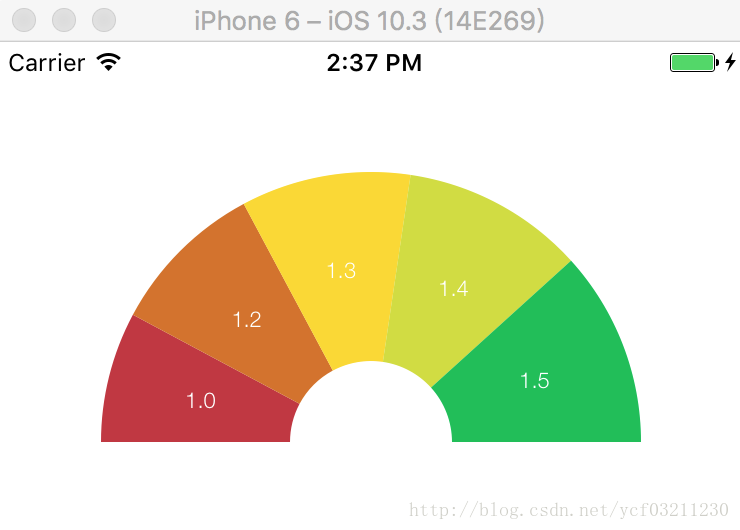
}5、绘制半圆扇形,直接用Charts,修改相关属性即可,先看下效果图
- (PieChartView *)chartView {

    if (!_chartView) {

        _chartView = [[PieChartView alloc] initWithFrame:CGRectZero];
        _chartView.delegate = self;
        _chartView.backgroundColor = [UIColor yellowColor];
        _chartView.holeColor = UIColor.clearColor;
        _chartView.transparentCircleRadiusPercent = 0.1;//设置镂空圆有阴影的大小
        _chartView.holeRadiusPercent = 0.3;//设置中间漏空圆的大小的
        _chartView.rotationEnabled = NO;
        _chartView.highlightPerTapEnabled = NO;//每个模块是否可点击
        _chartView.chartDescription.enabled = NO;//右下角的关于图标的详细描述

        _chartView.maxAngle = 180.0; // Half chart 这边是设置半圆的形式
        _chartView.rotationAngle = 180.0; // Rotate to make the half on the upper side
        _chartView.drawCenterTextEnabled = NO;//是否显示中间的文字
        _chartView.legend.enabled = NO;//饼图分区说明
        _chartView.entryLabelColor = UIColor.whiteColor;
        _chartView.entryLabelFont = [UIFont fontWithName:@"HelveticaNeue-Light" size:12.f];
        _chartView.noDataText = @"";//没有数据是显示的文字说明
    }

    return _chartView;
}

- (void)createPieView {

    CGFloat spaWidth = 300;
    CGFloat spaHeight = 300;

    [self.view addSubview:self.chartView];
    _chartView.frame = CGRectMake((CGRectGetWidth(self.view.frame) - spaWidth) / 2, 60, spaWidth, spaHeight);

    [self setPieChartView:@[@"1.0",@"1.2",@"1.3",@"1.4",@"1.5"]];
}

- (void)setPieChartView:(NSArray *)parties {

    NSMutableArray *values = [[NSMutableArray alloc] init];

     NSArray *fiveColors = [NSArray arrayWithObjects:COLOR_RGB(0xC2363F),COLOR_RGB(0xD57321),COLOR_RGB(0xFBDA14),COLOR_RGB(0xD1DE30),COLOR_RGB(0xDC054), COLOR_RGB(0x1D9042),COLOR_RGB(0xC2363F),COLOR_RGB(0xD57321),COLOR_RGB(0xFBDA14),COLOR_RGB(0xD1DE30),COLOR_RGB(0xDC054), COLOR_RGB(0x1D9042),COLOR_RGB(0xC2363F),COLOR_RGB(0xD57321),COLOR_RGB(0xFBDA14),COLOR_RGB(0xD1DE30),COLOR_RGB(0xDC054), COLOR_RGB(0x1D9042),nil];

    for (int i = 0; i < parties.count; i++)
    {
        [values addObject:[[PieChartDataEntry alloc] initWithValue:([parties[i] doubleValue]) label:parties[i % parties.count]]];
    }

    PieChartDataSet *dataSet = [[PieChartDataSet alloc] initWithValues:values label:@""];
    dataSet.sliceSpace = 0.0;//扇形与扇形间的空间间隔
    dataSet.selectionShift = 5.0;
    dataSet.drawValuesEnabled = NO;
    dataSet.colors = fiveColors;//设置扇形的颜色

    PieChartData *pieData = [[PieChartData alloc] initWithDataSet:dataSet];

    NSNumberFormatter *pFormatter = [[NSNumberFormatter alloc] init];
    pFormatter.numberStyle = NSNumberFormatterPercentStyle;
    pFormatter.maximumFractionDigits = 1;
    pFormatter.multiplier = @1.f;

    pFormatter.percentSymbol = @" %";
    pFormatter.percentSymbol = @"";
    [pieData setValueFormatter:[[ChartDefaultValueFormatter alloc] initWithFormatter:pFormatter]];

    [pieData setValueFont:[UIFont fontWithName:@"HelveticaNeue-Light" size:11.f]];
    [pieData setValueTextColor:UIColor.whiteColor];

    _chartView.data = pieData;

    [_chartView.data notifyDataChanged];
    [_chartView notifyDataSetChanged];
    [_chartView setNeedsDisplay];

    [_chartView animateWithXAxisDuration:1.4 easingOption:ChartEasingOptionEaseOutBack];
}
6、现在半圆和指针都绘制出来了,那么如何将两者联合起来,并且根据我们给出的权重,让指针指向准确的位置呢?先看下整合的效果图
- (void)viewDidLoad {
    [super viewDidLoad];
//
//    [self createPieView];
//    [self createPoint];

    CGFloat spaWidth = 300;
    CGFloat spaHeight = 300;

    [self.view addSubview:self.chartView];
    _chartView.frame = CGRectMake((CGRectGetWidth(self.view.frame) - spaWidth) / 2, 60, spaWidth, spaHeight);

    [self setPieChartView:@[@"1.0",@"1.2",@"1.3",@"1.4",@"1.5"]];


    float dia = 40.0;//直径
    float flagN = 3.0;
    CGFloat spaAllH = dia*flagN;//该view的总高度

    [self.view addSubview:self.pointView];
    //pointView的位置是可计算出来的,扇形的高度是总高度的一半,知道指针的高度和圆直径等,可以计算出来,那个点也是指针按着该点进行旋转的位置(总高度/2  - 指针总高度 + 半径)因为指针的底部圆往下了半径的距离
    _pointView.frame =  CGRectMake((CGRectGetWidth(self.view.frame)- dia)/2, 60+spaHeight/2-spaAllH+dia/2, dia, spaAllH);

    CGFloat roate = (flagN*2-1)/(flagN*2);//此时指针高度占总高度的5/6,其实是可以计算的
    /*
     设置锚点(以视图上的哪一点为旋转中心,(0,0)是左下角,(1,1)是右上角,(0.5,0.5)是中心)
     (0.5,roate)就是指针底部圆的圆心位置,我们旋转就是按照这个位置在旋转
     */
    [self setAnchorPoint:CGPointMake(0.5, roate) forView:_pointView];

}
7、让指针旋转到我们需要的权重,指针旋转,先说下我们该如何计算思路
1)先计算总权重值,即@[@”1.0”,@”1.2”,@”1.3”,@”1.4”,@”1.5”],总共有多少
2)然后计算每部分占半圆的角度总和
3)比如我们当前权重是1.3,那么我们计算在1.3包括1.3(即前面的1.0,1.2,1.3)他们的总角度值占半圆的比值,就是指针要指向的位置
#pragma mark 总权重
+ (CGFloat)getAllAngle:(NSArray *)weightArray{

    CGFloat allWeight = 0.0;

    for (NSString *weight in weightArray) {
        allWeight += [weight floatValue];
    }
    //    AppLog(@"allWeight--->%f",allWeight);
    return allWeight;
}

#pragma mark 获取每块的角度
+ (NSArray *)getEveryAngle:(NSArray *)weightArray {

    CGFloat allWeight = [self getAllAngle:weightArray];
    NSMutableArray *anglesArray = [NSMutableArray array];

    for (int i = 0; i < weightArray.count; i++) {

        CGFloat angle = [weightArray[i] floatValue] / allWeight*180;
        [anglesArray addObject:@(angle)];
    }
    //    AppLog(@"anglesArray--->%@",anglesArray);
    return anglesArray;
}
#pragma mark 获取当前权重几之前的块所有角度
+ (CGFloat)getCurrentAngle:(NSArray *)weightArray withCurrentWeight:(CGFloat)currentWeight{

    NSLog(@"currentWeight-->%f",currentWeight);
    NSArray *allAngelWeight = [self getEveryAngle:weightArray];

    NSLog(@"allAngelWeight--->%@",allAngelWeight);


    CGFloat currentAllangle = 0.0;

    for (int i = 0; i <weightArray.count; i++) {

        if (currentWeight >= [weightArray[i] floatValue]) {
            currentAllangle += [allAngelWeight[i] floatValue];
        }
    }
    if (currentAllangle == 0.0) {
        CGFloat allWeight = [self getAllAngle:weightArray];

        NSLog(@"allWeight--->%f",allWeight);
        currentAllangle = currentWeight / allWeight*180;
    }
    NSLog(@"currentAllangle--->%f",currentAllangle);
    return currentAllangle;
}
8、指针旋转的动画
#pragma mark 旋转指针
- (void)updateWeightx:(CGFloat)weight {


    CGFloat angle = M_PI/180*(weight + 270);

    [UIView animateWithDuration:0.5 animations:^{
        _pointView.transform = CGAffineTransformMakeRotation(angle);
    }];

}
9、
[self updateWeightx:[GlobalFunction getCurrentAngle:weightArray withCurrentWeight: 1.3]];
//此时指针就指向了1.3的位置
10、最终的效果图


 1732
1732


 被折叠的 条评论
为什么被折叠?
被折叠的 条评论
为什么被折叠?
 到【灌水乐园】发言


