


现在我们进入了Struts2框架学习的进阶二了,总觉得该说点什么但又不知道该说什么,直接进入正文。
Struts1框架中,在请求参数中传入执行的方法,那么开发人员编写的Action得继承DispatchAction,然后在其配置文件中配置这样的action:
<action path=".../manage"  type="...DispatchAction" parameter="method" >
</action>访问上面action的URL路径应该是这样的:…/manage?method=addUI。
Struts2提供了两种方法来实现在请求参数中传入执行的方法的需求。
动态方法
URL中action名称后面加上”!+方法名”。例如:http://…/manage!other.action。Struts2.1已经不建议使用了,有可能以后的版本都不能用了。在struts.xml中设置常量(动态方法禁用掉)<constant name="struts.enable.DynamicMethodInvocation" value="false"/>该方法就不再可用了。
- 使用通配符
*代表通配符。
下面将详细讲解这两种方法。
动态方法的调用
如果Action中存在多个方法时,我们可以使用!+方法名调用指定方法。如下:
public class HelloWorldAction {
    private String message;
    ....
    public String execute() throws Exception{
        this.message = "我的第一个struts2应用";
        return "success";
    }
    public String other() throws Exception{
        this.message = "第二个方法";
        return "success";
    }
}假设访问上面action的URL路径为:/struts/test/helloworld.action,要访问action的other()方法,我们可以这样调用:/struts/test/helloworld!other.action。
例,我们首先在cn.itcast.action包下创建一个Action——HelloWorldAction.action。
public class HelloWorldAction {
    private String msg;

    public String getMsg() {
        return msg;
    }

    public String addUI() {
        this.msg = "addUI";
        return "success";
    }

    public String execute() { // execute()的返回值必须是String类型
        this.msg = "execute";
        return "success";
    }
}
接下来在类路径下(即src目录下)创建Struts2框架的配置文件——struts.xml。
<?xml version="1.0" encoding="UTF-8" ?>
<!DOCTYPE struts PUBLIC
    "-//Apache Software Foundation//DTD Struts Configuration 2.3//EN"
    "http://struts.apache.org/dtds/struts-2.3.dtd">

<struts>
    <constant name="struts.action.extension" value="do,action" />

    <package name="employee" namespace="/control/employee" extends="struts-default">
        <action name="list" class="cn.itcast.action.HelloWorldAction" method="execute">
            <result name="success">/WEB-INF/page/message.jsp</result>
        </action>
    </package>
</struts>
最后在WEB-INF/page/目录下创建一个jsp页面——message.jsp。
<%@ page language="java" contentType="text/html; charset=UTF-8"
    pageEncoding="UTF-8"%>
<!DOCTYPE html PUBLIC "-//W3C//DTD HTML 4.01 Transitional//EN" "http://www.w3.org/TR/html4/loose.dtd">
<html>
<head>
<meta http-equiv="Content-Type" content="text/html; charset=UTF-8">
<title>Insert title here</title>
</head>
<body>
    ${msg }
</body>
</html>我们一般都会通过浏览器访问这个URL地址:http://localhost:8080/Struts2/control/employee/list.action,当我们访问该URL地址时,默认调用的是HelloWorldAction.java的execute()方法,但是我们定要访问HelloWorldAction.java的addUI()方法,那该怎么破呢?我们可以这样调用:http://localhost:8080/Struts2/control/employee/list!addUI.action,但是会马上发现报异常:
警告: Could not find action or result: /Struts2/control/employee/list!addUI.action
There is no Action mapped for namespace [/control/employee] and action name [list!addUI] associated with context path [/Struts2]. - [unknown location]
或许是在Struts2.3.24这个版本中不再支持这种动态方法的调用了,并且我们也不推荐使用这种动态方法的调用。
如果不想使用这种动态方法调用,我们可以通过常量struts.enable.DynamicMethodInvocation关闭动态方法调用。如:
<constant name="struts.enable.DynamicMethodInvocation" value="false"/>使用通配符定义action
我们可以使用通配符定义action,因此我们可以将struts.xml文件的内容修改为:
<?xml version="1.0" encoding="UTF-8" ?>
<!DOCTYPE struts PUBLIC
    "-//Apache Software Foundation//DTD Struts Configuration 2.3//EN"
    "http://struts.apache.org/dtds/struts-2.3.dtd">

<struts>
    <constant name="struts.enable.DynamicMethodInvocation" value="false" />
    <constant name="struts.action.extension" value="do,action" />

    <package name="employee" namespace="/control/employee" extends="struts-default">
        <action name="list_*" class="cn.itcast.action.HelloWorldAction" method="{1}">
            <result name="success">/WEB-INF/page/message.jsp</result>
        </action>
    </package>
</struts>注意:list_*中_*可以有多个,如list_*_*,class属性中以及result标签内容中都可以使用{1}。
这样,要访问HelloWorldAction.java中的addUI()方法,可以通过这样的URL访问:http://localhost:8080/Struts2/control/employee/list_addUI.action;若要访问HelloWorldAction.java中的execute()方法,可以通过这样的URL访问:
- http://localhost:8080/Struts2/control/employee/list_execute.action
- http://localhost:8080/Struts2/control/employee/list_.action
- http://localhost:8080/Struts2/control/employee/list.action
接收请求参数
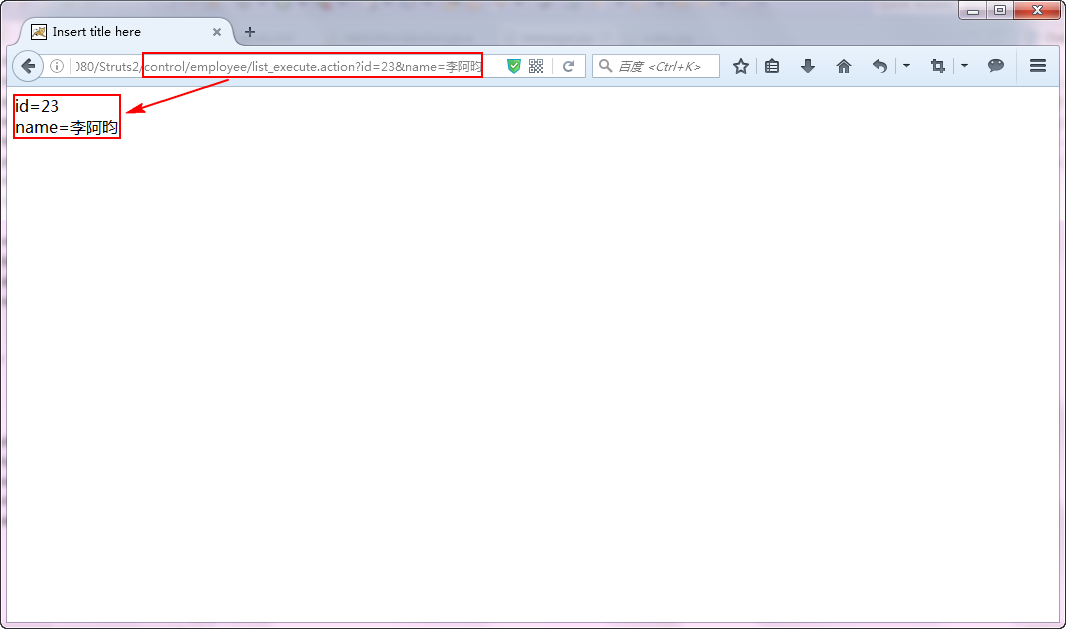
采用基本类型接受请求参数(get/post)
假设请求路径为:http://localhost:8080/Struts2/control/employee/list_execute.action?id=23&name=李阿昀。
那我们就要修改HelloWorldAction类的代码为:
public class HelloWorldAction {
    private Integer id;
    private String name;

    public Integer getId() {
        return id;
    }

    public void setId(Integer id) {
        this.id = id;
    }

    public String getName() {
        return name;
    }

    public void setName(String name) {
        this.name = name;
    }

    public String addUI() {
        return "success";
    }

    public String execute() { // execute()的返回值必须是String类型
        return "success";
    }
}注意:Struts2通过反射技术调用与请求参数同名的属性的setter方法来获取请求参数值。
struts.xml文件内容不用修改,只需修改message.jsp页面的内容为:
<%@ page language="java" contentType="text/html; charset=UTF-8"
    pageEncoding="UTF-8"%>
<!DOCTYPE html PUBLIC "-//W3C//DTD HTML 4.01 Transitional//EN" "http://www.w3.org/TR/html4/loose.dtd">
<html>
<head>
<meta http-equiv="Content-Type" content="text/html; charset=UTF-8">
<title>Insert title here</title>
</head>
<body>
    id=${id }<br/>
    name=${name }
</body>
</html>这样当我们通过浏览器访问URL地址(http://localhost:8080/Struts2/control/employee/list_execute.action?id=23&name=李阿昀)时,会看到这样的结果:
上面是通过get提交方式提交请求参数,如果是使用post提交方式提交请求参数,那又是一种什么情况?
我们可以这样做,在WebRoot根目录下创建网站首页——index.jsp。
<%@page import="java.util.Date"%>
<%@ page language="java" contentType="text/html; charset=UTF-8"
    pageEncoding="UTF-8"%>
<!DOCTYPE html PUBLIC "-//W3C//DTD HTML 4.01 Transitional//EN" "http://www.w3.org/TR/html4/loose.dtd">
<html>
<head>
<meta http-equiv="Content-Type" content="text/html; charset=UTF-8">
<title>Insert title here</title>
</head>
<body>
    <form action="<%=request.getContextPath() %>/control/employee/list_execute.action" method="post">
        id:<input type="text" name="id"><br/>
        name:<input type="text" name="name"><br/>
        <input type="submit" value="发送">
    </form>
</body>
</html>
这样,当我们通过浏览器访问该项目的首页时,填入id和name输入项的值,点击发送按钮,此时就意味着我们是使用post提交方式提交请求参数的。点击发送按钮后同样也可以看到我们所填入的值。
采用复合类型接受请求参数
假设请求路径为:http://localhost:8080/Struts2/control/employee/list_execute.action?person.id=23&person.name=李阿昀。
那我们就要修改HelloWorldAction类的代码为:
public class HelloWorldAction {

    private Person person; // 一般采用复合类型接收请求参数

    public Person getPerson() {
        return person;
    }

    public void setPerson(Person person) {
        this.person = person;
    }

    public String addUI() {
        return "success";
    }

    public String execute() { // execute()的返回值必须是String类型
        return "success";
    }

}
接下来我们就要在cn.itcast.bean包下创建Person类了——Person.java。
public class Person {
    private String name;
    private Integer id;

    public String getName() {
        return name;
    }
    public void setName(String name) {
        this.name = name;
    }
    public Integer getId() {
        return id;
    }
    public void setId(Integer id) {
        this.id = id;
    }
}
struts.xml文件内容同样不用修改,只需修改index.jsp页面的内容为:
<%@page import="java.util.Date"%>
<%@ page language="java" contentType="text/html; charset=UTF-8"
    pageEncoding="UTF-8"%>
<!DOCTYPE html PUBLIC "-//W3C//DTD HTML 4.01 Transitional//EN" "http://www.w3.org/TR/html4/loose.dtd">
<html>
<head>
<meta http-equiv="Content-Type" content="text/html; charset=UTF-8">
<title>Insert title here</title>
</head>
<body>
    <form action="<%=request.getContextPath() %>/control/employee/list_execute.action" method="post">
        id:<input type="text" name="person.id"><br/>
        name:<input type="text" name="person.name"><br/>
        <input type="submit" value="发送">
    </form>
</body>
</html>
并且message.jsp页面的内容还要修改为:
<%@ page language="java" contentType="text/html; charset=UTF-8"
    pageEncoding="UTF-8"%>
<!DOCTYPE html PUBLIC "-//W3C//DTD HTML 4.01 Transitional//EN" "http://www.w3.org/TR/html4/loose.dtd">
<html>
<head>
<meta http-equiv="Content-Type" content="text/html; charset=UTF-8">
<title>Insert title here</title>
</head>
<body>
    id=${person.id }<br/>
    name=${person.name }
</body>
</html>
这样,当我们通过浏览器访问该项目的首页时,填入id和name输入项的值,点击发送按钮,此时就意味着我们是使用post提交方式提交请求参数的。点击发送按钮后同样也可以看到我们所填入的值。
若在Person类中只有一个有参构造函数,即Person类的代码为:
public class Person {
    private String name;
    private Integer id;

    public Person(String name, Integer id) {
        this.name = name;
        this.id = id;
    }
    public String getName() {
        return name;
    }
    public void setName(String name) {
        this.name = name;
    }
    public Integer getId() {
        return id;
    }
    public void setId(Integer id) {
        this.id = id;
    }

}提示:Person类中没有默认构造函数,控制台打印错误,jsp页面部分内容不显示。
这样,当我们通过浏览器访问该项目的首页时,填入id和name输入项的值,点击发送按钮,发现message.jsp页面中部分内容不显示,但是Eclipse的控制台打印错误:
java.lang.InstantiationException: cn.itcast.bean.Person
    at java.lang.Class.newInstance(Unknown Source)
    ...
报异常的原因是:Struts2首先通过反射技术调用Person的默认构造器创建Person对象,然后再通过反射技术调用Person中与请求参数同名的属性的setter方法来获取请求参数值。
总结
在Action类中定义与请求参数同名属性,Struts2会自动接收请求参数并赋予同名属性;而Struts1在formbean中使用与请求参数同名的属性,并且有setter、getter方法。
自定义类型转换器
Struts2有两种类型的转换器:
- 局部类型转换器:只对某个Action起作用。
- 全局类型转换器:对整个应用中的所有Action起作用。
我们举一个例子来说明自定义类型转换器这个知识点。我们首先将HelloWorldAction类的代码修改为:
public class HelloWorldAction {

    private Date birthday;

    public Date getBirthday() {
        return birthday;
    }

    public void setBirthday(Date birthday) {
        System.out.println(birthday);
        this.birthday = birthday;
    }

    public String addUI() {
        return "success";
    }

    public String execute() { // execute()的返回值必须是String类型
        return "success";
    }

}
struts.xml配置文件的内容仍不变,为:
<?xml version="1.0" encoding="UTF-8" ?>
<!DOCTYPE struts PUBLIC
    "-//Apache Software Foundation//DTD Struts Configuration 2.3//EN"
    "http://struts.apache.org/dtds/struts-2.3.dtd">

<struts>
    <constant name="struts.enable.DynamicMethodInvocation" value="false" />
    <constant name="struts.action.extension" value="do,action" />

    <package name="employee" namespace="/control/employee" extends="struts-default">
        <action name="list_*" class="cn.itcast.action.HelloWorldAction" method="{1}">
            <result name="success">/WEB-INF/page/message.jsp</result>
        </action>
    </package>
</struts>
最后修改message.jsp页面的内容为:
<%@ page language="java" contentType="text/html; charset=UTF-8"
    pageEncoding="UTF-8"%>
<!DOCTYPE html PUBLIC "-//W3C//DTD HTML 4.01 Transitional//EN" "http://www.w3.org/TR/html4/loose.dtd">
<html>
<head>
<meta http-equiv="Content-Type" content="text/html; charset=UTF-8">
<title>Insert title here</title>
</head>
<body>
    ${birthday }
</body>
</html>
当我们像下面这样访问时,我们会发现诸如2009-12-21这样格式的字符串会自动转换成java.util.Date类型。
但是需要将值为诸如20091221这样格式的请求参数注入到birthday属性中时,就像这样:
我们会发现Struts2无法自动完成类型转换,这时必须定义类型转换器了。
自定义类型转换器——局部
关于自定义类型转换器,它要能够实现双向转换,即:
- 由请求参数的值转换成属性的值。
- 使用到Struts2的标签时,需要把属性的值转换成字符串进行数据回显。
我们先编写一个日期类型的转换器,即要在cn.itcast.type.converter包中创建一个DateTypeConverter类,注意,该类要继承DefaultTypeConverter类。
public class DateTypeConverter extends DefaultTypeConverter {

    @Override
    public Object convertValue(Map<String, Object> context, Object value, Class toType) {
        SimpleDateFormat dateFormat = new SimpleDateFormat("yyyyMMdd");
        try {
            if (toType == Date.class) { // 当字符串向Date类型转换时
                String[] params = (String[]) value; // request.getParameterValues()
                return dateFormat.parse(params[0]);
            } else if (toType == String.class) {// 当Date转换成字符串时
                Date date = (Date) value;
                return dateFormat.format(date);
            }
        } catch (ParseException e) { }
        return null;
    }

}
有些人可能对于这句代码:
String[] params = (String[]) value;存疑,Struts2在接受请求参数的时候,为什么是个数组呢?
答案是:Struts2是个框架,它要考虑所有类型的参数。若是复选框,名字都为ids,因为选择的是多个,使用Request.getParameterValues()得到所有的参数,得到的是一个数组。所以,Struts2为了兼容这种情况,所有的参数都是用数组,即使只有一个值。
接下来的这步非常重要,即我们要将上面的类型转换器注册为局部类型转换器,方法为:
在Action类所在的包下放置ActionClassName-conversion.properties文件,ActionClassName是Action的类名,后面的-conversion.properties是固定写法。
对于本例而言,文件的名称应为HelloWorldAction-conversion.properties 。在properties文件中的内容为:属性名称=类型转换器的全类名,即:
birthday=cn.itcast.type.converter.DateTypeConverter当我们像下面这样访问时,我们会发现诸如20091221这样格式的字符串会自动转换成java.util.Date类型。
自定义类型转换器——全局
我们再来将类型转换器(DateTypeConverter)注册为全局类型转换器,方法为:
在WEB-INF/classes下(即src目录下)放置xwork-conversion.properties文件。在properties文件中的内容为:待转换的类型=类型转换器的全类名。
对于本例而言,xwork-conversion.properties文件中的内容为:
java.util.Date=cn.itcast.type.converter.DateTypeConverter(对于应用中的这种类型都是用这种类型转换器注册)
此时,我们同样会发现诸如20091221这样格式的字符串会自动转换成java.util.Date类型。
注意:全局类型转换器对格式要求很严格,该全局类型转换器要求日期的格式都是19921212这种类型,而Struts2默认的转换该1992-12-12类型会受到影响。
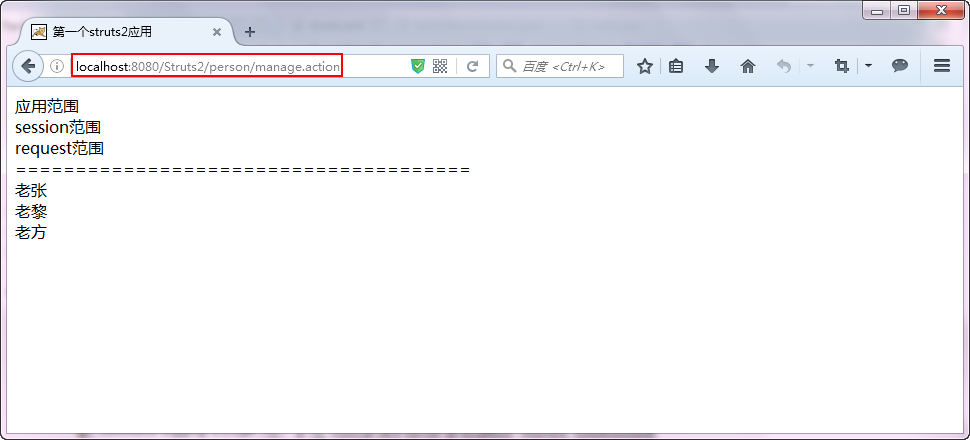
访问或添加request/session/application属性
在做Web开发时,很多情况下,我们都要在request/session/application这些域中存放一些东西,现在我们就来讲解在Struts2中怎么访问或添加request/session/application属性。
首先将HelloWorldAction类的代码修改为:
public class HelloWorldAction {

    public String execute() {
        ActionContext ctx = ActionContext.getContext(); // 仅仅是添加属性,用这种方法
        ctx.getApplication().put("app", "应用范围"); // 往ServletContext里放入app
        ctx.getSession().put("ses", "session范围"); // 往session里放入ses
        ctx.put("req", "request范围"); // 往request里放入req
        ctx.put("names", Arrays.asList("老张", "老黎", "老方")); // 在request域里面存放集合
        return "message";
    }

}
紧接着我们就要将struts.xml配置文件置为:
<?xml version="1.0" encoding="UTF-8" ?>
<!DOCTYPE struts PUBLIC
    "-//Apache Software Foundation//DTD Struts Configuration 2.3//EN"
    "http://struts.apache.org/dtds/struts-2.3.dtd">

<struts>
    <constant name="struts.enable.DynamicMethodInvocation" value="false" />
    <constant name="struts.action.extension" value="do,action" />

    <package name="person" namespace="/person" extends="struts-default">
        <action name="manage" class="cn.itcast.action.HelloWorldAction" method="execute">
            <result name="message">/WEB-INF/page/hello.jsp</result>
        </action>
    </package>
</struts>
最后我们要在WEB-INF/page/目录下创建hello.jsp页面。
<%@ page language="java" contentType="text/html; charset=UTF-8"
    pageEncoding="UTF-8"%>
<%@ taglib uri="http://java.sun.com/jsp/jstl/core" prefix="c" %>
<!DOCTYPE html PUBLIC "-//W3C//DTD HTML 4.01 Transitional//EN" "http://www.w3.org/TR/html4/loose.dtd">
<html>
<head>
<meta http-equiv="Content-Type" content="text/html; charset=UTF-8">
<title>第一个struts2应用</title>
</head>
<body>
    ${applicationScope.app}<br>
    ${sessionScope.ses}<br>
    ${requestScope.req}<br>
    ======================================<br/>
    <c:forEach items="${names }" var="name">
        ${name }<br/>
    </c:forEach>
</body>
</html>
记住这时项目中要导入jstl-1.2.jar文件。
此时,通过浏览器访问URL地址——http://localhost:8080/Struts2/person/manage.action,会看到如下结果:
获取HttpServletRequest/HttpSession/ServletContext/HttpServletResponse对象
要获取HttpServletRequest/HttpSession/ServletContext/HttpServletResponse这些对象,我们有两种方法:
方法一,通过ServletActionContext类直接获取:(建议)
public String rsa() throws Exception{
    HttpServletRequest request = ServletActionContext.getRequest();
    ServletContext servletContext = ServletActionContext.getServletContext();
    request.getSession();
    HttpServletResponse response = ServletActionContext.getResponse();
    return "scope";
}
方法二,实现指定接口,由Struts2框架运行时注入:
public class HelloWorldAction implements ServletRequestAware, ServletResponseAware, ServletContextAware{
    private HttpServletRequest request;
    private ServletContext servletContext;
    private HttpServletResponse response;
    public void setServletRequest(HttpServletRequest req) {  // 运行期 Struts2对象会在运行期注入
        this.request=req;
    }
    public void setServletResponse(HttpServletResponse res) {
        this.response=res;
    }
    public void setServletContext(ServletContext ser) {
        this.servletContext=ser;
    }
}
推荐采用第一种方法,所以我们通过第一种方法来举例说明如何获取HttpServletRequest/HttpSession/ServletContext/HttpServletResponse对象。
我们首先将HelloWorldAction类的代码修改为:
public class HelloWorldAction {
public String execute() {
ActionContext ctx = ActionContext.getContext(); // 仅仅是添加属性,用这种方法
ctx.getApplication().put("app", "应用范围"); // 往ServletContext里放入app
ctx.getSession().put("ses", "session范围"); // 往session里放入ses
ctx.put("req", "request范围"); // 往request里放入req
// ctx.put("names", Arrays.asList("老张", "老黎", "老方")); // ognl
return "message";
}
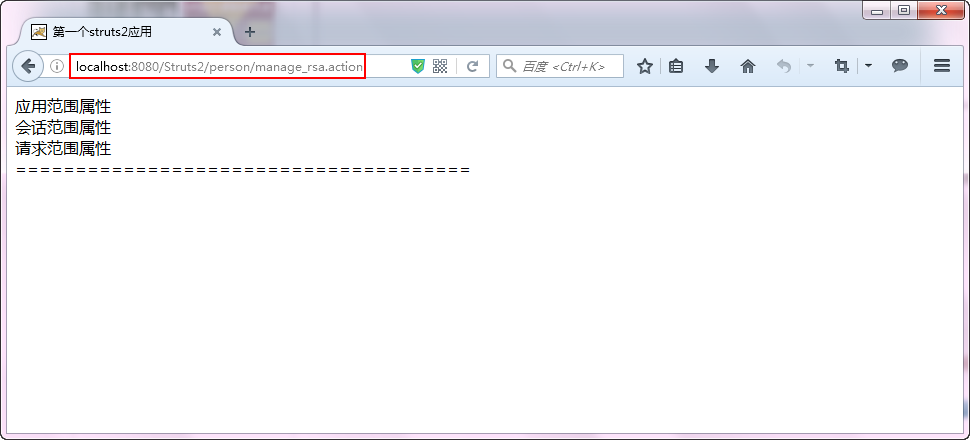
public String rsa() throws Exception{
HttpServletRequest request = ServletActionContext.getRequest();
ServletContext servletContext = ServletActionContext.getServletContext();
request.setAttribute("req", "请求范围属性");
request.getSession().setAttribute("ses", "会话范围属性");
servletContext.setAttribute("app", "应用范围属性");
return "message";
}
}然后我们要将struts.xml配置文件的内容置为:
<?xml version="1.0" encoding="UTF-8" ?>
<!DOCTYPE struts PUBLIC
    "-//Apache Software Foundation//DTD Struts Configuration 2.3//EN"
    "http://struts.apache.org/dtds/struts-2.3.dtd">

<struts>
    <constant name="struts.enable.DynamicMethodInvocation" value="false" />
    <constant name="struts.action.extension" value="do,action" />

    <package name="person" namespace="/person" extends="struts-default">
        <action name="manage_*" class="cn.itcast.action.HelloWorldAction" method="{1}">
            <result name="message">/WEB-INF/page/hello.jsp</result>
        </action>
    </package>
</struts>这样,我们通过浏览器访问URL地址——http://localhost:8080/Struts2/person/manage_ras.action,会看到如下结果:
总结
这时,我们就要思考一个问题了,到底什么场景下要访问或添加request/session/application属性,什么场景下要获取HttpServletRequest/HttpSession/ServletContext/HttpServletResponse对象呢?
- 访问或添加request/session/application属性的场景:仅仅是添加属性。
获取HttpServletRequest/HttpSession/ServletContext/HttpServletResponse对象的场景:
如,我们要获取站点目录下的某一个文件的绝度路径时,必须要获取以上这些对象了,代码类似:ServletContext servletContext = ServletActionContext.getServletContext(); servletContext.getRealPath("..."); // 假设要获取站点目录下的某一个文件的绝度路径
文件上传
在Struts2中要实现文件上传,须遵循以下步骤:
- 在WEB-INF/lib下加入commons-fileupload-1.3.1.jar、commons-io-2.2.jar。这两个文件可以从http://commons.apache.org/下载。 (struts2.1后第一个jar自动包含进去了,可以不添加)。
把form表的enctype设置为:“multipart/form-data“,如下:
<form enctype="multipart/form-data" action="${pageContext.request.contextPath}/xxx.action" method="post">
    <input type="file" name="uploadImage">
</form>
在Action类中添加以下属性,属性部分对应于表单中文件字段的名称:
public class HelloWorldAction{
    private File uploadImage; // 得到上传的文件
    private String uploadImageContentType; // 得到文件的类型
    private String uploadImageFileName; // 得到文件的名称
    // 这里略省了属性的getter/setter方法
    public String upload() throws Exception{   // 将文件存放到站点的images目录下
        String realpath = ServletActionContext.getServletContext().getRealPath("/images");
        File file = new File(realpath);
        if(!file.exists()) file.mkdirs();
        FileUtils.copyFile(uploadImage, new File(file, uploadImageFileName));
        return "success";
    }
}
弄清楚文件上传的三个步骤以后,现在我们就来举例来说明在Struts2中如何实现文件上传。
我们先将struts.xml配置文件的内容修改为:
<?xml version="1.0" encoding="UTF-8" ?>
<!DOCTYPE struts PUBLIC
    "-//Apache Software Foundation//DTD Struts Configuration 2.3//EN"
    "http://struts.apache.org/dtds/struts-2.3.dtd">

<struts>
    <constant name="struts.enable.DynamicMethodInvocation" value="false" />
    <constant name="struts.action.extension" value="do,action" />

    <package name="employee" namespace="/control/employee" extends="struts-default">
        <action name="list_*" class="cn.itcast.action.HelloWorldAction" method="{1}">
            <result name="success">/WEB-INF/page/message.jsp</result>
        </action>
    </package>
</struts>
紧接着我们在WebRoot根目录下创建文件上传页面——employeeAdd.jsp。
<%@ page language="java" contentType="text/html; charset=UTF-8"
    pageEncoding="UTF-8"%>
<!DOCTYPE html PUBLIC "-//W3C//DTD HTML 4.01 Transitional//EN" "http://www.w3.org/TR/html4/loose.dtd">
<html>
<head>
<meta http-equiv="Content-Type" content="text/html; charset=UTF-8">
<title>Insert title here</title>
</head>
<body>
    <form action="${pageContext.request.contextPath }/control/employee/list_execute.action" enctype="multipart/form-data" method="post">
        文件:<input type="file" name="image"><br/>
        <input type="submit" value="上传">
    </form>
</body>
</html>
然后我们还要在WEB-INF/page/目录下创建一个全局消息显示页面——message.jsp。
<%@ page language="java" contentType="text/html; charset=UTF-8"
    pageEncoding="UTF-8"%>
<!DOCTYPE html PUBLIC "-//W3C//DTD HTML 4.01 Transitional//EN" "http://www.w3.org/TR/html4/loose.dtd">
<html>
<head>
<meta http-equiv="Content-Type" content="text/html; charset=UTF-8">
<title>Insert title here</title>
</head>
<body>
    ${message }
</body>
</html>
最后我们编写HelloWorldAction类的代码为:
public class HelloWorldAction {

    private File image;
    private String imageFileName; // 得到上传文件的名称
    private String imageContentType;//得到上传文件的类型

    public String getImageFileName() {
        return imageFileName;
    }

    public void setImageFileName(String imageFileName) {
        this.imageFileName = imageFileName;
    }

    public File getImage() {
        return image;
    }

    public void setImage(File image) {
        this.image = image;
    }

    public String addUI() {
        return "success";
    }

    public String execute() throws IOException {
        String realpath = ServletActionContext.getServletContext().getRealPath("/images");
        System.out.println(realpath);
        if (image != null) {
            File savefile = new File(new File(realpath), imageFileName);
            if (!savefile.getParentFile().exists()) { // 判断savefile保存的目录是否存在
                savefile.getParentFile().mkdirs();
            }
            FileUtils.copyFile(image, savefile);
            ActionContext.getContext().put("message", "上传成功!!!");
        }
        return "success";
    }

}
访问效果如下:
这时我们可以在诸如…\apache-tomcat-8.0.36\webapps\Struts2\images目录下找到我们上传的图片。
如果这时上传的文件内容太大,上传就会失败,但我们可以修改常量struts.multipart.maxSize,如:
<constant name="struts.multipart.maxSize" value="107010960" />现在虽然可以上传大一点的文件了,但是我们要明白在实际Web开发中,大容量的文件上传是不能通过这种方式进行上传的,因为网络不稳定,有可能10次上传都会失败,所以在实际Web开发中,我们会集成诸如迅雷等应用程序进行大容量的文件上传。
多文件上传
我们仍举例说明在Struts2中怎么实现多文件上传。
首先,我们要修改文件上传页面——employeeAdd.jsp的内容为:
<%@ page language="java" contentType="text/html; charset=UTF-8"
    pageEncoding="UTF-8"%>
<!DOCTYPE html PUBLIC "-//W3C//DTD HTML 4.01 Transitional//EN" "http://www.w3.org/TR/html4/loose.dtd">
<html>
<head>
<meta http-equiv="Content-Type" content="text/html; charset=UTF-8">
<title>Insert title here</title>
</head>
<body>
    <form action="${pageContext.request.contextPath }/control/employee/list_execute.action" enctype="multipart/form-data" method="post">
        文件1:<input type="file" name="image"><br/>
        文件2:<input type="file" name="image"><br/>
        文件3:<input type="file" name="image"><br/>
        <input type="submit" value="上传">
    </form>
</body>
</html>
接下来我们只要修改HelloWorldAction类的代码就可以了。
public class HelloWorldAction {

    private File[] image;
    private String[] imageFileName; // 得到上传文件的名称

    public File[] getImage() {
        return image;
    }

    public void setImage(File[] image) {
        this.image = image;
    }

    public String[] getImageFileName() {
        return imageFileName;
    }

    public void setImageFileName(String[] imageFileName) {
        this.imageFileName = imageFileName;
    }

    public String addUI() {
        return "success";
    }

    public String execute() throws IOException {
        String realpath = ServletActionContext.getServletContext().getRealPath("/images");
        System.out.println(realpath);
        if (image != null) {
            File savedir = new File(realpath);
            if (!savedir.exists()) {
                savedir.mkdirs();
            }
            for (int i = 0; i < image.length; i++) {
                File file = image[i];
                File savefile = new File(savedir, imageFileName[i]);
                FileUtils.copyFile(image[i], savefile);
            }
            ActionContext.getContext().put("message", "上传成功!!!");
        }
        return "success";
    }

}
访问效果如下:
这时我们可以在诸如…\apache-tomcat-8.0.36\webapps\Struts2\images目录下找到我们上传的图片。
自定义拦截器
现在我们有一个需求:如果用户登录后可以访问action中的所有方法;如果用户没有登录则不允许访问action中的方法,并提示“你没有权限执行该操作”。
现在我们来模拟用户登录,当用户访问user.jsp页面时就代表他已经登录,这样user.jsp页面的内容就应为:
<%@ page language="java" contentType="text/html; charset=UTF-8"
    pageEncoding="UTF-8"%>
<!DOCTYPE html PUBLIC "-//W3C//DTD HTML 4.01 Transitional//EN" "http://www.w3.org/TR/html4/loose.dtd">
<html>
<head>
<meta http-equiv="Content-Type" content="text/html; charset=UTF-8">
<title>设置用户为登录状态</title>
</head>
<body>
    <%
        request.getSession().setAttribute("user", "liayun");
    %>
    用户已经登录
</body>
</html>
当用户访问quit.jsp页面时就代表他已经退出登录,这样,quit.jsp页面的内容就应为:
<%@ page language="java" contentType="text/html; charset=UTF-8"
    pageEncoding="UTF-8"%>
<!DOCTYPE html PUBLIC "-//W3C//DTD HTML 4.01 Transitional//EN" "http://www.w3.org/TR/html4/loose.dtd">
<html>
<head>
<meta http-equiv="Content-Type" content="text/html; charset=UTF-8">
<title>设置用户为退出登录状态</title>
</head>
<body>
    <%
        request.getSession().removeAttribute("user");
    %>
    用户已经退出登录
</body>
</html>
接下来,我们就要修改HelloWorldAction类的代码为:
public class HelloWorldAction {

    private String message;

    public String getMessage() {
        return message;
    }

    public void setMessage(String message) {
        this.message = message;
    }

    public String addUI() {
        this.message = "addUI";
        return "success";
    }

    public String execute() {
        this.message = "execute";
        return "success";
    }

}
紧接着我们就要自定义一个拦截器了,该拦截器得实现com.opensymphony.xwork2.interceptor.Interceptor接口。我们在cn.itcast.interceptor包下创建出这样一个拦截器——PermissionInterceptor.java,具体代码为:
public class PermissionInterceptor implements Interceptor {

    @Override
    public void destroy() {

    }

    @Override
    public void init() {

    }

    @Override
    public String intercept(ActionInvocation invocation) throws Exception {
        Object user = ActionContext.getContext().getSession().get("user");
        if (user != null) { // 判断用户是否登录,如果user不为null,代表用户已经登录,允许执行action中的方法
            return invocation.invoke(); // 被拦截到的方法执行
        }
        ActionContext.getContext().put("message", "你没有权限执行该操作");
        return "success"; // 定义成一个全局视图
    }

}
最后我们需要在程序中引用自定义的拦截器了,那到底该怎么做呢?很简单,只须在struts.xml文件中配置即可。
我们一开始这样配置可行否?
<?xml version="1.0" encoding="UTF-8" ?>
<!DOCTYPE struts PUBLIC
    "-//Apache Software Foundation//DTD Struts Configuration 2.3//EN"
    "http://struts.apache.org/dtds/struts-2.3.dtd">

<struts>
    <constant name="struts.enable.DynamicMethodInvocation" value="false" />
    <constant name="struts.action.extension" value="do,action" />
    <constant name="struts.multipart.maxSize" value="107010960" />

    <package name="employee" namespace="/control/employee" extends="struts-default">
        <interceptors>
            <interceptor name="permission" class="cn.itcast.interceptor.PermissionInterceptor"></interceptor>
        </interceptors>

        <global-results>
            <result name="success">/WEB-INF/page/message.jsp</result>
        </global-results>

        <action name="list_*" class="cn.itcast.action.HelloWorldAction" method="{1}">
            <!-- Struts2有一个特点:如果你为某一个action使用了你所自定义的拦截器,那么Struts2核心的拦截器就会丢掉 -->
            <interceptor-ref name="permission" />
        </action>
    </package>
</struts>很显然这样配置是不行的,因为Struts2有一个特点:如果你为某一个action使用了你所自定义的拦截器,那么Struts2核心的拦截器就会丢掉。
所以我们应该这样配置:
<?xml version="1.0" encoding="UTF-8" ?>
<!DOCTYPE struts PUBLIC
    "-//Apache Software Foundation//DTD Struts Configuration 2.3//EN"
    "http://struts.apache.org/dtds/struts-2.3.dtd">

<struts>
    <constant name="struts.enable.DynamicMethodInvocation" value="false" />
    <constant name="struts.action.extension" value="do,action" />
    <constant name="struts.multipart.maxSize" value="107010960" />

    <package name="employee" namespace="/control/employee" extends="struts-default">
        <interceptors>
            <interceptor name="permission" class="cn.itcast.interceptor.PermissionInterceptor"></interceptor>
            <!--定义一个拦截器栈(即由一个或多个拦截器组成,一堆拦截器的集合),即权限栈 -->
            <interceptor-stack name="permissionStack">
                <!-- 系统提供的拦截器栈,包含了实现Struts2很多核心功能的拦截器,注意:应该把系统的拦截器放在前面(会先执行),自定义的拦截器放在后面 -->
                <interceptor-ref name="defaultStack"></interceptor-ref>
                <interceptor-ref name="permission"></interceptor-ref>
            </interceptor-stack>
        </interceptors>

        <global-results>
            <result name="success">/WEB-INF/page/message.jsp</result>
        </global-results>

        <action name="list_*" class="cn.itcast.action.HelloWorldAction" method="{1}">
            <interceptor-ref name="permissionStack"></interceptor-ref>
        </action>
    </package>
</struts>
访问效果如下:
总结
因为Struts2中如文件上传,数据验证,封装请求参数到action等功能都是由系统默认的defaultStack中的拦截器实现的,所以我们定义的拦截器需要引用系统默认的defaultStack,这样应用才可以使用Struts2框架提供的众多功能。
如果希望包下的所有action都使用自定义的拦截器,可以通过<default-interceptor-ref name=“permissionStack”/>把拦截器定义为默认拦截器。这样,struts.xml配置文件的内容就应该为:
<?xml version="1.0" encoding="UTF-8" ?>
<!DOCTYPE struts PUBLIC
    "-//Apache Software Foundation//DTD Struts Configuration 2.3//EN"
    "http://struts.apache.org/dtds/struts-2.3.dtd">

<struts>
    <constant name="struts.enable.DynamicMethodInvocation" value="false" />
    <constant name="struts.action.extension" value="do,action" />
    <constant name="struts.multipart.maxSize" value="107010960" />

    <package name="employee" namespace="/control/employee" extends="struts-default">
        <interceptors>
            <interceptor name="permission" class="cn.itcast.interceptor.PermissionInterceptor"></interceptor>
            <!--定义一个拦截器栈(即由一个或多个拦截器组成,一堆拦截器的集合),即权限栈 -->
            <interceptor-stack name="permissionStack">
                <!-- 系统提供的拦截器栈,包含了实现Struts2很多核心功能的拦截器,注意:应该把系统的拦截器放在前面(会先执行),自定义的拦截器放在后面 -->
                <interceptor-ref name="defaultStack"></interceptor-ref>
                <interceptor-ref name="permission"></interceptor-ref>
            </interceptor-stack>
        </interceptors>

        <default-interceptor-ref name="permissionStack"></default-interceptor-ref>

        <global-results>
            <result name="success">/WEB-INF/page/message.jsp</result>
        </global-results>

        <action name="list_*" class="cn.itcast.action.HelloWorldAction" method="{1}">

        </action>
    </package>
</struts>
注意:每个包只能指定一个默认拦截器。另外,一旦我们为该包中的某个action显式指定了某个拦截器,则默认拦截器不会起作用。例如struts.xml配置文件的内容为:
<?xml version="1.0" encoding="UTF-8" ?>
<!DOCTYPE struts PUBLIC
    "-//Apache Software Foundation//DTD Struts Configuration 2.3//EN"
    "http://struts.apache.org/dtds/struts-2.3.dtd">

<struts>
    <constant name="struts.enable.DynamicMethodInvocation" value="false" />
    <constant name="struts.action.extension" value="do,action" />
    <constant name="struts.multipart.maxSize" value="107010960" />

    <package name="employee" namespace="/control/employee" extends="struts-default">
        <interceptors>
            <interceptor name="permission" class="cn.itcast.interceptor.PermissionInterceptor"></interceptor>
            <!--定义一个拦截器栈(即由一个或多个拦截器组成,一堆拦截器的集合),即权限栈 -->
            <interceptor-stack name="permissionStack">
                <!-- 系统提供的拦截器栈,包含了实现Struts2很多核心功能的拦截器,注意:应该把系统的拦截器放在前面(会先执行),自定义的拦截器放在后面 -->
                <interceptor-ref name="defaultStack"></interceptor-ref>
                <interceptor-ref name="permission"></interceptor-ref>
            </interceptor-stack>
        </interceptors>

        <default-interceptor-ref name="permissionStack"></default-interceptor-ref>

        <global-results>
            <result name="success">/WEB-INF/page/message.jsp</result>
        </global-results>

        <action name="list_*" class="cn.itcast.action.HelloWorldAction" method="{1}">
            <interceptor-ref name="xxxx"></interceptor-ref>
        </action>
    </package>
</struts>
我们为该包中的名称为list_*的action显式指定了某个拦截器,所以默认拦截器permissionStack将不会起作用。这即使说只要你的action里面引用了拦截器,则默认的拦截器就会失去效果。
但是我们希望不仅要单独为某一个action引入进拦截器,而且还希望保留默认拦截器的作用,这时可以这样做:
<?xml version="1.0" encoding="UTF-8" ?>
<!DOCTYPE struts PUBLIC
    "-//Apache Software Foundation//DTD Struts Configuration 2.3//EN"
    "http://struts.apache.org/dtds/struts-2.3.dtd">

<struts>
    <constant name="struts.enable.DynamicMethodInvocation" value="false" />
    <constant name="struts.action.extension" value="do,action" />
    <constant name="struts.multipart.maxSize" value="107010960" />

    <package name="employee" namespace="/control/employee" extends="struts-default">
        <interceptors>
            <interceptor name="permission" class="cn.itcast.interceptor.PermissionInterceptor"></interceptor>
            <!--定义一个拦截器栈(即由一个或多个拦截器组成,一堆拦截器的集合),即权限栈 -->
            <interceptor-stack name="permissionStack">
                <!-- 系统提供的拦截器栈,包含了实现Struts2很多核心功能的拦截器,注意:应该把系统的拦截器放在前面(会先执行),自定义的拦截器放在后面 -->
                <interceptor-ref name="defaultStack"></interceptor-ref>
                <interceptor-ref name="permission"></interceptor-ref>
            </interceptor-stack>
        </interceptors>

        <default-interceptor-ref name="permissionStack"></default-interceptor-ref>

        <global-results>
            <result name="success">/WEB-INF/page/message.jsp</result>
        </global-results>

        <action name="list_*" class="cn.itcast.action.HelloWorldAction" method="{1}">
            <interceptor-ref name="permissionStack" />
            <!-- 使用特定的拦截器,前面加上默认拦截器,不加上默认的,则会覆盖默认的拦截器 -->
            <interceptor-ref name="xxxx"></interceptor-ref>
        </action>
    </package>
</struts>


 2768
2768

 被折叠的 条评论
为什么被折叠?
被折叠的 条评论
为什么被折叠?
 到【灌水乐园】发言


