序引
本系列文章将介绍iOS开发中的UITableView控件,将会分成四篇文章完整的讲述UITableView的具体使用方法和注意点,文章编写周期会长一些,由于本人还在学习iOS开发阶段,有些东西可能会描述不对或错误,Markdown排版也不是特别好,欢迎各位读者指点其中不对的地方。
本文主要涉及的知识点:
- UITableView的概念
- UITableView显示数据的两种样式
- UITableView的使用步骤
- UITableView的常见属性
- UITableViewCell的基本概念
- UITableViewCell的常见属性
- UITableView的代理方法
- UITableViewController的讲解
- UITableViewCell的重用
1. UITableView的概念
- 在iOS开发中,要实现展示列表数据,就常用的做法就是使用UITableView
- UITbaleView继承自UIScrollView,因此支持垂直滚动,而且性能极佳
2. UITableView显示数据的两种样式
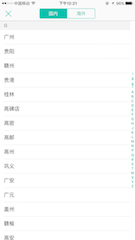
单组样式
- UITableViewStylePlain
- 展示单组数据,没有分组
- 例如:
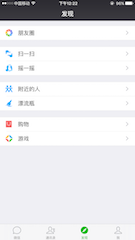
分组样式
- UITableViewStyleGrouped
- 展示多组数据,有分组,每一组可以有不同的行数
- 例如:
3. UITableView的使用步骤
第一步:设置数据源对象
self.tableView.dataSource = self;- 数据源对象一般设置为当前控制器
设置的语句写在控制器的
- (void)viewDidLoad方法中- (void)viewDidLoad { [super viewDidLoad]; // 设置数据源对象为当前控制器 self.tableView.dataSource = self; }
第二步:设置的数据源对象要遵守协议
设置为数据源对象的类一定要遵守
UITableViewDataSource协议@interface ViewController () <UITableViewDataSource> @end
第三步:实现数据源协议中的方法
- 单组数据必须实现数据源中的两个方法
多行数据必须实现数据源中的三个方法
- (NSInteger)numberOfSectionsInTableView:(UITableView *)tableView- 告诉tableView一共有多少组数据
- 单组数据可以不用实现(因为只有一组数据,系统默认为1),多组数据必须实现
参数section:传入当前是第几组,当样式为单组数据的时候,section永远为0
- (NSInteger)numberOfSectionsInTableView:(UITableView *)tableView
{
  return 4;
}
- (NSInteger)tableView:(UITableView *)tableView numberOfRowsInSection:(NSInteger)section- 告诉tableView每一组有多少行数据
- 单组数据和多组数据都必须实现
- 参数section:传入当前是第几组
参数
- (NSInteger)tableView:(UITableView *)tableView numberOfRowsInSection:(NSInteger)section
{
  if (section == 0) {
      return 2; // 第0组有两行数据
  } else if (section == 1) {
      return 6; // 第1组有六行数据
  } else if (section == 2) {
      return 6; // 第2组有六行数据
  } else {
      return 1; // 第3组有一行数据
  }
}
- (UITableViewCell *)tableView:(UITableView *)tableView cellForRowAtIndexPath:(NSIndexPath *)indexPath- 告诉tableView每一行显示的内容
- tableView每一行的内容一定是
UITableViewCell - 单组数据和多组数据都必须实现
参数indexPath:indexPath有两个属性,
indexPath.section传入当前是第几组,indexPath.row传入当前是第几行- (UITableViewCell *)tableView:(UITableView *)tableView cellForRowAtIndexPath:(NSIndexPath *)indexPath { UITableViewCell *cell = [[UITableViewCell alloc] init]; if (indexPath.section == 0) { if (indexPath.row == 0) { // 第0组第0行显示的数据为“通用” cell.textLabel.text = @"通用"; } else if (indexPath.row == 1) { // 第0组第1行显示的数据为“隐私” cell.textLabel.text = @"隐私"; } } else { // 其他组显示的数据为自己的组号和行号 cell.textLabel.text = [NSString stringWithFormat:@"%zd组%zd行-其他数据", indexPath.section,indexPath.row]; } return cell; }
- (NSString *)tableView:(UITableView *)tableView titleForHeaderInSection:(NSInteger)section- 告诉tableView每一组的头部标题
参数section:传入当前是第几组
- (NSString *)tableView:(UITableView *)tableView titleForHeaderInSection:(NSInteger)section
{
  if (section == 0) {
      return @"头部标题";
  } else {
      return @"头部标题";
  }
}
- (NSString *)tableView:(UITableView *)tableView titleForFooterInSection:(NSInteger)section- 告诉tableView每一组的尾部标题
参数section:传入当前是第几组
- (NSString *)tableView:(UITableView *)tableView titleForFooterInSection:(NSInteger)section
{
  if (section == 0) {
      return @"尾部标题";
  } else {
      return @"尾部标题";
  }
}
4. UITableView的常见属性
设置行高的高度:
属性:
@property (nonatomic) CGFloat rowHeight;

使用格式:
self.tableView.rowHeight = 70;

说明:
默认是44
设置每一组的头部高度:
属性:
@property (nonatomic) CGFloat sectionHeaderHeight;

使用格式:
self.tableView.sectionHeaderHeight = 50;
设置分割线的颜色:
属性:
@property (nonatomic, strong) UIColor *separatorColor

使用格式:
self.tableView.separatorColor = [UIColor redColor];

说明:
设置[UIColor clearColor]代表隐藏分割线,[UIColor clearColor]为透明色对象
设置分割线的样式:
属性:
@property (nonatomic) UITableViewCellSeparatorStyle separatorStyle

使用格式:
self.tableView.separatorStyle = UITableViewCellSeparatorStyleSingleLine;

枚举UITableViewCellSeparatorStyle常用的枚举元素:
UITableViewCellSeparatorStyleNone // 隐藏分割线
UITableViewCellSeparatorStyleSingleLine // 默认样式
UITableViewCellSeparatorStyleSingleLineEtched // 仅支持在grouped样式,但是和默认样式没什么区别
设置表头控件:
属性:
@property (nonatomic, strong) UIView *tableHeaderView;

使用格式:
self.tableView.tableHeaderView = [[UISwitch alloc] init];
设置表尾控件:
属性:
@property (nonatomic, strong) UIView *tableFooterView;

使用格式:
self.tableView.tableFooterView = [[UISwitch alloc] init];
5. UITableViewCell的基本概念
UITableView的每一行都是一个UITableViewCellUITableView内部有个默认的子控件:contentView,填充整个UITableViewCell的父控件UITableView的子控件实质都在contentView
6. UITableViewCell的常见属性
设置cell右边的指示控件:
属性:
@property (nonatomic, strong) UIView *accessoryView;

使用格式:
cell.accessoryView = [[UISwitch alloc] init];
设置cell右边的指示样式:
属性:
@property (nonatomic) UITableViewCellAccessoryType accessoryType;

使用格式:
cell.accessoryType = UITableViewCellAccessoryDisclosureIndicator;

枚举UITableViewCellSeparatorStyle常用的枚举元素:
UITableViewCellSeparatorStyleNone // 隐藏分割线
UITableViewCellSeparatorStyleSingleLine // 默认样式
UITableViewCellSeparatorStyleSingleLineEtched //
设置cell的选中样式:
属性:
@property (nonatomic) UITableViewCellSelectionStyle selectionStyle;

使用格式:
cell.selectionStyle = UITableViewCellSelectionStyleNone;

枚举UITableViewCellSelectionStyle常用的枚举元素:
UITableViewCellSelectionStyleNone // 不能选中
UITableViewCellSelectionStyleBlue
UITableViewCellSelectionStyleGray
UITableViewCellSelectionStyleDefault
设置cell的背景控件:
属性:
@property (nonatomic, strong) UIView *backgroundView;

使用格式:
UIView *bg = [[UIView alloc] init];
bg.backgroundColor = [UIColor redColor];
cell.backgroundView = bg;
设置cell的背景颜色:
属性:
@property(nullable, nonatomic,copy) UIColor *backgroundColor

使用格式:
cell.backgroundColor = [UIColor blueColor];

说明:
还可以设置cell的子控件背景图片
cell.textLabel.backgroundColor = [UIColor greenColor];
设置cell选中的背景view:
属性:
@property (nonatomic, strong) UIView *selectedBackgroundView;

使用格式:
UIView *seletedBg = [[UIView alloc] init];
seletedBg.backgroundColor = [UIColor purpleColor];
cell.selectedBackgroundView = seletedBg;
7. UITableView的代理方法
当选中某一行cell的时候就会调用这个方法:
方法声明:
- (void)tableView:(UITableView *)tableView didSelectRowAtIndexPath:(NSIndexPath *)indexPath;

使用格式:
- (void)tableView:(UITableView *)tableView didSelectRowAtIndexPath:(NSIndexPath *)indexPath
{
  NSLog(@"选中第%zd行", indexPath.row);
}
当取消选中某一行cell的时候就会调用这个方法:
方法声明:
- (void)tableView:(UITableView *)tableView didDeselectRowAtIndexPath:(NSIndexPath *)indexPath;

使用格式:
- (void)tableView:(UITableView *)tableView didDeselectRowAtIndexPath:(NSIndexPath *)indexPath
{
  NSLog(@"取消选中第%zd行", indexPath.row);
}
返回每一组的头部控件:
方法声明:
- (UIView *)tableView:(UITableView *)tableView viewForHeaderInSection:(NSInteger)section;

使用格式:
- (UIView *)tableView:(UITableView *)tableView viewForHeaderInSection:(NSInteger)section
{
  return [UIButton buttonWithType:UIButtonTypeContactAdd];
}
返回每一组的尾部控件:
方法声明:
- (UIView *)tableView:(UITableView *)tableView viewForFooterInSection:(NSInteger)section;

使用格式:
- (UIView *)tableView:(UITableView *)tableView viewForFooterInSection:(NSInteger)section
{
  return [[UISwitch alloc] init];
}
返回每一组的头部高度:
方法声明:
- (CGFloat)tableView:(UITableView *)tableView heightForHeaderInSection:(NSInteger)section;

使用格式:
- (CGFloat)tableView:(UITableView *)tableView heightForHeaderInSection:(NSInteger)section
{
  return 100;
}
返回每一组的尾部高度:
方法声明:
- (CGFloat)tableView:(UITableView *)tableView heightForFooterInSection:(NSInteger)section;

使用格式:
- (CGFloat)tableView:(UITableView *)tableView heightForFooterInSection:(NSInteger)section
{
return 100;
}
返回每一行cell的高度:
方法声明:
- (CGFloat)tableView:(UITableView *)tableView heightForRowAtIndexPath:(NSIndexPath *)indexPath;

使用格式:
- (CGFloat)tableView:(UITableView *)tableView heightForRowAtIndexPath:(NSIndexPath *)indexPath
{
  if (indexPath.row == 0) {
      return 100;
  } else {
      return 50;
  }
}
8. UITableViewController的讲解
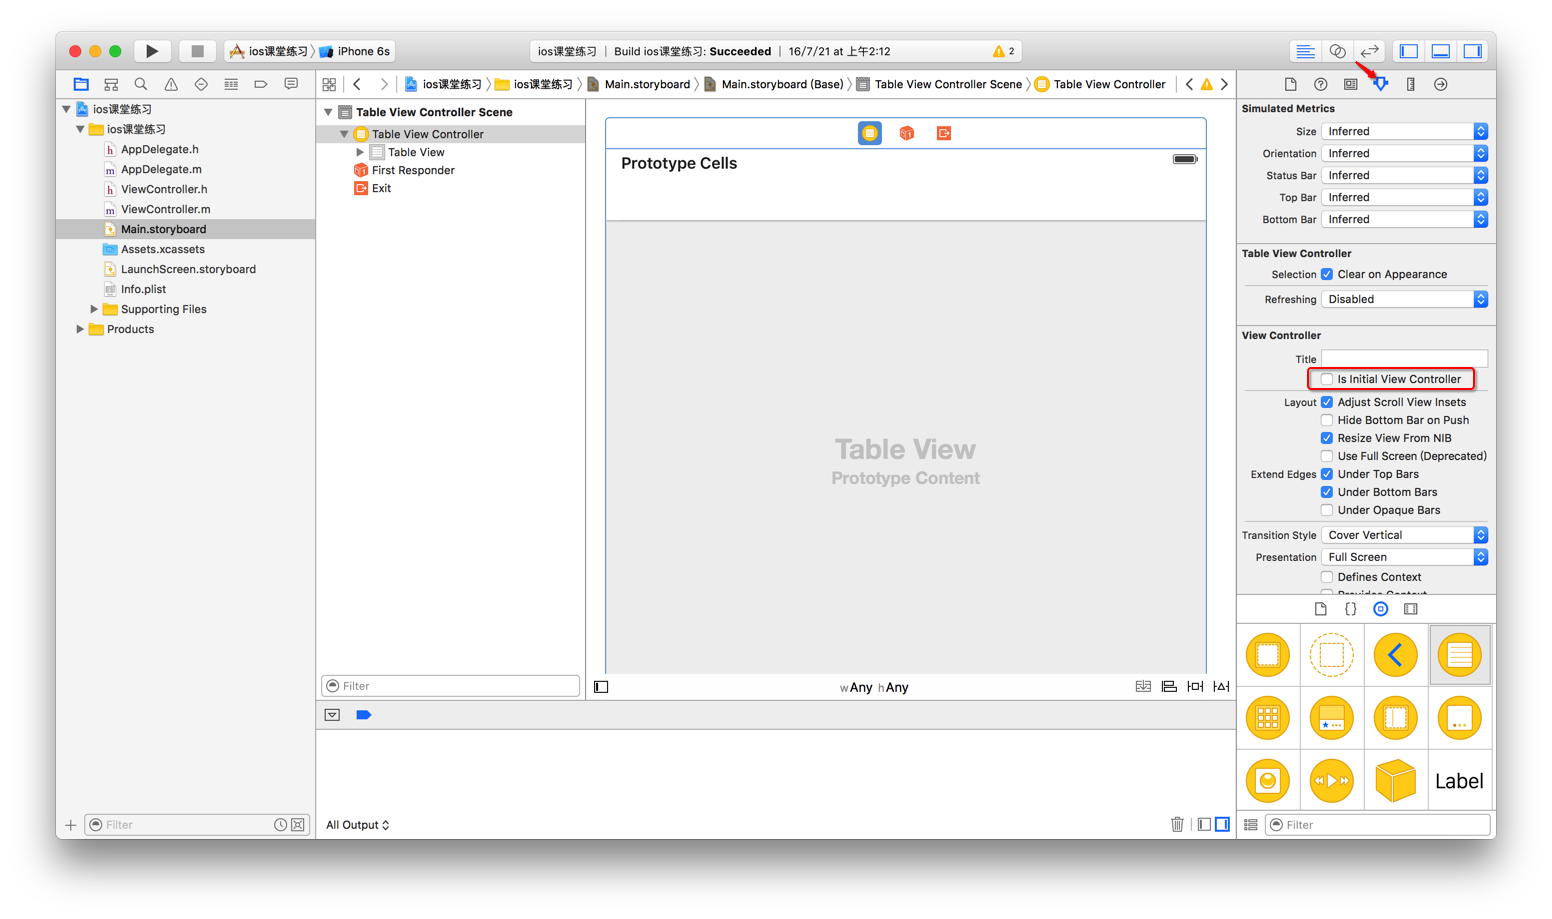
将控制器设置为UITableView的方法和步骤
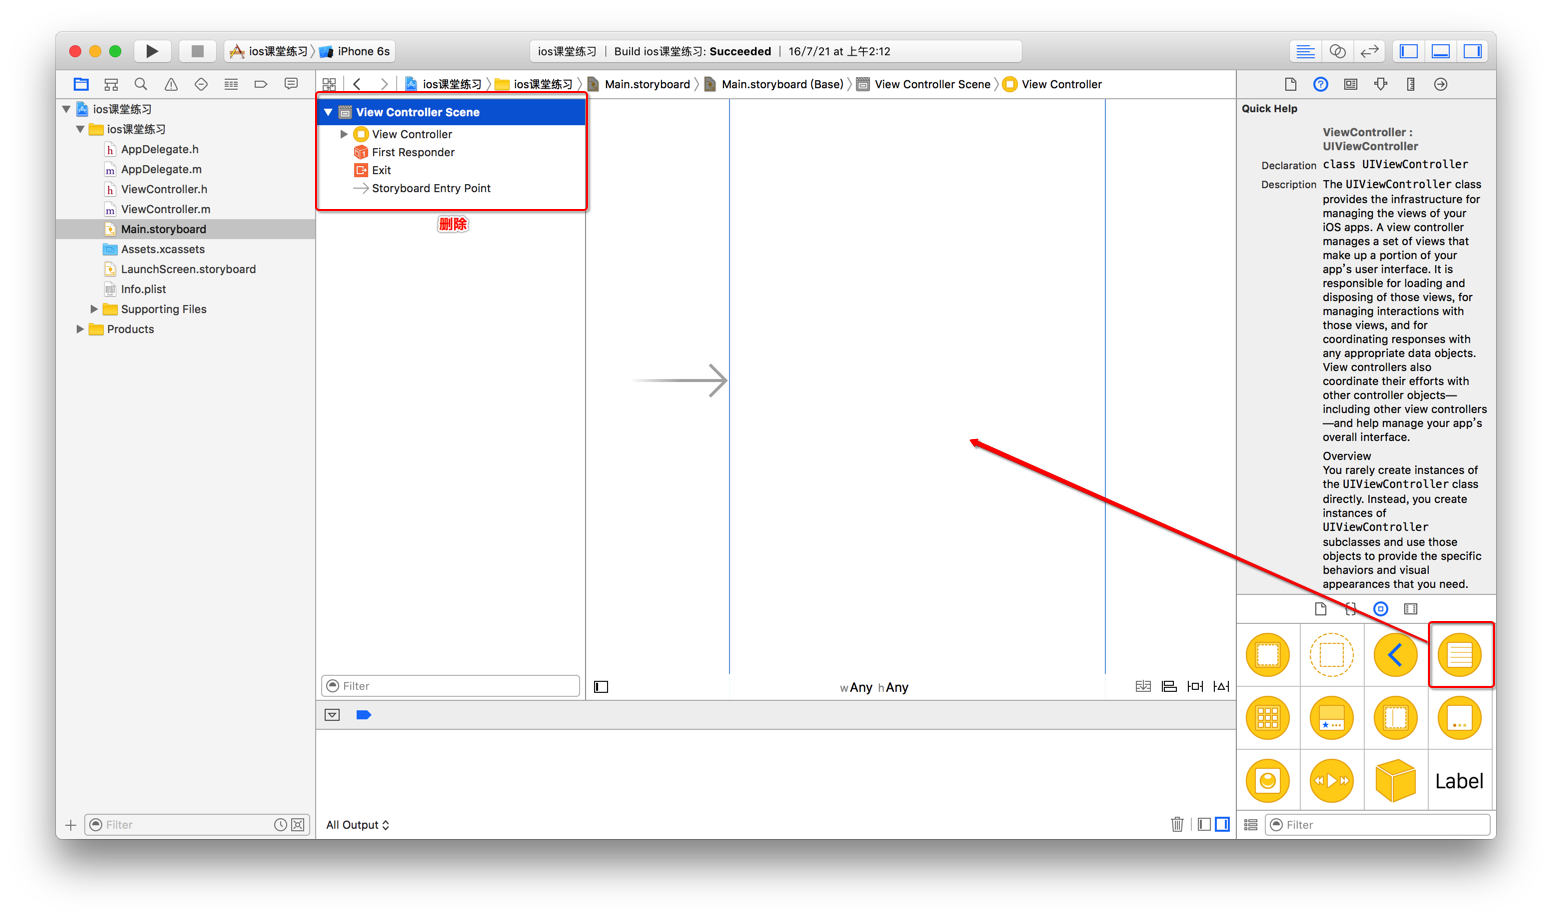
- 第一步:创建新的类或修改原有的ViewController类,继承自UITableViewController
- 第二步:在Main.storyboard中删除自带的
UIViewController控制器,然后往里面拖一个UITableViewController控制器
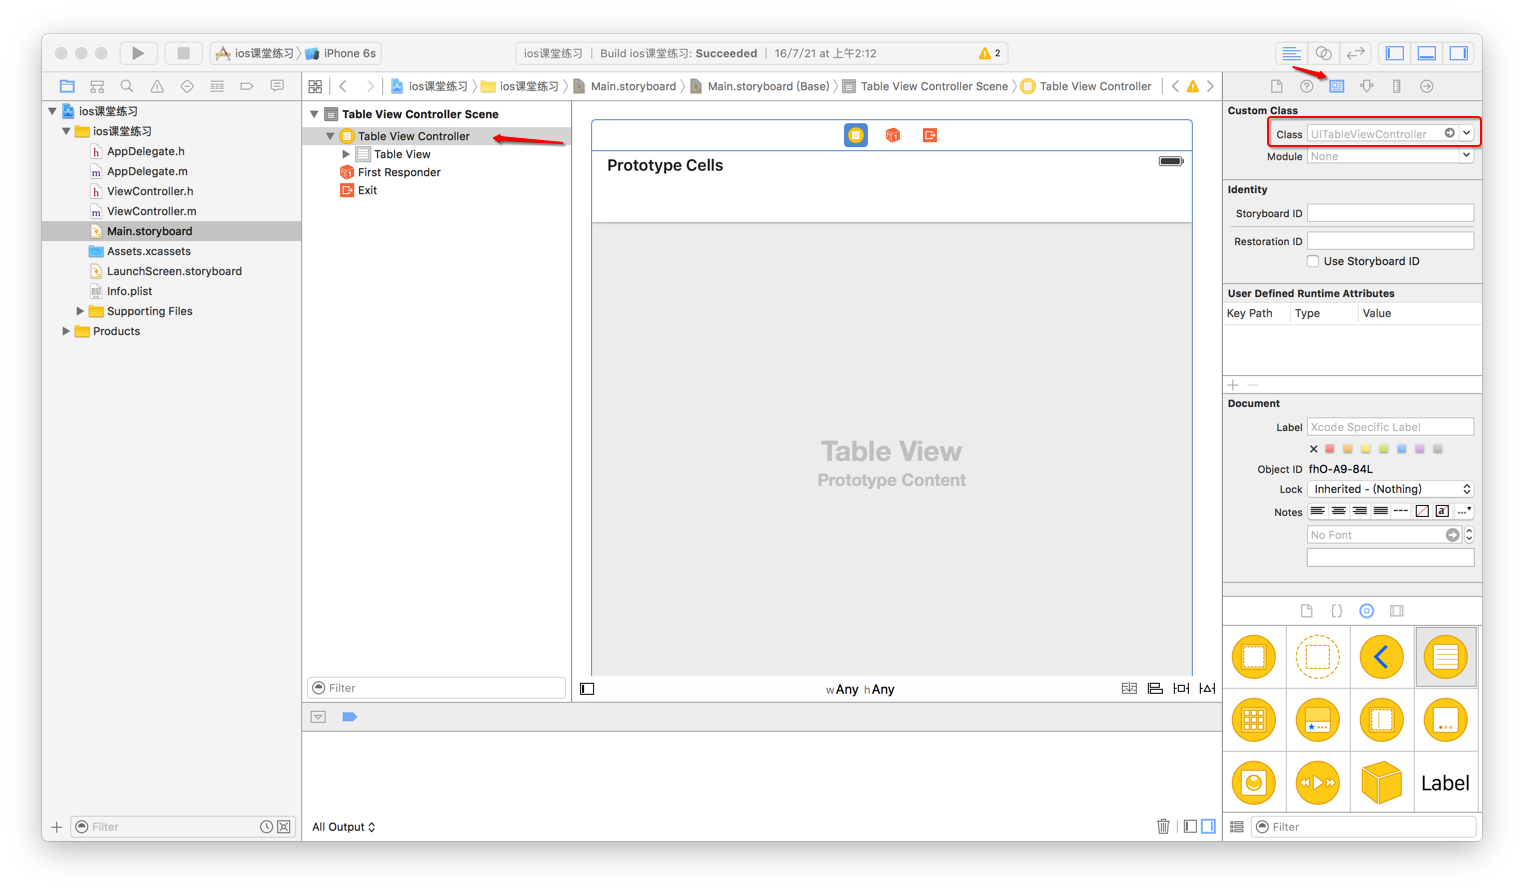
- 第三步:修改新拖进来的
TableViewController控制器的自定义类名为第一步中继承自UITableViewController类的类名
- 第四步:勾选
TableViewController控制器为程序启动第一个加载的控制器
注意点:
tableVieController有个tableView属性,指向一个tableViewtableView的dataSource和delegate属性指向的就是这个控制器,并且这个控制器已经遵守了UITableViewDataSource和UITableViewDelegate- 每个控制器的内部都有一个
view属性,在tableVieController中,view和tableView属性指向的是同一个对象(控制器的view就是tableView)
9. UITableViewCell的重用
- 原因
- iOS设备的内存有限,如果用UITableView显示成千上万条数据,就需要成千上万个
UITableViewCell对象的话,那将会耗尽iOS设备的内存 - 要解决该问题,需要重用
UITableViewCell对象
- iOS设备的内存有限,如果用UITableView显示成千上万条数据,就需要成千上万个
- 原理:
- 当滚动列表时,部分
UITableViewCell会移出窗口,UITableView会将窗口外的UITableViewCell放入一个缓存池中,等待重用 - 当
UITableView要求dataSource返回UITableViewCell时,dataSource会先查看这个对象池,如果池中有未使用的UITableViewCell,dataSource会用新的数据配置这个UITableViewCell,然后返回给UITableView,重新显示到窗口中,从而避免创建新的UITableViewCell对象
- 当滚动列表时,部分
Cell重用的实现代码
方法一:
- 定义一个cell的重用标识
- 根据这个ID去缓存池中看有没有可循环利用的cell
- 如果缓存池中没有可循环利用的cell,自己创建
- (UITableViewCell *)tableView:(UITableView *)tableView cellForRowAtIndexPath:(NSIndexPath *)indexPath
{
      // 1. 定义一个重用标识
      static NSString *ID = @"A";

      // 2. 根据这个ID去缓存池中看有没有可循环利用的cell
      UITableViewCell *cell = [tableView dequeueReusableCellWithIdentifier:@"A"];

      // 3. 如果缓存池中没有可循环利用的cell, 自己创建
      if (cell == nil) {
          cell = [[UITableViewCell alloc] initWithStyle:UITableViewCellStyleDefault reuseIdentifier:@"A"];
      }
      return cell;
}
方法二:
- 定义一个cell的重用标识
- 根据这个ID去缓存池中看有没有可循环利用的cell
- 如果缓存池中没有会看有没有根据ID这个标识注册对应的cell类型
- 如果有注册,会根据这个ID创建对应的类型的cell,并且会绑定这个ID标识,返回这个cell
// 1. 定义一个重用标识
static NSString *ID = @"A";

- (void)viewDidLoad
{
      [super viewDidLoad];

      // 3. 根据ID 这个标识 注册 对应的cell类型是UITableViewCell
      [self.tableView registerClass:[YTTableViewCell class] forCellReuseIdentifier:ID];
}

- (UITableViewCell *)tableView:(UITableView *)tableView cellForRowAtIndexPath:(NSIndexPath *)indexPath
{
        // 2. 根据这个ID去缓存池中看有没有可循环利用的cell
        YTTableViewCell *cell = [tableView dequeueReusableCellWithIdentifier:ID];

        return cell;
}




 1218
1218


 被折叠的 条评论
为什么被折叠?


