


将自定义字体添加到您的项目
相比之前的版本,使用Android中的自定义字体将会变得更加容易,因为自定义字体设置为在Android O中成为完全支持的资源类型。这意味着向应用程序添加自定义字体将与添加任何其他资源一样简单,如图像和文字。
Android O支持.otf(OpenType)和.ttf(TrueType)格式。有很多网站免费提供这些字体,所以花几分钟时间搜索Google,就可以找到喜欢的字体。
除此之外你还应该考虑您的应用程序的目的,内容和目标受众,因为不同的字体传达不同的消息。如果你正在设计一个应用程序来帮助人们完成纳税申报,那么如果你的受众可能会以奇怪而古怪的字体传送,你的受众可能很难认真对待你的应用程序的财务和法律建议!
找到要使用的字体后,请下载并解压缩。此时,应该检查字体的无效字符的文件名,基本上不是小写字母a-z,0-9或下划线。尝试添加任何其他字符,Android Studio会尽快引用该错误。
一旦你有你的字体文件,你需要在某个地方存储它们:
- 右键单击项目的app / res文件夹,然后选择New > Android resource directory
- 打开下拉菜单并选择font
- 输入font作为File name
- 点击ok
将您的字体文件拖放到新的res / font文件夹中。
使用您的自定义字体
你可以使用新的android:fontFamily XML属性将自定义字体应用于你的文本:
<TextView
  android:text="This is some text"
  android:layout_width="wrap_content"
  android:layout_height="wrap_content"
  android:fontFamily="@font/doublefeature"/>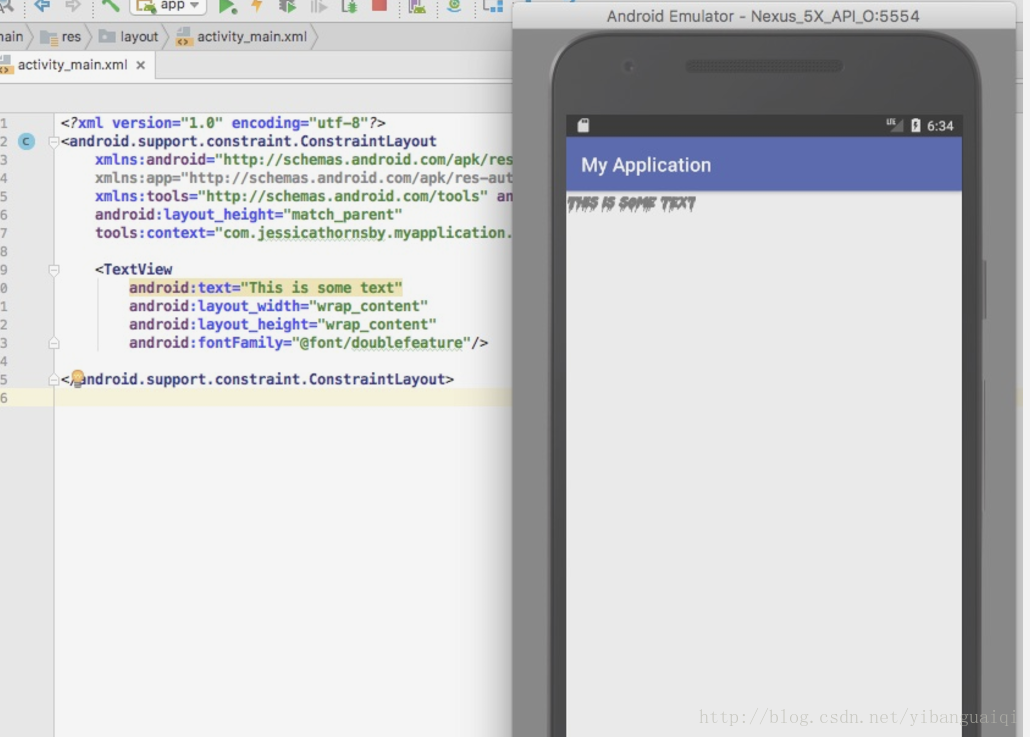
你还可以将自定义字体添加到你在应用程序中创建的任何样式:
<style name=“headlineFont" parent="@android:style/TextAppearance.Small">
   <item name="android:fontFamily">@font/doublefeature</item>
</style>
如果要以编程方式使用自定义字体,则可以使用getFont(int)方法检索自定义字体,例如:
import android.support.v7.app.AppCompatActivity;
import android.os.Bundle;
import android.widget.LinearLayout;
import android.widget.TextView;
import android.widget.LinearLayout.LayoutParams;
import android.graphics.Typeface;

public class MainActivity extends AppCompatActivity {

  @Override
  protected void onCreate(Bundle savedInstanceState) {
      super.onCreate(savedInstanceState);
      LinearLayout linearLayout = new LinearLayout(this);
      TextView ProgrammaticallyTextView = new TextView(this);
      ProgrammaticallyTextView.setText("This is some text");

//Reference your custom font//

      Typeface typeface = getResources().getFont(R.font.doublefeature);
      ProgrammaticallyTextView.setTypeface(typeface);
      linearLayout.addView(ProgrammaticallyTextView);

      this.setContentView(linearLayout, new LinearLayout.LayoutParams(
              LayoutParams.MATCH_PARENT, LayoutParams.MATCH_PARENT));
  }

}
创建一个字体系列
有时,您可以解压缩字体文件夹,并发现多个版本的字体相同,如斜体版本,或重量和厚度不同的字体。如果您使用相同字体的多个版本,那么您可能希望将它们分组到一个字体系列中。字体系本质上是一个专用的XML文件,您可以在其中定义字体的每个版本,以及相关联的样式和权重属性。
要创建一个字体系列:
- 确保您已将所有字体文件添加到项目的res / font文件夹中。
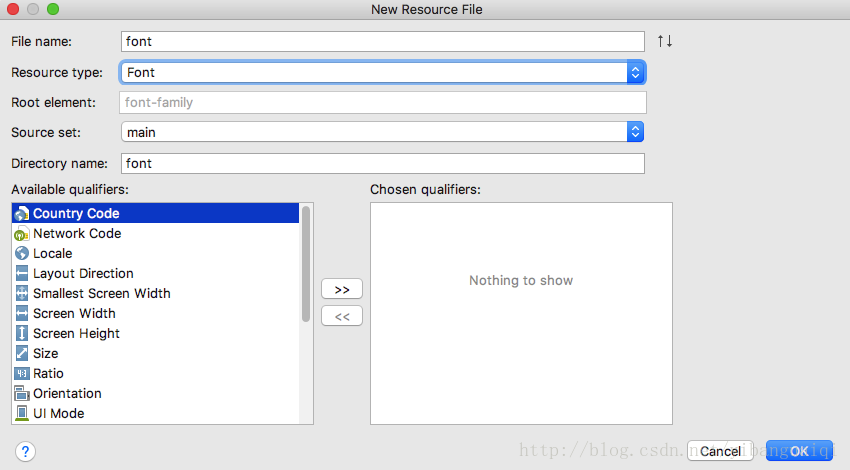
- 右键单击项目的res / font文件夹,然后选择新建>字体资源文件。
- 给这个文件一个名称,然后单击确定。
- 打开此XML文件并定义该字体的所有不同版本,以及其样式和权重属性,例如:
<?xml version="1.0" encoding="utf-8"?>
http://schemas.android.com/apk/res/android">
  <font
       android:fontStyle="normal"
       android:fontWeight="400"
       android:font="@font/doublefeature_regular" />

   <font
       android:fontStyle="italic"
       android:fontWeight="400"
       android:font="@font/doublefeature_italic" />

 <font
       android:fontStyle="bold"
       android:fontWeight="400"
       android:font="@font/doublefeature_bold" />

</font-family>
然后,您可以使用android:fontFamily属性引用此系列中的任何字体。例如:
android:fontFamily="@font/doublefeature_bold"


 233
233


 被折叠的 条评论
为什么被折叠?
被折叠的 条评论
为什么被折叠?
 到【灌水乐园】发言


