


上一篇关于hibernate学习笔记一,主要是作为hibernate的入门知识。没有和spring发生任何关系,这一篇我将把spring集成进去,看spring如何管理hibernate,还有和未使用spring之前有什么区别?将在文章后面附上使用spring集成和不使用spring集成,不同的地方。好,开始spring集成hibernate的学习之旅。
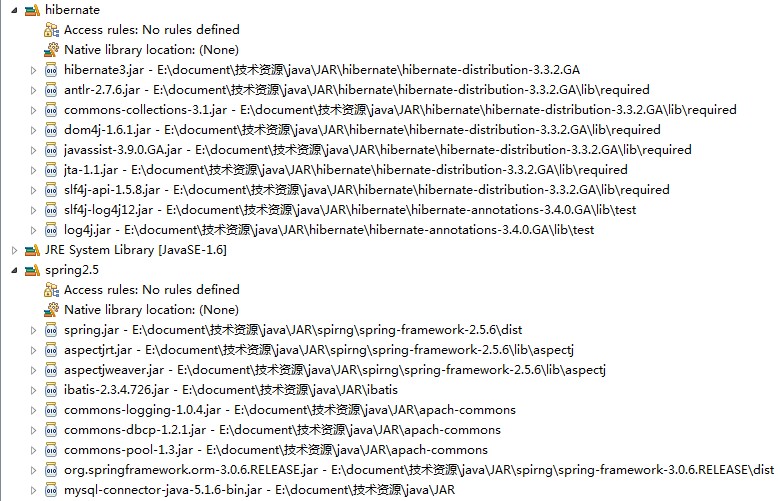
还是准备必要的jar包,如图:
下面,开始新建项目工程,新建普通的java project,如图:
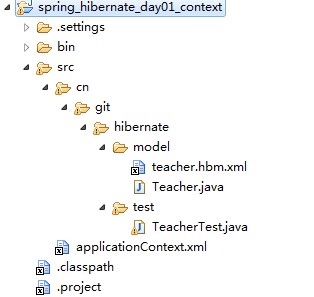
其实,跟上一篇博客中的工程文件没多大区别,主要的区别是去掉了hibernate.cfg.xml,增加了applicationContext.xml配置文件,主要原因是把hibernate交给spring来管理,所以hibernate.cfg.xml文件就不需要了
其中,model类中的实体类没多大区别,主要看一下spring配置文件applicationContext.xml中的具体配置内容。代码如下:
<?xml version="1.0" encoding="UTF-8"?>
<beans xmlns="http://www.springframework.org/schema/beans"
       xmlns:xsi="http://www.w3.org/2001/XMLSchema-instance"
       xsi:schemaLocation="http://www.springframework.org/schema/beans
           http://www.springframework.org/schema/beans/spring-beans-2.5.xsd">

  <bean id="dataSource" class="org.apache.commons.dbcp.BasicDataSource" destroy-method="close">
  	<property name="driverClassName" value="com.mysql.jdbc.Driver"></property>
  	<property name="url" value="jdbc:mysql://localhost/test"></property>
  	<property name="username" value="root"></property>
  	<property name="password" value="123456"></property>
  </bean>

	<bean id="hibernateSessionFactory" class="org.springframework.orm.hibernate3.LocalSessionFactoryBean">
		<property name="dataSource" ref="dataSource"></property>
		<property name="mappingLocations">
			<list>
				<value>classpath*:/cn/***/hibernate/model/*.hbm.xml</value>
			</list>
		</property>
		<property name="hibernateProperties">
			<props>
				<prop key="hibernate.dialect">
					org.hibernate.dialect.MySQLDialect
				</prop>
			</props>
		</property>
	</bean>

	<bean id="hibernateTemplate" class="org.springframework.orm.hibernate3.HibernateTemplate">
		<property name="sessionFactory" ref="hibernateSessionFactory"></property>
	</bean>

	<bean id="teacher" class="cn.***.hibernate.model.Teacher"></bean>
</beans>
其中,数据源配置,我们采用了dbcp,代码如下:
<bean id="dataSource" class="org.apache.commons.dbcp.BasicDataSource" destroy-method="close">
  	<property name="driverClassName" value="com.mysql.jdbc.Driver"></property>
  	<property name="url" value="jdbc:mysql://localhost/test"></property>
  	<property name="username" value="root"></property>
  	<property name="password" value="123456"></property>
  </bean>
这一部分和未使用spring集成之前的区别是,我们把数据源datasource配置在了hibernate.cfg.xml中
还有,使用了spring之后我们采用如下的配置方式,加载*.hbm.xml文件(其实加载该配置文件的方式有很多中,具体参照spring的文档),代码如下:
<bean id="hibernateSessionFactory" class="org.springframework.orm.hibernate3.LocalSessionFactoryBean">
		<property name="dataSource" ref="dataSource"></property>
		<property name="mappingLocations">
			<list>
				<value>classpath*:/cn/***/hibernate/model/*.hbm.xml</value>
			</list>
		</property>
		<property name="hibernateProperties">
			<props>
				<prop key="hibernate.dialect">
					org.hibernate.dialect.MySQLDialect
				</prop>
			</props>
		</property>
	</bean>
比较关键的配置,就是下面的配置方法(spring采用这种配置去加载多个*.hbm.xml文件):
<property name="mappingLocations">
			<list>
				<value>classpath*:/cn/***/hibernate/model/*.hbm.xml</value>
			</list>
		</property>
下面,就是我们真正看到spring和hibernate集成的主要地方,也是我们要使用hibernate的核心:
<bean id="hibernateTemplate" class="org.springframework.orm.hibernate3.HibernateTemplate">
		<property name="sessionFactory" ref="hibernateSessionFactory"></property>
	</bean>
我们使用hibernateTemplate来保存实体到数据库。
好到此为止,我们使用spring来管理hibernate的学习已经完成,下面使用代码来进行测试
import java.util.Date;

import org.hibernate.Session;
import org.hibernate.SessionFactory;
import org.hibernate.cfg.Configuration;
import org.springframework.context.ApplicationContext;
import org.springframework.context.support.ClassPathXmlApplicationContext;
import org.springframework.orm.hibernate3.HibernateTemplate;

import cn.git.hibernate.model.Teacher;

public class TeacherTest {

	/**
	 * @param args
	 */
	public static void main(String[] args) {
		ApplicationContext context = new ClassPathXmlApplicationContext("applicationContext.xml");
		HibernateTemplate template = (HibernateTemplate) context.getBean("hibernateTemplate");
		Teacher teacher = (Teacher) context.getBean("teacher");
		teacher.setName("spring_hibernate");
		teacher.setAddress("spring");
		teacher.setYear(new Date());
		template.save(teacher);
	}

}
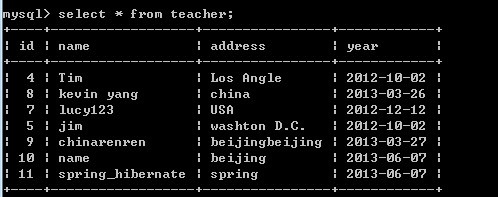
查看一下数据库,看采用该方式是否能成功保存数据到数据库
数据成功保存到数据库,该篇学习笔记大功告成,结束。。。


 374
374


 被折叠的 条评论
为什么被折叠?
被折叠的 条评论
为什么被折叠?
 到【灌水乐园】发言


