


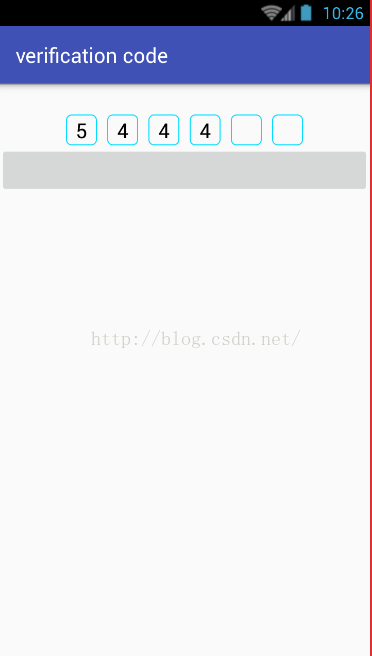
由于看到滴滴打车的输入验证码的效果挺好的,就想着自己实现一个,先上一个效果图,
实现了基本的功能,下面的是主要类
package com.example.mengsong.verificationcode;

import android.content.Context;
import android.content.res.TypedArray;
import android.graphics.Color;
import android.text.Editable;
import android.text.InputFilter;
import android.text.InputType;
import android.text.TextWatcher;
import android.util.AttributeSet;
import android.view.Gravity;
import android.view.KeyEvent;
import android.view.MotionEvent;
import android.view.View;
import android.widget.EditText;
import android.widget.LinearLayout;
import android.widget.TextView;

import java.util.ArrayList;
import java.util.List;

/**
 * Created by MengSong on 2016/11/27.
 */
public class Code extends LinearLayout implements TextWatcher, View.OnKeyListener {
    //验证码的位数
    private int codeNumber;
    //两个验证码之间的距离
    private int codeSpace;
    //验证码边框的边长
    private int lengthSide;
    //验证码的大小
    private float textSize;
    //字体颜色
    private int textColor = Color.BLACK;

    private int inputType = 2;

    private LinearLayout.LayoutParams mEditparams;

    private LinearLayout.LayoutParams mViewparams;

    private Context mContext;

    private List<EditText> mEditTextList = new ArrayList<>();

    private int currentPosition = 0;

    public Code(Context context) {
        super(context);
    }

    public Code(Context context, AttributeSet attrs) {
        super(context, attrs);
        mContext = context;
        TypedArray typedArray = context.obtainStyledAttributes(attrs, R.styleable.code);
        codeNumber = typedArray.getInteger(R.styleable.code_codeNumber, 6);
        codeSpace = typedArray.getInteger(R.styleable.code_codeSpace, 20);
        lengthSide = typedArray.getInteger(R.styleable.code_lengthSide, 50);
        textSize = typedArray.getFloat(R.styleable.code_textSize, 20);
        inputType = typedArray.getInteger(R.styleable.code_inputType, 2);
        mEditparams = new LinearLayout.LayoutParams(lengthSide, lengthSide);
        mViewparams = new LinearLayout.LayoutParams(codeSpace, lengthSide);
        initView();
    }

    /**
     * 初始化输入框
      */
    private void initView() {
        for (int i = 0; i < codeNumber; i++) {
            EditText editText = new EditText(mContext);
            editText.setCursorVisible(false);
            editText.setOnKeyListener(this);
            editText.setTextSize(textSize);
            editText.setInputType(inputType);
            editText.setTextColor(textColor);
            editText.setPadding(0, 0, 0, 0);
            editText.setFilters(new InputFilter[]{new InputFilter.LengthFilter(1)});
            editText.addTextChangedListener(this);
            editText.setLayoutParams(mEditparams);
            editText.setGravity(Gravity.CENTER);
            editText.setBackgroundResource(R.drawable.shape_edit);
            addView(editText);
            mEditTextList.add(editText);
            if (i != codeNumber - 1) {
                View view = new View(mContext);
                view.setLayoutParams(mViewparams);
                addView(view);
            }
        }
    }

    @Override
    public void beforeTextChanged(CharSequence charSequence, int i, int i1, int i2) {
    }

    @Override
    public void onTextChanged(CharSequence charSequence, int i, int i1, int i2) {

        if (i == 0 && i2 >= 1 && currentPosition != mEditTextList.size() - 1) {
            currentPosition++;
            mEditTextList.get(currentPosition).requestFocus();
        }
    }

    @Override
    public void afterTextChanged(Editable editable) {
    }

    @Override
    public boolean onInterceptTouchEvent(MotionEvent ev) {
        return true;
    }

    /**
     * 监听删除键
     * @param view
     * @param i
     * @param keyEvent
     * @return
     */
    @Override
    public boolean onKey(View view, int i, KeyEvent keyEvent) {
        EditText editText = (EditText) view;
        if (i == KeyEvent.KEYCODE_DEL && editText.getText().length() == 0) {
            int action = keyEvent.getAction();
            if (currentPosition != 0 && action == KeyEvent.ACTION_DOWN) {
                currentPosition--;
                mEditTextList.get(currentPosition).requestFocus();
                mEditTextList.get(currentPosition).setText("");
            }
        }
        return false;
    }

    /**
     * 获取验证码
     * @return
     */
    public String getVerificationCode() {
        StringBuffer stringBuffer = new StringBuffer();
        for (EditText string : mEditTextList) {
            stringBuffer.append(string.getText().toString());
        }
        return stringBuffer.toString();
    }
}
使用方法,直接在布局中使用我的布局是
<?xml version="1.0" encoding="utf-8"?> <LinearLayout xmlns:android="http://schemas.android.com/apk/res/android" xmlns:app="http://schemas.android.com/apk/res-auto" xmlns:tools="http://schemas.android.com/tools" android:layout_width="match_parent" android:layout_height="match_parent" android:orientation="vertical" tools:context="com.example.mengsong.verificationcode.MainActivity"> <com.example.mengsong.verificationcode.Code android:layout_marginTop="30dp" android:id="@+id/code" android:gravity="center" android:orientation="horizontal" android:layout_width="match_parent" android:layout_height="wrap_content" android:layout_centerInParent="true" 验证码位数 app:codeNumber="6" 验证码之间的距离 app:codeSpace="20" 输入类型,可以到InputType中查找对应的数字 app:inputType="2" 验证码框边长 app:lengthSide="60" 验证码字体大小 app:textSize="20" /> <Button android:layout_width="match_parent" android:layout_height="wrap_content" android:onClick="show" /> </LinearLayout> attr文件的代码如下:<?xml version="1.0" encoding="utf-8"?> <resources> <declare-styleable name="code"> <attr name="codeNumber" format="integer"/> <attr name="codeSpace" format="integer"/> <attr name="lengthSide" format="integer"/> <attr name="textSize" format="float"/> <attr name="inputType" format="integer"/> </declare-styleable> </resources>源代码我已经分享到百度网盘下载地址:http://pan.baidu.com/s/1nuQonhv
分享是最好的学习


 2756
2756


 被折叠的 条评论
为什么被折叠?
被折叠的 条评论
为什么被折叠?
 到【灌水乐园】发言


