


本文介绍下传统的tomcat负载均衡和session复制. session复制是基于JVM内存的,当然在当今的互联网大数据时代,有更好的替代方案,如将session数据保存在Redis中.
1、安装nginx
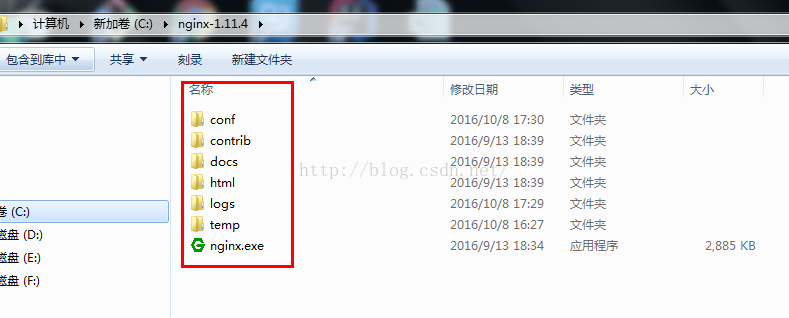
首先下载nginx,我下载的版本是1.11.4版本 .http://nginx.org/download/nginx-1.11.4.zip .
下载后,解压.
安装完成之后,配置下conf目录下的nginx.conf文件.
主要添加了如下内容:
     #tomcat的三个服务
      upstream mysite {
      server localhost:18080 weight=5;
      server localhost:28080 weight=5;
      server localhost:38080 weight=5;
        }
proxy_pass http://mysite;
#添加如下3个配置后,当一台server宕机,切换速度会很快,此时配置是1秒
proxy_connect_timeout 1;
proxy_send_timeout 1;
proxy_read_timeout 1; 完整的文件如下:
#user nobody;
worker_processes 1;
#error_log logs/error.log;
#error_log logs/error.log notice;
#error_log logs/error.log info;
#pid logs/nginx.pid;
events {
worker_connections 1024;
}
http {
include mime.types;
default_type application/octet-stream;
#log_format main '$remote_addr - $remote_user [$time_local] "$request" '
# '$status $body_bytes_sent "$http_referer" '
# '"$http_user_agent" "$http_x_forwarded_for"';
#access_log logs/access.log main;
sendfile on;
#tcp_nopush on;
#keepalive_timeout 0;
keepalive_timeout 10;
#gzip on;
#tomcat的三个服务
upstream mysite {
server localhost:18080 weight=5;
server localhost:28080 weight=5;
server localhost:38080 weight=5;
}
server {
listen 80;
server_name localhost;
#charset koi8-r;
#access_log logs/host.access.log main;
location / {
root html;
index index.html index.htm;
proxy_pass http://mysite;
            #添加如下3个配置后,当一台server宕机,切换速度会很快,此时配置是1秒
            proxy_connect_timeout   1;
            proxy_send_timeout      1;
            proxy_read_timeout      1;
}
#error_page 404 /404.html;
# redirect server error pages to the static page /50x.html
#
error_page 500 502 503 504 /50x.html;
location = /50x.html {
root html;
}
# proxy the PHP scripts to Apache listening on 127.0.0.1:80
#
#location ~ \.php$ {
# proxy_pass http://127.0.0.1;
#}
# pass the PHP scripts to FastCGI server listening on 127.0.0.1:9000
#
#location ~ \.php$ {
# root html;
# fastcgi_pass 127.0.0.1:9000;
# fastcgi_index index.php;
# fastcgi_param SCRIPT_FILENAME /scripts$fastcgi_script_name;
# include fastcgi_params;
#}
# deny access to .htaccess files, if Apache's document root
# concurs with nginx's one
#
#location ~ /\.ht {
# deny all;
#}
}
# another virtual host using mix of IP-, name-, and port-based configuration
#
#server {
# listen 8000;
# listen somename:8080;
# server_name somename alias another.alias;
# location / {
# root html;
# index index.html index.htm;
# }
#}
# HTTPS server
#
#server {
# listen 443 ssl;
# server_name localhost;
# ssl_certificate cert.pem;
# ssl_certificate_key cert.key;
# ssl_session_cache shared:SSL:1m;
# ssl_session_timeout 5m;
# ssl_ciphers HIGH:!aNULL:!MD5;
# ssl_prefer_server_ciphers on;
# location / {
# root html;
# index index.html index.htm;
# }
#}
}
2、Tomcat配置
下载tomcat之后, 新建三个文件夹tomcat1、tomcat2、tomcat3,把解压后的文件分别复制进这三个文件夹中,更改每个tomcat目录下的server.xml文件.
更改server和Connector端口. tomcat1 中server的端口为18005,Connector端口为18080,;tomcat2的分别是28005,28080;tomcat3分别是38085 ,38080。
为了session复制,还需要对server.xml做如下配置:
(1)取消Cluster节点的注释. (2)保持每个Engine 节点jvmRoute的值是相同的.
如下是tomcat1中的server.xml配置文件:
<?xml version="1.0" encoding="UTF-8"?>
<!--
  Licensed to the Apache Software Foundation (ASF) under one or more
  contributor license agreements.  See the NOTICE file distributed with
  this work for additional information regarding copyright ownership.
  The ASF licenses this file to You under the Apache License, Version 2.0
  (the "License"); you may not use this file except in compliance with
  the License.  You may obtain a copy of the License at

      http://www.apache.org/licenses/LICENSE-2.0

  Unless required by applicable law or agreed to in writing, software
  distributed under the License is distributed on an "AS IS" BASIS,
  WITHOUT WARRANTIES OR CONDITIONS OF ANY KIND, either express or implied.
  See the License for the specific language governing permissions and
  limitations under the License.
-->
<!-- Note:  A "Server" is not itself a "Container", so you may not
     define subcomponents such as "Valves" at this level.
     Documentation at /docs/config/server.html
 -->
<Server port="18005" shutdown="SHUTDOWN">
  <Listener className="org.apache.catalina.startup.VersionLoggerListener" />
  <!-- Security listener. Documentation at /docs/config/listeners.html
  <Listener className="org.apache.catalina.security.SecurityListener" />
  -->
  <!--APR library loader. Documentation at /docs/apr.html -->
  <Listener className="org.apache.catalina.core.AprLifecycleListener" SSLEngine="on" />
  <!-- Prevent memory leaks due to use of particular java/javax APIs-->
  <Listener className="org.apache.catalina.core.JreMemoryLeakPreventionListener" />
  <Listener className="org.apache.catalina.mbeans.GlobalResourcesLifecycleListener" />
  <Listener className="org.apache.catalina.core.ThreadLocalLeakPreventionListener" />

  <!-- Global JNDI resources
       Documentation at /docs/jndi-resources-howto.html
  -->
  <GlobalNamingResources>
    <!-- Editable user database that can also be used by
         UserDatabaseRealm to authenticate users
    -->
    <Resource name="UserDatabase" auth="Container"
              type="org.apache.catalina.UserDatabase"
              description="User database that can be updated and saved"
              factory="org.apache.catalina.users.MemoryUserDatabaseFactory"
              pathname="conf/tomcat-users.xml" />
  </GlobalNamingResources>

  <!-- A "Service" is a collection of one or more "Connectors" that share
       a single "Container" Note:  A "Service" is not itself a "Container",
       so you may not define subcomponents such as "Valves" at this level.
       Documentation at /docs/config/service.html
   -->
  <Service name="Catalina">

    <!--The connectors can use a shared executor, you can define one or more named thread pools-->
    <!--
    <Executor name="tomcatThreadPool" namePrefix="catalina-exec-"
        maxThreads="150" minSpareThreads="4"/>
    -->


    <!-- A "Connector" represents an endpoint by which requests are received
         and responses are returned. Documentation at :
         Java HTTP Connector: /docs/config/http.html
         Java AJP  Connector: /docs/config/ajp.html
         APR (HTTP/AJP) Connector: /docs/apr.html
         Define a non-SSL/TLS HTTP/1.1 Connector on port 8080
    -->
    <Connector port="18080" protocol="HTTP/1.1"
               connectionTimeout="20000"
               redirectPort="8443" />
    <!-- A "Connector" using the shared thread pool-->
    <!--
    <Connector executor="tomcatThreadPool"
               port="8080" protocol="HTTP/1.1"
               connectionTimeout="20000"
               redirectPort="8443" />
    -->
    <!-- Define a SSL/TLS HTTP/1.1 Connector on port 8443
         This connector uses the NIO implementation with the JSSE engine. When
         using the JSSE engine, the JSSE configuration attributes must be used.
    -->
    <!--
    <Connector port="8443" protocol="org.apache.coyote.http11.Http11NioProtocol"
               maxThreads="150" SSLEnabled="true">
        <SSLHostConfig>
            <Certificate certificateKeystoreFile="conf/localhost-rsa.jks"
                         type="RSA" />
        </SSLHostConfig>
    </Connector>
    -->
    <!-- Define a SSL/TLS HTTP/1.1 Connector on port 8443 with HTTP/2
         This connector uses the APR/native implementation. When using the
         APR/native implementation or the OpenSSL engine with NIO or NIO2 then
         the OpenSSL configuration attributes must be used.
    -->
    <!--
    <Connector port="8443" protocol="org.apache.coyote.http11.Http11AprProtocol"
               maxThreads="150" SSLEnabled="true" >
        <UpgradeProtocol className="org.apache.coyote.http2.Http2Protocol" />
        <SSLHostConfig>
            <Certificate certificateKeyFile="conf/localhost-rsa-key.pem"
                         certificateFile="conf/localhost-rsa-cert.pem"
                         certificateChainFile="conf/localhost-rsa-chain.pem"
                         type="RSA" />
        </SSLHostConfig>
    </Connector>
    -->

    <!-- Define an AJP 1.3 Connector on port 8009 -->
    <Connector port="18009" protocol="AJP/1.3" redirectPort="8443" />


    <!-- An Engine represents the entry point (within Catalina) that processes
         every request.  The Engine implementation for Tomcat stand alone
         analyzes the HTTP headers included with the request, and passes them
         on to the appropriate Host (virtual host).
         Documentation at /docs/config/engine.html -->

    <!-- You should set jvmRoute to support load-balancing via AJP ie :
    <Engine name="Catalina" defaultHost="localhost" jvmRoute="jvm1">
    -->
    <Engine name="Catalina" defaultHost="localhost" jvmRoute="jvm1">

      <!--For clustering, please take a look at documentation at:
          /docs/cluster-howto.html  (simple how to)
          /docs/config/cluster.html (reference documentation) -->

      <Cluster className="org.apache.catalina.ha.tcp.SimpleTcpCluster"/>


      <!-- Use the LockOutRealm to prevent attempts to guess user passwords
           via a brute-force attack -->
      <Realm className="org.apache.catalina.realm.LockOutRealm">
        <!-- This Realm uses the UserDatabase configured in the global JNDI
             resources under the key "UserDatabase".  Any edits
             that are performed against this UserDatabase are immediately
             available for use by the Realm.  -->
        <Realm className="org.apache.catalina.realm.UserDatabaseRealm"
               resourceName="UserDatabase"/>
      </Realm>

      <Host name="localhost"  appBase="webapps"
            unpackWARs="true" autoDeploy="true">

        <!-- SingleSignOn valve, share authentication between web applications
             Documentation at: /docs/config/valve.html -->
        <!--
        <Valve className="org.apache.catalina.authenticator.SingleSignOn" />
        -->

        <!-- Access log processes all example.
             Documentation at: /docs/config/valve.html
             Note: The pattern used is equivalent to using pattern="common" -->
        <Valve className="org.apache.catalina.valves.AccessLogValve" directory="logs"
               prefix="localhost_access_log" suffix=".txt"
               pattern="%h %l %u %t "%r" %s %b" />

      </Host>
    </Engine>
  </Service>
</Server>
3、部署web工程
新建个一个web工程,我这里命名为session_test, 主要就是web.xml和index.jsp文件,将工程分别部署到tomcat1-3里面. 为了区分各个tomcat服务器,index.jsp稍微不一样.
web.xml :添加 了<distributable/>
<?xml version="1.0" encoding="UTF-8"?>
<web-app xmlns:xsi="http://www.w3.org/2001/XMLSchema-instance" xmlns="http://java.sun.com/xml/ns/javaee" xsi:schemaLocation="http://java.sun.com/xml/ns/javaee http://java.sun.com/xml/ns/javaee/web-app_3_0.xsd" id="WebApp_ID" version="3.0">
  <display-name>session_test</display-name>
  <distributable/>
  <welcome-file-list>
    <welcome-file>index.html</welcome-file>
    <welcome-file>index.htm</welcome-file>
    <welcome-file>index.jsp</welcome-file>
    <welcome-file>default.html</welcome-file>
    <welcome-file>default.htm</welcome-file>
    <welcome-file>default.jsp</welcome-file>
  </welcome-file-list>

  <servlet>
    <description>This is the description of my J2EE component</description>
    <display-name>This is the display name of my J2EE component</display-name>
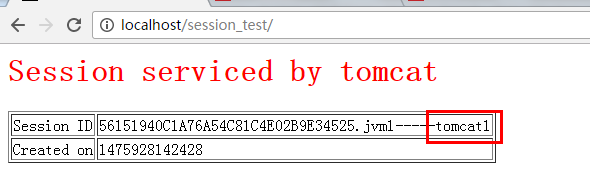
</web-app><%@page language="java"%>
<html>
<body>
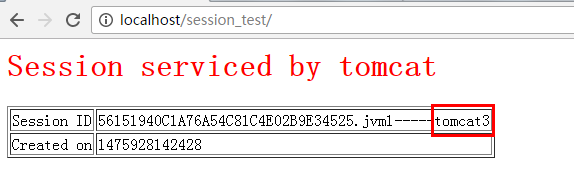
<h1><font color="red">Session serviced by tomcat</font></h1>
<table aligh="center" border="1">
<tr>
<td>Session ID</td>
<td><%=session.getId() %>-----tomcat1</td>
<% session.setAttribute("abc","abc");%>
</tr>
<tr>
<td>Created on</td>
<td><%= session.getCreationTime() %></td>
</tr>
</table>
</body>
<html>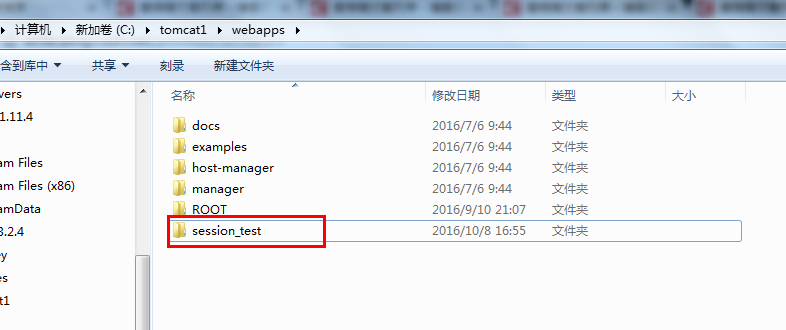
至此,所有配置和部署都完成了.
4、启动nginx和tomcat服务
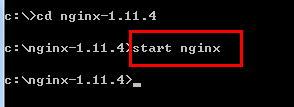
注:停止nginx服务的命令是 nginx -s stop
(2) 分别启动tomcat1 、tomcat2、tomcat3服务.
直接双击tomcat 下的bin目录的startup.bat文件即可启动对应的tomcat服务.
5、测试负载均衡和session复制


 7万+
7万+

 被折叠的 条评论
为什么被折叠?
被折叠的 条评论
为什么被折叠?
 到【灌水乐园】发言


