


由于Android本身对于四大组件的封装,导致在开发当中根本不需要知道四大组件的底层原理及运行过程,但是如果作为一个高级者来说或者为了解决一些底层出现的问题,那么了解四大组件的运行原理和启动过程那么非常必要的。而且目前市面上的热修复,插件化技术越来越火,那么如果连四大组件的启动过程和运行原理都不知道的话,那么也就根本就不明白这些技术的实现原理的,总之好处还是大大的,那么就让我们来一起研究一下吧。
在阅读源码以前还是先简要的说一下,其实四大组件的底层原理是用了Binder机制,那么如果对Binder机制一点都不了解的话,希望还是先看一下Binder机制,之前也有写一篇关于Binder的文章,希望可以有所帮助插件化知识详细分解及原理 之Binder机制
我们先说Service的启动过程,下面会说新进程的启动过程
一、Service的启动过程 :
启动Service的方式有两种,一种是startService和bindService,虽然调用的方法不同,但是其底层原理基本都一样,这里就从startService开始了,本文源码基于5.1
然后我们先看一下继承关系:
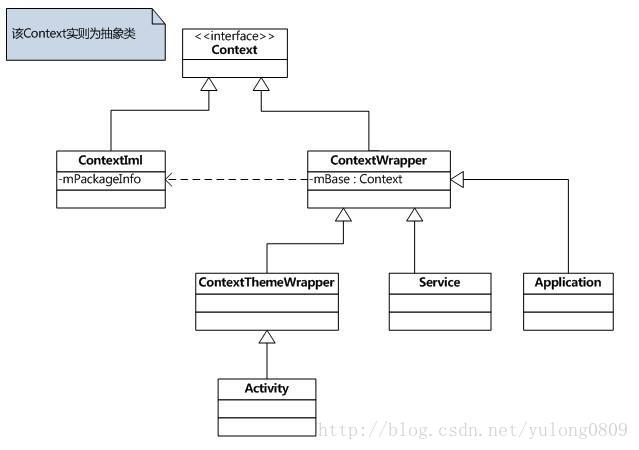
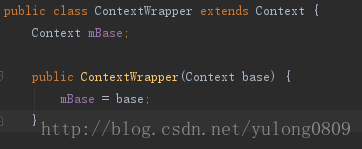
1、一般情况下我们都是在Activity当中通过调用startService来启动的,但是Activity并没有重写Context的startService方法,而是调用了ContextWrapper中的startService方法,那么我们就从这里开始了
源码路径:
/frameworks/base/core/java/android/content/ContextWrapper.java
    @Override
    public ComponentName startService(Intent service) {
        return mBase.startService(service);
    }
2、通过上面的代码我们看到他调用了mBase.startService(service)方法,mBase是什么我们看一下,然后我们进入他的startService再看
我们看到mBase是Context类型,而Context是一个抽象类,它的实现类是ContextImpl,那么我们就直接去看ContextImpl中的startService就好了
源码路径:
/frameworks/base/core/java/android/app/ContextImpl.java
    @Override
    public ComponentName startService(Intent service) {
        //这里只判断了是否是系统进程,如果是打了一段log,忽略
        warnIfCallingFromSystemProcess();
        //调用了本类的startServiceCommon方法
        return startServiceCommon(service, mUser);
    }
3、上面又调用了ContextImpl类中的startServiceCommon方法,进去看看
    private ComponentName startServiceCommon(Intent service, UserHandle user) {
        try {
            //验证Intent的信息是否有效,无效抛出异常
            validateServiceIntent(service);
            service.prepareToLeaveProcess();
            //这里又调用了ActivityManagerNative中startService
            ComponentName cn = ActivityManagerNative.getDefault().startService(
                mMainThread.getApplicationThread(), service,
                service.resolveTypeIfNeeded(getContentResolver()), user.getIdentifier());
                //对远程调用的结果验证
            if (cn != null) {
                if (cn.getPackageName().equals("!")) {
                    throw new SecurityException(
                            "Not allowed to start service " + service
                            + " without permission " + cn.getClassName());
                } else if (cn.getPackageName().equals("!!")) {
                    throw new SecurityException(
                            "Unable to start service " + service
                            + ": " + cn.getClassName());
                }
            }
            return cn;
        } catch (RemoteException e) {
            return null;
        }
    }
4、上面又转到了ActivityManagerNative.getDefault().startService当中,而ActivityManagerNative.getDefault()是一个Binder对象,我们看一下
源码路径:
/frameworks/base/core/java/android/app/ActivityManagerNative.java
//ActivityManagerNative 类继承Binder 实现了IActivityManager
public abstract class ActivityManagerNative extends Binder implements IActivityManager
{

    ...

    //getDefault方法返回了gDefault.get()
   static public IActivityManager getDefault() {
        return gDefault.get();
    }

    //gDefault是一个单例,
    private static final Singleton<IActivityManager> gDefault = new Singleton<IActivityManager>() {
        protected IActivityManager create() {
        //获取ActivityManagerService
            IBinder b = ServiceManager.getService("activity");
            if (false) {
                Log.v("ActivityManager", "default service binder = " + b);
            }
            //远程调用将ACtivityManagerService的代理类
            IActivityManager am = asInterface(b);
            if (false) {
                Log.v("ActivityManager", "default service = " + am);
            }
            return am;
        }
    };

    //asInterface方法将返回ActivityManagerService的代理类
    static public IActivityManager asInterface(IBinder obj) {
        if (obj == null) {
            return null;
        }
        //查询是否是本地调用
        IActivityManager in =
            (IActivityManager)obj.queryLocalInterface(descriptor);
        if (in != null) {
            return in;
        }
        //返回代理
        return new ActivityManagerProxy(obj);
    }

    ...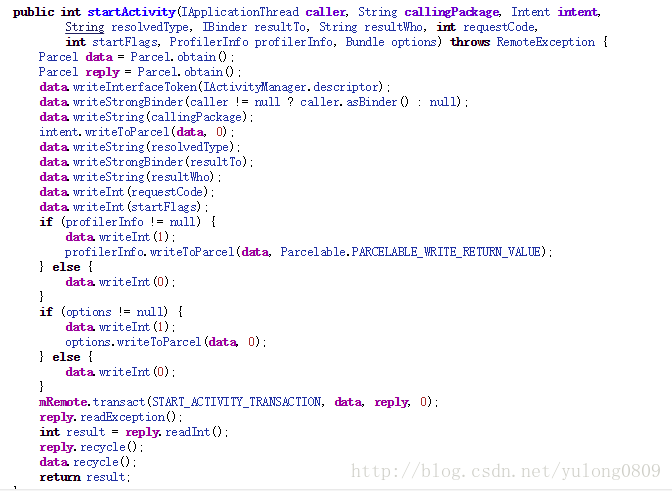
}5、通过上面的代码我们可以知道ActivityManagerNative.getDefault()返回的是ActivityManagerService的代理类,也就是ActivityManagerProxy,而ActivityManagerProxy是ActivityManagerNative的内部类其中的startService也只是发起了远程调用,最终会调用到ActivityManagerService中的startService方法,这里有不明白的请先看插件化知识详细分解及原理 之Binder机制
6、上面的代码会转到ActivityManagerService当中,调用startService方法,下面我们就去看ActivityManagerService当中的startService
源码路径:
/frameworks/base/services/core/java/com/android/server/am/ActivityManagerService.java
public final class ActivityManagerService extends ActivityManagerNative
        implements Watchdog.Monitor, BatteryStatsImpl.BatteryCallback {

    public ActivityManagerService(Context systemContext) {
        ...
        //构造方法中初始化了mServices
        mServices = new ActiveServices(this);
        ...
    }
    @Override
    public ComponentName startService(IApplicationThread caller, Intent service,
            String resolvedType, int userId) {
       ...
       //调用了mServices的startServiceLocked方法
            ComponentName res = mServices.startServiceLocked(caller, service,
                    resolvedType, callingPid, callingUid, userId);
            Binder.restoreCallingIdentity(origId);
            return res;
        }
    }

}
7、上面的代码又转到了ActiveServices中的startServiceLocked方法中,继续跟进
源码路径:
/frameworks/base/services/core/java/com/android/server/am/ActiveServices.java
    ComponentName startServiceLocked(IApplicationThread caller,
            Intent service, String resolvedType,
            int callingPid, int callingUid, int userId) {
        if (DEBUG_DELAYED_STARTS) Slog.v(TAG, "startService: " + service
                + " type=" + resolvedType + " args=" + service.getExtras());

        final boolean callerFg;
        //这里的caller是调用者所在的ActivityThread中的内部类ApplicationThread,它也是一个Binder对象
        //主要用来和应用进程进行通信
        if (caller != null) {
            final ProcessRecord callerApp = mAm.getRecordForAppLocked(caller);
            if (callerApp == null) {
                throw new SecurityException(
                        "Unable to find app for caller " + caller
                        + " (pid=" + Binder.getCallingPid()
                        + ") when starting service " + service);
            }
            callerFg = callerApp.setSchedGroup != Process.THREAD_GROUP_BG_NONINTERACTIVE;
        } else {
            callerFg = true;
        }

        //retrieveServiceLocked是解析Intent对象,从ActivityManagerService中取这个进程中
        //的ServiceMap,然后从ServiceMap当中看是否存在这个service的ServiceRecord,
        //如果不存在则创建一个ServiceRecord,ServiceRecord是用来记录这个service的各种信息的,
        //包括属于哪个进程,service的名称,应用包名等等,然后将ServiceRecord存入ActivityManagerService
        //的成员变量mServiceMap当中
        ServiceLookupResult res =
            retrieveServiceLocked(service, resolvedType,
                    callingPid, callingUid, userId, true, callerFg);
        if (res ==
最低0.47元/天 解锁文章


 860
860


 被折叠的 条评论
为什么被折叠?
被折叠的 条评论
为什么被折叠?
 到【灌水乐园】发言


