


因为正在学习seasar,没有任何书籍,只是在seasar的网站上看了全部的文章来学习,边学边写,以便理解。参考网址http://s2jsf.seasar.org/ja/example.html#employeeManagement(日文)
例子程序的下载网址:http://s2jsf.seasar.org/en/(英文)
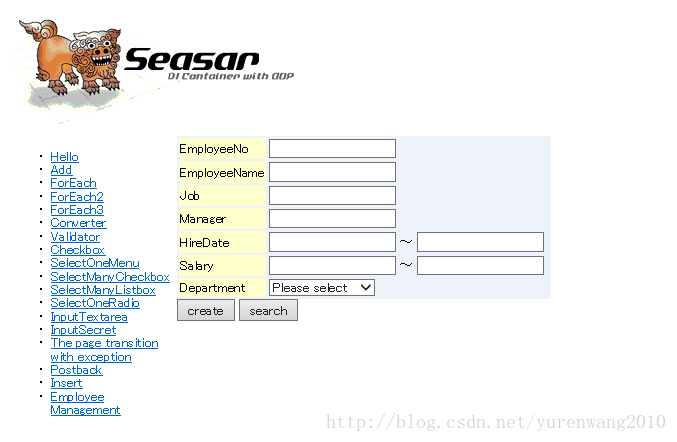
1. 画面结果显示
输入以下网址:http://localhost:8080/s2jsf-example/employee/employeeSearch.html
2. employeeSearch.html分析
<html xmlns:m="http://www.seasar.org/maya"
 m:action="#{employeeSearchInitAction.initialize}"
 m:extends="/WEB-INF/layout/layout.html">
<head>
<meta http-equiv="Content-Type" content="text/html; charset=Windows-31j"/>
<title>Employee Management</title>
<link rel="stylesheet" type="text/css" href="../css/global.css"/>
</head>
这是页面初期化的action类及方法。
以下是这个action类的实现
public class EmployeeSearchInitActionImpl implements EmployeeSearchInitAction {

	private EmployeeLogic employeeLogic;

	private List departmentDtoList;

	public void setEmployeeLogic(EmployeeLogic employeeLogic) {
		this.employeeLogic = employeeLogic;
	}

	public List getDepartmentDtoList() {
		return departmentDtoList;
	}

	public String initialize() {
		departmentDtoList = employeeLogic.getAllDepartments();
		return null;
	}

}
在接着看employeeSearch.html
<tr>
    <td class="label">Department</td>
    <td><select id="deptno" m:value="#{employeeSearchDto.deptno}"
    		m:items="#{departmentDtoList}"
    		m:itemValue="deptno"
    		m:itemLabel="dname"
    		m:nullLabel="Please select">
    		<option value="">Please select</option>
			<option value="10">ACCOUNTING</option>
			<option value="20">RESEARCH</option>
			<option value="30">SALES</option>
			<option value="40">OPERATIONS</option>
		</select>
	</td>
	<td><span m:inject="h:message" m:for="deptno" m:class="error"/></td>
</tr>
如上,用DAO取得的JavaBean的List设置departmentDtoList。
3. Action的自动登录设定
在app.dicon里,如下所示,登录action到S2Container。
	<component
		class="org.seasar.framework.container.autoregister.FileSystemComponentAutoRegister"
	>
		<property name="instanceDef">
			@org.seasar.framework.container.deployer.InstanceDefFactory@REQUEST
		</property>
		<initMethod name="addClassPattern">
			<arg>"examples.jsf.action.impl"</arg>
			<arg>".*ActionImpl"</arg>
		</initMethod>
	</component>

	<component
		class="org.seasar.framework.container.autoregister.AspectAutoRegister"
	>
		<property name="interceptor">actionInterceptorChain</property>
		<initMethod name="addClassPattern">
			<arg>"examples.jsf.action.impl"</arg>
			<arg>".*ActionImpl"</arg>
		</initMethod>
	</component>
在此,可以看到以ActionImpl结尾的类的存放目录。并且以ActionImpl结尾的类会被登录到request scope。
下部的内容与actionInterceptorChain有关,而actionInterceptorChain被定义在examples/jsf/dicon/allaop.dicon中。
4. DTO的自动登录
DTO的登录定义也是在app.dicon里
	<component
		class="org.seasar.framework.container.autoregister.FileSystemComponentAutoRegister"
	>
		<property name="instanceDef">
			@org.seasar.framework.container.deployer.InstanceDefFactory@REQUEST
		</property>
		<initMethod name="addClassPattern">
			<arg>"examples.jsf.dto"</arg>
			<arg>".*Dto"</arg>
		</initMethod>
	</component>
5. Logic的自动登录
Logic的登录在app.dicon里
 <component
  class="org.seasar.framework.container.autoregister.FileSystemComponentAutoRegister"
 >
  <initMethod name="addClassPattern">
   <arg>"examples.jsf.logic.impl"</arg>
   <arg>".*LogicImpl"</arg>
  </initMethod>
 </component> <component
  class="org.seasar.framework.container.autoregister.AspectAutoRegister"
 >
  <property name="interceptor">logicInterceptorChain</property>
  <initMethod name="addClassPattern">
   <arg>"examples.jsf.logic.impl"</arg>
   <arg>".*LogicImpl"</arg>
  </initMethod>
 </component>
在此,可以看到以LogicImpl结尾的类的存放目录。
下部的内容与logicInterceptorChain有关,而logicInterceptorChain被定义在examples/jsf/dicon/allaop.dicon中。
6. DAO的自动登录
DAO的登录还是在app.dicon里
	<component
		class="org.seasar.framework.container.autoregister.FileSystemComponentAutoRegister"
	>
		<initMethod name="addClassPattern">
			<arg>"examples.jsf.dao"</arg>
			<arg>".*Dao"</arg>
		</initMethod>
	</component>

	<component
		class="org.seasar.framework.container.autoregister.AspectAutoRegister"
	>
		<property name="interceptor">daoInterceptorChain</property>
		<initMethod name="addClassPattern">
			<arg>"examples.jsf.dao"</arg>
			<arg>".*Dao"</arg>
		</initMethod>
	</component>
在此,可以看到以Dao结尾的类的存放目录。
下部的内容与daoInterceptorChain有关,而daoInterceptorChain被定义在examples/jsf/dicon/allaop.dicon中。
7. Action和Logic类的说明
如上说明完了Action,Dto,Dao, Logic等, 现在对Action和Logic类加以说明。
public class EmployeeSearchInitActionImpl implements EmployeeSearchInitAction {

	private EmployeeLogic employeeLogic;

	private List departmentDtoList;
如上,在EmployeeSearchInitActionImpl类里声明了EmployeeLogic及Dto有关对象。Logic有关接口的实现如下:
public class EmployeeLogicImpl implements EmployeeLogic {

	private EmployeeDtoDao employeeDtoDao;

	private DepartmentDtoDao departmentDtoDao;

	public void setEmployeeDtoDao(EmployeeDtoDao employeeDtoDao) {
		this.employeeDtoDao = employeeDtoDao;
	}

	public void setDepartmentDtoDao(DepartmentDtoDao departmentDtoDao) {
		this.departmentDtoDao = departmentDtoDao;
	}

	public int getSearchCount(EmployeeSearchDto dto) {
		return employeeDtoDao.getSearchCount(dto);
	}

	public List searchEmployeeDtoList(EmployeeSearchDto dto) {
		return employeeDtoDao.searchEmployeeDtoList(dto);
	}

	public EmployeeDto getEmployeeDto(Integer empno) {
		return employeeDtoDao.getEmployeeDto(empno);
	}

	public List getAllDepartments() {
		return departmentDtoDao.getAllDepartments();
	}
仔细阅读上面代码,可以发现,基本上所有的方法都是与Dao有关的,而EmployeeDtoDao的定义如下:
public interface EmployeeDtoDao {

	public Class BEAN = EmployeeDto.class;
可以看到,BEAN被赋值为EmployeeDto类,而这个类其实是Employee类的子类。
再看Employee类:
public class Employee implements Serializable {

    private static final long serialVersionUID = 1L;

	public static final String TABLE = "EMP";
可见,Employee是和"EMP"表相关联的。
下面,我们再来看DepartmentDtoDao:
public interface DepartmentDtoDao {

	public Class BEAN = DepartmentDto.class;
此处,BEAN被告赋值为DepartmentDto类,而这个类是Department类的子类。
再看Department类:
public class Department implements Serializable {

    private static final long serialVersionUID = 1L;

	public static final String TABLE = "DEPT";
从上可见,Department类是和"DEPT"表相关联的。
8. employeeSearchAction的说明
再接着看employeeSearch.hmtl
<input type="button" value="create"
	m:action="#{employeeSearchAction.goEditForCreate}"
	οnclick="location.href='employeeEdit.html'"/>
<input type="button" value="search"
	m:action="#{employeeSearchAction.checkSearchCount}"
	οnclick="location.href='employeeList.html'"/>
由上可知,点击create和search两个按钮时,会调用employeeSearchAction中的方法。
public class EmployeeSearchActionImpl implements EmployeeSearchAction {

	private EmployeeLogic employeeLogic;

	private EmployeeSearchDto employeeSearchDto;

	private ProcessModeDto processModeDto;

	public void setEmployeeSearchDto(EmployeeSearchDto employeeSearchDto) {
		this.employeeSearchDto = employeeSearchDto;
	}

	public void setProcessModeDto(ProcessModeDto processModeDto) {
		this.processModeDto = processModeDto;
	}

	public void setEmployeeLogic(EmployeeLogic employeeLogic) {
		this.employeeLogic = employeeLogic;
	}

	public String checkSearchCount() {
		if (employeeLogic.getSearchCount(employeeSearchDto) == 0) {
			throw new BadCriteriaRuntimeException();
		}
		return "employeeList";
	}

	public String goEditForCreate() {
		processModeDto.setProcessMode(Constants.CREATE_MODE);
		return "employeeEdit";
	}
}
我们来看goEditForCreate方法,它返回了"employeeEdit",而从faces-config.xml中可知,
	<navigation-rule>
		<navigation-case>
			<from-outcome>employeeEdit</from-outcome>
			<to-view-id>/employee/employeeEdit.html</to-view-id>
		</navigation-case>
	</navigation-rule>
这就是返回employeeEdit.html画面。
同理,再看checkSearchCount方法,它返回了employeeList,从faces-config.xml中可知,
	<navigation-rule>
		<navigation-case>
			<from-outcome>employeeList</from-outcome>
			<to-view-id>/employee/employeeList.html</to-view-id>
		</navigation-case>
	</navigation-rule>
这也就是返回employeeList.html画面。


 316
316

 被折叠的 条评论
为什么被折叠?
被折叠的 条评论
为什么被折叠?
 到【灌水乐园】发言


