


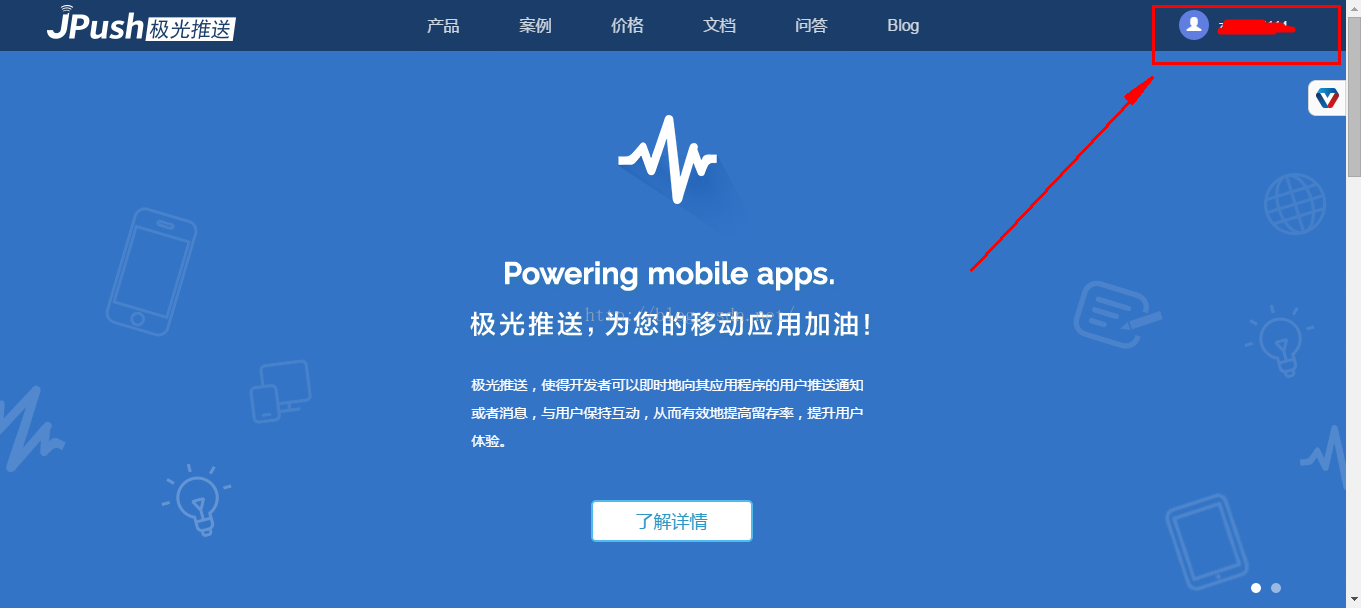
首先进入官网https://www.jpush.cn/,先注册一个账号。
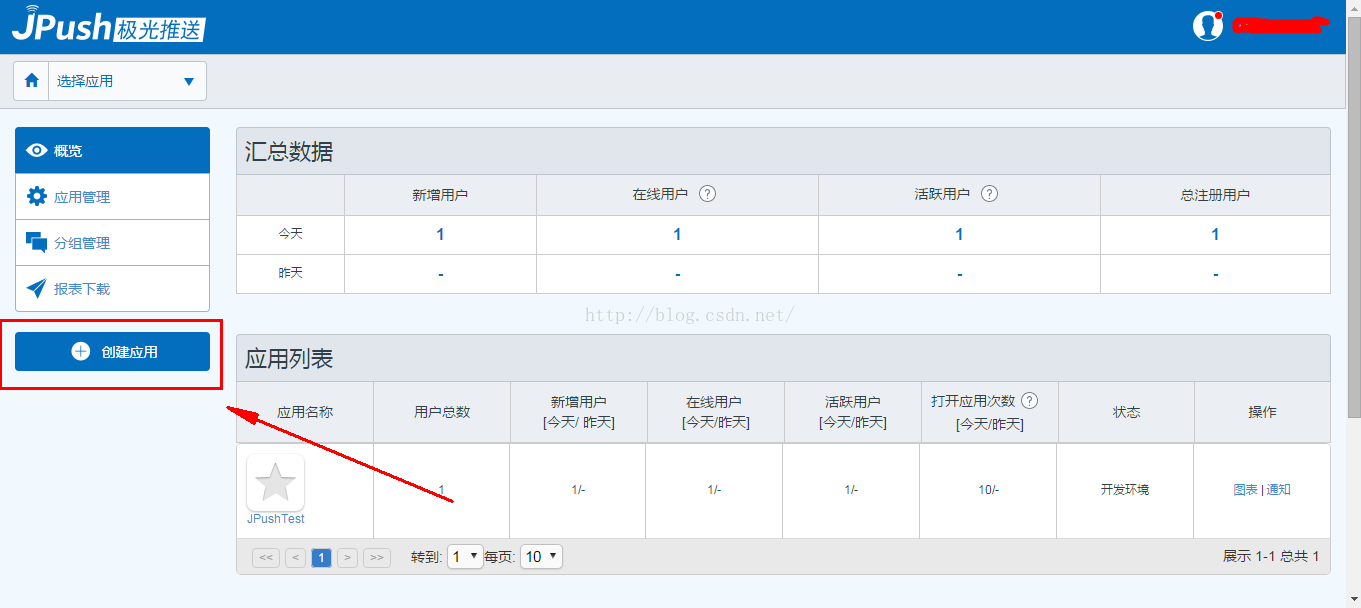
注册号以后,创建应用
2、点击创建应用
3、在创建应用界面输入自己项目的应用名和应用的包名,输入后点击创建我的应用按钮就可以完成创建。

4、创建完成后就能看到以下界面,这个界面中的AppKey就是我们等下要用的Key。该系统还帮你自动完成可一个属于你的Demo,供你参考,可以点击下载Android Example 下载。
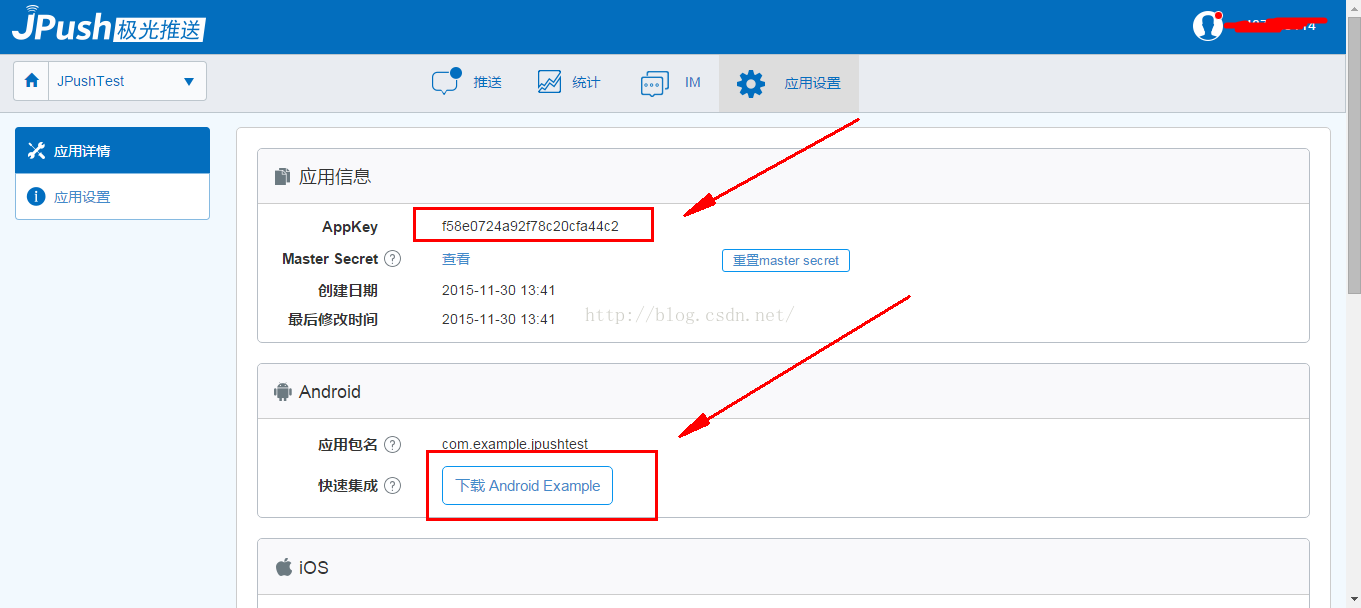
这样就完成了应用的创建,接下来就是下载SDK以便后面集成是使用。
下载SDK,根据以下步骤进入
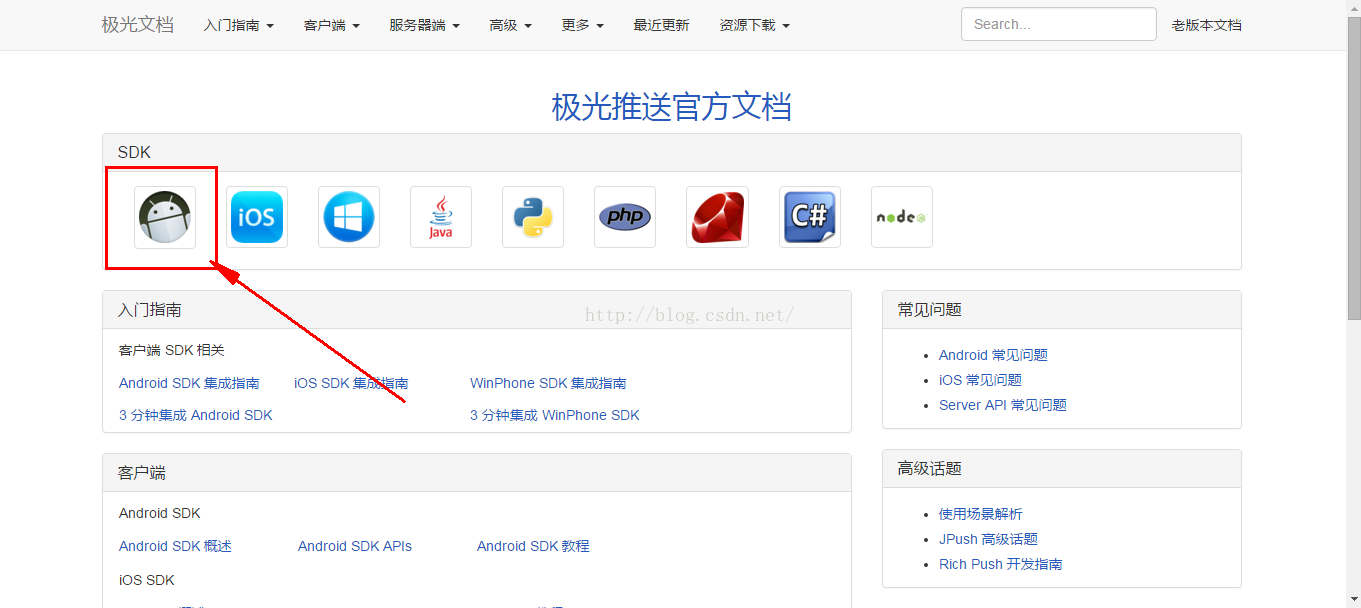
1、先进入官网、点击文档

2、进入文档页面后点击android图标
3、进入android SDK页面,点击Android 客户端 SDK下载
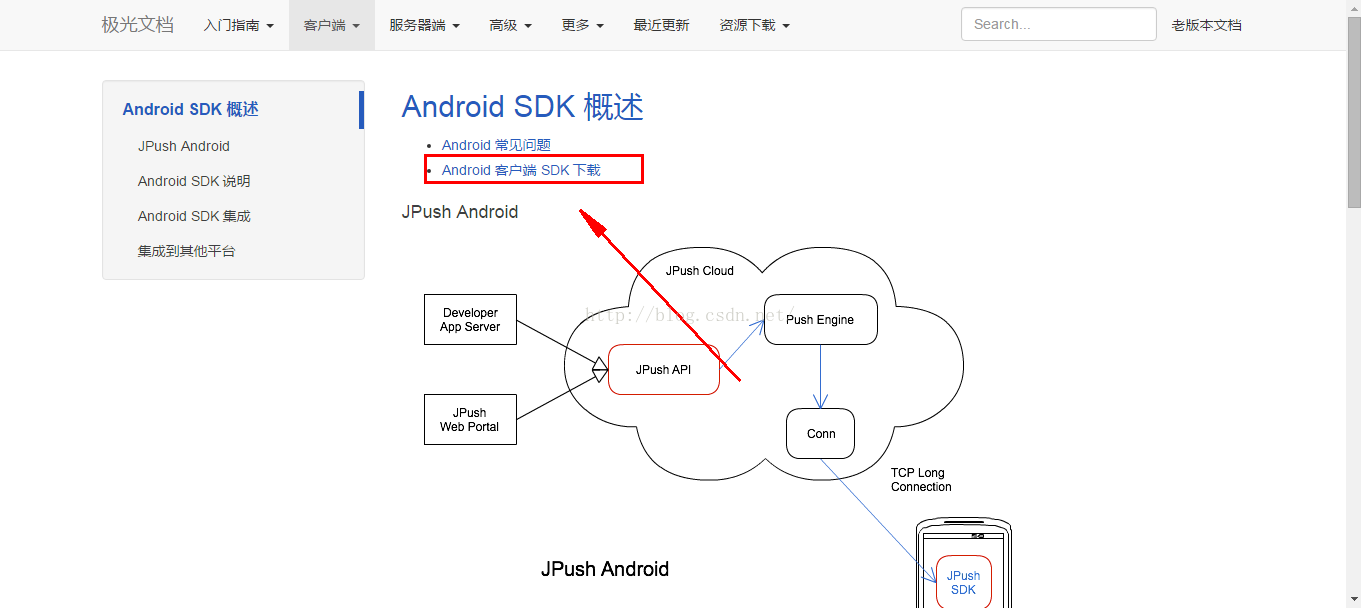
4、在客户端SDK下载中,点击下载

5、下载完成后解压,可以得到以下文件

接写来就可以开始SDK的集成了,接下来就根据官方的文档开始操作
1、导入 SDK 开发包到你自己的应用程序项目
--复制 libs/jpush-sdk-release2.x.y.jar 到工程 libs/ 目录下
--复制 libs/armeabi(和 armeabi-v7a/arm64-v8a)/中so文件 到工程libs/下对应的CPU目录下
--复制 res/drawable-hdpi 中的资源文件到工程的 res/drawable-hdpi/ 目录下
--复制 res/layout 中的布局文件到工程的 res/layout/ 目录下
2、配置 AndroidManifest.xml
Eclipse中AndroidManifest实例:
<manifest xmlns:android="http://schemas.android.com/apk/res/android"
  package="您应⽤用的包名"
    android:versionCode="205"
    android:versionName="2.0.5" >

    <uses-sdk
        android:minSdkVersion="11"
        android:targetSdkVersion="17" />
    <!-- Required ⾃自定义⽤用来收发消息的相关权限 -->
    <permission
        android:name="您应⽤用的包名.permission.JPUSH_MESSAGE"
        android:protectionLevel="signature" />
    <!-- Required ⼀一些系统要求的权限,如访问⺴⽹网络等 -->
    <uses-permission android:name="您应⽤用的包名.permission.JPUSH_MESSAGE" />
    <uses-permission android:name="android.permission.RECEIVE_USER_PRESENT" />
    <uses-permission android:name="android.permission.INTERNET" />
    <uses-permission android:name="android.permission.WAKE_LOCK" />
    <uses-permission android:name="android.permission.READ_PHONE_STATE" />
    <uses-permission android:name="android.permission.WRITE_EXTERNAL_STORAGE" />
    <uses-permission android:name="android.permission.READ_EXTERNAL_STORAGE" />
    <uses-permission android:name="android.permission.WRITE_SETTINGS" />
    <uses-permission android:name="android.permission.VIBRATE" />
    <uses-permission android:name="android.permission.MOUNT_UNMOUNT_FILESYSTEMS" />
    <uses-permission android:name="android.permission.ACCESS_NETWORK_STATE" />
    <uses-permission android:name="android.permission.ACCESS_WIFI_STATE" />
    <uses-permission android:name="android.permission.SYSTEM_ALERT_WINDOW" />
    <!-- Optional for location -->
    <uses-permission android:name="android.permission.ACCESS_COARSE_LOCATION" />
    <uses-permission android:name="android.permission.CHANGE_WIFI_STATE" />
    <uses-permission android:name="android.permission.ACCESS_FINE_LOCATION" />
    <uses-permission android:name="android.permission.ACCESS_LOCATION_EXTRA_COMMANDS" />
    <uses-permission android:name="android.permission.CHANGE_NETWORK_STATE" />

    <application
        android:icon="@drawable/ic_launcher"
        android:label="@string/app_name" >

        <!-- Required SDK核⼼心功能 -->
        <activity
            android:name="cn.jpush.android.ui.PushActivity"
            android:configChanges="orientation|keyboardHidden"
            android:exported="false"
            android:theme="@android:style/Theme.NoTitleBar" >
            <intent-filter>
                <action android:name="cn.jpush.android.ui.PushActivity" />

                <category android:name="android.intent.category.DEFAULT" />
                <category android:name="您应⽤用的包名" />
            </intent-filter>
        </activity>
        <!-- Required SDK核⼼心功能 -->
        <service
            android:name="cn.jpush.android.service.DownloadService"
            android:enabled="true"
            android:exported="false" >
        </service>
        <!-- Required SDK 核⼼心功能 -->
        <!-- option since 2.0.5 可配置android:process 参数将PushService设置为独⽴立进程 -->
        <service
            android:name="cn.jpush.android.service.PushService"
            android:enabled="true"
            android:exported="false" >
            <intent-filter>
                <action android:name="cn.jpush.android.intent.REGISTER" />
                <action android:name="cn.jpush.android.intent.REPORT" />
                <action android:name="cn.jpush.android.intent.PushService" />
                <action android:name="cn.jpush.android.intent.PUSH_TIME" />
            </intent-filter>
        </service>
        <!-- Required SDK 核⼼心功能 since 1.8.0 -->
        <service
            android:name="cn.jpush.android.service.DaemonService"
            android:enabled="true"
            android:exported="true" >
            <intent-filter>
                <action android:name="cn.jpush.android.intent.DaemonService" />

                <category android:name="您应⽤用的包名" />
            </intent-filter>
        </service>
        <!-- Required SDK核⼼心功能 -->
        <receiver
            android:name="cn.jpush.android.service.PushReceiver"
            android:enabled="true"
            android:exported="false" >
            <intent-filter android:priority="1000" >
                <action android:name="cn.jpush.android.intent.NOTIFICATION_RECEIVED_PROXY" />
                <!-- Required 显⽰示通知栏 -->
                <category android:name="您应⽤用的包名" />
            </intent-filter>
            <intent-filter>
                <action android:name="android.intent.action.USER_PRESENT" />
                <action android:name="android.net.conn.CONNECTIVITY_CHANGE" />
            </intent-filter>
            <!-- Optional -->
            <intent-filter>
                <action android:name="android.intent.action.PACKAGE_ADDED" />
                <action android:name="android.intent.action.PACKAGE_REMOVED" />

                <data android:scheme="package" />
            </intent-filter>
        </receiver>
        <!-- Required SDK核⼼心功能 -->
        <receiver android:name="cn.jpush.android.service.AlarmReceiver" />
        <!-- User defined. ⽤用户⾃自定义的⼲⼴广播接收器 -->
        <receiver
           android:name="您⾃自⼰己定义的Receiver"
            android:enabled="true" >
            <intent-filter>
                <action android:name="cn.jpush.android.intent.REGISTRATION" />
                <!-- Required ⽤用户注册SDK的intent -->
                <action android:name="cn.jpush.android.intent.UNREGISTRATION" />
                <action android:name="cn.jpush.android.intent.MESSAGE_RECEIVED" />
                <!-- Required ⽤用户接收SDK消息的intent -->
                <action android:name="cn.jpush.android.intent.NOTIFICATION_RECEIVED" />
                <!-- Required ⽤用户接收SDK通知栏信息的intent -->
                <action android:name="cn.jpush.android.intent.NOTIFICATION_OPENED" />
                <!-- Required ⽤用户打开⾃自定义通知栏的intent -->
                <action android:name="cn.jpush.android.intent.ACTION_RICHPUSH_CALLBACK" />
                <!-- Optional ⽤用户接受Rich Push Javascript 回调函数的intent -->
                <action android:name="cn.jpush.android.intent.CONNECTION" />
                <!-- 接收⺴⽹网络变化 连接/断开 since 1.6.3 -->
                <category android:name="您应⽤用的包名" />
            </intent-filter>
        </receiver>
        <!-- Required . Enable it you can get statistics data with channel -->
        <meta-data
            android:name="JPUSH_CHANNEL"
            android:value="developer-default" />
        <meta-data
            android:name="JPUSH_APPKEY"
           android:value="您的Appkey" />
        <!-- </>值来⾃自开发者平台取得的AppKey -->
    </application>
您应用的包名:自己的应用包名;
自己定义的Receive:对应的广播接收者。
紫色部分和黄色部分还好,红色部分刚开始做的时候不知道怎么写,文档上没看到(太粗心了估计),随便写了个。结果在收到消息推送的时候出错了,于是查看了写资料,才知道那里应该是一个广播接受者,来接受消息的推送以及一系列操作,于是自定义了一个广播接收者。
新建MyReceiver,用于接收到通知后进行一系列操作:
package com.example.jpushtest;

import java.util.Iterator;

import org.json.JSONException;
import org.json.JSONObject;

import android.annotation.SuppressLint;
import android.app.Notification;
import android.app.NotificationManager;
import android.content.BroadcastReceiver;
import android.content.Context;
import android.content.Intent;
import android.os.Bundle;
import android.support.v4.app.NotificationCompat;
import android.util.Log;
import cn.jpush.android.api.JPushInterface;

public class MyReceiver extends BroadcastReceiver{
	private static final String TAG = "JPush";
	@Override
	public void onReceive(Context context, Intent intent) {
		Bundle bundle = intent.getExtras();
		Log.d(TAG, "[MyReceiver] onReceive - " + intent.getAction() + ", extras: " + printBundle(bundle));

		if (JPushInterface.ACTION_REGISTRATION_ID.equals(intent.getAction())) {
			String regId = bundle.getString(JPushInterface.EXTRA_REGISTRATION_ID);
			Log.d(TAG, "[MyReceiver] 接收Registration Id : " + regId);

		} else if (JPushInterface.ACTION_MESSAGE_RECEIVED.equals(intent.getAction())) {
			Log.d(TAG, "[MyReceiver] 接收到推送下来的自定义消息: " + bundle.getString(JPushInterface.EXTRA_MESSAGE));
			 receivingNotification(context, bundle);

		} else if (JPushInterface.ACTION_NOTIFICATION_RECEIVED.equals(intent.getAction())) {
			Log.d(TAG, "[MyReceiver] 接收到推送下来的通知");
			int notifactionId = bundle.getInt(JPushInterface.EXTRA_NOTIFICATION_ID);
			Log.d(TAG, "[MyReceiver] 接收到推送下来的通知的ID: " + notifactionId);

		} else if (JPushInterface.ACTION_NOTIFICATION_OPENED.equals(intent.getAction())) {
			Log.d(TAG, "[MyReceiver] 用户点击打开了通知");

			//打开自定义的Activity
			Intent i = new Intent(context, ReceiverActivity.class);
			i.putExtras(bundle);
			i.setFlags(Intent.FLAG_ACTIVITY_NEW_TASK | Intent.FLAG_ACTIVITY_CLEAR_TOP );
			context.startActivity(i);

		} else if (JPushInterface.ACTION_RICHPUSH_CALLBACK.equals(intent.getAction())) {
			Log.d(TAG, "[MyReceiver] 用户收到到RICH PUSH CALLBACK: " + bundle.getString(JPushInterface.EXTRA_EXTRA));
			//在这里根据 JPushInterface.EXTRA_EXTRA 的内容处理代码,比如打开新的Activity, 打开一个网页等..

		} else if(JPushInterface.ACTION_CONNECTION_CHANGE.equals(intent.getAction())) {
			boolean connected = intent.getBooleanExtra(JPushInterface.EXTRA_CONNECTION_CHANGE, false);
			Log.w(TAG, "[MyReceiver]" + intent.getAction() +" connected state change to "+connected);
		} else {
			Log.d(TAG, "[MyReceiver] Unhandled intent - " + intent.getAction());
		}
	}
	//通知栏的现实样式
	private void receivingNotification(Context context, Bundle bundle) {
		NotificationManager manager = (NotificationManager) context
	            .getSystemService(Context.NOTIFICATION_SERVICE);
	    String message = bundle.getString(JPushInterface.EXTRA_MESSAGE);
	    String extras = bundle.getString(JPushInterface.EXTRA_EXTRA);
	    // 使用notification
	    // 使用广播或者通知进行内容的显示
	    NotificationCompat.Builder builder = new NotificationCompat.Builder(
	            context);
	    builder.setContentText(message).setSmallIcon(R.drawable.ic_launcher).setContentTitle(JPushInterface.EXTRA_TITLE);
	    builder.setDefaults(Notification.DEFAULT_SOUND);
	    manager.notify(1,builder.build());
	}

	// 打印所有的 intent extra 数据
	@SuppressLint("NewApi")
	private static String printBundle(Bundle bundle) {
		StringBuilder sb = new StringBuilder();
		for (String key : bundle.keySet()) {
			if (key.equals(JPushInterface.EXTRA_NOTIFICATION_ID)) {
				sb.append("\nkey:" + key + ", value:" + bundle.getInt(key));
			}else if(key.equals(JPushInterface.EXTRA_CONNECTION_CHANGE)){
				sb.append("\nkey:" + key + ", value:" + bundle.getBoolean(key));
			} else if (key.equals(JPushInterface.EXTRA_EXTRA)) {
				if (bundle.getString(JPushInterface.EXTRA_EXTRA).isEmpty()) {
					Log.i(TAG, "This message has no Extra data");
					continue;
				}

				try {
					JSONObject json = new JSONObject(bundle.getString(JPushInterface.EXTRA_EXTRA));
					Iterator<String> it =  json.keys();

					while (it.hasNext()) {
						String myKey = it.next().toString();
						sb.append("\nkey:" + key + ", value: [" +
								myKey + " - " +json.optString(myKey) + "]");
					}
				} catch (JSONException e) {
					Log.e(TAG, "Get message extra JSON error!");
				}

			} else {
				sb.append("\nkey:" + key + ", value:" + bundle.getString(key));
			}
		}
		return sb.toString();
	}

}
(目前只用到黄色部分,其他地方可以根据实际情况进行适当操作)
推送通知界面上的“通知标题”字段
Bundle bundle = intent.getExtras();
String title = bundle.getString(JPushInterface.EXTRA_NOTIFICATION_TITLE);
Bundle bundle = intent.getExtras();
String content = bundle.getString(JPushInterface.EXTRA_ALERT);
推送消息界面上的“可选设置”里的附加字段
Bundle bundle = intent.getExtras();
String type = bundle.getString(JPushInterface.EXTRA_EXTRA);添加代码
配置完成后,只要在onCreate中执行以下两行代码即可完成消息推送。
JPushInterface.setDebugMode(true);
JPushInterface.init(this);
这样就完成了,去官网推送一天消息试试
在个人中心中,选择推送--》发送通知--》输入推送内容--》立即发送

要是在手机上收到推送的消息,就说明推送成功了!!!
这里只是做个入门,更多消息推送的功能请查阅官方文档。
转载请说明出处
若有错误之处,感谢指出


 9667
9667

 被折叠的 条评论
为什么被折叠?
被折叠的 条评论
为什么被折叠?
 到【灌水乐园】发言


