


对于Web开发,Spring提供了一站式的解决方案。表现web层,可以使用springmvc。持久层,spring提供了JDBC模板技术和数据库进行交互。
除了JDBC模板,还有Hibernate模板。
JDBC模板直接使用sql语言。
环境搭建
需要引入的包如下:
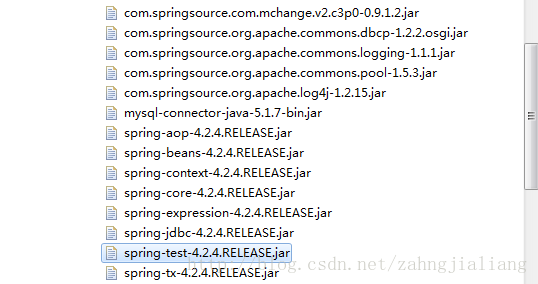
数据库使用的是mysql,因此必须需要导入mysql的jar包。除此之外,还有 Spring-jdbc.jar和Spring-tx.jar。
Spring-jdbc.jar是Spring JDBC模板技术需要用到的jar包。
如果要使用事务,就需要引入Spring-tx.jar。
Spring的JDBC模板有自己的连接池,直接在配置文件中配置就可以使用。当然也可以使用C3P0和DBCP数据库连接池。引入相关jar包,配置文件中配置了就可以使用了。
首先创建数据库和表:
use study;

create table t_account(
        id int primary key auto_increment,
        name varchar(20),
        money double
    );
创建一个javaBean
public class Account {

    private Integer id;
    private String name;
    private Double money;

    public Integer getId() {
        return id;
    }
    public void setId(Integer id) {
        this.id = id;
    }
    public String getName() {
        return name;
    }
    public void setName(String name) {
        this.name = name;
    }
    public Double getMoney() {
        return money;
    }
    public void setMoney(Double money) {
        this.money = money;
    }
    @Override
    public String toString() {
        return "Account [id=" + id + ", name=" + name + ", money=" + money + "]";
    }

}
applicationContext.xml配置文件
<beans xmlns="http://www.springframework.org/schema/beans"
    xmlns:xsi="http://www.w3.org/2001/XMLSchema-instance"
    xmlns:context="http://www.springframework.org/schema/context"
    xmlns:aop="http://www.springframework.org/schema/aop"
    xmlns:tx="http://www.springframework.org/schema/tx"
    xsi:schemaLocation="http://www.springframework.org/schema/beans
    http://www.springframework.org/schema/beans/spring-beans.xsd
    http://www.springframework.org/schema/context
    http://www.springframework.org/schema/context/spring-context.xsd
    http://www.springframework.org/schema/aop
    http://www.springframework.org/schema/aop/spring-aop.xsd
    http://www.springframework.org/schema/tx
    http://www.springframework.org/schema/tx/spring-tx.xsd">

    <!--开启注解扫描,可以扫描com.mq包下的所有bean  -->
    <context:component-scan base-package="com.mq"/>

    <!-- 内置的连接池:先配置连接池  -->
    <bean id="dataSource" class="org.springframework.jdbc.datasource.DriverManagerDataSource">
        <property name="driverClassName" value="com.mysql.jdbc.Driver"/>
        <property name="url" value="jdbc:mysql:///study"/>
        <property name="username" value="root"/>
        <property name="password" value="root"/>
    </bean>


    <!-- 配置DBCP的连接池
    <bean id="dataSource" class="org.apache.commons.dbcp.BasicDataSource">
        <property name="driverClassName" value="com.mysql.jdbc.Driver"/>
        <property name="url" value="jdbc:mysql:///study"/>
        <property name="username" value="root"/>
        <property name="password" value="root"/>
    </bean>
    -->

    <!-- 配置C3P0的连接池 -->
<!--    <bean id="dataSource" class="com.mchange.v2.c3p0.ComboPooledDataSource">
        <property name="driverClass" value="com.mysql.jdbc.Driver"/>
        <property name="jdbcUrl" value="jdbc:mysql:///study"/>
        <property name="user" value="root"/>
        <property name="password" value="root"/>
    </bean> -->

    <!-- 配置JDBC的模板类 -->
    <bean id="jdbcTemplate" class="org.springframework.jdbc.core.JdbcTemplate">
        <property name="dataSource" ref="dataSource"/>
    </bean>

</beans>
注意,spring的JDBC模板自带数据库连接池。如果需要其他连接池,引入相关jar包再做配置。
必须配置模板类,将使用的连接池进行依赖注入。
注意数据库的名称,账号和密码要和自己的一致。
测试
@RunWith(SpringJUnit4ClassRunner.class)
@ContextConfiguration("classpath:applicationContext.xml")
public class MyTest {
    @Resource(name="jdbcTemplate")
    private JdbcTemplate jdbcTemplate;

    @Test
    public void f1(){
        jdbcTemplate.update("insert into t_account values (null,?,?)", "关羽",1000);
    }

    /**
     * update(String sql,Object...params)   可以完成增删改操作
     */
    @Test
    public void f2(){
        jdbcTemplate.update("update t_account set name = ? where id = ?","张飞",5);
    }

    /**
     * 删除测试
     */
    @Test
    public void f3(){
        jdbcTemplate.update("delete from t_account where id = ?",5);
    }

    /**
     * 测试查询:通过主键查询一条记录
     */
    @Test
    public void f4(){
        Account ac = jdbcTemplate.queryForObject("select * from t_account where id = ?", new BeanMapper(), 1);
        System.out.println(ac);
    }

    /**
     * 查询所有的数据
     */
    @Test
    public void f5(){
        List<Account> list = jdbcTemplate.query("select * from t_account", new BeanMapper());
        System.out.println(list);
    }

    /**
     * 自己手动的来封装数据(一行一行封装数据)
     * @author Administrator
     */
    class BeanMapper implements RowMapper<Account>{

        public Account mapRow(ResultSet rs, int rowNum) throws SQLException {
            Account ac = new Account();
            ac.setId(rs.getInt("id"));
            ac.setName(rs.getString("name"));
            ac.setMoney(rs.getDouble("money"));
            return ac;
        }
    }

}
因为Spring的JDBC模板技术不想Hibernate那样提供数据库的表和javaBean之间的映射关系,所以需要自己写一个类实现RowMapper接口,完成这种映射关系。
事务管理
事务简介
- 事务:指的是逻辑上一组操作,组成这个事务的各个执行单元,要么一起成功,要么一起失败!
事务的特性
- 原子性:要么全部成功,要么全部失败
- 一致性:操作前后,总的状态保持不变。
- 隔离性:并发事务之间互相影响的程度,比如一个事务会不会读取到另一个未提交的事务修改的数据。
- 持久性:事务提交后,对系统的影响是永久的。
如果不考虑隔离性,引发安全性问题
读问题:
- 脏读:
- 不可重复读:
- 虚读:
写问题:
- 丢失更新:
如何解决安全性问题
- 读问题解决,设置数据库隔离级别
- 写问题解决可以使用 悲观锁和乐观锁的方式解决
平台事务管理器:PlatformTransactionManager接口
平台事务管理器.(真正管理事务的类)。该接口有具体的实现类,根据不同的持久层框架,需要选择不同的实现类!
* 如果使用的Spring的JDBC模板或者MyBatis框架,需要选择DataSourceTransactionManager实现类
* 如果使用的是Hibernate的框架,需要选择HibernateTransactionManager实现类
该接口常用的方法:
* void commit(TransactionStatus status) :提交事务
* TransactionStatus getTransaction(TransactionDefinition definition) :获取事务
* void rollback(TransactionStatus status) :回滚。
Spring事务的管理有两种方式,一种是编程式事务管理,一种是声明式事务管理。
注意,虽然事务是数据库相关的内容,但开发中,在业务层管理事务。
编程式事务管理不推荐使用,声明式事务管理是重点。
声明式事务管理有两种方式,一种是配置xml文件的方式,一种是注解的方式。
注解方式最简洁,这里主要就说说注解方式。
说起事务,最典型的问题莫过于转账问题,两个不同的账户上,钱的进和出必须同一时刻完成,要不一起失败,要么一起成功。
使用Spring的事务管理,需要额外引入:
com.springsource.org.aopalliance-1.0.0.jar
使用注解的方式时,需要在配置文件中开启事务的注解:
<tx:annotation-driven transaction-manager="transactionManager"/>配置文件如下:
<?xml version="1.0" encoding="UTF-8"?>
<beans xmlns="http://www.springframework.org/schema/beans"
    xmlns:xsi="http://www.w3.org/2001/XMLSchema-instance"
    xmlns:context="http://www.springframework.org/schema/context"
    xmlns:aop="http://www.springframework.org/schema/aop"
    xmlns:tx="http://www.springframework.org/schema/tx"
    xsi:schemaLocation="http://www.springframework.org/schema/beans
    http://www.springframework.org/schema/beans/spring-beans.xsd
    http://www.springframework.org/schema/context
    http://www.springframework.org/schema/context/spring-context.xsd
    http://www.springframework.org/schema/aop
    http://www.springframework.org/schema/aop/spring-aop.xsd
    http://www.springframework.org/schema/tx
    http://www.springframework.org/schema/tx/spring-tx.xsd">

    <!--开启注解扫描,可以扫描com.mq包下的所有bean  -->
    <context:component-scan base-package="com.mq"/>

    <!-- 开启事务的注解 -->
    <tx:annotation-driven transaction-manager="transactionManager"/>

    <!-- 内置的连接池:先配置连接池  -->
    <bean id="dataSource" class="org.springframework.jdbc.datasource.DriverManagerDataSource">
        <property name="driverClassName" value="com.mysql.jdbc.Driver"/>
        <property name="url" value="jdbc:mysql:///study"/>
        <property name="username" value="root"/>
        <property name="password" value="root"/>
    </bean>

    <!-- 配置JDBC的模板类 -->
    <bean id="jdbcTemplate" class="org.springframework.jdbc.core.JdbcTemplate">
        <property name="dataSource" ref="dataSource"/>
    </bean>

        <!-- 配置平台事务管理器 -->
    <bean id="transactionManager" class="org.springframework.jdbc.datasource.DataSourceTransactionManager">
        <property name="dataSource" ref="dataSource"/>
    </bean>

    <bean id="dao" class="com.mq.dao.MydaoImpl">
        <property name="dataSource" ref="dataSource"/>
    </bean>

</beans>需要说明的是,Dao类必须在xml文件中配置。其他类的IoC可以使用注解形式。
Dao类
public class MydaoImpl extends JdbcDaoSupport implements Mydao {

    public void save() {
    System.out.println("这里是持久层");
    }

    //付款
    @Override
    public void pay(String out,int count) {
        this.getJdbcTemplate().update("update t_account set money = money - ? where name = ?", count,out);

    }
    //收到钱
    @Override
    public void receive(String in,int count) {
        this.getJdbcTemplate().update("update t_account set money = money + ? where name = ?", count,in);

    }

}
MydaoImpl 需要继承JdbcDaoSupport 类。从配置文件中可以看出,JdbcDaoSupport 有一个dataSource的属性,该属性需要注入连接池。
因此,MydaoImpl在xml文件中配置IoC,没有使用注解的IoC。
serevice类
@Transactional
@Component(value="myService")
public class MyServiceImpl implements MyService {
    @Resource(name="dao")
    private Mydao mydao;

    @Override
    public void saveUser() {
        System.out.println("业务层保存用户");
    }
    @Override
    public void transfer(String out,String in,int money) {
        mydao.pay(out,money);
        mydao.receive(in,money);
    }

}需要给MyServiecImpl类添加一个注解:@Transactional,该注解表示该类中的所有方法都开启了事务。
测试:
@RunWith(SpringJUnit4ClassRunner.class)
@ContextConfiguration("classpath:applicationContext_tx.xml")
public class MyTest2 {
@Resource(name="myService")
private MyService myService;
@Test
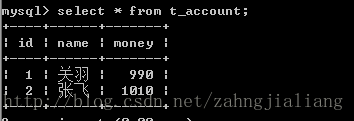
public void test1() {
myService.transfer("关羽","张飞",10);
}
}数据库操作结果:
模拟转账过程中发生异常:
    @Override
    public void transfer(String out,String in,int money) {
        mydao.pay(out,money);
        int i=1/0;
        mydao.receive(in,money);
    }
如果没有开启事务,结果是这样的:
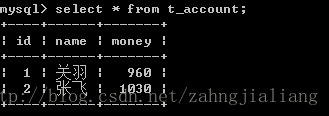
可见,关羽的账户少了10元,而张飞的账户并没有收到钱。(初始关羽账户有970,张飞有1030)。
而添加事务的注解后,一旦转账过程中发生异常,那么操作会全部失败。每个人的账户中的钱都保持不变。


 7821
7821


 被折叠的 条评论
为什么被折叠?
被折叠的 条评论
为什么被折叠?
 到【灌水乐园】发言


