


对于硬盘上的具体文件的读写比较简单。因为路径比较清晰,但是项目中资源文件下的资源文件路径在部署后就比较不确定,今天就来说道说道。
1.先看下项目结构,项目是maven工程ssm框架打造,我们要读写的资源文件是count.properties:
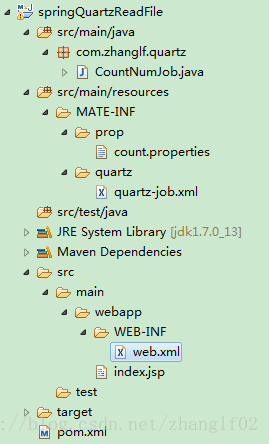
先看操作资源文件的必备知识点:
a> 类名.class.getClassLoader().getResource("").getPath的含义:指得到本项目本工程所在部署服务器/本机的具体路径。比如我打印出来的
CountNumJob.class.getClassLoader().getResource("").getPath()的路径为:/E:/workspace/.metadata/.plugins/org.eclipse.wst.server.core/tmp1/wtpwebapps/springQuartzReadFile。可以看到是定位到工程的路径。
b> src/main/java,src/main/resources , src/test/resources , src/test/java 这四个路径的根路径都是工程/项目的目录,即:
类名.class.getClassLoader().getResource("").getPath。到这里我们知道,如果想读取那个分支的具体那个文件就比较清晰了。比如我想读取src/main/resources下的count.properties。看工程结构-就需要在原来工程的路径上加上MATE-INF/prop/+文件名:count.properties。就可以了。其对应的代码就是这样的:
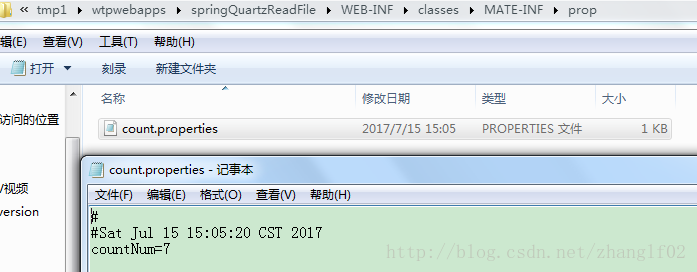
String path=CountNumJob.class.getClassLoader().getResource("").getPath()+"MATE-INF/prop/count.properties";c.要清楚我们操作的不是项目结构中的文件count.properties,而是操作本项目在服务器/本机硬盘中的那个文件,所以即使我们改变了数据,在工程目录下的资源文件你是看不到效果的。但是在你找到在机器上具体部署的位置上打开对应的count.porperties是变了的。并且,只要你不该动项目结构下的资源文件,对应本地目录中的资源文件是会保留上一次你操作后的数据。但是一旦你修改了资源文件,本地目录下的也会更新为这个数据。如下图:本机中的资源文件count.properteis
项目中的资源文件 count.properties
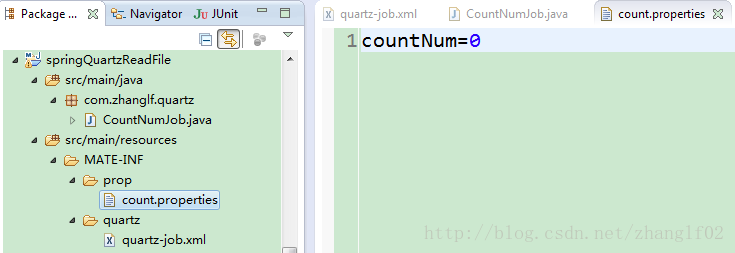
比较看就比较明显了。项目中的数据是不会变的,我们通过流的方式改变的是本地的资源路径中的文件。
下面是具体的代码:实现上是通过job定时改变count.properties的值,然后重启项目,再看之前的数据是不是保存了还是从0开始的?结果现实是保存了的。
框架是基于前面的定时轮循的框架。稍微改动了自定义类。
1.src/main/resources目录下的配置和资源文件
1.1 /prop/count.properties
countNum=01.2 /quartz/quartz-job.xml
<?xml version="1.0" encoding="UTF-8"?>
<beans xmlns="http://www.springframework.org/schema/beans"
    xmlns:xsi="http://www.w3.org/2001/XMLSchema-instance" xmlns:context="http://www.springframework.org/schema/context"
    xsi:schemaLocation="http://www.springframework.org/schema/beans
 http://www.springframework.org/schema/beans/spring-beans-3.0.xsd
 http://www.springframework.org/schema/context
  http://www.springframework.org/schema/context/spring-context-4.1.xsd">

    <!-- 扫包,注入service层 -->
    <context:component-scan base-package="com.zhanglf" />

    <bean name="changeNumJob" class="com.zhanglf.quartz.CountNumJob"></bean>
    <bean name="autochangeNumJob" class="org.springframework.scheduling.quartz.MethodInvokingJobDetailFactoryBean">
        <property name="targetObject">
            <ref bean="changeNumJob" /><!-- 指定自定义类 -->
        </property>
        <property name="targetMethod">
            <value>readResourceFileAndChangeNumber</value><!-- 指定方法名 -->
        </property>
        <!-- 配置是否阻塞线程,即一个一个的调用,还是不等第一个完成就可以执行第二个,false表示阻塞执行。多个job不会并发执行,第二个不会再第一个job完成前执行 ,第二种方式没有这种配置-->
        <property name="concurrent" value="false" />
    </bean>

    <!-- 定时触发器 -->
    <bean id="autoChangeNumCronTrigger" class="org.springframework.scheduling.quartz.CronTriggerBean">
        <property name="jobDetail">
            <ref bean="autochangeNumJob" />
        </property>
        <property name="cronExpression">
            <value>0/20 * * * * ?</value><!-- 每20秒执行一次 -->
        </property>
    </bean>

    <!-- 任务调度器 -->
    <bean class="org.springframework.scheduling.quartz.SchedulerFactoryBean">
        <property name="triggers">
            <list>
                <ref bean="autoChangeNumCronTrigger" />
            </list>
        </property>
    </bean>

</beans>
1.3 web.xml
<?xml version="1.0" encoding="UTF-8"?>
<web-app xmlns:xsi="http://www.w3.org/2001/XMLSchema-instance"
    xmlns="http://java.sun.com/xml/ns/javaee"
    xsi:schemaLocation="http://java.sun.com/xml/ns/javaee http://java.sun.com/xml/ns/javaee/web-app_3_0.xsd"
    version="3.0">
    <display-name>Archetype Created Web Application</display-name>
    <!-- Spring和mybatis的配置文件 -->
    <context-param>
        <param-name>contextConfigLocation</param-name>
        <param-value>classpath:/MATE-INF/quartz/quartz-job.xml</param-value>
    </context-param>

    <listener>
        <listener-class>org.springframework.web.context.ContextLoaderListener</listener-class>
    </listener>
</web-app>
1.4 pom.xml
<project xmlns="http://maven.apache.org/POM/4.0.0" xmlns:xsi="http://www.w3.org/2001/XMLSchema-instance"
    xsi:schemaLocation="http://maven.apache.org/POM/4.0.0 http://maven.apache.org/maven-v4_0_0.xsd">
    <modelVersion>4.0.0</modelVersion>
    <groupId>com.zhanglf.cn</groupId>
    <artifactId>springQuarztDemo</artifactId>
    <packaging>war</packaging>
    <version>0.0.1-SNAPSHOT</version>
    <name>springQuarztDemo Maven Webapp</name>
    <url>http://maven.apache.org</url>

    <properties>
        <spring.version>4.0.2.RELEASE</spring.version>
    </properties>


    <dependencies>
        <!--引入定时任务quartz依赖 -->
        <dependency>
            <groupId>org.quartz-scheduler</groupId>
            <artifactId>quartz</artifactId>
            <version>1.8.5</version>
        </dependency>

        <!-- Spring-context的扩展支持,用于MVC方面 -->
        <dependency>
            <groupId>org.springframework</groupId>
            <artifactId>spring-context-support</artifactId>
            <version>${spring.version}</version>
        </dependency>

        <dependency>
            <groupId>org.springframework</groupId>
            <artifactId>spring-web</artifactId>
            <version>${spring.version}</version>
        </dependency>
        <dependency>
            <groupId>org.springframework</groupId>
            <artifactId>spring-tx</artifactId>
            <version>${spring.version}</version>
        </dependency>
    </dependencies>
    <build>
        <finalName>springQuarztDemo</finalName>
    </build>
</project>
2.src/main/java目录下的文件
2.1 com/zhanglf/quartz/CountNumJob.java
package com.zhanglf.quartz;

import java.io.FileInputStream;
import java.io.FileOutputStream;
import java.util.Properties;

public class CountNumJob {
    private final String path=CountNumJob.class.getClassLoader().getResource("").getPath()+"MATE-INF/prop/count.properties";
    private static Properties pt=new Properties();//单例

    public void readResourceFileAndChangeNumber(){
        try {
            FileInputStream fis=new FileInputStream(path);
            pt.load(fis);
            //读出数据
            String num = pt.getProperty("countNum");
            System.out.println("读出来的countNum的值:"+num);
            //数据加1
            num=String.valueOf(Integer.valueOf(num)+1);
            fis.close();

            FileOutputStream fos=new FileOutputStream(path);
            pt.setProperty("countNum", num);
            pt.store(fos, "");
            fos.flush();
            fos.close();
        } catch (Exception e) {
            // TODO Auto-generated catch block
            e.printStackTrace();
        }

    }
}
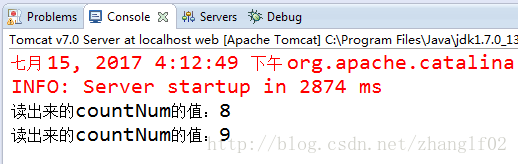
然后启动项目。就可以看到job调用每次加1的运行结果:
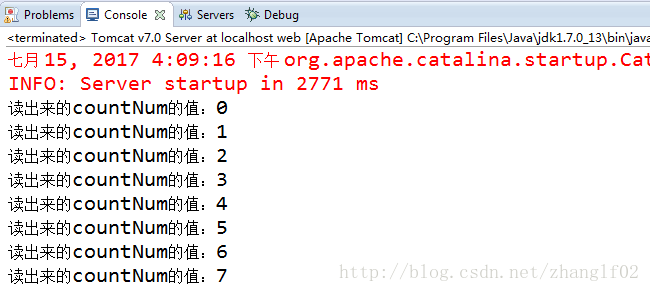
然后我重新启动项目,看累加结果有没有保存


 1371
1371


 被折叠的 条评论
为什么被折叠?
被折叠的 条评论
为什么被折叠?
 到【灌水乐园】发言


