


Android社交类APP动态详情代码实现通用模板
Android平台上一些比较流行的社交类APP比如微信、陌陌等,都有动态详情页,在该页面,用户发表的动态详情,好友可以发起评论、点赞等等。这种设计在微信和陌陌上大同小异。我自己写了一个较为通用的模板,记下作为备忘和参考,更多更丰富的内容可据此深入定制和开发。
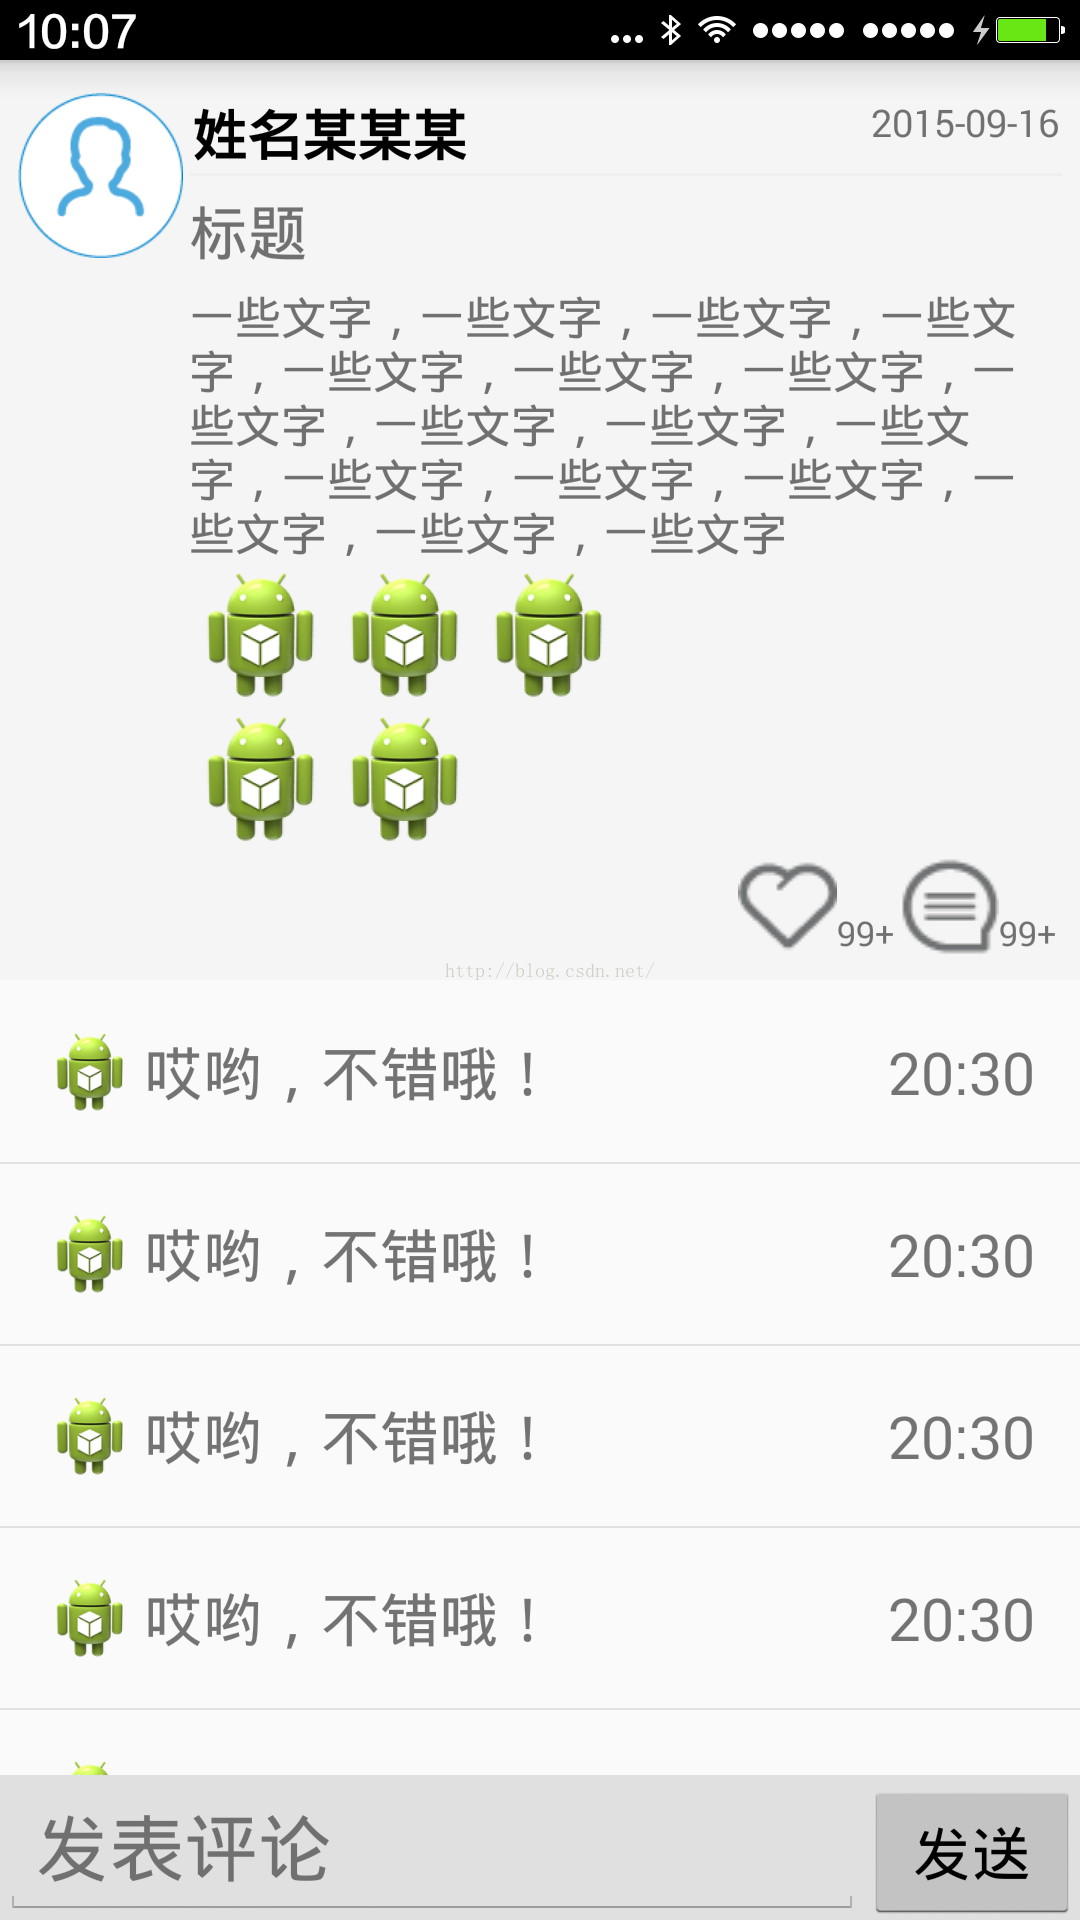
思路:整体是一个ListView实现,ListView添加一个header,作为该用户发送的动态详情呈现页面,然后在ListView下面的item里面是该用户的好友们发表的评论等等。
ListView下方是一个单独的布局,该布局放置一个EditText和Button,供发送评论。
先看代码运行的结果:
实现代码:
测试的主Activity:MainActivity.java:
package zhangphil.detail;

import java.util.Random;

import android.app.Activity;
import android.content.Context;
import android.os.Bundle;
import android.view.LayoutInflater;
import android.view.View;
import android.view.ViewGroup;
import android.widget.ArrayAdapter;
import android.widget.ImageView;
import android.widget.ListView;
import android.widget.TableLayout;
import android.widget.TableRow;

public class MainActivity extends Activity {

	@Override
	protected void onCreate(Bundle savedInstanceState) {
		super.onCreate(savedInstanceState);
		LayoutInflater mLayoutInflater = LayoutInflater.from(this);

		View view = View.inflate(this, R.layout.activity_main, null);

		ListView listView = (ListView) view.findViewById(android.R.id.list);

		// 每条评论的适配器
		ArrayAdapter adapter = new MyArrayAdapter(this, -1);
		listView.setAdapter(adapter);
		listView.setHeaderDividersEnabled(false);

		// ListView的头部
		View v = mLayoutInflater.inflate(R.layout.listview_head, null);
		listView.addHeaderView(v);

		TableLayout tableLayout = (TableLayout) v.findViewById(R.id.tableLayout);
		final int WC = ViewGroup.LayoutParams.WRAP_CONTENT;

		// 随机生成若干张测试图片的量值。
		int total = new Random().nextInt(10);
		int ROW = 0;
		int mod = total % 3;
		if (mod == 0)
			ROW = total / 3;
		else
			ROW = total / 3 + 1;

		Context context = this;

		// 转换成ROW行3列的格式。
		int k = 0;
		for (int i = 0; i < ROW; i++) {
			TableRow tableRow = new TableRow(this);

			for (int j = 0; j < 3; j++) {
				if (k < total) {

					// 测试图片
					ImageView iv = new ImageView(context);
					iv.setImageResource(R.drawable.ic_launcher);

					tableRow.addView(iv);

					k++;
				}
			}

			tableLayout.addView(tableRow, new TableLayout.LayoutParams(WC, WC));
		}

		setContentView(view);
	}

	private class MyArrayAdapter extends ArrayAdapter {

		private LayoutInflater mLayoutInflater;

		public MyArrayAdapter(Context context, int resource) {
			super(context, resource);
			mLayoutInflater = LayoutInflater.from(context);
		}

		@Override
		public View getView(int pos, View convertView, ViewGroup parent) {
			if (convertView == null)
				convertView = mLayoutInflater.inflate(R.layout.comment_item, null);
			return convertView;
		}

		// 返回一个测试数据量值
		@Override
		public int getCount() {
			return 5;
		}
	}
}
MainActivity.java需要的布局文件:activity_main.xml文件:
<?xml version="1.0" encoding="utf-8"?>
<RelativeLayout xmlns:android="http://schemas.android.com/apk/res/android"
    android:layout_width="match_parent"
    android:layout_height="match_parent" >

    <ListView
        android:id="@android:id/list"
        android:layout_width="match_parent"
        android:layout_height="wrap_content"
        android:layout_above="@+id/commentLinearLayout"
        android:layout_gravity="center"
        android:scrollbars="none" />

    <LinearLayout
        android:id="@+id/commentLinearLayout"
        android:layout_width="match_parent"
        android:layout_height="wrap_content"
        android:layout_alignParentBottom="true"
        android:background="#e0e0e0"
        android:orientation="horizontal" >

        <EditText
            android:id="@+id/commentEditText"
            android:layout_width="0dip"
            android:layout_height="wrap_content"
            android:layout_weight="8"
            android:hint="发表评论" />

        <Button
            android:id="@+id/buttonSend"
            style="?android:attr/buttonStyleSmall"
            android:layout_width="0dip"
            android:layout_height="wrap_content"
            android:layout_weight="2"
            android:text="发送" />
    </LinearLayout>

</RelativeLayout>
ListView头部布局用到的listview_head.xml:
<?xml version="1.0" encoding="utf-8"?>
<RelativeLayout xmlns:android="http://schemas.android.com/apk/res/android"
    android:layout_width="match_parent"
    android:layout_height="match_parent"
    android:background="#f5f5f5"
    android:padding="5dip"
    android:paddingBottom="20dip" >

    <ImageView
        android:id="@+id/imageViewHead"
        android:layout_width="wrap_content"
        android:layout_height="wrap_content"
        android:layout_alignParentLeft="true"
        android:layout_alignParentTop="true"
        android:layout_marginTop="5dip"
        android:adjustViewBounds="true"
        android:maxHeight="60dip"
        android:maxWidth="60dip"
        android:padding="1dip"
        android:src="@drawable/head" />

    <LinearLayout
        android:layout_width="match_parent"
        android:layout_height="match_parent"
        android:layout_marginTop="5dip"
        android:layout_toRightOf="@+id/imageViewHead"
        android:orientation="vertical"
        android:padding="1dip" >

        <RelativeLayout
            android:layout_width="match_parent"
            android:layout_height="wrap_content"
            android:padding="1dip" >

            <TextView
                android:id="@+id/name"
                android:layout_width="wrap_content"
                android:layout_height="wrap_content"
                android:layout_alignParentTop="true"
                android:layout_centerVertical="true"
                android:text="姓名某某某"
                android:textColor="@android:color/black"
                android:textSize="13sp"
                android:textStyle="bold" />

            <TextView
                android:id="@+id/time"
                android:layout_width="wrap_content"
                android:layout_height="wrap_content"
                android:layout_alignParentRight="true"
                android:layout_alignParentTop="true"
                android:layout_centerVertical="true"
                android:text="2015-09-16"
                android:textSize="9sp" />
        </RelativeLayout>

        <View
            android:layout_width="match_parent"
            android:layout_height="1dip"
            android:background="#EFEFEF"
            android:padding="1dip" />

        <TextView
            android:id="@+id/title"
            android:layout_width="wrap_content"
            android:layout_height="wrap_content"
            android:layout_marginTop="5dip"
            android:text="标题" />

        <TextView
            android:id="@+id/detail"
            android:layout_width="match_parent"
            android:layout_height="wrap_content"
            android:layout_marginTop="5dip"
            android:text="一些文字,一些文字,一些文字,一些文字,一些文字,一些文字,一些文字,一些文字,一些文字,一些文字,一些文字,一些文字,一些文字,一些文字,一些文字,一些文字,一些文字"
            android:textSize="11sp" />

        <TableLayout
            android:id="@+id/tableLayout"
            android:layout_width="match_parent"
            android:layout_height="wrap_content"
            android:shrinkColumns="0,1,2" />

        <RelativeLayout
            android:layout_width="match_parent"
            android:layout_height="wrap_content"
            android:padding="1dip" >

            <LinearLayout
                android:layout_width="wrap_content"
                android:layout_height="wrap_content"
                android:layout_alignParentRight="true"
                android:orientation="horizontal" >

                <TextView
                    android:layout_width="wrap_content"
                    android:layout_height="wrap_content"
                    android:drawableLeft="@drawable/favorite"
                    android:gravity="bottom|right"
                    android:padding="1dip"
                    android:text="99+"
                    android:textSize="8sp" />

                <TextView
                    android:layout_width="wrap_content"
                    android:layout_height="wrap_content"
                    android:drawableLeft="@drawable/comment"
                    android:gravity="bottom|right"
                    android:padding="1dip"
                    android:text="99+"
                    android:textSize="8sp" />
            </LinearLayout>
        </RelativeLayout>
    </LinearLayout>

</RelativeLayout>
ListView适配器加载的每一个item的布局文件:comment_item.xml:
<?xml version="1.0" encoding="utf-8"?>
<RelativeLayout xmlns:android="http://schemas.android.com/apk/res/android"
    android:layout_width="match_parent"
    android:layout_height="match_parent"
    android:orientation="horizontal"
    android:padding="15dip" >

    <ImageView
        android:id="@+id/head"
        android:layout_width="30dip"
        android:layout_height="30dip"
        android:layout_alignParentLeft="true"
        android:layout_centerVertical="true"
        android:src="@drawable/ic_launcher" />

    <TextView
        android:id="@+id/comment"
        android:layout_width="wrap_content"
        android:layout_height="wrap_content"
        android:layout_centerVertical="true"
        android:layout_marginLeft="2dip"
        android:layout_toRightOf="@+id/head"
        android:gravity="center"
        android:padding="1dip"
        android:text="哎哟,不错哦!" />

    <TextView
        android:id="@+id/time"
        android:layout_width="wrap_content"
        android:layout_height="wrap_content"
        android:layout_alignParentRight="true"
        android:layout_centerVertical="true"
        android:gravity="center"
        android:text="20:30" />

</RelativeLayout>
其中,图片素材head.png、comment.png、favorite.png可以自行根据喜好选取。
附我写的另外一篇与此相关的参考文章:
《Android社交类APP常用的动态消息发布通用模板》
文章链接:http://blog.csdn.net/zhangphil/article/details/48467309


 1978
1978


 被折叠的 条评论
为什么被折叠?
被折叠的 条评论
为什么被折叠?
 到【灌水乐园】发言


