


http://blog.csdn.net/sunitjy/article/details/42709311
****************************************************
最近一些项目需要让Maven来管理,一种情况是将之前的eclipse的Java Project项目和Web project 加入Maven管理,还有一种情况是,将SVN上的Maven项目拉到本地,在eclipse中使用时遇到的一些棘手问题,问题过程和解决具体方案如下:
1.在eclipse中安装maven插件后启动eclipse时,会遇到如下警告:
The Maven Integration requires that Eclipse be running in a JDK, because a number of Maven core plugins are using jars from the JDK
Please make sure the -vm option in eclipse.ini is pointing to a JDK and verify that Installed JRE’s are also using JDK installs.
2.使用maven插件在eclipse中编译或者Maven Install时有时会出现会出现如下问题:
[ERROR] Failed to execute goal org.apache.maven.plugins:maven-compiler-plugin:3.1:testCompile (default-testCompile) on project springside-core: Compilation failure
[ERROR] No compiler is provided in this environment. Perhaps you are running on a JRE rather than a JDK?以上两个问题解决方法如下:
(1)set your JDK as a default Java environment in eclipse (default installed JRE)
Open eclipse. Click on ‘Window’ -> ‘Preferences’ -> ‘Java’ -> ‘Installed JREs’.
If you can’t find any JDK on the list -> click ‘Add’ -> ‘Standard VM’ -> set all paths and click ‘Finish’.
After that – check this JDK on the list of installed JREs and click ‘OK’.
有时采取第(1)种方案并不能有效解决问题,还需要如下处理:
(2)add path to your SDK in eclipse.ini
open ‘eclipse.ini’ and add there: -vm path_to_javaw_on_your_machine,so in my example it will be (jdk1.6.0_17 on Windows):
-vm
D:\\Java\jdk1.6.0_13\jre\bin\javaw
your ‘eclipse.ini’ looks like this:
-startup
plugins/org.eclipse.equinox.launcher_1.0.201.R35x_v20090715.jar
--launcher.library
plugins/org.eclipse.equinox.launcher.win32.win32.x86_1.0.200.v20090519
-showsplash
org.eclipse.platform
--launcher.XXMaxPermSize
256m
-vm
D:\Java\jdk1.6.0_13\jre\bin\javaw
-vmargs
-Xms40m
-Xmx256m
注:‘-vm’ must be "-vmargs" above
3.使用Maven,经常会自己搭建nexus私服,具体步骤如下:
建立私服的优点:
(1) 降低中央仓库负荷
(2) 节省外网带宽
(3) 加速Maven构建
(4) 自己部署构件
1). Nexus安装
(1) 下载:http://www.sonatype.org/nexus/,下载包:nexus-2.0.2.war
(2) 安装
A. WAR方式安装Nexus
将nexus-2.0.2.war拷贝至Tomcat的部署目录:C:\Apache-tomcat-7.0.26\webapps下,
启动Tomcat, 进入Tomcat管理首页即可;
浏览器访问地址:http://localhost:8080/nexus
B. Bundle方式安装Nexus
因为Bundle方式的Nexus默认集成了Jetty容器,因此不需要其他第三方Web容器,解压下载的Bundle
方式的Nexus文件,有下面的两个目录:
nexus-webapp-2.0.2:包含Nexus所需要的文件,如启动脚本,依赖JAR等。
sonatype-work:包含Nexus生成的配置文件、日志文件、仓库文件。
WinOS下,进入nexus-webapp-2.0.2/bin/jsw/windows-x86-32运行nexus.bat脚本启动服务。
浏览器访问地址:http://localhost:8081/nexus
备注:
更改访问端口:修改nexus-webapp-2.0.2/conf/plexus.properties
(3) 登录
Nexus默认的管理员及密码:admin/admin123
2). Nexus的仓库与仓库组
Nexus有四种仓库类型:group,hosted,proxy,virtual,仓库格式为:maven2或maven1,仓库属性Policy为:Release或Snapshot.
3.设置本地Maven库步骤和在eclipse中使用Maven遇到的一些问题及解决方案如下:以下是在D:\Java\apache-maven-3.0.1\conf的settings.xml文件中配置,maven的settings.xml是全局设置,下面会在eclipse中使用该自定义的maven:
1).设置本地Maven库地址:
<localRepository>D:/Java/maven_repository</localRepository>
2).建立nexus私服后,设置访问服务器的账号和密码:
<server>
<id>nexus-releases</id>
<username>admin</username>
<password>admin123</password>
</server>
<server>
<id>nexus-snapshots</id>
<username>admin</username>
<password>admin123</password>
</server>
3).有关在settings.xml配置镜像
简单讲一下为什么我们需要配置镜像,如果不配置镜像,你会发现maven默认从http://repo1.maven.org/maven2地址去下载的,这是为什么呢?
原因如下:在D:\Java\apache-maven-3.0.1\lib\maven-model-builder-3.0.1.jar的jar包你会发现有个maven-model-builder-3.0.1.jar\org\apache\maven\model\pom-4.0.0.xml文件,里面指定了如下配置
<repositories>
<repository>
<id>central</id>
<name>Maven Repository Switchboard</name>
<url>http://repo1.maven.org/maven2</url>
<layout>default</layout>
<snapshots>
<enabled>false</enabled>
</snapshots>
</repository>
</repositories>
<pluginRepositories>
<pluginRepository>
<id>central</id>
<name>Maven Plugin Repository</name>
<url>http://repo1.maven.org/maven2</url>
<layout>default</layout>
<snapshots>
<enabled>false</enabled>
</snapshots>
<releases>
<updatePolicy>never</updatePolicy>
</releases>
</pluginRepository>
</pluginRepositories>
如果让我们本机的Maven只使用私服,即覆盖如上中央仓库的默认地址,则需要配置如下镜像:
<mirror>
<id>Mirror</id>
<!--如果想为所有的仓库做镜像那么这里加*-->
<mirrorOf>*</mirrorOf>
<name>Mirror</name>
<url>http://172.16.101.17:8081/nexus/content/groups/public/</url>
</mirror>
4).在settings.xml配置获取依赖包和插件如下:
<profile>
<id>nexus</id>
<repositories>
<repository>
<id>nexus</id>
<name>Nexus</name>
<url>http://172.16.101.17:8081/nexus/content/groups/public/</url>
<releases>
<enabled>true</enabled>
</releases>
<snapshots>
<enabled>true</enabled>
</snapshots>
</repository>
</repositories>
<pluginRepositories>
<pluginRepository>
<id>nexus</id>
<name>Nexus</name>
<url>http://172.16.101.17:8081/nexus/content/groups/public/</url>
<releases>
<enabled>true</enabled>
</releases>
<snapshots>
<enabled>true</enabled>
</snapshots>
</pluginRepository>
</pluginRepositories>
</profile>
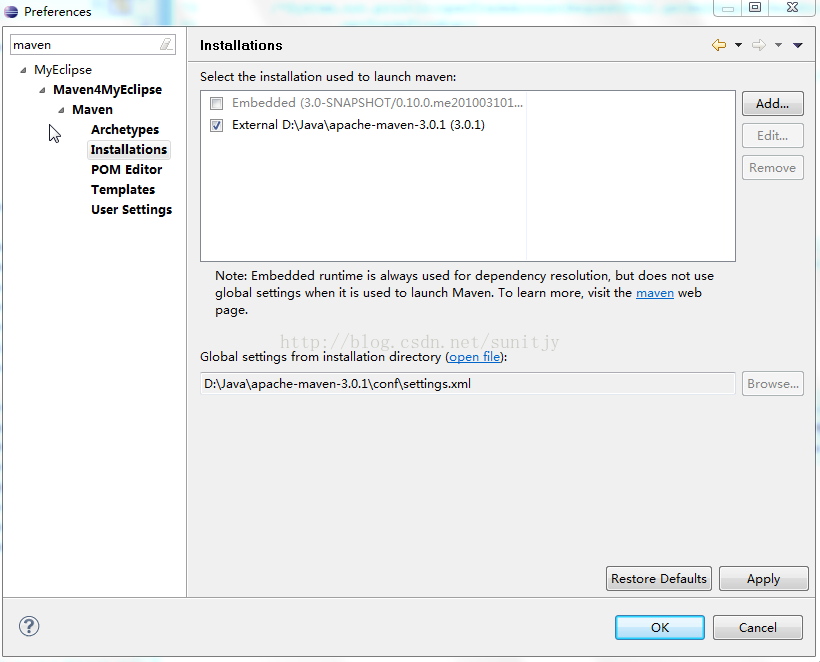
5).在eclipse中配置上面自定义的的maven,如下图:
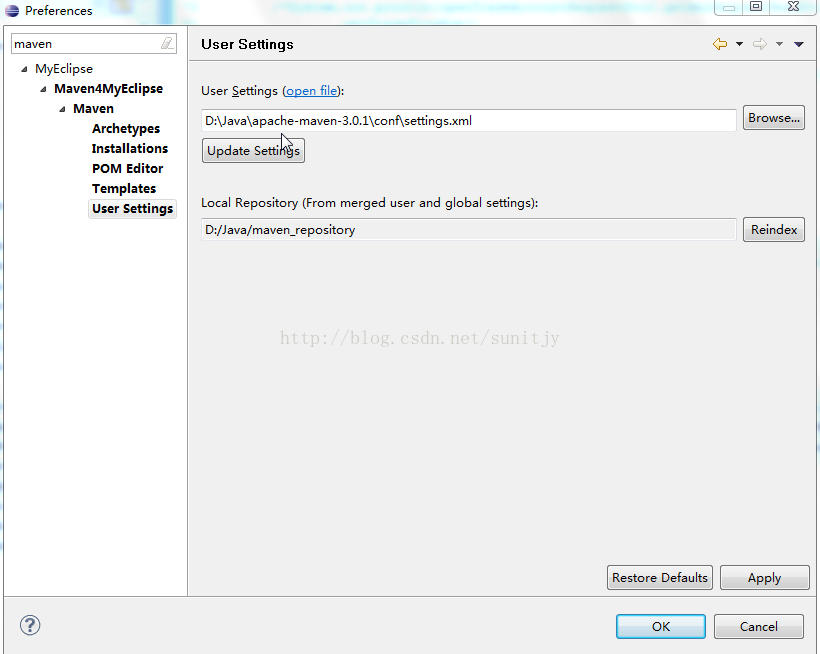
6).eclipse中的项目更新依赖的jar包和系统Maven配置方法如下图:

7).下面的配置可以在每个项目的pom文件中设置,目的是将本地项目使用Maven部署构件至Nexus库中:
<distributionManagement>
<repository>
<id>nexus-releases</id>
<name>Nexus Releases Repository</name>
<url>http://172.16.101.17:8081/nexus/content/repositories/releases/</url>
</repository>
<snapshotRepository>
<id>nexus-snapshots</id>
<name>Nexus Snapshots Repository</name>
<url>http://172.16.101.17:8081/nexus/content/repositories/snapshots/</url>
</snapshotRepository>
</distributionManagement>
4.下面的问题是个比较重要的问题,也提供解决方法:
我向来喜欢用简单的工具,因为开发效率高的同时,调试和查问题也会变得很简单,如果我们平时使用myeclipse作为开发工具来,会习惯使用它自带的集成tomcat工具,版本低的eclipse只能配置tomcat6,不能配置tomcat7等高版本,其实这个也是有解决方法的,后面再说。
如果我们使用maven这个插件来开发,部分人会使用jetty插件或者tomcat插件来部署应用,如果部署的应用有一些问题,比如:我们有时会需要到web容器中查找有没有部署成功等等,如果此时使用插件,可能有点不方便,这时候就会觉得myeclipse自带的集成tomcat环境有很大用处,但是这里会存在一个部署问题如下图:
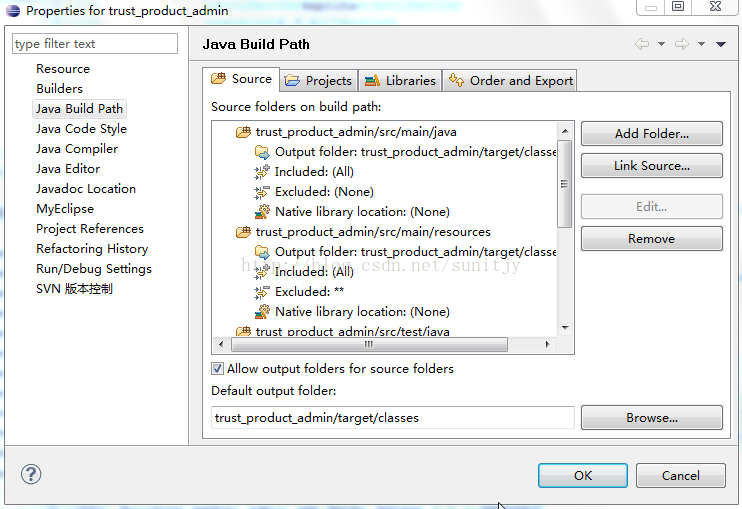
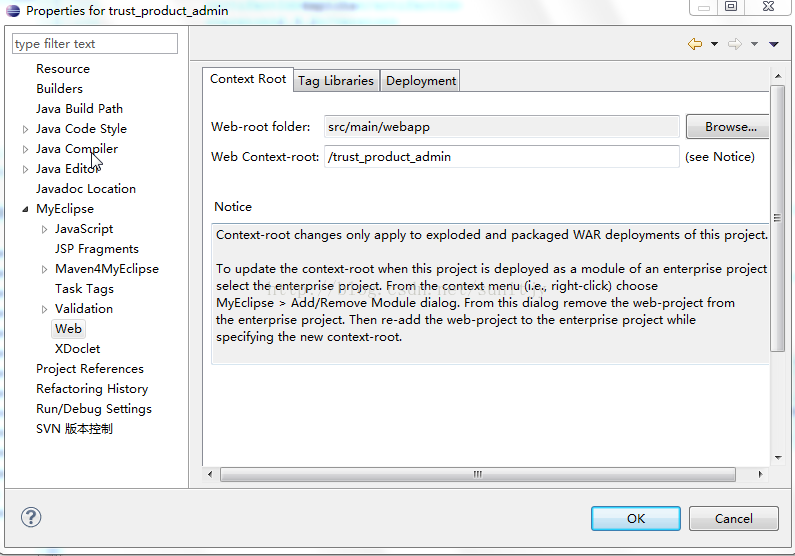
按照maven的结构,编译之后的代码都是默认放在${project_name}/target/classes下的,但是你部署到tomcat的路径是如下图:
这样就会存在一个问题,如果你修改的工程代码,工程代码不会实时更新到web容器中,至于什么原因,大家通过比较上面两张图应该能看出,所以我们要解决这些默认问题,解决问题如下:

即将${project_name}/target/classes改为${project_name}/src/main/webapp/WEB-INF/classes即可,注意图中编译之后的class文件存放路径等细节。
5.有时我们在使用Maven命令做编译或者Maven Install时,可能需要跳过TestCase检验,方案如下:
1.在pom.xml文件中,追加如下插件
2.或者在使用mvn install命令的时候,加上如下参数:
mvn install -D maven.test.skip=true 注:加了则跳过TestCase检验,否则在install时会运行TestCase测试。


 1656
1656


 被折叠的 条评论
为什么被折叠?
被折叠的 条评论
为什么被折叠?
 到【灌水乐园】发言


