


最近在学习GEF开发,使用的是GEF-whole-upload这个教程。由于教程当时所使用的版本与本人使用的版本有一些差异,中间出现了不少问题,现在将解决方案分享给大家。
本人使用的Eclipse版本是3.7 Indigo,gef是3.7.1
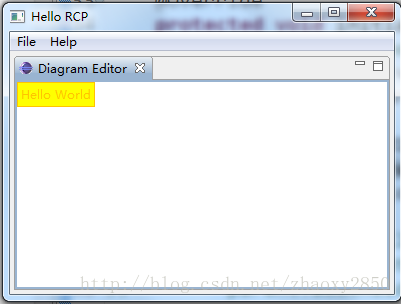
问题1.添加布局管理器XYLayout之后Label仍旧无法显示
原因:XYLayout是采用坐标定位,没有指定坐标则无法显示Label
解决方案1:将XYLayout改为FlowLayout
解决方案2:继续按照教程往下进行加上约束
效果:
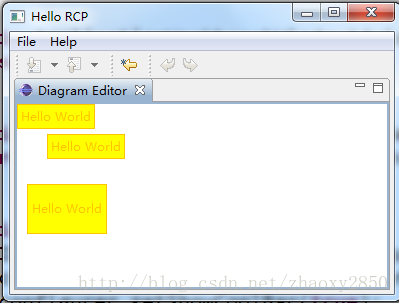
问题2:在plugin.xml中设置了contributorClass后仍然无法显示工具栏
原因:最新版的Eclipse RCP模板默认隐藏了工具栏
解决方案:在ApplicationWorkbenchWindowAdvisor类的preWindowOpen方法中将setShowCoolBar设置为true即可。注意,不是ApplicationWorkbenchAdvisor,这两个类名比较像,不要弄错了。
效果:
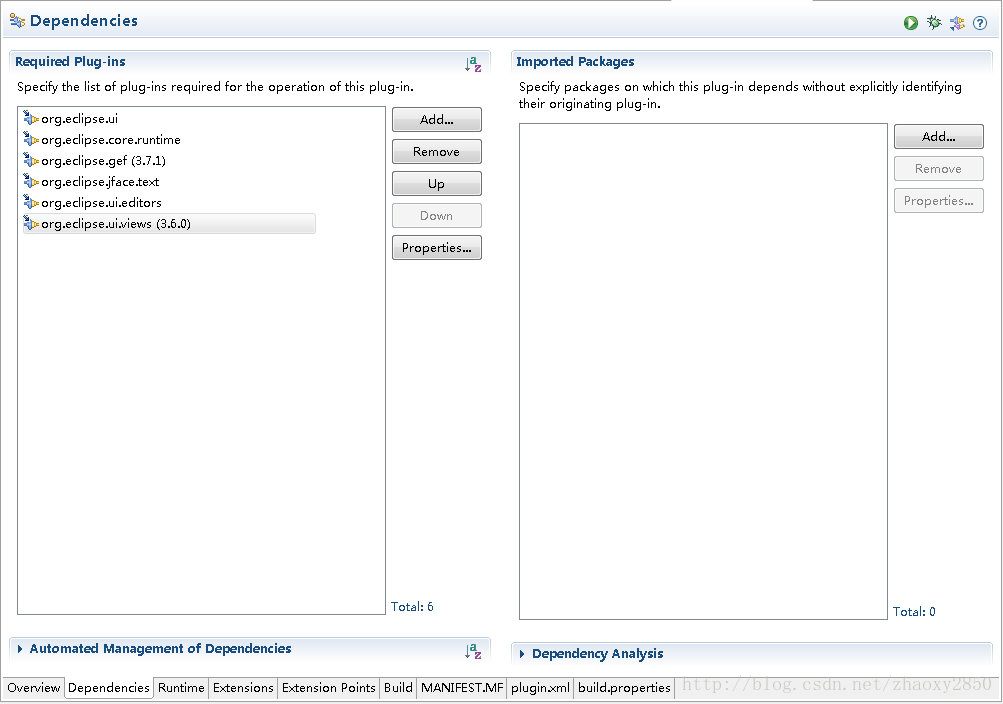
问题3:添加属性视图时没有找到IPropertySource这个接口,The import org.eclipse.ui.views.properties cannot be resolved
原因:没有引入org.eclipse.ui.views这个包
解决方案:在plugin.xml文件的Dependencies中加入org.eclipse.ui.views
效果:
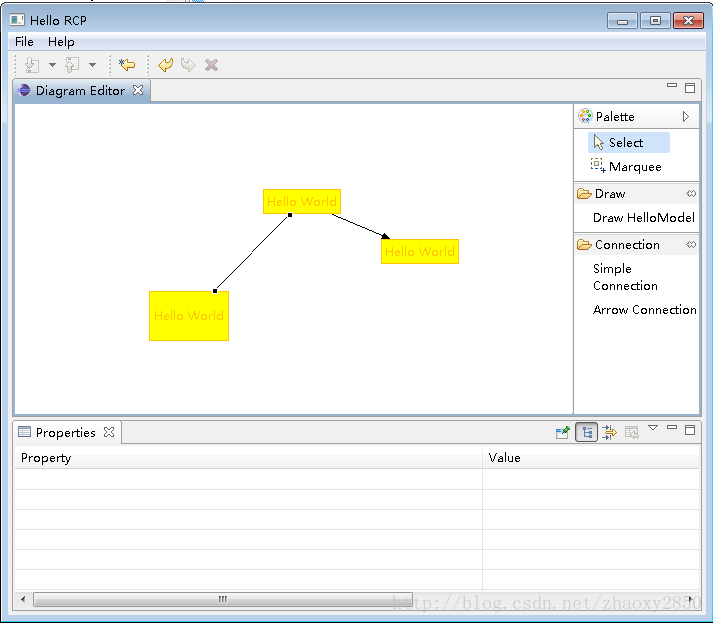
问题4:实现功能选中连接时,安装CustomConnectionEndpointEditPolicy之后仍旧无法选中连接
原因:ArrowConnectionEditPart和LineConnectionEditPart中没有安装该Policy
解决方案:将ArrowConnectionEditPart和LineConnectionEditPart的父类修改为CustomAbstractConnectionEditPart即可
效果:
问题5:在创建可以重新定向的连接时,教程中未给出ReconnectConnectionCommand类的源代码,在自己实现的时候可能会出现一些问题。比如本人在做的时候就出现了undo无法实现的问题,花了一番功夫才找到原因。
解决方案:
在这里给出本人自己实现的源码
public class ReconnectConnectionCommand extends Command {
    AbstractConnectionModel connection;
    HelloModel newTarget, newSource, oldTarget, oldSource;

    @Override
    public void execute() {
        // TODO Auto-generated method stub
        super.execute();

        if (newSource!=null) {
            oldSource = connection.getSource();
            connection.detachSource();
            connection.setSource(newSource);
            connection.attachSource();
        }

        if (newTarget!=null) {
            oldTarget = connection.getTarget();
            connection.detachTarget();
            connection.setTarget(newTarget);
            connection.attachTarget();
        }
    }

    @Override
    public void undo() {
        // TODO Auto-generated method stub
        super.undo();

        if (oldSource!=null) {
            newSource = connection.getSource();
            connection.detachSource();
            connection.setSource(oldSource);
            connection.attachSource();
        }

        if (oldTarget!=null) {
            newTarget = connection.getTarget();
            connection.detachTarget();
            connection.setTarget(oldTarget);
            connection.attachTarget();
        }
    }

    public void setConnection(AbstractConnectionModel connectionModel) {
        connection = connectionModel;
    }

    public void setNewTarget(Object object) {
        newTarget = (HelloModel) object;
    }

    public void setNewSource(Object object) {
        newSource = (HelloModel) object;
    }
}
问题6:实现并安装DeleteBendPointCommand之后,点击工具栏上的删除按钮,会将整个连接删除,无法删除连接点
原因:删除连接点的方式不对
解决方案:在连接点上按下鼠标,拖动回原来的位置(与改变连接点位置类似,只是让连线恢复成直线)即可删除连接点。有兴趣的朋友可以试一下,在没有实现DeleteBendPointCommand之前,这样操作后连接点会自动回到原来的位置上。
该教程的完整实例可在http://download.csdn.net/detail/zhaoxy2850/5829685处下载。
本文地址:http://blog.csdn.net/zhaoxy2850/article/details/9497753
个人博客:http://blog.csdn.net/zhaoxy2850
转载请注明出处,谢谢!


 165
165


 被折叠的 条评论
为什么被折叠?
被折叠的 条评论
为什么被折叠?
 到【灌水乐园】发言


