


今天在老师的带领下初识了Android Studio,并且老师带着我们运用一些常用的UI控件,做了一个简单的登录界面。
activity_main().xml文件
<?xml version="1.0" encoding="utf-8"?>
<LinearLayout xmlns:android="http://schemas.android.com/apk/res/android"
    xmlns:tools="http://schemas.android.com/tools"
    android:layout_width="match_parent"
    android:layout_height="match_parent"
    android:paddingBottom="@dimen/activity_vertical_margin"
    android:paddingLeft="@dimen/activity_horizontal_margin"
    android:paddingRight="@dimen/activity_horizontal_margin"
    android:paddingTop="@dimen/activity_vertical_margin"
    android:orientation="vertical"
    tools:context="com.jerehedu.helloworld.MainActivity">
<!--LineraLayout目的是让每个模块规则地排版,vertical是竖型-->
    <TextView
        android:layout_width="match_parent"
        android:layout_height="wrap_content"
        android:text="Hello World!"
        android:gravity="center"
        android:textSize="40sp"
        android:textColor="#ffbb00"
        android:id="@+id/textView" />
    <!--match_parent是根据屏幕的长宽-->
    <!--wrap_content是根据内容的长宽-->
    <!--一般文字的大小用sp表示-->
    <!--gravity or textAlignment用来设置文本的对齐方式,但后者要API 17以上才能用-->
    <TextView
        android:layout_width="match_parent"
        android:layout_height="wrap_content"
        android:textSize="20sp"
        android:ellipsize="end"
        android:maxLines="2"
        android:minLines="1"
        android:text="        一男子在闹市骑摩托撞昏了一个陌生的老汉! 男子惊吓的不知所措!围观群众越来越多!突然,该男抱住老"
        android:id="@+id/show"/>
    <!--ellipsize这里设置的end,是让文本最后显示不出来的用"..."表示,告诉别人后面还有内容-->
    <!--maxLines和minLines是用来限制文本的行数-->
    <EditText
        android:layout_width="match_parent"
        android:layout_height="wrap_content"
        android:maxLines="1"
        android:hint="请输入用户名"
        android:drawableRight="@mipmap/ic_launcher"
        android:id="@+id/userName" />
    <!--EditText文本框可提供给用户输入-->
    <!--hint的作用是添加灰色的提示文字,当选中该文本框时,内容消失-->
    <!--drawableRight的作用是在文本框中添加图标-->
    <EditText
        android:layout_width="match_parent"
        android:layout_height="wrap_content"
        android:maxLines="1"
        android:hint="请输入密码"
        android:drawablePadding="20dp"
        android:drawableLeft="@mipmap/ic_launcher"
        android:inputType="textPassword"
        android:id="@+id/passWord"/>
    <!--drawablePadding的作用是设置图标和文本直接的间隔距离,单位常用dp-->
    <!--inputType用于设置输入文本的属性,其textPassword属性值是让密码不可见-->
    <Button
        android:layout_width="match_parent"
        android:layout_height="wrap_content"
        android:text="登录"
        android:textSize="20sp"
        android:textColor="#ff00ff"
        android:id="@+id/btnLogin" />
    <!--这里id后面用的@+id,目的是新建一个id,否者是引用已有的-->

    <RadioButton
        android:layout_width="wrap_content"
        android:layout_height="wrap_content"
        android:text="New RadioButton"
        android:id="@+id/radioButton2"
        android:layout_below="@+id/radioButton"
        android:layout_alignParentLeft="true"
        android:layout_alignParentStart="true" />

    <CheckBox
        android:layout_width="wrap_content"
        android:layout_height="wrap_content"
        android:text="New CheckBox"
        android:id="@+id/checkBox"
        android:layout_below="@+id/radioButton2"
        android:layout_alignParentLeft="true"
        android:layout_alignParentStart="true" />

    <CheckBox
        android:layout_width="wrap_content"
        android:layout_height="wrap_content"
        android:text="New CheckBox"
        android:id="@+id/checkBox2"
        android:layout_below="@+id/checkBox"
        android:layout_alignParentLeft="true"
        android:layout_alignParentStart="true" />

    <Switch
        android:layout_width="match_parent"
        android:layout_height="wrap_content"
        android:text="New Switch"
        android:id="@+id/switch1"
        android:layout_below="@+id/checkBox2"
        android:layout_alignParentLeft="true"
        android:layout_alignParentStart="true" />

</LinearLayout>
MainActivity.java文件
package com.jerehedu.helloworld;

import android.support.v7.app.AppCompatActivity;
import android.os.Bundle;
import android.view.View;
import android.widget.Button;
import android.widget.EditText;
import android.widget.TextView;
import android.widget.Toast;

public class MainActivity extends AppCompatActivity {  //如果要将MainActivity设计成UI必须继承此类

    @Override
    protected void onCreate(Bundle savedInstanceState) {  //有on开头的方法通常是系统调用的
        super.onCreate(savedInstanceState);
        setContentView(R.layout.activity_main);
        Button btnLogin = (Button) findViewById(R.id.btnLogin);
        //定义变量接收界面中的输入组件
        final EditText userName = (EditText) findViewById(R.id.userName);
        final EditText passWord = (EditText) findViewById(R.id.passWord);
        final TextView show = (TextView) findViewById(R.id.show);
        btnLogin.setOnClickListener(new View.OnClickListener() {
            @Override
            public void onClick(View v) {//创建点击事件
                String name = userName.getText().toString();
                String pwd = passWord.getText().toString();
                show.setText("用户名:" + name + "\n密码:" + pwd);
                Toast.makeText(
                        MainActivity.this,
                        "您点击了按钮。",
                        Toast.LENGTH_SHORT
                ).show();

            }

        });
    }
}
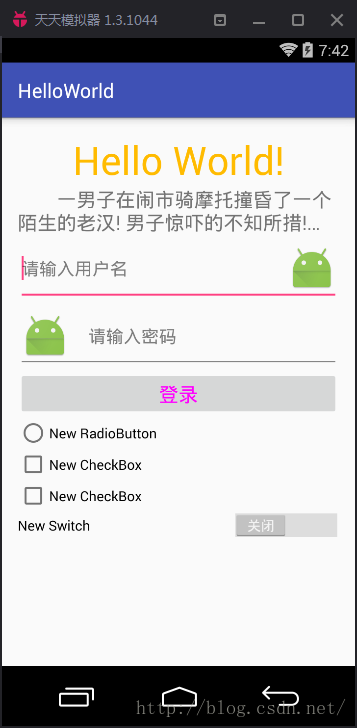
成果截图:
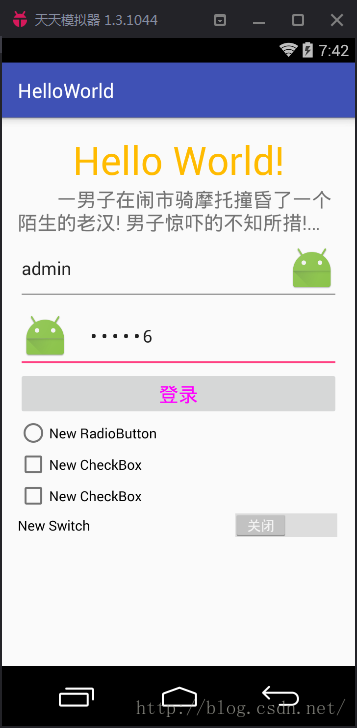
1.输入用户名和密码。
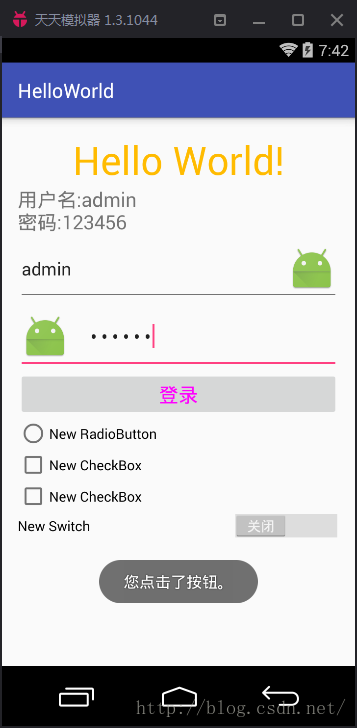
2.点击“登录”,文本框告知已输入的用户名及密码。


 269
269


 被折叠的 条评论
为什么被折叠?
被折叠的 条评论
为什么被折叠?
 到【灌水乐园】发言


