


之前一直想做一款应用中可以用到类似在横向导航栏切换的功能,今天碰巧看到了,所以就在这里记录一下。
首先要注意的是
TabWidget的id一定要是@android:id/tabs,
FrameLayout的id一定要是@android:id/tabcontent.
我之前的做法是让Activity继承自TabActivity,这样在android 2.3下是正常的,但是在android4.0下会显示继承自TabActivity已过时,后来看了一下别人的做法所以可以让它继承Activity。
xml文件:
<TabHost xmlns:android="http://schemas.android.com/apk/res/android"
    xmlns:tools="http://schemas.android.com/tools"
    android:id="@+id/tabHost"
    android:layout_width="match_parent"
    android:layout_height="match_parent"
    tools:context=".MainActivity" >

    <LinearLayout
        android:layout_width="match_parent"
        android:layout_height="match_parent"
        android:orientation="vertical" >

        <TabWidget
            android:id="@android:id/tabs"
            android:layout_width="match_parent"
            android:layout_height="wrap_content" >
        </TabWidget>

        <FrameLayout
            android:id="@android:id/tabcontent"
            android:layout_width="match_parent"
            android:layout_height="match_parent" >

            <LinearLayout
                android:id="@+id/page1"
                android:layout_width="match_parent"
                android:layout_height="match_parent" >

                <TextView
                    android:layout_width="match_parent"
                    android:layout_height="match_parent"
                    android:text="这是第一个页面" />
            </LinearLayout>

            <LinearLayout
                android:id="@+id/page2"
                android:layout_width="match_parent"
                android:layout_height="match_parent" >

                <TextView
                    android:layout_width="match_parent"
                    android:layout_height="match_parent"
                    android:text="这是第二个页面" />
            </LinearLayout>

            <LinearLayout
                android:id="@+id/page3"
                android:layout_width="match_parent"
                android:layout_height="match_parent" >

                <TextView
                    android:layout_width="match_parent"
                    android:layout_height="match_parent"
                    android:text="这是第三个页面" />
            </LinearLayout>
        </FrameLayout>
    </LinearLayout>

</TabHost>
java处理代码:
public class MainActivity extends Activity {
private TabHost tabHost;
private TabSpec tabSpec;
@Override
protected void onCreate(Bundle savedInstanceState) {
super.onCreate(savedInstanceState);
setContentView(R.layout.activity_main);
tabHost=(TabHost) findViewById(R.id.tabHost);
tabHost.setup();
tabSpec=tabHost.newTabSpec("page1");
tabSpec.setContent(R.id.page1);
tabSpec.setIndicator("本地");
tabHost.addTab(tabSpec);
tabSpec=tabHost.newTabSpec("page2");
tabSpec.setContent(R.id.page2);
tabSpec.setIndicator("在线");
tabHost.addTab(tabSpec);
tabSpec=tabHost.newTabSpec("page3");
tabSpec.setContent(R.id.page3);
tabSpec.setIndicator("推荐");
tabHost.addTab(tabSpec);
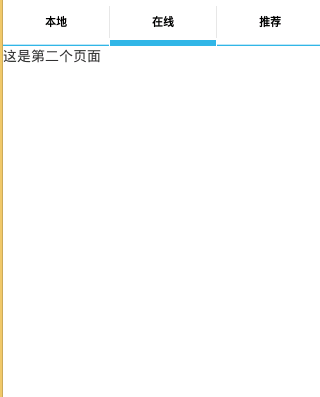
tabHost.setCurrentTab(1);//默认显示第二个
}
}这个是显示效果:
自定义标签页的实现:
在上面的代码实现时发现tabSpec.setIndicator(View view );里面的参数可以是一个view,也就是说可以自定义实现每一个选项的样式。
自定义tab.xml
<?xml version="1.0" encoding="utf-8"?>
<LinearLayout xmlns:android="http://schemas.android.com/apk/res/android"
    android:layout_width="match_parent"
    android:layout_height="match_parent"
    android:orientation="vertical" >

    <TextView
        android:id="@+id/name"
        android:layout_width="match_parent"
        android:layout_height="match_parent"
        android:background="@drawable/tab_bg"
        android:gravity="center" />

</LinearLayout>
tab_bg.xml:
<?xml version="1.0" encoding="utf-8"?>
<selector xmlns:android="http://schemas.android.com/apk/res/android">

    <item android:drawable="@drawable/bg_select" android:state_pressed="true"></item>
    <item android:drawable="@drawable/bg_select" android:state_selected="true"></item>
    <item android:drawable="@drawable/bg_normal"></item>

</selector>
在这里state_pressed:点击,state_selected:选中,他们用的是同一张图片,也就是说点击和选中时效果是一样的。没有状态的是默认显示时的情况。
修改后的代码:
        tabSpec=tabHost.newTabSpec("page1");
        tabSpec.setContent(R.id.page1);
       // tabSpec.setIndicator("本地");
        tabSpec.setIndicator( createView("本地"));
        tabHost.addTab(tabSpec);
private View createView(String name) {
// TODO Auto-generated method stub
View tabView=getLayoutInflater().inflate(R.layout.tab, null);
TextView tab=(TextView) tabView.findViewById(R.id.name);
tab.setText(name);
return tabView;
}


 795
795


 被折叠的 条评论
为什么被折叠?
被折叠的 条评论
为什么被折叠?
 到【灌水乐园】发言


