


这段时间看了一些关于瀑布流的文章。有些是使用UICollectionView实现的有些是使用UItableView实现的。两种方法都试验过,最后还是觉得使用UItableView实现的效果要好一些。
工程源码:点击打开链接 https://github.com/zhuming3834/UITableView-waterfall
下面的这两张图的对比就是说明。 左边是使用UItableView实现的效果图,右边是使用UICollectionView实现的效果图。


最主要的区别是图片之间的上下间距。
每张图片所在的数据模型中数据单元有:
数据已经说明了图片的尺寸信息,这里我们只需要根据需求做缩放即可,不需要再去获取图片的size信息了。
在使用三个tableView实现之前,当时就觉得三个tableView怎么样让它们一起滚动呢?
后来看了UItableView的的协议方法后,找了这么一个方法:
- (void)scrollViewDidScroll:(UIScrollView *)scrollView;主要使用了两个第三方库:AFNetworking和SDWebImage。
这里我是封装了一个下载类,声明了一个协议
下载类的方法:数据下载完成欧通过协议放回个另一方。由于有三个下载的链接,我就给每一个下载加了一个identity用于区分。
AFNetworkModel.m
/**
 *  AFNetwork类下载数据
 *
 *  @param URLString 下载地址的URLString
 */
- (void)downloadDataFromURLString:(NSString *)URLString{

	NSURL * url = [NSURL URLWithString:URLString];
#pragma mark - 监听网络状态
	AFHTTPRequestOperationManager * manage = [[AFHTTPRequestOperationManager alloc] initWithBaseURL:url];
	[manage.reachabilityManager setReachabilityStatusChangeBlock:^(AFNetworkReachabilityStatus status){
		if (status == AFNetworkReachabilityStatusUnknown || status == AFNetworkReachabilityStatusNotReachable) {

			UIAlertView * netStatusAl = [[UIAlertView alloc] initWithTitle:@"服务器连接失败" message:@"请检查网络连接" delegate:nil cancelButtonTitle:nil otherButtonTitles:@"确定", nil];
			[netStatusAl show];  //请检查网络连接
		}
	}];
	//开始监听
	[manage.reachabilityManager startMonitoring];

#pragma mark - AFHTTP异步下载后 解析Json数据  代理
	manage.responseSerializer = [AFHTTPResponseSerializer serializer];
	[manage GET:URLString parameters:nil success:^(AFHTTPRequestOperation *operation, id responseObject){
		//		NSLog(@"responseObject = %@",responseObject);
		[self.delegate getDownloadData:responseObject withAFNetworking:self];

	}failure:^(AFHTTPRequestOperation *operation, NSError *error){
		//		NSLog(@"error = %@",error);
		//1.服务器连接失败
		//2.断网
		UIAlertView * netStatusAl = [[UIAlertView alloc] initWithTitle:@"服务器连接失败" message:@"请检查网络连接" delegate:nil cancelButtonTitle:nil otherButtonTitles:@"确定", nil];
		[netStatusAl show];  //请检查网络连接
	}];
}
AFNetworkModel.h
/**
 *  声明一个协议
 */
@protocol AFNetworkDownloadDelegat <NSObject>

- (void)getDownloadData:(NSData *)downloadData withAFNetworking:(id)AFNetwork;

@end

@interface AFNetworkModel : NSObject

@property (nonatomic,copy)NSString * identity;

@property (nonatomic,strong)id<AFNetworkDownloadDelegat>delegate;

- (void)downloadDataFromURLString:(NSString *)URLString;

@end
还是看看主要的实现部分。
//
//  ViewController.m
//  UITableView-waterfall
//
//  Created by HGDQ on 15/10/7.
//  Copyright (c) 2015年 HGDQ. All rights reserved.
//

#import "ViewController.h"
#import "BaseModel.h"
#import "AFNetworkModel.h"
#import "MyTableViewCell.h"
#import "UIImageView+WebCache.h"

#define URLSTRING1   @"http://itugo.com/client/ios/api/getpiclist?_version=20140117.2.5.1&_req_from=oc&_source=ios&type=&_uuid=efe47094e00109db8c28cf0ae9b607b9&max=&tag=&_promotion_channel=App%20Store&_platform=iPhone&sort=new&from=tag&_uiid=2FF998CF0D2A40E7AF6F8FAFB8F57538&_net=wifi&min=0"

#define URLSTRING2   @"http://itugo.com/client/ios/api/getpiclist?_version=20140117.2.5.1&_req_from=oc&_source=ios&type=accessary&_uuid=efe47094e00109db8c28cf0ae9b607b9&max=&tag=&_promotion_channel=App%20Store&_platform=iPhone&sort=new&from=tag&_uiid=2FF998CF0D2A40E7AF6F8FAFB8F57538&_net=wifi&min=0"

#define URLSTRING3   @"http://itugo.com/client/ios/api/getpiclist?_version=20140117.2.5.1&_req_from=oc&_source=ios&type=shoes&_uuid=efe47094e00109db8c28cf0ae9b607b9&max=&tag=&_promotion_channel=App%20Store&_platform=iPhone&sort=new&from=tag&_uiid=2FF998CF0D2A40E7AF6F8FAFB8F57538&_net=wifi&min=0"

@interface ViewController ()<UITableViewDataSource,UITableViewDelegate,AFNetworkDownloadDelegat>

@property (nonatomic,strong)NSArray *URLArray;
@property (nonatomic,strong)NSArray *tableViewArr1;
@property (nonatomic,strong)NSArray *tableViewArr2;
@property (nonatomic,strong)NSArray *tableViewArr3;

@end

@implementation ViewController

- (void)viewDidLoad {
	[super viewDidLoad];

	self.view.backgroundColor = [UIColor grayColor];

	[self getURLArray];
	[self startDownload];

	[self setMainView];

	// Do any additional setup after loading the view, typically from a nib.
}
/**
 *  新建主界面的三个tableView
 */
- (void)setMainView{
	for (int i = 0; i < self.URLArray.count; i ++) {
		UITableView *tableView = [[UITableView alloc] init];
		tableView.frame = CGRectMake(5*(i + 1) + 100*i, 0, 100, 568);
		tableView.tag = 100 + i;
		tableView.delegate = self;
		tableView.dataSource = self;
		[self.view addSubview:tableView];

		tableView.bounces = NO;
		tableView.showsVerticalScrollIndicator = NO;

		[tableView registerNib:[UINib nibWithNibName:@"MyTableViewCell" bundle:nil] forCellReuseIdentifier:@"Cell"];
	}
}
/**
 *  设置每个tableView里面显示的cell的个数
 *
 *  @param tableView tableView本身
 *  @param section   第几个section
 *
 *  @return 需要设置的个数
 */
- (NSInteger)tableView:(UITableView *)tableView numberOfRowsInSection:(NSInteger)section{
	NSInteger tag = tableView.tag;
	if (tag == 100) {
		return self.tableViewArr1.count;
	}
	if (tag == 101) {
		return self.tableViewArr2.count;
	}
	if (tag == 102) {
		return self.tableViewArr3.count;
	}
	return 0;
}
/**
 *  设置cell的高度
 *
 *  @param tableView tableView本身
 *  @param indexPath cell的位置
 *
 *  @return 设置的高度
 */
- (CGFloat)tableView:(UITableView *)tableView heightForRowAtIndexPath:(NSIndexPath *)indexPath{
	NSInteger tag = tableView.tag;
	if (tag == 100) {
		BaseModel *model = (BaseModel *)self.tableViewArr1[indexPath.row];
		float height = model.height.floatValue;
		return height/2.0;
	}
	if (tag == 101) {
		BaseModel *model = (BaseModel *)self.tableViewArr2[indexPath.row];
		float height = model.height.floatValue;
		return height/2.0;
	}
	if (tag == 102) {
		BaseModel *model = (BaseModel *)self.tableViewArr3[indexPath.row];
		float height = model.height.floatValue;
		return height/2.0;
	}
	return 0;
}
/**
 *  tableView加载cell
 *
 *  @param tableView tableView 本身
 *  @param indexPath cell的位置
 *
 *  @return cell
 */
- (UITableViewCell *)tableView:(UITableView *)tableView cellForRowAtIndexPath:(NSIndexPath *)indexPath{
	NSInteger tag = tableView.tag;
	static NSString * identify = @"Cell";
	MyTableViewCell * cell = [tableView dequeueReusableCellWithIdentifier:identify];
	if (cell == nil) {
		cell = [[[NSBundle mainBundle] loadNibNamed:@"MyTableViewCell" owner:self options:nil] firstObject];
	}
	if (tag == 100) {
		BaseModel *model = (BaseModel *)self.tableViewArr1[indexPath.row];
		[cell.backImageView setImageWithURL:[NSURL URLWithString:model.pic_url_d]];
		return cell;
	}
	if (tag == 101) {
		BaseModel *model = (BaseModel *)self.tableViewArr2[indexPath.row];
		[cell.backImageView setImageWithURL:[NSURL URLWithString:model.pic_url_d]];
		return cell;
	}
	if (tag == 102) {
		BaseModel *model = (BaseModel *)self.tableViewArr3[indexPath.row];
		[cell.backImageView setImageWithURL:[NSURL URLWithString:model.pic_url_d]];
		return cell;
	}
	return nil;
}
/**
 *  tableView滚动的协议方法
 *
 *  @param scrollView scrollView
 */
- (void)scrollViewDidScroll:(UIScrollView *)scrollView{
	UITableView *tableView1 = (UITableView *)[self.view viewWithTag:100];
	UITableView *tableView2 = (UITableView *)[self.view viewWithTag:101];
	UITableView *tableView3 = (UITableView *)[self.view viewWithTag:102];

	if (scrollView == tableView1) {
		[tableView2 setContentOffset:tableView1.contentOffset];
		[tableView3 setContentOffset:tableView1.contentOffset];
	}
	if (scrollView == tableView2) {
		[tableView1 setContentOffset:tableView2.contentOffset];
		[tableView3 setContentOffset:tableView2.contentOffset];
	}
	if (scrollView == tableView3) {
		[tableView2 setContentOffset:tableView3.contentOffset];
		[tableView1 setContentOffset:tableView3.contentOffset];
	}
}
/**
 *  把下载链接存进数组
 */
- (void)getURLArray{
	self.URLArray = @[URLSTRING1,URLSTRING2,URLSTRING3];
}
/**
 *  开始下载数据
 */
- (void)startDownload{
	for (int i = 0; i < self.URLArray.count; i ++) {
		AFNetworkModel *model = [[AFNetworkModel alloc] init];
		model.identity = [NSString stringWithFormat:@"%d",i];
		model.delegate = self;
		[model downloadDataFromURLString:self.URLArray[i]];
	}
}
/**
 *  下载数据协议方法
 *
 *  @param downloadData 下载成功后返回的数据
 *  @param AFNetwork    AFNetworkModel本质
 */
- (void)getDownloadData:(NSData *)downloadData withAFNetworking:(id)AFNetwork{
	AFNetworkModel *model = (AFNetworkModel *)AFNetwork;
	//得到AFNetworkModel的identity
	NSString *identify = model.identity;
	//解析下载后的数据
	NSDictionary *dice = [NSJSONSerialization JSONObjectWithData:downloadData options:NSJSONReadingMutableContainers error:nil];
	if ([identify isEqualToString:@"0"]) {
		UITableView *tableView = (UITableView *)[self.view viewWithTag:100];
		BaseModel *dataModel = [[BaseModel alloc] init];
		self.tableViewArr1 = [dataModel setBaseModelWithDictionary:dice];
		[tableView reloadData];
	}
	if ([identify isEqualToString:@"1"]) {
		UITableView *tableView = (UITableView *)[self.view viewWithTag:101];
		BaseModel *dataModel = [[BaseModel alloc] init];
		self.tableViewArr2 = [dataModel setBaseModelWithDictionary:dice];
		[tableView reloadData];
	}
	if ([identify isEqualToString:@"2"]) {
		UITableView *tableView = (UITableView *)[self.view viewWithTag:102];
		BaseModel *dataModel = [[BaseModel alloc] init];
		self.tableViewArr3 = [dataModel setBaseModelWithDictionary:dice];
		[tableView reloadData];
	}
}
- (void)didReceiveMemoryWarning {
	[super didReceiveMemoryWarning];
	// Dispose of any resources that can be recreated.
}

@end
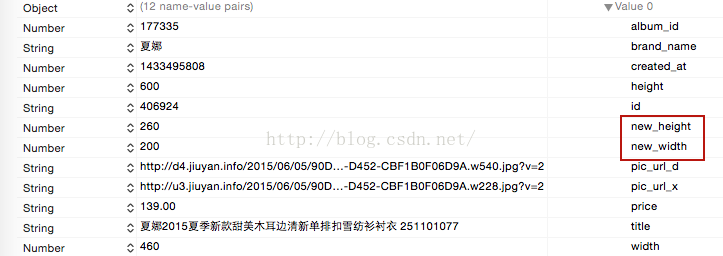
数据模型的封装部分可以由于上面JSON数据截图里面的有些字段有new_XX的以new开头的,在Xcode6.4里面是不合法的,所以我就重新取了名字,单个使用KVC。
BaseModel.h
#import <Foundation/Foundation.h>

@interface BaseModel : NSObject

@property (nonatomic,copy)NSString *brand_name;
@property (nonatomic,copy)NSNumber *height;
@property (nonatomic,copy)NSNumber *width;
@property (nonatomic,copy)NSString *pic_url_d;
@property (nonatomic,copy)NSString *pic_url_x;
@property (nonatomic,copy)NSString *price;
@property (nonatomic,copy)NSString *title;


- (NSArray *)setBaseModelWithDictionary:(NSDictionary *)dice;

@end
BaseModel.m
#import "BaseModel.h"

@implementation BaseModel

/**
 *  把封装的数据模型存入数组
 *
 *  @param dice 需要分装的字典
 *
 *  @return 模型数组
 */
- (NSArray *)setBaseModelWithDictionary:(NSDictionary *)dice{
	NSMutableArray *baseModelArr = [[NSMutableArray alloc] init];
	NSArray *dataArr = dice[@"data"][@"data"];
	for (NSDictionary *dic in dataArr) {
		BaseModel *model = [BaseModel setModelWithDictionary:dic];
		[baseModelArr addObject:model];
	}
	return baseModelArr;
}
/**
 *  数据模型的封装
 *
 *  @param dice 需要封装的字典数据
 *
 *  @return 返回一个封装好的数据模型
 */
+ (BaseModel *)setModelWithDictionary:(NSDictionary *)dice{
	BaseModel *model = [[BaseModel alloc] init];
	//由于数据存在以new开头的字段,这里重新声明了属性 选取关键数据单个封装
	[model setValue:dice[@"brand_name"] forKey:@"brand_name"];
	[model setValue:dice[@"new_height"] forKey:@"height"];
	[model setValue:dice[@"new_width"] forKey:@"width"];
	[model setValue:dice[@"pic_url_d"] forKey:@"pic_url_d"];
	[model setValue:dice[@"pic_url_x"] forKey:@"pic_url_x"];
	[model setValue:dice[@"price"] forKey:@"price"];
	[model setValue:dice[@"title"] forKey:@"title"];
	return model;
}

@end做完后觉得瀑布流不难,但是还有许多需要关注的细节部分可能是比较难的,只是我没发现。还需要仔细研究瀑布流。


 1156
1156


 被折叠的 条评论
为什么被折叠?
被折叠的 条评论
为什么被折叠?
 到【灌水乐园】发言


