


最近做一个项目,需要使用到图片裁剪功能。之前 没使用过这个功能,经历了百度-测试-看官方文档。总算对这个东西有些印象了。为什么要看官方文档?如果只是拿过来就使用,不知道官方说的一些细节和流程,感觉也不会记得太清楚,以后再次使用需要注意的一些问题也不会知道。不废话了,上代码。
首先新建一个工具类ToolUnit头文件里面的代码
#import <Foundation/Foundation.h>
#import <UIKit/UIKit.h>


@interface ToolUnit : NSObject

/**
 *  图片裁剪
 *
 *  @param superImage 需要被裁剪的图片
 *  @param subRect    需要裁剪的区域
 *
 *  @return 裁剪后的图片
 */
+ (UIImage *)cutSuperImage:(UIImage *)superImage subImageRect:(CGRect)subRect;

/**
 *  图片压缩
 *
 *  @param superImage 需要被压缩的图片
 *  @param percent    压缩系数 0~1
 *
 *  @return 压缩后的图片
 */
+ (UIImage *)compressImage:(UIImage *)superImage percent:(CGFloat)percent;

/**
 *  截图
 *
 *  @param view 需要截取的视图
 *
 *  @return 目标视图
 */
+ (UIImage *)screenShotForView:(UIView *)view;

/**
 *  根据文件名获取文件路径
 *
 *  @param fileName 文件名
 *
 *  @return 返回文件路径
 */
+ (NSString *)getFilePath:(NSString *)fileName fileType:(NSString *)type;

/**
 *  图片切割
 *
 *  @param image   需要切割的图片
 *  @param x       切割的份数
 *  @param quality 切割的质量
 *
 *  @return 切割后小图片的文件路径
 */
+ (NSDictionary *)separateImage:(UIImage *)image separate:(NSInteger)x cacheQuality:(CGFloat)quality;#import "ToolUnit.h"
#import <Foundation/Foundation.h>
#import <QuartzCore/QuartzCore.h>
@implementation ToolUnit
/**
* 图片裁剪
*
* @param superImage 需要被裁剪的图片
* @param subRect 需要裁剪的区域
*
* @return 裁剪后的图片
*/
+ (UIImage *)cutSuperImage:(UIImage *)superImage subImageRect:(CGRect)subRect{
CGContextRef context = UIGraphicsGetCurrentContext();
UIGraphicsBeginImageContext(CGSizeMake(subRect.size.width, subRect.size.height));
CGImageRef imageRef = superImage.CGImage;
CGImageRef subImage = CGImageCreateWithImageInRect(imageRef, subRect);
CGContextDrawImage(context, subRect, subImage);
UIImage *retImage = [UIImage imageWithCGImage:subImage];
UIGraphicsEndImageContext();
return retImage;
}
/**
* 图片压缩
*
* @param superImage 需要被压缩的图片
* @param percent 压缩系数 0~1
*
* @return 压缩后的图片
*/
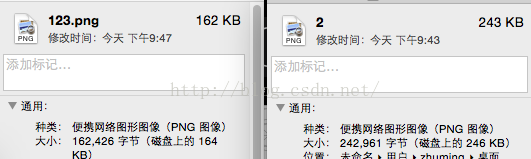
+ (UIImage *)compressImage:(UIImage *)superImage percent:(CGFloat)percent{
NSData *superData = UIImageJPEGRepresentation(superImage, percent);
UIImage *comImage = [UIImage imageWithData:superData];
[UIImagePNGRepresentation(comImage) writeToFile:[self getFilePath:@"123" fileType:@"png"] atomically:YES];
return comImage;
}
/**
* 截图
*
* @param view 需要截取的视图
*
* @return 目标视图
*/
+ (UIImage *)screenShotForView:(UIView *)view
{
//[UIScreen mainScreen].scale,保持截屏的图片精度
UIGraphicsBeginImageContextWithOptions(view.bounds.size, YES, [UIScreen mainScreen].scale);
[view.layer renderInContext:UIGraphicsGetCurrentContext()];
UIImage *img = UIGraphicsGetImageFromCurrentImageContext();
UIGraphicsEndImageContext();
return img;
}
/**
* 根据文件名获取文件路径
*
* @param fileName 文件名
*
* @return 返回文件路径
*/
+ (NSString *)getFilePath:(NSString *)fileName fileType:(NSString *)type{
NSArray *paths = NSSearchPathForDirectoriesInDomains(NSDocumentDirectory, NSUserDomainMask, YES);
NSString *documetsDirectory = [paths objectAtIndex:0];
NSString *path = [documetsDirectory stringByAppendingPathComponent:[NSString stringWithFormat:@"%@.%@",fileName,type]];
NSLog(@"path = %@",path);
return path;
}
/**
* 图片切割
*
* @param image 需要切割的图片
* @param x 切割的份数
* @param quality 切割的质量
*
* @return 切割后小图片的文件路径
*/
+ (NSDictionary *)separateImage:(UIImage *)image separate:(NSInteger)x cacheQuality:(CGFloat)quality
{
// 错误处理
if (x<1) {
NSLog(@"illegal x!");
return nil;
}
if (![image isKindOfClass:[UIImage class]]) {
NSLog(@"illegal image format!");
return nil;
}
CGFloat xstep = image.size.width*1.0;
CGFloat ystep = image.size.height*1.0/x;
NSMutableDictionary *mutableDictionary=[[NSMutableDictionary alloc]initWithCapacity:1];
NSString *prefixName = @"win";
// 把图片裁剪为小图片存进沙盒
for (int i=0; i<x; i++)
{
for (int j=0; j<1; j++)
{
CGRect rect=CGRectMake(xstep*j, ystep*i, xstep, ystep);
CGImageRef imageRef=CGImageCreateWithImageInRect([image CGImage],rect);
UIImage* elementImage=[UIImage imageWithCGImage:imageRef];
UIImageView *imageView=[[UIImageView alloc] initWithImage:elementImage];
imageView.frame=rect;
NSString *imageString=[NSString stringWithFormat:@"%@_%d_%d.jpg",prefixName,i,j];
// 切割后的图片保存进字典 图片 图片名
[mutableDictionary setObject:imageView forKey:imageString];
if (quality<=0)
{
continue;
}
quality=(quality>1)?1:quality;
// 切割后的图片写进文件
NSString *imagePath=[NSHomeDirectory() stringByAppendingPathComponent:imageString];
// 图片压缩 quality是压缩系数 0~1 之间
NSData *imageData=UIImageJPEGRepresentation(elementImage, quality);
// 压缩后的图片 写进文件
[imageData writeToFile:imagePath atomically:NO];
}
}
NSDictionary *dictionary = mutableDictionary;
return dictionary;
}#import "ViewController.h"
#import "ToolUnit.h"
@interface ViewController ()<BlindDelegate>
@property (nonatomic,strong)UIImage *image1;
@property (nonatomic,strong)UIImage *image2;
@end
@implementation ViewController
- (void)viewDidLoad {
[super viewDidLoad];
self.image1 = [UIImage imageNamed:@"1"];
self.image2 = [UIImage imageNamed:@"2"];
self.view.backgroundColor = [UIColor orangeColor];
[ToolUnit compressImage:self.image2 percent:0.2];
// Do any additional setup after loading the view, typically from a nib.
}
这一篇先不妨代码下载地址,下一篇关于百叶窗的再放全部代码的下载地址。


 1262
1262


 被折叠的 条评论
为什么被折叠?
被折叠的 条评论
为什么被折叠?
 到【灌水乐园】发言


