


一、简介:
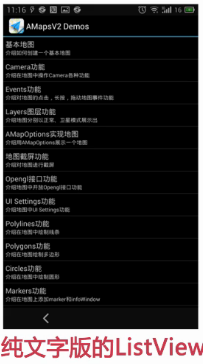
1.每个ListView都包含很多个列表项:

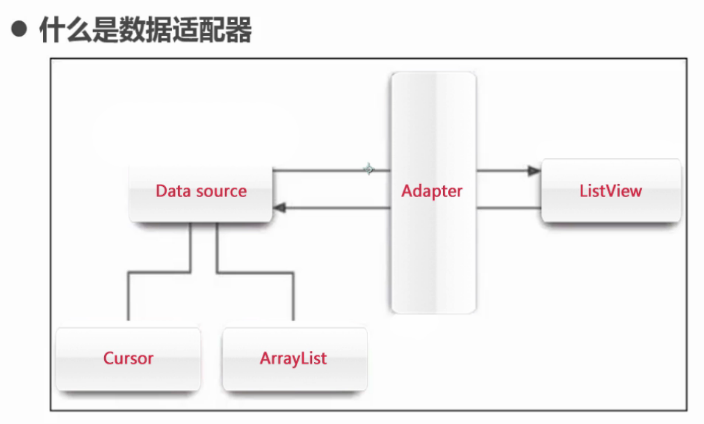
2. 数据适配器:
例如电视台是数据源,通过数据适配器显示在电视上。
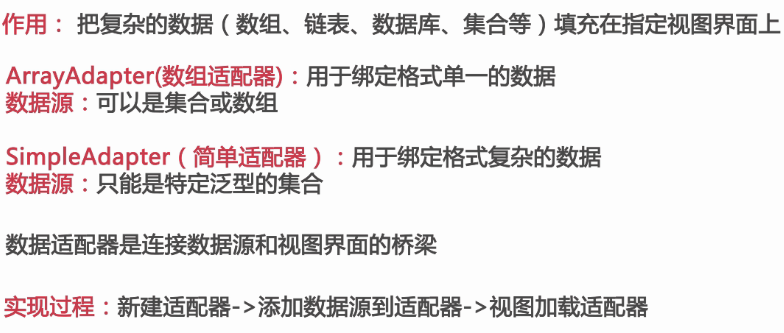
3. 典型应用案例:

写在前面的话,对于每一个Adapter,它们都是要接收数据源List和每个itme的布局文件的,然后在Adapter中提供各种方法,比如说getCount、getItem、getView等等,其中的getView是把List中的某一项根据布局文件加载为一个View并返回给ListView控件的,这下懂了其中的原理了吗?
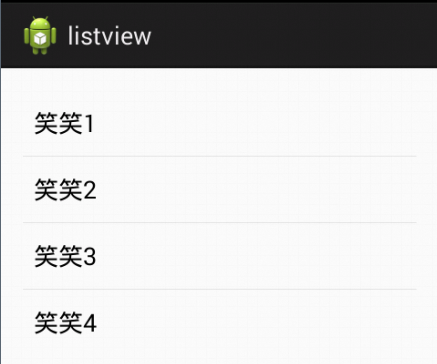
4. 使用ArrayAdapter。
布局中只需要加入一个ListView控件:
<ListView
        android:id="@+id/listView"
        android:layout_width="match_parent"
        android:layout_height="wrap_content"
        android:layout_weight="1" >
    </ListView>
MainActivity.java源代码:
package com.example.listview;

import android.os.Bundle;
import android.app.Activity;
import android.widget.ArrayAdapter;
import android.widget.ListView;
import android.widget.SimpleAdapter;

public class MainActivity extends Activity {

	private ListView listView;
	private ArrayAdapter<String> arr_adapter;
	private SimpleAdapter simp_adapter;

    @Override
    protected void onCreate(Bundle savedInstanceState) {
        super.onCreate(savedInstanceState);
        setContentView(R.layout.activity_main);

        listView = (ListView) findViewById(R.id.listView);
        /*
         * 1. 新建一个适配器。
         * 		采用数组的模式,第一个参数context是上下文,第二个参数resource当前ListView中加载的每一个列表项所对应的布局文件,这里我们采用Android自带的。
         *  	第三个参数objects是数据源。
         *  2. 适配器加载数据源。
         * */
        String[] arr_data = {"笑笑1","笑笑2","笑笑3","笑笑4"};
        arr_adapter = new ArrayAdapter<String>(this, android.R.layout.simple_list_item_1, arr_data);

        /*
         * 3. 视图(ListView)加载适配器。
         * */
        listView.setAdapter(arr_adapter);
    }

}
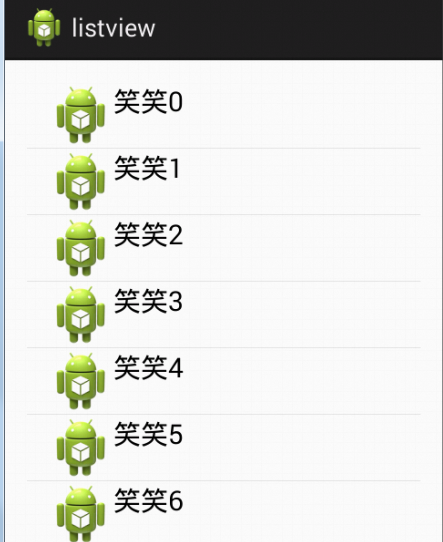
5. 使用SimpleAdapter
<?xml version="1.0" encoding="utf-8"?>
<LinearLayout xmlns:android="http://schemas.android.com/apk/res/android"
    android:layout_width="match_parent"
    android:layout_height="match_parent"
    android:orientation="horizontal" >

    <!-- 我们在这个item的布局文件中主要是为了设计ListView中每一项的布局
    	这里要设置的是每一项包含一个图片和文字。
     -->
     <ImageView
         android:id="@+id/pic"
         android:layout_marginLeft="15dp"
         android:layout_width="wrap_content"
         android:layout_height="wrap_content"
         android:src="@drawable/ic_launcher"
         />

     <TextView
         android:id="@+id/text"
         android:layout_width="wrap_content"
         android:layout_height="wrap_content"
         android:textSize="20sp"
         android:textColor="#000000"
         android:text="demo"
         />

</LinearLayout>在软件布局中,也仅仅是放置了一个ListView控件:
<ListView
        android:id="@+id/listView"
        android:layout_width="match_parent"
        android:layout_height="wrap_content"
        android:layout_weight="1" >
</ListView>设置MainActivity文件:
package com.example.listview;
import java.util.ArrayList;
import java.util.HashMap;
import java.util.List;
import java.util.Map;
import android.os.Bundle;
import android.app.Activity;
import android.widget.ArrayAdapter;
import android.widget.ListView;
import android.widget.SimpleAdapter;
public class MainActivity extends Activity {
private ListView listView;
private ArrayAdapter<String> arr_adapter;
private SimpleAdapter simp_adapter;
// 有个问题就是,不太会用Map,有点没看懂,键值对,那么前面是键,后面是值
private List<Map<String,Object>> datalist;
@Override
protected void onCreate(Bundle savedInstanceState) {
super.onCreate(savedInstanceState);
setContentView(R.layout.activity_main);
listView = (ListView) findViewById(R.id.listView);
/*
* 1. 新建一个适配器。
* 第一个参数 context:上下文
* 第二个参数data:List<? extends Map<String, ?>> data
* 是一个特定泛型的集合,数据源。一个Map所组成的List集合。
* 每一个Map都会去对应ListView列表中的一行。每一个Map(键-值对)中的键必须去包含所有在from中所制定的键。
* 第三个参数resource:列表项的布局文件ID。这个布局文件可以用Android自带的,也可以自己新建一个,这里我们新建一个布局文件叫item.xml
* 第四个参数from:Map中的键名。这里的例子中对应item中的两个控件起了两个名字。这里指的是所有可能的键,
* 第五个参数to:绑定数据视图中的ID,与from对应,这个例子中的to指的是用户自定义的item中的图片和文字控件的ID。
* 2. 适配器加载数据源。
* */
datalist = new ArrayList<Map<String,Object>>();// 为什么是这样分配的?
/*
* 我再来解释一下这个第四五的参数
* 第四个参数是指在每一条item中包含的控件的键名
* 第五个参数是指在每一条item中对应的item布局的
* */
simp_adapter = new SimpleAdapter(this, getData(),R.layout.item , new String[]{"PIC","TEXT"}, new int[]{R.id.pic,R.id.text});
/*
* 3. 视图(ListView)加载适配器。
* */
listView.setAdapter(simp_adapter);
}
private List<Map<String,Object>> getData(){
for(int i=0; i<20; i++){
Map<String,Object> map = new HashMap<String, Object>();
map.put("PIC", R.drawable.ic_launcher); // 前面是键,后面是值。
map.put("TEXT", "笑笑"+i); // 前面是键,后面是值。
datalist.add(map);
}
return datalist;
}
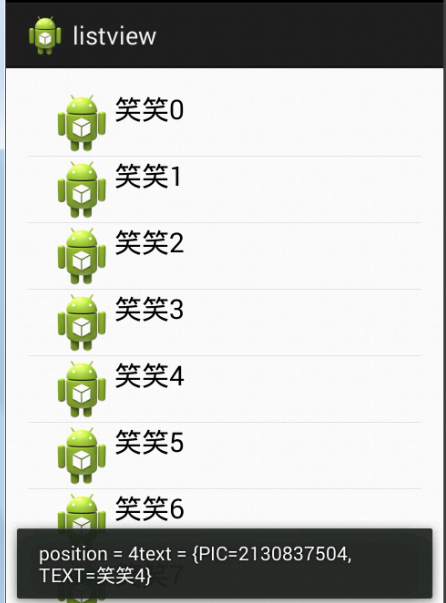
}第四步:效果图:
6. 监听器:
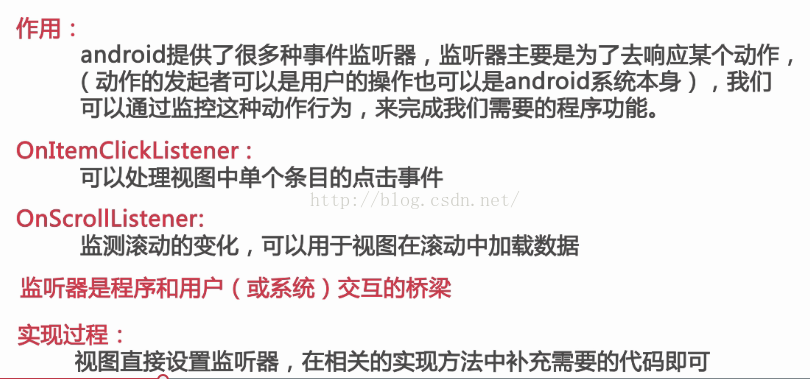
7. 监听ListView列表项点击事件:
用接口的方式来实现。
package com.example.listview;

import java.util.ArrayList;
import java.util.HashMap;
import java.util.List;
import java.util.Map;

import android.os.Bundle;
import android.app.Activity;
import android.view.View;
import android.widget.AbsListView;
import android.widget.AbsListView.OnScrollListener;
import android.widget.AdapterView;
import android.widget.AdapterView.OnItemClickListener;
import android.widget.ArrayAdapter;
import android.widget.ListView;
import android.widget.SimpleAdapter;
import android.widget.Toast;

public class MainActivity extends Activity implements OnItemClickListener,OnScrollListener{

	private ListView listView;
	private ArrayAdapter<String> arr_adapter;
	private SimpleAdapter simp_adapter;

	private List<Map<String,Object>> datalist;

    @Override
    protected void onCreate(Bundle savedInstanceState) {
        super.onCreate(savedInstanceState);
        setContentView(R.layout.activity_main);

        listView = (ListView) findViewById(R.id.listView);
        datalist = new ArrayList<Map<String,Object>>();
        simp_adapter = new SimpleAdapter(this, getData(),R.layout.item , new String[]{"PIC","TEXT"}, new int[]{R.id.pic,R.id.text});

        listView.setAdapter(simp_adapter);
        listView.setOnItemClickListener(this);

    }

    private List<Map<String,Object>> getData(){
    	for(int i=0; i<20; i++){
    		Map<String,Object> map = new HashMap<String, Object>();
    		map.put("PIC", R.drawable.ic_launcher);
    		map.put("TEXT", "笑笑"+i);
    		datalist.add(map);
    	}
    	return datalist;
    }

	@Override
	public void onItemClick(AdapterView<?> arg0, View arg1, int position, long arg3) {
		// position传递当前点击列表项目所传过来的对应位置。
		String text = listView.getItemAtPosition(position)+" ";
		// 第三个参数duration表示的是显示时长,
		Toast.makeText(this, "position = "+ position+"text = "+text, Toast.LENGTH_SHORT).show();
	}

}
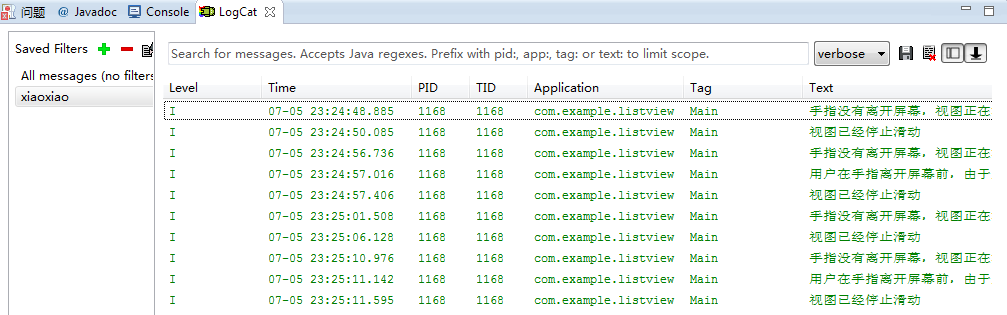
8. 监听ListView滚动事件:
在上面的基础上,这样实现onScrollStateChanged函数:
mListView.setOnTouchListener(new View.OnTouchListener(){
<span style="white-space:pre">	</span>@Override
<span style="white-space:pre">	</span>public void onScrollStateChanged(AbsListView arg0, int scrollState) {
<span style="white-space:pre">		</span>// TODO Auto-generated method stub
<span style="white-space:pre">		</span>switch(scrollState){
<span style="white-space:pre">		</span>case SCROLL_STATE_FLING:
<span style="white-space:pre">			</span>Log.i("Main","用户在手指离开屏幕前,由于用力的滑了以下,视图可以依靠惯性继续滑");
<span style="white-space:pre">			</span>break;
<span style="white-space:pre">		</span>case SCROLL_STATE_IDLE:
<span style="white-space:pre">			</span>Log.i("Main", "视图已经停止滑动");
<span style="white-space:pre">			</span>break;
<span style="white-space:pre">		</span>case SCROLL_STATE_TOUCH_SCROLL:
<span style="white-space:pre">			</span>Log.i("Main", "手指没有离开屏幕,视图正在滑动");
<span style="white-space:pre">			</span>break;
<span style="white-space:pre">		</span>default:
<span style="white-space:pre">			</span>break;
<span style="white-space:pre">		</span>}
<span style="white-space:pre">	</span>}
<span style="white-space:pre">	</span>
<span style="white-space:pre">	</span>@Override
<span style="white-space:pre">	</span>public void onScroll(AbsListView view,
<span style="white-space:pre">			</span>int firstVisibleItem,//当前能看见的第一个Item的ID,从0开始。
<span style="white-space:pre">			</span>int visibleItemCount,//能看到的Item总数,包括没有显示完整的item。
<span style="white-space:pre">			</span>int totalItmeCount){//整个ListView的Item总数
<span style="white-space:pre">		</span>// 滚动时一直调用
<span style="white-space:pre">		</span>Log.d("Test","onScroll");
<span style="white-space:pre">	</span>}
});
一些小判断:
if(firstVisibleItem+visibleItemCount == totalItemCount && totalItemCount>0){
	// 滚动到最后一行
}

if(firstVisibleItem > lastVisibleItemPosition){
	// 上滑
}else if(firstVisibleItem < lastVisibleItemPosition){
	// 下滑
}
lastVisibleItemPosition = firstVisibleItem;//记录上一次的位置。
还有一些封装的:
// 获取可视区域内最后一个Item的id
mListView.getLastVisiblePosition();
// 获取可视区域内第一个Item的id
mListView.getFirstVisiblePosition();
效果图:
9、OnTouchListener:
根据坐标判断用户滑动的方向,并在不同的事件中进行相应的逻辑处理:
mListView.setOnTouchListener(new View.OnTouchListener(){
	@Override
	public boolean onTouch(View v, MotionEvent event){
		switch(event.getAction()){
		case MotionEvent.ACTION_DOWN:
			// 触摸时操作
			break;
		case MotionEvent.ACTION_MOVE:
			// 移动时操作
			break;
		case MotionEvent.ACTION_UP:
			// 离开时操作
			break;
		}
		return false;
	}
});
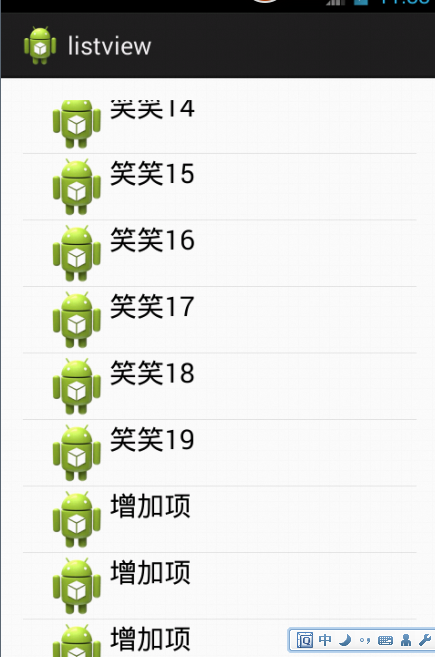
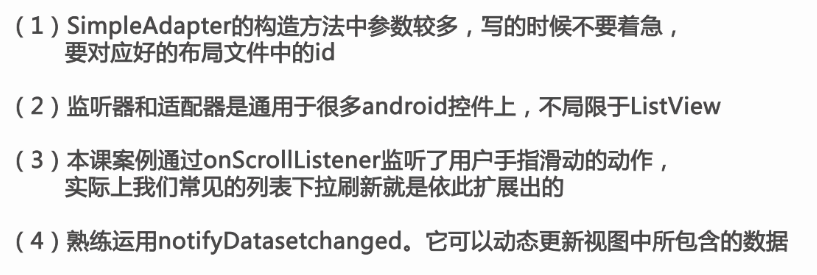
9. 一个小小案例:
这个案例是指当用户将ListView拉到最低端时,列表自动更新新的项出现,我们后台是给数据源增加新的项,并刷新数据源:
@Override
	public void onScrollStateChanged(AbsListView arg0, int scrollState) {
		// TODO Auto-generated method stub
		switch(scrollState){
		case SCROLL_STATE_FLING:
			Log.i("Main","用户在手指离开屏幕前,由于用力的滑了以下,视图可以依靠惯性继续滑");
			Map<String, Object>map = new HashMap<String, Object>();
			map.put("PIC",R.drawable.ic_launcher);
			map.put("TEXT", "增加项");
			datalist.add(map);
			simp_adapter.notifyDataSetChanged();	// 数据源发生变化,就要用这个语句刷新一下,不然程序会崩溃的。
			break;
		case SCROLL_STATE_IDLE:
			Log.i("Main", "视图已经停止滑动");
			break;
		case SCROLL_STATE_TOUCH_SCROLL:
			Log.i("Main", "手指没有离开屏幕,视图正在滑动");
			break;
		default:
			break;
		}
	}
效果图:
10. 注意点:
五、ListView缓存机制
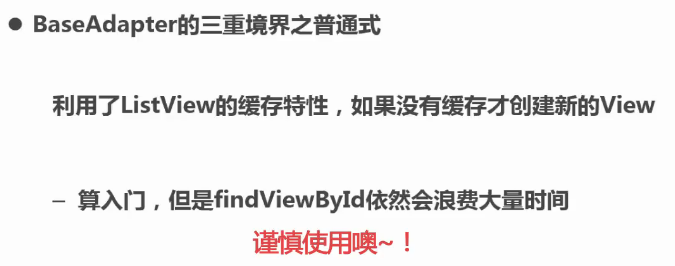
1. 什么是BaseAdapter:最常用的数据适配器,降低耦合性,容易扩展。
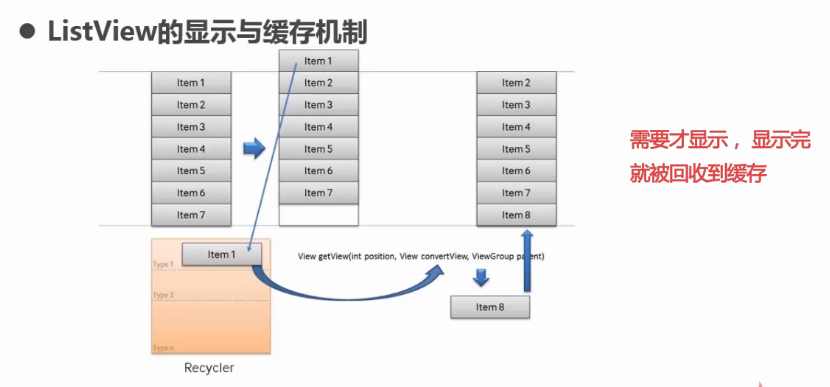
2. ListView的显示与缓存机制:
六、BaseAdapter的文艺使用方法
- package com.example.listviewdemo;
- import java.util.List;
- import com.example.listviewdemo.ItemBean;
- import android.R;
- import android.content.Context;
- import android.view.LayoutInflater;
- import android.view.View;
- import android.view.ViewGroup;
- import android.widget.BaseAdapter;
- import android.widget.ImageView;
- import android.widget.TextView;
- public class MyAdapter extends BaseAdapter{
- private List<ItemBean> mList;
- private LayoutInflater mInflater;
- // 通过构造方法将数据源与适配器进行关联:
- public MyAdapter(List<ItemBean> list,Context context){
- mList = list;
- // context要使用当前的Adapter的界面对象
- // mInflater:布局装载器对象。
- mInflater = LayoutInflater.from(context);
- }
- @Override
- public int getCount() {
- // TODO Auto-generated method stub
- return mList.size();
- }
- @Override
- public Object getItem(int position) {
- // TODO Auto-generated method stub
- return mList.get(position);
- }
- @Override
- public long getItemId(int position) {
- // TODO Auto-generated method stub
- return position;
- }
- /*
- * 返回每一项的显示内容:
- * */
- @Override
- public View getView(int position, View convertView, ViewGroup parent) {
- // TODO Auto-generated method stub
- /* 逗比式
- // 第一个参数是需要装载到item中的布局文件,第二个通常写null
- View view = mInflater.inflate(R.layout.item, null);
- ImageView imageView = (ImageView)view.findViewById(R.id.iv_image);
- TextView title = (TextView)view.findViewById(R.id.tv_title);
- TextView content = (TextView)view.findViewById(R.id.tv_content);
- ItemBean bean = mList.get(position);
- imageView.setImageResource(bean.ItemImageResid);
- title.setText(bean.ItemTitle);
- content.setText(bean.ItemContent);
- return view;
- */
- /*
- * 普通式与逗比式差别并不是很大,只是对convertView的处理不同,
- * 但正是这样的处理,我们充分利用了ListView的缓存机制,
- * 避免重复的创建convertView对象。
- * 因为我们将一个布局通过inflate转化为一个view时是非常耗资源的。
- * 通过这样一个简单的判断,我们就可以避免创建大量的convertView对象。
- * 从而对getView方法进行一个很好的优化。
- * */
- /*
- if(convertView == null){
- convertView = mInflater.inflate(R.layout.item, null);
- }
- ImageView imageView = (ImageView)convertView.findViewById(R.id.iv_image);
- TextView title = (TextView)convertView.findViewById(R.id.tv_title);
- TextView content = (TextView)convertView.findViewById(R.id.tv_content);
- ItemBean bean = mList.get(position);
- imageView.setImageResource(bean.ItemImageResid);
- title.setText(bean.ItemTitle);
- content.setText(bean.ItemContent);
- return convertView;
- */
- ViewHolder viewHolder;
- if(convertView == null){
- viewHolder = new ViewHolder();
- convertView = mInflater.inflate(R.layout.item, null);
- viewHolder.imageView = (ImageView)convertView.findViewById(R.id.iv_image);
- viewHolder.title = (TextView)convertView.findViewById(R.id.tv_title);
- viewHolder.content = (TextView) convertView.findViewById(R.id.tv_content);
- // 建立convertView与viewHolder之间的关系: 把那个viewHolder保存起来,日后再用
- convertView.setTag(viewHolder);
- }else{
- viewHolder = (ViewHolder) convertView.getTag();
- }
- ItemBean bean = mList.get(position);
- viewHolder.imageView.setImageResource(bean.ItemImageResid);
- viewHolder.title.setText(bean.ItemTitle);
- viewHolder.content.setText(bean.ItemContent);
- return convertView;
- }
- /*
- * 定义内部类ViewHolder
- * */
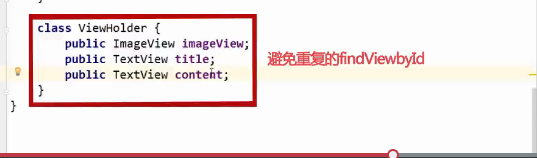
- class ViewHolder{
- public ImageView imageView;
- public TextView title;
- public TextView content;
- }
- }
七、关于ListView的一些使用小技巧
1、设置项目间分割线:
        android:divider="@android:color/darker_gray"	// 分割线背景色,灰色,也可以是图片资源
        android:dividerHeight="10dp" 			// 分割线高度
        android:divider="@null"				// 分割线背景色也可以设置为透明,也就是取消分割线的显示。
2、隐藏ListView的滚动条:
android:scrollbars="none" // 隐藏滚动条3、取消ListView的Item点击效果:
        android:listSelector="#00000000"	// 透明色
        android:listSelector="@android:color/transparent" // 透明色
4、设置ListView需要显示在第几项:
// 瞬间移动
listView.setSelection(N);

// 平滑移动
mListView.smoothScrollBy(distance,duration);
mListView.smoothScrollByOffset(offset);
mListView.smoothScrollToPositon(index);
5、动态修改ListView:
mData.add("new");
mAdapter.notifyDataSetChanged();
6、遍历ListView中的所有Item:
for(int i=0; i<mListView.getChildCount(); i++){
	View view = mListView.getChildAt(i);
}
7、处理空ListView:
就是在当前布局文件中通过FrameLayout给ListView后面再添加一个控件,这个控件可以是一个ImageView,然后用来显示一张图片什么的,最后在MainActivity中进行绑定。
listView.setEmptyView(findViewById(R.id.empty_view));八、ListView常用扩展
1、具有弹性的ListView:
貌似方法很多,作者介绍了一种很简单的控制滑动到边缘的方法,如下:
其中的重点在 mMaxOverDistance 上,这个值是用户自己定义的啦。
完整的弹性ListView如下:
在上面的initView中,为了能够满足多分辨率的需求,通过屏幕的density来计算具体值,让不同分辨率的弹性距离基本一致。
2 .自定显示、隐藏布局的ListView
就是通过监听ListView的onTouchListener事件,然后判断当ListView在滑动时,来用动画来控制Toolbar的出现和消失:
/**
 * Created by acer on 2015/10/30.
 */
public class MyActivity extends Activity {
	private Toolbar mToolbar;
	private ListView mListView;
	private String[] mStr = new String[20];
	private int mTouchSlop;
	private float mFirstY;
	private float mCurrentY;
	private int direction;
	private ObjectAnimator mAnimator;
	private boolean mShow = true;

	@Override
	protected void onCreate(Bundle savedInstanceState) {
		super.onCreate(savedInstanceState);
		setContentView(R.layout.scroll_hide);
		mListView = (ListView) findViewById(R.id.listview);

		// 首先需要给ListView增加一个HeaderView,避免第一个Item被Toolbar遮挡:
		View header = new View(this);
		header.setLayoutParams(new AbsListView.LayoutParams(
				ViewGroup.LayoutParams.MATCH_PARENT, // 宽 充满屏幕
				(int) getResources().getDimension( // 高 获取系统Actionbar的高度。
						R.dimen.abc_action_bar_default_height_material)));
		mListView.addHeaderView(header);

		// 获取系统认为的最少滑动距离:
		mTouchSlop = ViewConfiguration.get(this).getScaledTouchSlop();

		// 逐渐用Toolbar来取代ActionBar了,但是在使用的时候一定要注意使用的Theme要NoActionBar的,不然引起冲突。
		mToolbar = (Toolbar) findViewById(R.id.toolbar);
		// 设置数据源:
		for (int i = 0; i < mStr.length; i++) {
			mStr[i] = "item" + i;
		}
		mListView.setAdapter(new ArrayAdapter<String>(MyActivity.this,
				android.R.layout.simple_expandable_list_item_1, mStr));
		mListView.setOnTouchListener(myTouchListener);
	}

	View.OnTouchListener myTouchListener = new View.OnTouchListener() {
		@Override
		public boolean onTouch(View v, MotionEvent event) {
			switch (event.getAction()) {
			case MotionEvent.ACTION_DOWN:
				mFirstY = event.getY();
				break;
			case MotionEvent.ACTION_MOVE:
				mCurrentY = event.getY();
				Log.e("mess", "-----currentY=" + mCurrentY + ",firstY="
						+ mFirstY + ",======" + (mCurrentY - mFirstY));
				if (mCurrentY - mFirstY > mTouchSlop) {
					direction = 0;// down;
				} else if (mFirstY - mCurrentY > mTouchSlop) {
					direction = 1;// up
				}
				if (direction == 1) {
					if (mShow) {
						toolbarAnim(1);// hide
						mShow = !mShow;
					}
				} else if (direction == 0) {
					if (!mShow) {
						toolbarAnim(0);// show
						mShow = !mShow;
					}
				}
				break;
			case MotionEvent.ACTION_UP:
				break;
			default:
				break;
			}
			return false;
		}
	};

	private void toolbarAnim(int flag) {
		if (mAnimator != null && mAnimator.isRunning()) {
			mAnimator.cancel();
		}
		// mToolbar.getTranslationY()获取View的绝对位置,
		Log.e("mess", "transtionY==============" + mToolbar.getTranslationY()
				+ ",height=========" + mToolbar.getHeight());
		if (flag == 0) {// show toolbar
						// down,从mToolbar.getTranslationY()位置,移动到当前位置 y ,
			mAnimator = ObjectAnimator.ofFloat(mToolbar, "translationY",
					mToolbar.getTranslationY(), 0);
		} else {// hide toolbar up,从当前位置,移动到mToolbar.getTranslationY()位置 y
			mAnimator = ObjectAnimator.ofFloat(mToolbar, "translationY",
					mToolbar.getTranslationY(), -mToolbar.getHeight());
		}
		mAnimator.start();
	}

}
3、聊天ListView:
聊天时的ListView它和平时最大的不同在于它拥有两个不同的布局——收到布局和发送布局。
在定义BaseAdapter时,需要去重写它的getVIew方法,那么只需要在获取布局的时候,判断一下该获取哪一种布局就可以了。
在ListView中它提供两个方法,需要重写:
/***
 * 返回第position个Item是何种类型:
 */
@Override
public int getItemViewType(int position) {
	return type;
}

/**
 * 返回不同布局的总数:
 */
@Override
public int getViewTypeCount() {
	return number;
}
下面举个例子吧:主要是在getView函数中进行判断。
package defaultPackage;

import java.util.List;

import com.mtest.test.R;

import android.content.Context;
import android.view.LayoutInflater;
import android.view.View;
import android.view.ViewGroup;
import android.widget.BaseAdapter;
import android.widget.ImageView;
import android.widget.TextView;

public class ChatItemListViewAdapter extends BaseAdapter {

	private List<ChatTiemListViewBean> mData;
	private LayoutInflater mInflater;

	public ChatItemListViewAdapter(Context context,
			List<ChatTiemListViewBean> data) {
		this.mData = data;
		mInflater = LayoutInflater.from(context);
	}

	@Override
	public int getCount() {
		// TODO Auto-generated method stub
		return mData.size();
	}

	@Override
	public Object getItem(int position) {
		// TODO Auto-generated method stub
		return mData.get(position);
	}

	@Override
	public long getItemId(int position) {
		// TODO Auto-generated method stub
		return position;
	}

	/***
	 * 这两个方法是我们平时不会用到的 返回第position个Item是何种类型:
	 */
	@Override
	public int getItemViewType(int position) {
		ChatTiemListViewBean bean = mData.get(position);
		return bean.getType();
	}

	/**
	 * 返回不同布局的总数:
	 */
	@Override
	public int getViewTypeCount() {
		return 2;
	}

	@Override
	public View getView(int position, View convertView, ViewGroup parent) {
		ViewHolder holder;
		if (convertView == null) {
			if (getItemViewType(position) == 0) {
				holder = new ViewHolder();
				convertView = mInflater
						.inflate(R.layout.chat_item_itemin, null);
				holder.icon = (ImageView) convertView
						.findViewById(R.id.icon_in);
				holder.text = (TextView) convertView.findViewById(R.id.text_in);
			} else {
				holder = new ViewHolder();
				convertView = mInflater.inflate(R.layout.chat_item_itemout,
						null);
				holder.icon = (ImageView) convertView
						.findViewById(R.id.icon_out);
				holder.text = (TextView) convertView
						.findViewById(R.id.text_out);
			}
			convertView.setTag(holder);
		} else {
			holder = (ViewHolder) convertView.getTag();
		}

		holder.icon.setImageBitmap(mData.get(position).getIcon());
		holder.text.setText(mData.get(position).getText());
		return convertView;
	}

	public final class ViewHolder {
		public ImageView icon;
		public TextView text;
	}
}
4、动态改变ListView布局:
据书中介绍一般有2种方式:
-
两种布局写在一起,通过控制布局的隐藏,显示,控制切换布局
-
通过判断来选择加载不同的布局
public class FocusListViewAdapter extends BaseAdapter {

    private List<String> mData;
    private Context mContext;
    private int mCurrentItem = 0;

    public FocusListViewAdapter(Context context, List<String> data) {
        this.mContext = context;
        this.mData = data;
    }

    @Override
    public int getCount() {
        return mData.size();
    }

    @Override
    public Object getItem(int position) {
        return mData.get(position);
    }

    @Override
    public long getItemId(int position) {
        return position;
    }

    @Override
    public View getView(int position, View convertView, ViewGroup parent) {
        LinearLayout layout = new LinearLayout(mContext);
        layout.setOrientation(LinearLayout.VERTICAL);
        if (mCurrentItem == position) {
            layout.addView(addFocusView(position));
        } else {
            layout.addView(addNormalView(position));
        }
        return layout;
    }

    public void setCurrentItem(int currentItem) {
        this.mCurrentItem = currentItem;
    }

    private View addFocusView(int i) {
        ImageView iv = new ImageView(mContext);
        iv.setImageResource(R.drawable.ic_launcher);
        return iv;
    }

    private View addNormalView(int i) {
        LinearLayout layout = new LinearLayout(mContext);
        layout.setOrientation(LinearLayout.HORIZONTAL);

        ImageView iv = new ImageView(mContext);
        iv.setImageResource(R.drawable.in_icon);
        layout.addView(iv, new LinearLayout.LayoutParams(
                LinearLayout.LayoutParams.WRAP_CONTENT,
                LinearLayout.LayoutParams.WRAP_CONTENT));

        TextView tv = new TextView(mContext);
        tv.setText(mData.get(i));
        layout.addView(tv, new LinearLayout.LayoutParams(
                LinearLayout.LayoutParams.WRAP_CONTENT,
                LinearLayout.LayoutParams.WRAP_CONTENT));

        layout.setGravity(Gravity.CENTER);
        return layout;
    }
}public class FocusListViewTest extends Activity {
@Override
protected void onCreate(Bundle savedInstanceState) {
super.onCreate(savedInstanceState);
setContentView(R.layout.focus);
ListView listView = (ListView) findViewById(R.id.focus_listView);
List<String> data = new ArrayList<String>();
data.add("I am item 1");
data.add("I am item 2");
data.add("I am item 3");
data.add("I am item 4");
data.add("I am item 5");
final FocusListViewAdapter adapter = new FocusListViewAdapter(this, data);
listView.setAdapter(adapter);
listView.setOnItemClickListener(new AdapterView.OnItemClickListener() {
@Override
public void onItemClick(AdapterView<?> parent, View view,
int position, long id) {
adapter.setCurrentItem(position);
adapter.notifyDataSetChanged();
}
});
}
}


 579
579


 被折叠的 条评论
为什么被折叠?
被折叠的 条评论
为什么被折叠?
 到【灌水乐园】发言


