


说明:
本人使用的IDE为VS2010,使用的为ASP.NET MVC 3(但同样适应于ASP.NET MVC4)
Uploadify的官网为:http://www.uploadify.com/
本文使用的查件版本为最新版:3.2.1
正文开始:
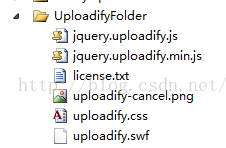
- 1、下载文件,添加文件
下载插件,剔除掉PHP文件,将其他文件添加到项目中,如下图若是
- 2、添加引用文件
【注意】JQuery文件在前。
- 3、前台JS文件
//初始化方法
$(function () {
       //空间上传的方法
    $("#uploadify").uploadify({
        'auto': false,
        'fileTypeDesc': '图片和PDF文件',
        'buttonText': '选择文件',
        'fileSizeLimit': 0,
        'width': 200,
        'multi': false,
        'queueID': 'some_file_queue',
        'fileTypeExts': '*.gif; *.jpg; *.png; *.pdf',
        'swf': $("#PreURL").val() + 'Scripts/UploadifyFolder/uploadify.swf',
        'uploader': $("#PreURL").val() + 'DrugInfoAndNotice/Notice/UploadFile',
        'cancelImg': $("#PreURL").val() + 'Scripts/UploadifyFolder/uploadify-cancel.png',
        'onUploadError': function (file, errorCode, errorMsg, errorString) {
            alert('The file ' + file.name + ' could not be uploaded: ' + errorString);
        },
        'formData': { 'noticeID': '0' },
        'onUploadStart': function (file) {
            $("#uploadify").uploadify('settings', 'formData', { 'noticeID': currentNoticeID });
        },
        'onUploadSuccess': function (file, data, response) {
            var result = $.parseJSON(data);
            if (result.success == "true") {
                $("#successFile").append("<p> 文件:" + file.name + "  上传成功!" + "</p>");
                $("#noticeAttachmentList").append("<p>附件:"+file.name+" 上传成功! </p>");
            } else {
                $("<div></div>").html("文件" + file.name + "未上传成功!异常信息:" + result.message).dialog({ autoOpen: false, title: "提示" }).dialog("open");
            }
        }
    });

    //上传方法
    $("#uploadFile").button().click(
        function () {
            $("#uploadify").uploadify("upload", "*");
        }
    );
});- 4、Controller文件
        //文件上传方法
        [AcceptVerbs(HttpVerbs.Post)]
        public string UploadFile(HttpPostedFileBase Filedata,string noticeID)
        {
            var returnstr = new { success = "false", message = ""};
            //第一步创建路径
            if (Filedata != null)
            {
                try
                {
                    //创建连接(此处是我连接项目的文档服务器),凡涉及到File及Dictionary的均是如此,可以略过。
                    int connectionCode = NetworkConnection.Connect(@"\\10.10.10.10\drug$", "Q:", "用户名", "密码");
<span style="white-space:pre">		</span>
                    if (connectionCode == (int)ERROR_ID.ERROR_SUCCESS)
                    {
                        string path = @"Q:\manuals";
                        //生成路径  路径生成规则:按月生成文件夹,每月的文件放在每个文件中
                        string floder = DateTime.Now.ToString("yyyyMM");

                        string floderPath = Path.Combine(path, floder); //生成路径,如:Q:\manuals\201511
                        //检查路径是否存在,不存在则创建
                        if (!Directory.Exists(floderPath))
                        {
                            try
                            {
                                Directory.CreateDirectory(floderPath);
                            }
                            catch (System.Exception ex)
                            {
                                returnstr = new { success = "false", message = "调用IO生成路径时发生异常,异常信息如下:" + ex.Message };
                                return new JavaScriptSerializer().Serialize(returnstr);
                            }
                        }


                        //判断文件是否存在,若存在,则返回提示内容
                        string fullpath = Path.Combine(floderPath, Path.GetFileName(Filedata.FileName));

                        if (System.IO.File.Exists(fullpath))
                        {
                            returnstr = new { success = "false", message = "服务器中已经存在该文件,请修改上传文件名称!"};
                            return new JavaScriptSerializer().Serialize(returnstr);
                        }


                        //将文件“拷贝”到指定路径
                        try
                        {
                            Filedata.SaveAs(fullpath);

                        }
                        catch (System.Exception e)
                        {
                            //删掉已经上传的文件
                            System.IO.File.Delete(fullpath);

                            returnstr = new { success = "false", message = "连接文档服务器OK!调用SaveAs方法过程中发生异常,异常信息如下:" + e.Message };
                            return new JavaScriptSerializer().Serialize(returnstr);
                        }

                        returnstr = new { success = "true", message = "文档上传成功!" };
                        return new JavaScriptSerializer().Serialize(returnstr);
                    }
                    else
                    {
                        returnstr = new { success = "false", message = "未能连接服务器!异常信息如下:请搜索WNetAddConnection2A,其返回结果为:" + connectionCode };
                        return new JavaScriptSerializer().Serialize(returnstr);
                    }

                }
                catch (System.Exception ex)
                {
                    returnstr = new { success = "false", message = "上传文件过程中发生异常,异常详情如下:" + ex.Message };
                    return new JavaScriptSerializer().Serialize(returnstr);
                }
            }
            else
            {
                return new JavaScriptSerializer().Serialize(returnstr);
            }

}- 5、插件的使用方法文档
- 6、思考
在Controller中传入的参数为:HttpPostedFileBase Filedata,其实Controller中的方法可以没有参数。
插件通过http协议,将需要上传的文件打成二进制流文件,然后通过request将文件传至应用服务器上。因此,应用服务器上的Controller方法可以通过Request获取文件。
Controller过程这样写:
[HttpPost]
public string uploadFile(){
            //获取当前的HttpContext
            HttpContextBase contextbase = new HttpContextWrapper(System.Web.HttpContext.Current);
            //获取当前的请求Request
            HttpRequestBase requestBase= contextbase.Request;
            //获取Request中的请求文件Collection
            //通过这个集合就可完成,多个文件的上传。本人Controller中参数为HttpPostedFileBase,则决定了使用单文件上传更好。
            //多文件上传的可通过插件的multi选项设定,其默认为true
            HttpFileCollectionBase myFileDateCollection = requestBase.Files;
            //获取集合中的指定名称的文件
            HttpPostedFileBase myFileDate = myFileDateCollection["Filedata"];  //注意,"Filedata"是插件指定的,可通过fileObjName选项进行修改
			...//相应的处理方法
}
6.2 另外,也可以使用HttpContext替换上面的HttpContextBase。
但为什么没用呢?
主要原因是HttpContext是老版本的(.NET3.5之前),抽象类,一般无法Mock(其实还是可以Mock的。例如Typemock使用Profiler的方式进行直接注入,可以Mock任何成员。不过,如果Moq等框架无法满足您的需要,一般便是您的设计有些问题了)。
HttpContext与HttpContextBase,几乎一模一样,具体可参见MSDN文档


 137
137


 被折叠的 条评论
为什么被折叠?
被折叠的 条评论
为什么被折叠?
 到【灌水乐园】发言


